Table of Contents
Advertisement
Quick Links
Advertisement
Table of Contents

Related Manuals for EMUS G1


Summary of Contents for EMUS G1
- Page 1 G1 Battery Management System User Manual 2.7.1...
-
Page 2: Table Of Contents
Table of contents PREFACE INTRODUCTION CHAPTER 1: SYSTEM STRUCTURE OVERVIEW ONTROL 1.1 USB DATA INTERFACE 1.2 RS232 DATA INTERFACE 1.3 CAN DATA INTERFACE 1.4 S ERIAL CELL COMMUNICATION DATA INTERFACE 1.5 G ENERAL PURPOSE INPUTS AND OUTPUTS 1.6 C URRENT SENSOR INPUTS 1.7 SOC OUTPUT 1.8 S... - Page 3 2.1.2 Distributed Grouped Cell Monitoring 2.1.3 Centralized Cell Monitoring 2.1.4 Temperature measurement 2.1.5 Tesla Module cell monitoring 2.2 C URRENT MEASUREMENT 2.2.1 EMUS current sensors 2.2.2 3 party CAN current sensors 2.3 SOC ESTIMATION 2.3.1 SOC legacy adjustment algorithm 2.3.2 Integrated SOC/SOH estimator (gen1 algorithm) 2.3.2.1 SOH algorithm...
- Page 4 3.1.1 Choosing the power supply strategy 3.2 C ODULES 3.3 T ESLA ODULE 3.4 C URRENT ENSOR 3.4.1 EMUS current sensor 3.4.2 3 Party current sensor 3.4.3 CAN Current Sensor 3.5 C OMMUNICATION DAPTERS 3.6 CAN B 3.7 C CAN C...
- Page 5 3.18 I NSULATION FAULT DETECTOR CHAPTER 4: CONFIGURATION 4.1 EMUS BMS C ONTROL ANEL 4.2 S ERIAL DATA INTERFACE 4.3 C HARGING ISABLE 4.4 CAN DATA INTERFACE 4.5 C ELL COMMUNICATION DATA INTERFACE 4.6 CAN C ROUP ODULE CONFIGURATION 4.7 E...
- Page 6 5.1 C ALIBRATION OF ODULE TEMPERATURE SENSORS 5.2 R CALIBRATION OF CURRENT SENSOR 5.3 M ASTER LEAR 5.4 S ETTING UP PASSWORD 5.5 E XPORTING AND IMPORTING CONFIGURATION 5.6 C ONTROL NIT FIRMWARE UPDATE 5.7 CAN C ROUP ODULE FIRMWARE UPDATE 5.8 D ISPLAY NIT FIRMWARE UPDATE...
- Page 7 4.11.2, 4.11.2.1, 4.11.2.2, 4.11.2.3, 4.11.2.4), added BMS battery cells arrangements configuration examples, all products technical information has been transferred to separate datasheet documents. 2021-08-17 1.7.0 Added new chapters (1.12.3, 2.1.5, 3.3). Detail description of the EMUS Tesla Module (TES011C) retrofit BMS. emusbms.com...
-
Page 8: Preface
Figure 1-9 Tesla Module (TES011C) retrofit BMS ............................27 Figure 1-10 EMUS G1 Dual Range Current Sensor: Bus Bar type......................28 Figure 1-11 EMUS G1 Dual Range Current Sensor: Closed Loop type ....................28 Figure 1-12 EMUS G1 Smartphone Connectivity Module ........................29 Figure 1-13 EMUS G1 Display Unit ................................ - Page 9 Figure 3-23 EMUS G1 Display Unit wiring ..............................85 Figure 3-24 Connecting contactor to EMUS G1 Control Unit: (a) directly, when the rated current of the contactor coil is less than 0.5A; (b) through a relay, when the rated current of the contactor coil is 0.5A or more..........86 Figure 3-25 Contactor pre-charge sub-circuit connection diagram ....................
- Page 10 a third-party electromechanical contactor..............................90 Figure 3-29 Correct analog signal controlled charger and charger contactor connection in respect of the battery, battery fuse, and main contactor ....................................91 Figure 3-30 : Cooling fan connection diagram ............................91 Figure 3-31 Heater connection diagram............................... 92 Figure 3-32 Examples of connecting visual or audial indicators to the Control Unit (left to right): an indication lamp, a self-oscillating buzzer, and an LED.
- Page 11 List of Tables Table 2-1 List of supported chargers and their communication protocols ..................43 Table 2-2 List of protections and their descriptions ..........................48 Table 2-3 List of reductions and their descriptions ........................... 51 Table 2-4 List of warnings and their descriptions ............................52 Table 2-5 List of statistics and their descriptions ............................
-
Page 12: Introduction
(series or parallel), capacity, voltage, and other factors. This document covers all aspects of using the EMUS G1 BMS, and aims to provide the user with an in-depth knowledge about its core functionality and utility functions, as well as with... - Page 13 NOTE: Using EMUS G1 BMS requires at least basic knowledge in electronics and electrical engineering. The use of EMUS G1 BMS in any way other than it is intended, especially if that compromises its core functions, including modification of its components, is considered improper and will void any warranty.
-
Page 14: Figure 0-1 Distributed Regular
EMUS G1 system can be used for any types of battery cells arrangements, below are provided 4 basic BMS configurations examples: • G1 Distributed Regular – for simple cases, when all battery cells are connected only in series (max. 40-60 cells in series);... -
Page 15: Figure 0-2 Distributed Grouped
• G1 Distributed Grouped – battery cells are grouped into particular packs and each pack combined with CAN Cell Group Modules (CGM), then all (max. 32) CGMs are connected via CAN to main Control Unit; Figure 0-2 Distributed grouped emusbms.com... -
Page 16: Figure 0-3 Centralized Ccgm
• G1 CCGM Centralized – for applications when batteries are split into separate blocks up to 16 cells and connected in series or/and parallel (max. 32 CCGMs for one Control Unit), recommended for cells with capacities up to ~70Ah; Figure 0-3 Centralized CCGM... -
Page 17: Figure 0-4 G1 Distributed Master/Slave Redundancy
• G1 Distributed Master/Slave redundancy – it can be combination of G1 Distributed regular and/or G1 Centralized. For applications which require high modularity, scalability, redundancy; several G1 systems can be combined using Master/Slave control units; Figure 0-4 G1 Distributed Master/Slave redundancy... -
Page 18: Chapter 1: System Structure Overview
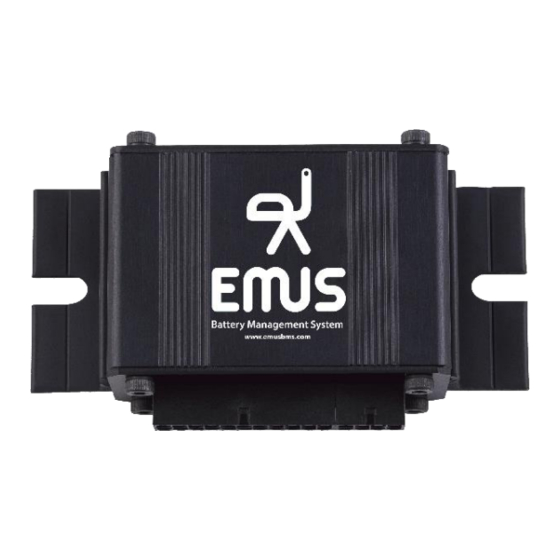
Chapter 1: System structure overview EMUS G1 BMS is a digital, distributed topology battery management system that consists of a main controller, several cell controller boards (one for each individual cell), cell communication adapters, a current sensor, and few other optional components that all serve different purposes. -
Page 19: Usb Data Interface
(e.g. computer, tablet, smartphone) when configuration, diagnostics, or maintenance is needed. Provided USB adapter in EMUS G1 Control Unit is populated on the main 22 pin connector as the “USBPWR”, “GROUND”, “USB D-”, and “USB D+” pins, detailed information about other EMUS products can be found in their datasheet. -
Page 20: Can Data Interface
Control Unit to communicate with the individual cell controller boards (cell modules). It consists of pins on the main EMUS G1 Control Unit 22 pin connector of as: “CELL RX-”, “CELL RX+”, “CELL TX-” and “CELL TX+”, detailed information about other EMUS products can be found in their datasheet. -
Page 21: Current Sensor Inputs
Control Unit. SOC output The "SOC OUT" pin on the secondary 8 pin connector of EMUS G1 Control Unit is a special purpose digital output pin that can generate a 0-5V pulse-width-modulated signal. Depending... -
Page 22: Speed Sensor Input
Speed sensor input The EMUS G1 Control Unit “SPEED IN” pin on the secondary 8 pin connector is a special purpose digital input that is wired directly to a peripheral that can measure frequency of a pulsed signal. -
Page 23: Cell Module Selection Recommendations
All cell modules can monitor from 2.00V to 4.55V. 1.10.1 Cell Module Selection Recommendations Cell Module type from EMUS assortment is selected according balancing current requirement. All cell modules functionally are identical, however, some newer models also have an additional external temperature sensor for measuring the temperature of the cell during operation. -
Page 24: Centralized Can Cell Group Module
CCGM directly monitors each battery cell. No additional adapters are needed when using CCGMs with Control Unit. Up to 32 Centralized CAN Cell Group can be connected to the G1 system in series or/and parallel. Figure 1-6 Centralized CAN group module CCGM022C... -
Page 25: Cell Communication Adapters
Communication Adapters: Top and Bottom Isolators, and CAN Cell Group Modules. 1.12.1 Top and Bottom Isolators EMUS G1 Top and Bottom Isolators are a specially designed pair of optical isolators that allow direct serial communication between the Control Unit and the Cell Modules. -
Page 26: Can Cell Grop Modules
This not only eliminates the drawbacks of the Top and Bottom Isolators, but also makes the EMUS G1 BMS scalable to serve a virtually unlimited number of cells. Furthermore, it enables the EMUS G1 BMS to manage battery packs that consist of several strings of cells connected in parallel. -
Page 27: Current Sensors
The method of measuring the hall effect also provides the characteristic galvanic isolation between the sensor and the conductive part. There are two functionally identical sensors in the EMUS G1 Dual Range Current Sensor group: bus bar and closed loop. -
Page 28: Closed Loop Type
Figure 1-10 EMUS G1 Dual Range Current Sensor: Bus Bar type 1.13.2 Closed Loop Type The second generation, or the Closed Loop type of EMUS G1 Dual Range Current Sensor has an improved design that makes it more rugged, accurate, and less sensitive to the environment factors when compared to the Bus Bar type. -
Page 29: Smartphone Connectivity Module
EMUS G1 Smartphone Connectivity Module is a wireless communication adapter that connects to the Control Unit via the RS232 interface and enables external devices to connect to EMUS G1 Control Unit via BT protocol using BLED112 USB dongle. It allows users to wirelessly monitoring, configuration, diagnostics, etc. -
Page 30: Can Splitter / Filter
CAN bus terminals. Internal CAN bus terminal is used to connect to internal BMS network, which consists of EMUS G1 Control Unit, CGMs/CCGMs and possible other CAN devices. Common CAN bus is used to connect to other CAN Splitters, 3 party CAN chargers and other user’s CAN devices. -
Page 31: Software
1x Common CAN BUS • Each EMUS G1 Control Unit must be connected to a different CAN Splitter over „Internal CAN BUS“ terminal. „Common CAN BUS“ terminals are used to interconnect other EMUS G1 CAN Splitters, 3rd party CAN chargers etc. -
Page 32: Control Panel
Store 1.18.2 Control Panel EMUS G1 Control Panel (or simply Control Panel) is the official Windows PC software tool for configuration, maintenance, and diagnostics of the EMUS G1 BMS. It comprehensively displays all BMS activity data received from the Control Unit, gives quick and effortless access to each individual configuration parameter, and allows to perform virtually easily and safely all maintenance operations. -
Page 33: Figure 1-18 Emus Control Panel
Figure 1-18 EMUS Control Panel emusbms.com... -
Page 34: Chapter 2: Functionality Overview
Individual cell monitoring is a fundamental and one of the most important functions of EMUS G1 BMS. It is a complex, multi-part process in which certain roles are distributed between Cell Modules, Cell CAN Group Modules, Centralized CAN Cell Group Modules and the Control Unit. -
Page 35: Distributed Grouped Cell Monitoring
to the "Up" output, therefore the request command is transferred throughout the whole daisy chain network of Cell Modules. Because the echo delay is almost negligible, all Cell Modules in the network receive the command nearly simultaneously. Once the command is received, each of them save the most recent measured value of the requested parameter and then take turns to send it to the Control Unit by forwarding the data through subsequent Cell Modules in the chain (as illustrated in Figure 2-1 Cell communication data flow: when using Top and Bottom... -
Page 36: Centralized Cell Monitoring
Where “Total Number of cells" is the value of a corresponding configuration parameter”. 2.1.3 Centralized Cell Monitoring EMUS Centralized CAN Cell Group Module (also known as CCGM) is a centralized cell module equipped with two CAN connectors. When using the Centralized CAN Cell Group Module, the Control Unit sends out the request message over the CAN interface like CGM. -
Page 37: Figure 2-3 Cell Communication When Using Centralized Can Cell Group Modules
EMUS CAN protocol. All requesting parameters have its own priority, so this functionality ensures fast and reliable data broadcast in EMUS G1 BMS. All core EMUS G1 Control Unit functions only use the minimum, maximum, or average values rather than individual cell data, therefore only these aggregated values are normally stored during the periodic cell monitoring process. -
Page 38: Temperature Measurement
Therefore, Control Panel displays a pair of these temperatures for each battery cell. EMUS CCGM uses a new centralized system that allowed to measure 5 external temperatures. We adapted our current parameter display view to this configuration. -
Page 39: Current Measurement
The measurement of the battery current in EMUS G1 BMS comprises of two continuous, simultaneously executed processes. During the first process, the Control Unit continuously measures the analog signals given by EMUS G1 Current Sensor using a high sample rate analog- to-digital converter peripheral, and periodically stores averaged measurement results for further processing. -
Page 40: Soc Legacy Adjustment Algorithm
It may suffer from long-term drift due to slight inaccuracies of the current measurement. Therefore, in EMUS implementation the SOC is adjusted to 100% each time the charging process successfully finishes by equating the battery charge to the value of "Capacity"... -
Page 41: Figure 2-5 Emus Equivalent Circuit Model
In order to use this algorithm, internal cell parameters (R0, Rp, Cp) must be known, along with OCV-SOC dependency curve. User can use one of existing cell models, defined by EMUS, or define its own model. More about how to configure such model look at chapter 4.14.2 SOC/SOH estimator (gen1 algorithm). -
Page 42: Soh Algorithm
As battery cell ages, its total capacity decreases and internal resistance increases. To estimate and correctly evaluate these values BMS regularly calculate these two parameters over time and estimate current state of health of a cell. To calculate the value of SOH EMUS, use this formula: Figure 2-6 Formula for SOH K is a coefficient that describes current depletion rate of a cell. -
Page 43: Table 2-1 List Of Supported Chargers And Their Communication Protocols
Currently EMUS G1 Control Unit officially supports the following chargers: Table 2-1 List of supported chargers and their communication protocols Charger Name Communication Protocol CAN J1939 Elcon CAN J1939 HF/PFC CAN J1939 CAN J1939 Eltek Valere EV Power Zivan NG and SG series... - Page 44 It is important to note that due to Control Unit’s internal memory limitations EMUS G1 Control Unit can support only one charging device type or model at a time, and it is necessary to re- upload the Control Unit with a different firmware in case it is desired to change the supported type or model.
- Page 45 The actual charging current value depends on certain EMUS G1 Control Unit configuration parameters as well as the physical limitations of the used charging device: When using a CAN charger, the charging current during this stage is set by either the "Fast...
- Page 46 When using a non-CAN charging device EMUS G1 Control Unit does not have any means to regulate the charging current, therefore in such case this stage is a bit different. When it begins, the charging device is kept on until the maximum cell voltage starts to exceed the "Fully Charged...
- Page 47 Connected, and Pack Under-Voltage protections are not checked in order to avoid blocking the charging process; Cell or cell module temperature too high – EMUS G1 Control Unit will terminate the charging if internal cell module temperature is higher than the value of Cell Module Over- heat protection "Activate at"...
-
Page 48: Charging Interlock
Charging stage" directly; Once "Charging Finished stage" has been reached, EMUS G1 Control Unit will go not back to "Pre-Charging stage", "Main Charging stage", or "Balancing stage" directly unless the minimum cell voltage has dropped below "Charger Restart Voltage" parameter value. This also applies if "Charging Finished stage"... - Page 49 No Cell Communication Prevents the battery operation when EMUS G1 Control Unit is not able to monitor the cells due to a hardware malfunction or incorrect installation Protection is activated in case an active signal is detected on a general- purpose input pin that is mapped with "PF15 Leakage Sensor Input"...
-
Page 50: Contactor Pre-Charge
(4.10 Protections). 2.5.1 Contactor pre-charge In a lot of different applications, the battery that is managed by EMUS G1 Control Unit connects to a load that has a substantial input capacitance. In such case, it is often desirable to limit the high in-rush current that occurs when the main contactor is closed in order to reduce stress to the internal components of the load device and prevent the contactor from welding. -
Page 51: External Contactor Deactivation
2.5.2 External contactor deactivation In case it is desired to allow an external system that utilizes EMUS G1 Control Unit to override the control of the main contactor without compromising the contactor pre-charge functionality, the External Contactor Deactivation feature can be used. -
Page 52: Warnings
"power reduction" signal on a general-purpose pin, G1 Control Unit can also send separate warning messages to G1 Control Panel. These messages can be used to notify the user of various dangerous situations without any direct impact on the operation of the battery management system. -
Page 53: Heater And Cooling Fan Control
In order to allow safe and reliable use of lithium batteries in various climate conditions, EMUS G1 Control Unit offers several different options to control a heater and/or a cooling device. Any of the Control Unit’s general-purpose output pins mapped with the "PF13 Battery Fan Output"... -
Page 54: Climate Control
BMS remains powered and can potentially drain the battery if it is not charged during that time. EMUS G1 Control Unit has a special feature that allows to disconnect the DC/DC converter automatically in order to prevent such situations. -
Page 55: Psu Under-Voltage Sense Control
configuration. It deactivates after the “Deactivation timeout” any general purpose output associated with the “PF24 DC / DC Control Output” pin function if the minimum cell voltage becomes less than or equal to the value of the corresponding active state threshold or passive state threshold parameter. -
Page 56: Battery Contactor Control By "Ignition
2.13 Statistics For diagnostic purposes, EMUS G1 Control Unit keeps track of various pre-defined battery and BMS operation statistics and stores them in its internal non-volatile memory. Each statistic, depending on its type, can consist of a corresponding main value, additional value, and a timestamp. - Page 57 ID of the cell module with minimum temperature, and timestamp of when these values were recorded. The number of times EMUS G1 Control Unit has been powered up. BMS start count Additionally, contains the timestamp of the last occurrence.
- Page 58 The number of times Low Cell Voltage reduction has been activated. Low voltage power reduction count Additionally, contains the timestamp of the last occurrence. The number of times High Discharge Current reduction has been High current power reduction count activated. Additionally, contains the timestamp of the last occurrence. High cell module temperature power The number of times High Cell Module Temperature reduction has been reduction count...
- Page 59 Each bit of the value stored by this statistic indicates if the normal range Secure statistics resolution* of the corresponding secure statistic (ID 1 to 7) has overflowed and its resolution has been decreased. The number of times No Current Sensor protection has been activated. No current sensor protection count Additionally, contains the timestamp of the last occurrence.
-
Page 60: Events
2.14 Events During operation, EMUS G1 Control Unit keeps a log of the most recent events in its internal non-volatile memory. It consists of 32 entries, each of which stores an event type identifier and occurrence timestamp. Once all 32 entries a filled, any new event replaces the oldest entry. All event types are described in the Table 2-6. -
Page 61: Vehicle Speed Measurement
"External Temperature Sensor" protection has been protection recovery deactivated 2.15 Vehicle speed measurement Using the EMUS G1 Control Unit SPEED IN input mapped with the corresponding special "PF1 Speed Sensor Input" pin function, the Control Unit can register the pulses of the vehicle’s speed emusbms.com... -
Page 62: Energy Consumption Calculation
All of these values can be read from the Control Unit through one of its digital interfaces and monitored in real time on EMUS G1 Display Unit or a third party display, which eliminates the need for a separate electronics for these functions and allows to simplify the electrical system of the vehicle. -
Page 63: Remaining Distance Estimation
2.15.2 Remaining distance estimation EMUS G1 Control Unit estimates the remaining distance based on the calculated values of energy consumption per distance unit, and by assuming that the ratio between the energy remaining in the battery and energy already used in during the current trip is equal to the ratio between the remaining SOC and SOC used since the start of the trip. -
Page 64: Communication With External Devices
CAN Splitter devices. It enables high modularity and high scalability, so G1 systems could be expanded and managed more easily. The idea of such system that two or more than battery packs (each controlled by G1 system), can be connected in series or in parallel. Battery packs must be equivalent. Each G1 Control Unit manages its own battery pack, while only one Control Unit (master) controls the charger. -
Page 65: Buzzer
No blinks Charger Disconnected • 1 blink Pre-heating stage • 2 blinks Pre-charging stage • 3 blinks Main charging stage • 4 blinks Balancing stage • Slow blink Charging stage • Rapid Charging error • blink Figure 2-11 Charging indicator timing 2.18.2 Buzzer A self-oscillating buzzer connected to any general-purpose pin mapped with "PF7 Sound Buzzer Output"... -
Page 66: Figure 2-13 Low Battery Indicator Timing
• Minimum cell voltage is below the “Low Cell Voltage” reduction “Active at“ threshold • Average cell voltage is below the “Low Cell Voltage” reduction “Active at“ threshold Figure 2-13 Low battery indicator timing emusbms.com... -
Page 67: Chapter 3: Installation
Control Unit EMUS G1 Control Unit should be tightly secured to a surface using screws, as shown in Figure 3-1Figure 3-1. It is recommended to install it small distance away from the battery (ideally in the same enclosure) in order to make the wiring process easy and to keep the wires between different EMUS G1 BMS components short. -
Page 68: Choosing The Power Supply Strategy
Control Unit and the rest of EMUS G1 BMS components from the grid using an appropriate isolated AC adapter, as shown in the example in Figure 3-2;... -
Page 69: Figure 3-3 Power Supply Strategy 2
"PF24 DC/DC Control Output" function. This ensures that EMUS G1 Control Unit does not drain the auxiliary nor the main battery when the system is not in operation, and also protects the main battery from damage due to depletion in case the operator forgets to turn off the ignition key and leaves the system to idle for an ex- tended period of time. -
Page 70: Cell Modules
Cell Modules EMUS G1 Cell Modules are designed to be mounted directly on the cell terminals together with the interconnecting bus bars and power cables, therefore they should be installed during the battery assembly process. -
Page 71: Figure 3-5 Correct Way Of Wiring A Cell Communication Daisy Chain: (A) Top And Bottom Isolators; (B) Can Cell Group Module
battery side wires with electrical tape in order to avoid unintentional damage in case the wires are accidentally dropped across several cells. Figure 3-5 Correct way of wiring a cell communication daisy chain: (a) Top and Bottom Isolators; (b) CAN Cell Group Module. -
Page 72: Figure 3-6 3M Tm Scotchlok Tm Butt Connector
Table 3-1 Recommended cell terminal bolt Terminal Bolt type Recommended tightening torque (N)m While tightening the bolts it should also be observed that the wrench would not touch the electrical components of the Cell Module and knock them off, or damage them in any other way. Once the interconnecting bus bars and Cell Modules are properly installed, the cell communication daisy chain can be wired. -
Page 73: Figure 3-7 Cell Modules Wires Positioning
The reliability, however, will be achieved only when the correct connectors for used wire gauge are used, and instructions of correct use are followed: Straighten the wire ends and trim them if necessary, but do not strip them; Fully insert the wires ends into the connector; Place the connector between pliers in such way that the wires would be sticking out in the same direction as the pliers are pointing;... -
Page 74: Tesla Module
EMUS G1 Control Unit need to connect CAN communication (1,2,3,4) connector to the EMUS G1 CAN Bus. All temperature sensors are optional and hot-swappable (the replacement or addition of temperature sensors to a system can be performed without stopping, shutting down, or rebooting the system). -
Page 75: Current Sensor
Current Sensor 3.4.1 EMUS current sensor EMUS G1 Current Sensor, regardless of its type, should be installed in such way that all currents going in and out of the battery would flow through it (i.e. behind all load, charging, or utility devices that are connected to the battery). -
Page 76: Rd Party Current Sensor
3.4.2 3 Party current sensor If a 3 party current sensor is being used, installation depends on sensor type. EMUS provides recommendations, how to install such current sensors, but if you need more details, you can refer to specific sensors datasheet. -
Page 77: Can Current Sensor
Figure 3-13 CAN current sensor Cell Communication Adapters EMUS G1 Top and Bottom Isolators should be connected to the Control Unit as shown in Figure 3-14 Figure 3-14 Correct way of connecting the TOP/BOT Isolator to the Control Unit. -
Page 78: Can Bus
CAN-equipped EMUS G1 BMS components are designed to be used in high-speed CAN networks, such as the one specified by the ISO 11898-2 standard. -
Page 79: Table 3-2 Maximum Bus Line Lengths
Maximum total bus length is essentially limited by propagation delays of the used CAN transceiver and transmission line, and CAN bit timing settings used in CAN-equipped EMUS G1 BMS components. In practice however, lengths with which CAN communication is reliable may... -
Page 80: Centralized Can Cell Group Module
CAN transceiver. The manufacturer of the transceivers used in CAN- equipped EMUS G1 BMS components specifies that it will drive a minimum load of 45W, allowing a maximum of 112 nodes to be connected, given that the differential input resistance of each node on the bus is not less than 20kO and 120W termination resistor are used. -
Page 81: Figure 3-16 Cells Connection, With E.g 8 Cells In Series
Figure 3-16 Cells connection, with e.g 8 cells in series To setup the 16 cells and 5 external temperature sensors please refer to figure below. Figure 3-17 CCGM Battery, Ext. Temperature Sensors installation emusbms.com... -
Page 82: Figure 3-18 Ccgm Can Port Pinout
To setup the CAN connector please refer to figure below. Figure 3-18 CCGM CAN port pinout Main power supply to CCGM CAN line should be supplied from Control Unit, with power supply from auxillary battery (12-32V) or other external power source through converter. Power supply from the battery cells is required to power up BQ chip, however unless CAN line is not powered, none of CCGM will be functioning. -
Page 83: Can Splitter / Filter
To setup the Temperature Breakout board please refer to figure below. Figure 3-20 Temperature Breakout Board connection possibility to CCGM NOTE: Temperature Breakout board is non stocked item, contact EMUS for availability. CAN Splitter / Filter In Figure 3-21 CAN Splitter connection you can see an example of how to use CAN splitter to create G1 system network. -
Page 84: Smartphone Connectivity Module
The end of each wire of the Connectivity Module cable should be stripped and, depending on its purpose, either crimped with the crimp contacts that are provided with the EMUS G1 Control Unit using an appropriate crimp tool and inserted into corresponding slots on the main 22 pin connector, or connected to the same power supply that powers the Control Unit. -
Page 85: Display Unit
3.10 Display unit EMUS G1 Display Unit should be connected to the Control Unit as shown in Figure 3-23 EMUS G1 Display Unit wiring. Figure 3-23 EMUS G1 Display Unit wiring The end of each wire of the Display Unit cable should be stripped and depending on its purpose,... -
Page 86: Contactor
Figure 3-24. Figure 3-24 Connecting contactor to EMUS G1 Control Unit: (a) directly, when the rated current of the contactor coil is less than 0.5A; (b) through a relay, when the rated current of the contactor coil is 0.5A or more. -
Page 87: Charger
EMUS G1 Control Unit to control it. The selection of a particular charging device should be done considering various aspects of the application, yet its output parameters are the most important from the battery management system’s point of view. -
Page 88: Can-Based Chargers
3.14.1 CAN-based chargers In order to allow EMUS G1 Control Unit to protect the battery in case a charging error occurs, a CAN charger should be connected to the battery through a separate dedicated contactor that is controlled by one of Control Unit’s general purpose outputs mapped with "PF10 Charger Enable"... -
Page 89: Can Chargers/Inverters
The figure below shows a visual example of the system that can use an EMUS G1 Battery Management system and CAN charger/inverter. Correct connection depends on various aspects of the system in which the battery is used in such cases it is out of the scope of this document. -
Page 90: Non-Can Chargers
3.14.3 Non-CAN chargers Non-CAN charging devices should generally be connected directly to the battery and controlled using a third-party electromechanical contactor, as shown in the example in Figure 3-28. In such cases, the charger connection acknowledgment should be provided to the Control Unit automatically using an appropriate signal relay, or manually using a latching pushbutton or a tumbler. -
Page 91: Cooling Fan
Figure 3-29 Correct analog signal controlled charger and charger contactor connection in respect of the battery, battery fuse, and main contactor 3.15 Cooling fan Cooling fan for cooling the Cell Modules during balancing is usually requires quite low amount of power, and can be supplied from the same power supply as the Control Unit and controlled using a single relay, as shown in the example in Figure 3-30. -
Page 92: Heater
A solid-state relay may be used instead of an electromechanical contactor to eliminate such risk (not to be confused with EMUS G1 Solid State Relay used for controlling non-CAN charger). -
Page 93: Insulation Fault Detector
Figure 3-32 Examples of connecting visual or audial indicators to the Control Unit (left to right): an indication lamp, a self-oscillating buzzer, and an LED. 3.18 Insulation fault detector If required by the application, insulation fault detector should be installed in the system by connecting its corresponding inputs to the battery terminals, and its output to one of the Control Unit’s general purpose inputs, as shown in the example in Figure 3-33. -
Page 94: Chapter 4: Configuration
Settings for data interfaces are located in Control Panel, Configuration page → General tab. NOTE: Certain configuration parameters may be inactive or invisible for certain versions used by the G1 Control Unit, please contact the EMUS Support team if you need to use parameters that are not available to you. -
Page 95: Serial Data Interface
EMUS Control Panel Update page allows to users update and discover EMUS BMS G1 components. Also, on this page, you can check your product firmware version and serial number. EMUS Control Panel External components page allows to configure, update and monitor EMUS BMS G1 system external components: EMUS G1 Display Unit, EMUS G1 Smartphone Connectivity module. -
Page 96: Charging Disable
Parameters" and "CAN Group Module Parameters" boxes. Figure 4-3 CAN communication parameters • Enable CAN – Check to use EMUS G1 Control Unit CAN interface for data transmission and reception. BMS reset is required for change to take effect; • CAN1 Speed– EMUS G1 Control Unit CAN interface speed. Available speed values: 50, 125, 250, 500, 800, 1000 kbps. -
Page 97: Cell Communication Data Interface
• CAN ID base – CAN ID Base address which allows to set an arbitrary base address for periodic broadcast of CAN messages generated by EMUS G1 Control Unit. It allows to use several EMUS G1 BMS systems on the same CAN bus or resolve the possible addressing conflicts with other devices. -
Page 98: Can Cell Group Module Configuration
Configuration is initiated by clicking on “Discover devise” which discovers all available CAN Group Modules connected to EMUS G1 Control Unit CAN bus. Discovered devices appear in the Unconfigured list table (Figure 4-5) along with serial number and number of cells. When discovering CAN devices EMUS G1 Control Unit is put into configuration mode until the discovery is complete. -
Page 99: Figure 4-6 Can Devices In Configuration Table Before Commit
(the one connected to the plus terminal) will be the first one on the right. NOTE: The configuration of the EMUS Tesla Module (TES011C) is identical to the CAN Group Modules (CGM). -
Page 100: External Temperature Breakout Board Configuration
10% due to different approach to cells balancing (key mode used). This parameter is located in EMUS Control Panel → Configuration page → General tab, under Battery Pack widget. Battery Pack widget is presented in the following Figure 4-10. -
Page 101: Charging Process
E. g. all values below 10% are treated as 0%, all values between 10 % and 19 % are treated as 10 % and so on. If CGM or TOP/BOT isolators are used, “Maximum balancing current parameter” can be set from 0% to 100% increased by 1%. - Page 102 duration checking. The possible values of these parameters range from 0 to 65 000 minutes. The column of cell voltage related settings on the left side of the "Cell Charging Parameters" group box consists of the following parameters: Fully Charged Voltage; •...
- Page 103 Charging Current parameter allows to charge with reduced charging current in case the available grid power is limited and should therefore be set accordingly lower than the Fast Charging Current parameter. The possible values of these two parameters range from 0.1A to 1000A. Pre- charge Current and Charge Finished Current parameters are expressed as percentage either from 1C current for a CAN charger or maximum charging current for an analog signal controlled charging device.
-
Page 104: Can Chargers / Inverters
(e.g. in solar energy storage applications), these parameters can be set to 0 to turn off the corresponding charging stage duration checking. It possible to set in EMUS G1 Control Panel “Configuration” page → “Charging” tab → “Charging Stage Duration Parameters”... -
Page 105: Load Power Reductions
EMUS G1 Control Unit is used or determined experimentally. Similarly, to the power reductions, the possible value range for the "Activate at" and "Deactivate at"... -
Page 106: Warnings
Figure 4-12 Single reduction example The "PF16 Power Reduction Output" pin function can be used for various purposes and the optimal values of these parameters will vary accordingly, therefore they are best to be determined experimentally. The possible value range for the "Activate at" and "Deactivate at" threshold parameters depend on the corresponding power reduction type: For Low Cell Voltage power reduction both parameters can have a value from 2.00V to 4.55V;... -
Page 107: Current Measurement
EMUS G1 Control Unit is used or determined experimentally. Similarly, to the protections and power reductions, the possible value range for the "Activate at" and "Deactivate at" threshold parameters depend on the corresponding protection type: For Cell Under-Voltage and Cell Over-Voltage protections both parameters can have a value from 2.00V to 4.55V;... -
Page 108: Figure 4-15 Isabellenhütte Sensor Configuration
for high currents. Dead zone field is used to improve zero value stability, meaning that current values that • are within set range both negative and positive are all treated as 0. Reverse direction option allows to reverse measurement polarity. It is required to use •... -
Page 109: Soc Estimation
The "Capacity" parameter value is used as a reference in SOC estimation, and should be set to nominal capacity of a single cell specified by the manufacturer, unless EMUS G1 Control Unit is configured to use different than nominal capacity during the discharge cycle, e.g. 80% or 110% of the nominal capacity. -
Page 110: Figure 4-17 "Battery Pack" Parameter Box
Figure 4-17 "Battery Pack" parameter box If it is necessary to use the "Reduce SOC at Under-Voltage" feature the corresponding checkbox should be checked, and "SOC at Low Volt. Warn." value should be set to whatever State of Charge value the Low Voltage Reduction "Activate at" parameter value corresponds to. This can be determined from the 0.5C discharge curve in the manufacturer provided cell specification sheet. -
Page 111: Soc/Soh Estimator (Gen1 Algorithm)
Reset all filters that adjust value of SOH and Cbat. Those two Restart Cbat Estimator values are also set to default. Enables diagnostical messages that are required when Estimator Diagnostics diagnosing estimator operation with EMUS support team. emusbms.com... -
Page 112: Cell Model Reference Settings
Figure 4-20 Tuning Parameters All parameters are used at the start and during the whole process of algorithm, they help accurately calculate SOC and Cbat. Some of these parameters’ values are continuously adjusted over the time of algorithm, ensuring most precise values. The values should be kept default or should be put in and managed with our assistance, at the start of using BMS. -
Page 113: Soc-Ocv Dependency Curve Of Cell
4.14.2.3 SOC-OCV dependency curve of cell Figure 4-22 SOC-OCV dependency curve of cell 4.14.2.4 SOC dependency on temperature The EMUS team is working on an algorithm and this feature will be available in the future EMUS G1 Control Unit versions. emusbms.com... -
Page 114: Heater Control
4.15 Heater control Settings for heater can be found in the Control Panel → Configuration page → Controls → Heater And Fan Control. Figure 4-23 Heater and Fan parameters Minimum Charging Temperature parameter is used in pre-heating charging stage, it •... -
Page 115: Battery Contactor Control
Ignition. • External Contactor Deactivation is used to enable battery contactor control deactivation over CAN message see: “EMUS G1 Control Unit CAN Protocol”. • Reset External Contactor Deactivation on Protection is used to enable external contactor deactivation will be reset if protection event occurs. Meaning that contactor will not be automatically closed after the protection clears, but instead of Control Unit will wait for an external activation CAN message again. -
Page 116: I/O Pins
There are some exceptions for special purpose inputs: For EMUS G1 Control Unit speed sensor input (SPEED IN), if it is mapped with its default pin function, the "Invert" parameter changes which edge is used to count the pulses of the speed signal –... - Page 117 2.8 Heater and cooling fan PF4 Ignition Key Allows to user manually control charging control Input Input contactor. 2.10 PSU Under-Voltage Sense Control PF15 Leakage 2.5 Battery protections, Input Activates “Insulation Fault” protection. Sensor Input 4.10 Protections PF28 PSU Under 2.10 PSU Under-Voltage Input PSU Under-Voltage feature enable...
- Page 118 PF21 ZVU Buffer Using for ZVU charger zero charging Output Mode Output current activation. PF22 BMS Failure Output Indicates EMUS G1 Control Unit failure. Output Using for connecting equalization PF23 Equalization Output resistor in series to perform string Enable Output...
-
Page 119: Figure 4-26 Pin Mapping Settings
Configuration page → Charger tab → Analog Charger Parameter box. The necessity of each pin function, as well as the values of the corresponding "Invert" and addition parameters should be assessed and determined according to the design and requirements of the system in which EMUS G1 Control Unit is used. emusbms.com... -
Page 120: Display Unit
NOTE: Please configure 4.21 Distance Parameters for valid speed measurements. 4.21 Distance Parameters Distance parameters located in EMUS BMS Control Panel → Configuration page → SOC/SOH → Distance Parameters. Here you can configure: • Pulses per Distance Unit – Used to calculate speed. -
Page 121: Master/Slave
(parameters, protections, pin functionality, etc.). After necessary configuration the system selects its master by comparing serial numbers of each EMUS G1 Control Unit. The one with the lowest value of serial number is selected to be the master and others become slaves. Master Control Unit is responsible for interacting with chargers and other core functionality that affects all Control Units simultaneously. -
Page 122: Figure 4-30 Master/Slave Configuration Parameters
Master/Slave Configuration contains configuration modes. Parallel represents that BMS‘es are all connected in parallel and Series represents that all BMS‘es are connected in series. Figure 4-30 Master/Slave Configuration parameters BMS List contains of all BMS'es on a CAN network. In the Number of BMS parameter field a quantity of installed BMS'es on a CAN Bus should be entered. -
Page 123: Figure 4-33 Master/Slave Protection And Reduction Table
Figure 4-33 Master/Slave Protection and Reduction table In the following list all protections/reductions are described: Table 4-4 List of master slave protections/reductions and their descriptions Reduction Name Description protection will become active in case Master/Slave topology is incorrectly specified, not all devices specified in the Master/Slave Configuration Error Master/Slave configuration are detected (applies to series Cutoff... -
Page 124: Chapter 5: Maintenance
It is important to notice that, external temperature calibration should be performed only when the type of the thermistors used is different than the type of the thermistors provided by EMUS. Otherwise the default calibration values are valid and there is no need for calibration. -
Page 125: Re-Calibration Of Current Sensor
Measure the current with the external current measurement device and write it down. • Also write down the value measured by EMUS G1 Control Unit - it can be found in Control Panel → Status page → General tab → Battery Pack box. -
Page 126: Master Clear
COM port should be "USB Serial Port (COMx)", where x is the number, which digit count can be more than 1. Toggle power supply to Control Unit in order to reset it. EMUS G1 Control Unit should • respond with "VR1" sentence, meaning operation succeeded. -
Page 127: Exporting And Importing Configuration
Configuration file will be saved as .bcf format. In order to upload the configuration to the system from a previously saved EMUS G1 Control Unit configuration file and want to upload it to the system click on “Load” button. Immediately new window will pop-up with progress bar showing uploading status. -
Page 128: Control Unit Firmware Update
Control Unit firmware update In order to ensure that EMUS G1 Control Unit would have all the latest features and bug-fixes, it is recommended to periodically perform Control Unit firmware update procedure. The latest firmware images can be found online at https://emusbms.com/support, however this procedure also to revert back to an older firmware if necessary. -
Page 129: Display Unit Firmware Update
NOTE: During update process normal operation of control unit will be stopped NOTE: The EMUS Tesla Module (TES011C) can be also updated with a CAN Cell Group Module firmware. - Page 130 Support Please contact EMUS for BMS installation or support questions to: support@emusbms.com Thank you for choosing EMUS BMS products!
Need help?
Do you have a question about the G1 and is the answer not in the manual?
Questions and answers