
Related Manuals for EarthLinked SC Series


Summary of Contents for EarthLinked SC Series
-
Page 1: Table Of Contents
® EarthLinked SC Series Compressor Unit R-410A Quick-Start Instructions CONTENTS PAGE Pre-Installation Placement & Mechanical Information System Application Options Electrical and Sound Data 230-1-60 Internal Wiring 230-3-60 Internal Wiring 460-3-60 Internal Wiring 575-3-60 Internal Wiring Field Wiring Diagram System Start-Up •... - Page 2 Installation must be made in accordance with the instructions set forth in this manual and the current EarthLinked Heating and Cooling Installation, Operation and Maintenance Manual. Failure to provide installation by an authorized, trained installer in a manner consistent with the subject manuals will void and nullify the limited warranty coverage for the system.
-
Page 3: Pre-Installation
2. All series Earth Loops: V1, D1, T1, V1.5, D1.5, V2, D2, D3, H1, H5 3. ACMs are for CC, SC, SD, SCW and SW compressor units only. ® Note: Desuperheater and all EarthLinked thermostats can be utilized throughout capacity range. Figure 1. Model Numbers Guidelines for the general layout of the system components are shown in Figure 2. -
Page 4: Placement & Mechanical Information
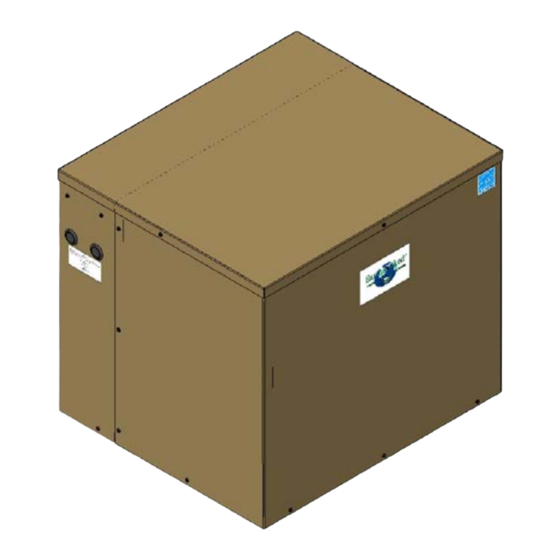
Figure 2. General System Layout Placement ® EarthLinked compressor units may be located outside or inside the building, following these guidelines. OUTSIDE Locate compressor unit: • On a standard HVAC condensing unit pad, resting on firm, level, settled ground. •... - Page 5 • For SD compressor units (which have potable domestic water connections) where the surrounding air temperature remains above 40°F. • Where suggested clearance is 3 feet on both sides, top and front, for access. However, local codes and applicable regulations take precedence. Clearance from back panel to wall and minimum side clearance should be at least one foot.
- Page 6 Compressor units are shipped from the factory with a low pressure nitrogen holding charge. Carefully relieve the holding charge when the compressor unit is being prepared to connect refrigerant system piping. The compressor unit package contains a service valve kit and an adapter kit. The two service valves are to be installed on the earth loop vapor and liquid connections of the compressor unit, using the adapters to right-size to the proper earth loop line set.
- Page 7 SC-410-QS (05/11) Page 7...
- Page 8 Figure 5. SC Connections for R-410A SC-410-QS (05/11) Page 8...
- Page 9 Figure 6. SC Internal Flow Schematic SC-410-QS (05/11) Page 9...
-
Page 10: System Application Options
Figure 7. SC Piping SC-410-QS (05/11) Page 10... - Page 11 Figure 8a. SC Air Heating and Cooling SC-410-QS (05/11) Page 11...
- Page 12 Figure 8b. SC Air Heating and Cooling; Domestic Hot Water by Field-Installed Desuperheater Kit SC-410-QS (05/11) Page 12...
- Page 13 Figure 9. SC Radiant Panel Hydronic Heating and Air (Chilled Water) Cooling SC-410-QS (05/11) Page 13...
-
Page 14: Electrical And Sound Data
Voltage Compressor Sound Pressure Level * Voltage/Phase/Hz Model @10 ft, dB(A) Min. Max. -018-1C 230-1-60 58.3 15.0 18.0 57.0 -024-1C 230-1-60 64.0 14.3 18.0 57.0 -024-2C 230-3-60 58.0 11.0 60.0 -024-3C 460-3-60 28.0 60.0 -030-1C 230-1-60 77.0 15.7 19.0 59.0 -030-2C 230-3-60 71.0... -
Page 15: 230-1-60 Internal Wiring
Figure 11. SC Electrical Ladder Diagram (230-1-60) SC-410-QS (05/11) Page 15... - Page 16 Figure 12. SC Electrical Schematic (230-1-60) SC-410-QS (05/11) Page 16...
-
Page 17: 230-3-60 Internal Wiring
Figure 13. SC Series 230-3-60 Electrical Ladder Diagram SC-410-QS (05/11) Page 17... - Page 18 Figure 14. SC Series 230-3-60 Electrical Schematic SC-410-QS (05/11) Page 18...
-
Page 19: 460-3-60 Internal Wiring
Figure 15. SC Series 460-3-60 Electrical Ladder Diagram SC-410-QS (05/11) Page 19... - Page 20 Figure 16. SC Series 460-3-60 Electrical Schematic SC-410-QS (05/11) Page 20...
-
Page 21: 575-3-60 Internal Wiring
Figure 17. SC Series 575-3-60 Electrical Ladder Diagram SC-410-QS (05/11) Page 21... - Page 22 Figure 18. SC Series 575-3-60 Electrical Schematic SC-410-QS (05/11) Page 22...
-
Page 23: Field Wiring Diagram
Figure 19. (Part 1 of 2) SC Field Wiring Diagram SC-410-QS (05/11) Page 23... - Page 24 Figure 19. (Part 2 of 2) SC Field Wiring Diagram SC-410-QS (05/11) Page 24...
-
Page 25: System Start-Up
System Start-up Evacuation/Charging 1. SC, SD, SCW, HC, HCW, HW and HWW Models Refer to Figure 20 and the following description: a. Seal Test Evacuation and Initial Charge 1. Carefully vent the nitrogen charge from the compressor unit. 2. After installing and nitrogen brazing the HVAC system components and compressor unit service valves, turn the service valves “OFF”... - Page 26 6. Initiate the system evacuation. Evacuate the system down to 230 MICRONS as read on the digital micron gage. After 230 microns has been achieved, turn off the LP and HP valves and turn “OFF” the vacuum pump. Reading the digital micron gage, the system pressure must not exceed 280 MICRONS WITHIN 5 MINUTES.
-
Page 27: Final Charge
7. Close the LP and HP valves on the gage block. Disconnect the vacuum pump and the utility hose from the gage block. Disconnect the digital micron gage from the liquid earth loop service valve. 8. Open the refrigerant container valve and inject liquid refrigerant into the charging port as shown in Figure 20. - Page 28 Comp. Hydronic Domestic Item System Functions Figure Unit Htg. Htg. Wtr. Htg. Air heating and cooling Air heating and cooling, domestic hot water by field installed desuperheater Air heating and cooling, domestic hot water by desuperheater Air heating and cooling, domestic hot water by priority heating with DWM Air heating Air heating and domestic hot water by priority heating...
- Page 29 Figure 23. Primary Circuit with Hydronic Water Module (HWM) Figure 24. Primary Circuit with Compressor Unit Heat Exchanger SC-410-QS (05/11) Page 29...
- Page 30 The final charging procedure is as follows, with the charging set up described in Figure 25: 1. Continue measuring the refrigerant charge weight as shown in Figures 25. 2. If the system is equipped with a domestic water module (DWM) in addition to the primary (air handler or hydronic) heating system, be sure the DWM switch is OFF.
- Page 31 Figure 25. Typical Final Charge Set-up for SC, SD, SCW, SW, HC, HCW, HW and HWW Compressor Units (SC Model shown) 10. Reconfirm that the liquid level of refrigerant is at the middle sight glass. If necessary, add or remove refrigerant to be at the middle sight glass. Document the total weight of refrigerant charge in the system.
- Page 32 Figure 26. Correct Final Charge Level ® Figure 26a. EarthLinked Performance Parameters SC-410-QS (05/11) Page 32...
-
Page 33: Cooling Assist Valve Adjustment
Cooling Assist Valve (CAV) Adjustment After the system has been fully charged, the Cooling Assist Valve (CAV) is to be adjusted in accordance with the following instructions or the process flow chart in Figure 30. 1. Before adjusting the CAV, attach a thermocouple lead with electrical tape, then wrapped with ½”... - Page 34 6. There will be many bubbles in the sight glass as shown in Figure 28. Figure 28. Initial Sight Glass Refrigerant Condition 7. After approximately 10 minutes, repeat step 5. Liquid must always be visible in the Active Charge Control (ACC) but not allowed above the top sight glass for an extended period of time.
- Page 35 Figure 30. CAV Adjustment Process Flow Chart SC-410-QS (05/11) Page 35...
Need help?
Do you have a question about the SC Series and is the answer not in the manual?
Questions and answers