Table of Contents
Advertisement
Quick Links
Advertisement
Table of Contents

Related Manuals for F&U MPF3471H


Summary of Contents for F&U MPF3471H
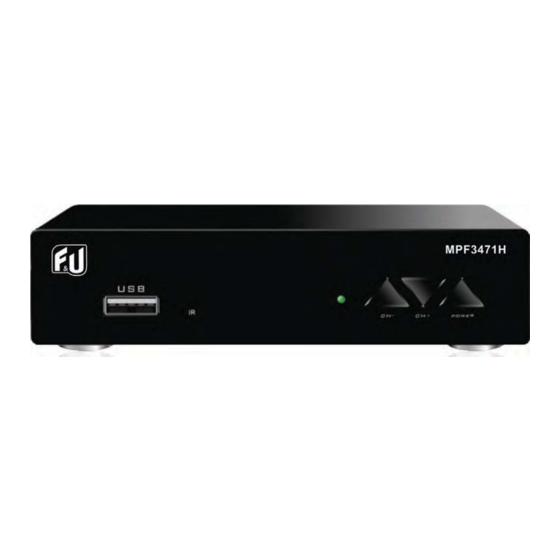
- Page 1 MPF3471H...
-
Page 2: Table Of Contents
CONTENT IMPORTANT SAFETY INSTRUCTIONS ..................2 FRONT AND REAR PANEL......................4 Front Panel/ Rear Panel ......................4 REMOTE CONTROL........................5 Installing the Batteries ........................6 Using the Remote Control......................6 Connections ............................7 First time installation ........................8 Basic Operation ..........................8 Program Manage Settings ......................8 Program Edit ...........................9 EPG (Electronic program guide)/ Sort/ LCN ..............10 Picture Setting..........................11 Aspect Ratio/ Resolution/ TV format/ Video output ............11... -
Page 3: Important Safety Instructions
IMPORTANT SAFETY INSTRUCTIONS 1. Read these instructions. Keep these instructions. 2. Keep these instructions. 3. Heed all warnings. 4. Follow all instructions. 5. Do not use this apparatus near water 6. Clean only with dry cloth. 7. Do not block any ventilation openings, install in accordance with the instructions. 8. - Page 4 The symbol indicates that dangerous voltages constituting a risk of electric shock are present within this unit. The symbol instructions indicate that there are important operating and maintenance the literature accompanying this unit. This symbol indicates that this product incorporates double insulation between hazardous mains voltage and user accessible parts.
-
Page 5: Front And Rear Panel
FRONT AND REAR PANEL Front Panel Receive the signal from the remote control USB: Data input from USB storage devices Rear Panel ANT IN: The aerial input connector LOOP OUT: To TV Loop Out connector COAXIAL: Connect to Amplifier Coaxial input terminal HDMI: Connect to TV set HDMI input terminal SCART:... -
Page 6: Remote Control
REMOTE CONTROL STANDB : S itch the product to on or stand Mode MUT : Mute or Restore Audio Output lectronic Program uide Call up the IN O: Sho information of the current program TTX: Displa Teletext contents PIC: Select to picture Mode R C: Record TV program Personal video... -
Page 7: Installing The Batteries
Installing the Batteries Remove the atter cover from the Remote Control and put 2pcs si e atteries 1.5 V AAA inside the compartment. The diagram inside the Batter Compartment sho s the correct a to install the atteries. Using the Remote Control To use the Remote Control point it to ards the front of the Digital Set Top Box The Remote Control has a range of up to meters from the Set Top Box at an angle of up to... -
Page 8: Connections
Connections or a asic connection from our S T TOP BOX to our TV set ou can use SCART connection or a higher ualit connection use a direct HDMI connection as sho n elo . Connect to an audio amplifier use coaxial is an optional. -
Page 9: First Time Installation
First time installation After all connections have een made properl s itch on TV and ma e sure the receiver is connected to the Main Po er. Press Po er utton to s itch on restoring receiver. if ou are using the receiver for the first time or have restored the unit to actor Default the Installation uide ill appear on our TV screen. -
Page 10: Program Edit
Program Edit To edit your program preferences (lock, skip, favourite, move or delete) you will need to enter the Program Edit Menu. Set Favourite Program You can create a shortlist of favourite program that you can easily access. Set Favourite TV or Radio program: 1. -
Page 11: Epg (Electronic Program Guide)/ Sort/ Lcn
2. Press the UP/DOWN button to move the channel 3. Press the OK button to confirm 4. Repeat the above steps to move more programs Lock Program You can lock the selected programs for restricted view Lock a TV or Radio Program: 1. -
Page 12: Picture Setting
Picture Setting To access the Menu press M NU then select Picture using the RI HT L T e . The Menu provides options to ad ust the video settings. Press UP DO N to select an option and press RI HT L T to ad ust that setting. -
Page 13: Channel Search
Channel Search To access the menu, press MENU and select [Search Channel] using the RIGHT/LEFT keys. This Menu provides options to adjust the Search Channel settings. Press UP/DOWN to select an option and press RIGHT/LEFT to adjust the settings Press EXIT to exit the Menu Auto Search This option will automatically search for channels and save them once the scanning is complete. -
Page 14: Country/ Antenna Power
Country Select our countr of residence. Antenna power na le Antenna Po er if an external active antenna is connected. Time Setting To access the Menu press M NU then select Time using the RI HT L T e s. The Menu provides options to ad ust the time settings. -
Page 15: Osd Language/ Subtitle Language/ Audio Language
Please set Power On and Power Off as Enable, then move the cursor to set Power On/Off Time. After all the settings are made, this screen will appear. Press the OK button to exit Option To access the Menu, press MENU and select [Option] using the RIGHT/LEFT keys. The menu provides options to adjust the OSD Language,Subtitle Language and Audio Language. -
Page 16: Digital Audio
Audio Language Select the preferred audio language for watching TV channels. If the language is not available, the default language will be selected Digital Audio If no sound from audio amplifier which connected to coaxial you can change this setting. System Setting To access the Menu, press MENU and select [System] using the RIGHT/LEFT keys. -
Page 17: Usb
To access the Menu, press the MENU button and select [USB] using the RIGHT/LEFT keys. The menu provides options to playback Music, Photo and Multimedia files.lt can support AVl, MP3, WMA, JPEG and BMP formats. Multimedia: When a USB device is attached you can select from the Music Photo, Movie or PVR options in this menu using the RIGHT/LEFT keys and OK to select. -
Page 18: Movie Configure/ Usb Pvr Configure
Movie Configure Subtitle Specific: Select the subtitle size. Available settings are Small, Normal and Big Subtitle BG: Select the subtitle background color. Available settings are Transparent, Gray Yellow, Green and White. Subtitle Font Color: Select the subtitle font color. Available settings are White, Black, Red, Blue and Green USB PVR Configure: Record Device: Displays information of the connected USB storage device. -
Page 19: Timeshift
The recording files can be deleted on this unit, you can go to the PVR, and press yellow button to delete it. The TV program is recorded to file at .PVR format, which can be played back on this unit and PC using a suitable player, but cannot be played back on DVD or PDVD For recording high definition TV programs, the version (and speed) of USB device should be 2.0 or above, otherwise the unit may not record the HD programs correctly. -
Page 20: Recording
recording. Press [Stop] key again to stop the recording. Recording Press [REC] key can record current program to USB disc. Press [REC] repeatly to choice recording time. Press [INFO] key to see recording information during recording as below: Press [PVR] key to open the PVR file list. You can select recorded file and press [OK] to play the file... -
Page 21: Troubleshooting
TROUBLESHOOTING PROBLEM POTENTIAL REASONS WHAT TO DO Power isn't connected Connect the power No picture The power switch is not on Switch on the power Not connect DVB-T cable Plug in the DVB-T cable Screen shows "No Signal'" Incorrect setting Set up correct parameter No or incorrect connection with Connect the audio cable correctly... -
Page 22: Technical Specification
TECHNICAL SPECIFICATION ITEM SUB ITEM PARAMETER 23 MH Input re uenc 5 MH R Input level Tuner I Band idth Modulation 4 AM 2 ISO I C 13 1 2 Decoder ormat 4 ISO I C 144 H.2 4 ISO I C 144 Video Output ormat p 2 p 1... - Page 23 Compatible Compatible Note: Note: This DVB T receiver is an advanced 3D Compatible Set Top Box. It has new software enhancements for processing 3D video and graphics prior to being delivered to a 3D compatible television. To enjoy a 3D effect service, a 3D video, a 3D TV set purchased after March 2010 (with or without 3D glasses depending on the type of TV set), and a 3D compatible DVB T receiver are required.
Need help?
Do you have a question about the MPF3471H and is the answer not in the manual?
Questions and answers