Table of Contents
Advertisement
Quick Links
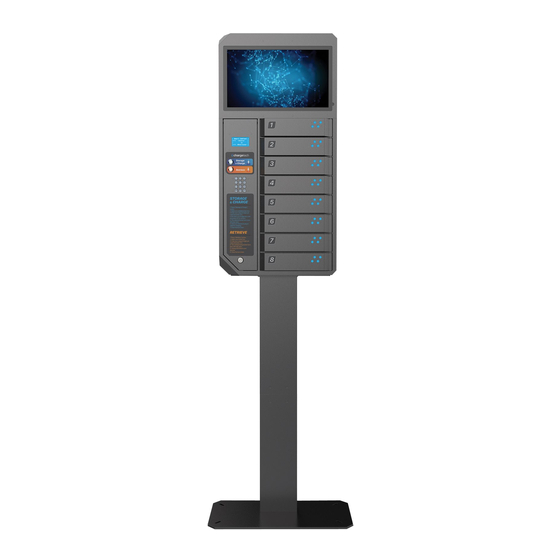
8 Bay Pin Code
Charging Locker
(PPL8)
Installation Guide
1
2
1. Fix rectangle pole
on base plate with 4 x
M8 screws.
2. Fix 4 x rubber foots
on base plate with 4 x
M5 screws.
3. Fix 4 metal pieces
in rectangle pole A
with 12 x M5 screws.
5. Fix metal plate on rectangle
3
pole with 4 x M5 screws.
4
4. Fix rectangle pole B
on rectangle pole A
with 12 x M5 screws.
5
6
6. Fix PPL8 on rectangle pole
with 4 x M5 Hex screws.
7. Put extension cord
through rectangle pole.
8. Connect power cord
with the extension cord.
8
7
P1
Advertisement
Table of Contents

Related Manuals for ChargeTech PPL8

Summary of Contents for ChargeTech PPL8
- Page 1 Installation Guide 4. Fix rectangle pole B on rectangle pole A with 12 x M5 screws. 6. Fix PPL8 on rectangle pole with 4 x M5 Hex screws. 1. Fix rectangle pole on base plate with 4 x M8 screws.
- Page 2 Option A: Fix product by the wall Option B: Hang on wall 1. Fix 2 x L racks on the top of the product by using 2 x M3 screws. 2. Mark the hole on wall. Drill 2 x Ø6mm holes on Ø6mm Ø6mm wall according to the Mark.
- Page 3 B. Replace Cable Option C: Fix product on ground Ø12mm 3. Open the cable clip. 4. Unplug USB Cable. 5. Take out the cable through the hole. 1. Mark the holes on floor. 2. Drill 4 x Ø12mm holes on floor according to the Mark.
- Page 4 Micro USB Cable + Lightning Cable + Type C Cable fully. - Dimensions(PPL8 only): 480 x 200 x 668 mm - Dimensions(PPL8 with Floor Stand): 590 x 280 x 1660mm Press button Press button - Material (Housing) : Cold Rolled Steel “0”...
Need help?
Do you have a question about the PPL8 and is the answer not in the manual?
Questions and answers