
Subscribe to Our Youtube Channel
Related Manuals for Vimar ELVOX Tab 5S UP


Summary of Contents for Vimar ELVOX Tab 5S UP
- Page 1 Use and Configuration Manual 40515 TAB 5S UP 5” Due Fili Plus Wi-Fi hands-free video entryphone...
- Page 2 Tab 5S UP - 40515...
-
Page 3: Table Of Contents
Tab 5S UP - 40515 Index • 1. General information ................4 • 1.1 Description ......................4 • 1.2 Warnings ......................4 • 1.2.1 Maintenance .....................4 • 1.2.2 Warnings for the user ................4 • 1.2.3 Disclaimer for operation of the App ............5 •... - Page 4 Tab 5S UP - 40515 • 4.2.4 Alert messages ..................36 • 4.2.5 System events ..................36 • 4.2 6 Deleting the calls and messages history ..........37 • 4.2.8 "Memory full" warning ................38 • 4.3 Operating modes ....................40 • 4.4 Contacts List ......................41 •...
- Page 5 Tab 5S UP - 40515 • 5.7.2 Installer menu ..................101 • 5.7.3 Administrator PIN ...................102 • 5.7.4 Video entryphone configuration ..............104 • 5.7.5 Primary ID configuration .................105 • 5.7.6 Secondary ID configuration ..............106 • 5.7.7 Restoring the factory settings ..............107...
-
Page 6: General Information
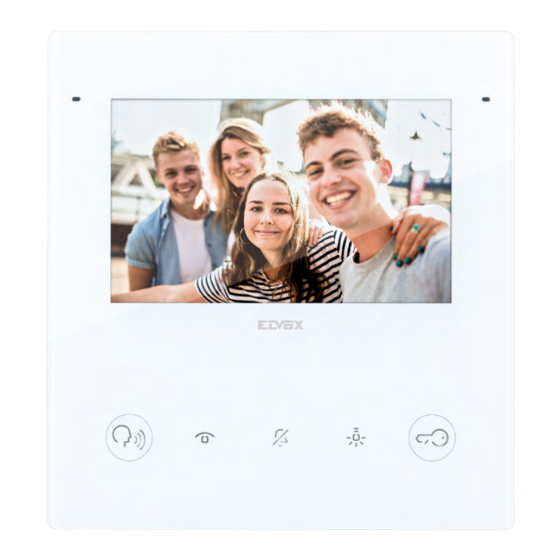
Tab 5S UP - 40515 General information Description Wall-mounted Tab 5S UP hands-free video entryphone for Due Fili Plus system, integrated Wi-Fi for call forwarding to smartphone with dedicated app, with 5" touch-screen colour LCD display, capacitive keyboard for video door entry functions and intercom calls, video voicemail, teleloop for hearing aids, complete with bracket for fixing in round or rectangular mounting box., surface mounting or semi-flush mounting, white Warnings... -
Page 7: Disclaimer For Operation Of The App
App Store. Vimar is not responsible for the selection of technical equipment for accessing the Internet that the Customer needs to use the service, and which is based on an agreement that the Customer has signed with an Internet Service Provider (ISP);... -
Page 8: Characteristics
Tab 5S UP - 40515 Characteristics 1.3.1 Calls • Receipt of audio or audio/video calls from an outdoor station. • Specific self-start from an outdoor station, and cyclical self-start. • Call to/from switchboard. • Audio-only intercom calls to/from another indoor station. •... -
Page 9: 1.4 Additional Functions
Tab 5S UP - 40515 1.4 Additional functions 1.4.1 Audio frequency function for hearing aids (Teleloop) The video entryphone can be used by people wearing hearing aids. For correct functioning of the hearing aid, please refer to its instruction manual. Any metal objects or electronic equipment in the vicinity may affect the quality of the sound received by the hearing aid. -
Page 10: Button And Signal Functions
Tab 5S UP - 40515 Button and signal functions 1 - Microphone 5” Display, 16.8 million colours, 800x480 resolution, ratio of 15:9, capacitive touch screen. Indicators (white backlighting): 3 - New notifications or messages (steady); device power-on, device awaiting configuration (flashing). 4 - No connectivity 5 - Door open / Professional firm function state 6 - Ringtone mute / Do not disturb... -
Page 11: First Power-Up
Tab 5S UP - 40515 First power up Configuration wizard The first time the device is started, a welcome screen is displayed. The configuration wizard starts automatically after 3 seconds, or when any part of the screen is touched. When accessing the configuration wizard, the first step is to select the language. The system will show Italian as the default language. - Page 12 Tab 5S UP - 40515 The user must manually set the date and time. To confirm the set configurations, enter the device PIN code. Default PIN: 0000 Entering the PIN code, the confirmation button will appear in order to proceed. The device will now ask you to select the video entryphone configuration mode, with two possibilities: primary configuration or secondary configuration.
- Page 13 Tab 5S UP - 40515 If the desired choice is selected, the button will be activated to confirm your choice and the user will be guided to the next screen. The configuration in progress screen only permits one action: “exit”. Once configuration is complete, the device shows a confirmation screen.
-
Page 14: Call Functions
Tab 5S UP - 40515 Call functions Call from outdoor station When the video door entry device receives a call from an entrance panel, the display shows image recorded on the calling outdoor station on full-screen. The outdoor entrance panel ID is shown at the top. The following controls are available: “Answer”, “Ignore”, “Door release”. -
Page 15: Adjusting Call Settings
Tab 5S UP - 40515 3.1.1 Adjusting call settings To view the control panel, swipe upwards. During an incoming call, the following are present in the control menu: - screen brightness - ringtone volume Adjust the values using the cursors. To disable the ringtone keeping the volume control, using the “Mute”... -
Page 16: Answering A Call
Tab 5S UP - 40515 3.1.2 Answering a call Enter talk mode by pressing the "Answer" button. In talk mode, the “Answer” button is replaced by the “mute microphone” button, while “Ignore” is replaced by “Close”. Enable the option by pressing the “Mute microphone” button. After 4 seconds the controls disappear, leaving the free video stream visible. -
Page 17: Adjusting Talk Settings
Tab 5S UP - 40515 3.1.3 Adjusting talk settings To view the adjusting talk settings menu, swipe upwards. During a call, the following are present in the control menu: - screen brightness - talk volume Adjust the values using the cursors. To disable the audio keeping the volume control, using the “Disable audio”... -
Page 18: Video Controls
Tab 5S UP - 40515 3.1.4 Video controls During a call or self-start, controls are available for adjusting the talk volume and screen backlighting, as well as accessory controls for adjusting the video stream brightness and contrast. Accessing the control panel, an additional “Video controls” button is available Press the “Video controls”... -
Page 19: Additional Controls And Favourites
Tab 5S UP - 40515 3.1.5 Additional controls and Favourites To display the additional controls and favourites panel, use the “Expand” button. The favourites panel appears with a sliding effect from the right, colouring the area; it shows the favourite elements, according to a 2 or 3 columns matrix with 2 elements, in which the first is already occupied by the controls available in standard display mode. -
Page 20: Zoom Function
Tab 5S UP - 40515 3.1.6 Zoom function By touching the screen again (in an area where there are no controls), the display returns to the no-controls mode. By touching the screen twice, the zoom area selection screen appears. During a call it is possible to use the “Zoom” function. The interface shows a graphic track over the video stream divided into five areas, to allow the user to select the portion to zoom into. -
Page 21: Door Release
Tab 5S UP - 40515 3.1.7 Door release For an incoming call from the entrance panel, it is possible to open the door without necessarily answering the call, by pressing the “Door release” button. The system enables the opening control. -
Page 22: Refusing A Call
Tab 5S UP - 40515 3.1.8 Refusing a call If you decide to refuse the call, the “Incoming call” window closes and automatically returns to the home page (or any screen that was active prior to the incoming call). Mute Ringtone 3.1.9 Answering an audio-only call... -
Page 23: Answering A Reception Call
Tab 5S UP - 40515 Answering a Reception call Incoming calls from reception may be audio/video or audio-only. The controls are similar to the call from entrance panel controls, except the Door release If an audio call arrives from the switchboard, the controls are similar to those of the calls from entrance panel, except the door release (the video controls could be missing or disabled with audio-only calls). -
Page 24: Video Voicemail
Tab 5S UP - 40515 Video voicemail If the video voicemail function has been enabled in the indoor station, the arrival of a call from entrance panel can switch the call, after an adjustable delay, to recording an answering machine message. After the set interval, the video entryphone will stop streaming the video and will return to standby. -
Page 25: Answering A Call From An Indoor Station (Apartment)
Tab 5S UP - 40515 Answering a call from an indoor station (Apartment) For an incoming call from another apartment, the call controls and actuations will be available, but not the door release. In talk mode, the “Answer” button is replaced by the “mute microphone” button, while “Ignore” is replaced by “Close”. -
Page 26: Call From A Mobile Device
Tab 5S UP - 40515 Call from a mobile device For an incoming call from a mobile device, the call controls and actuations will be available, but not the door release. In talk mode, the “Answer” button is replaced by the “mute microphone” button, while “Ignore” is replaced by “Close”. -
Page 27: Landing Call
Tab 5S UP - 40515 Landing call When enabling a landing call, the video entryphone plays the associated ringtone and shows a full-screen pop-up. The pop-up is displayed for 30 seconds. It may be ended in advance. Closing, it returns to the previously displayed page. -
Page 28: Making A Call
Tab 5S UP - 40515 Making a call If from the contacts list you press the “mobile device” icon connected to the system, an “Outgoing call” window opens to that contact, with the possibility to end the call. Example of outgoing call to indoor station Example of outgoing call to apartment Example of outgoing call to switchboard. -
Page 29: Home Page And Other Functions
Tab 5S UP - 40515 Home page and other functions Home Page State icons State bar Contacts List Customisable Home page area Operating modes Navigation bar Home Settings Calls and messages Touching the touch area on the device, the display comes on showing the home page; on the left, the screen has two function access points, on the right a customisable space containing any favourite objects, at the top the state bar, and at the bottom the navigation bar. -
Page 30: State Bar
Tab 5S UP - 40515 4.1.2 State bar Mute Ringtone The state bar also shows the following states: connection to the WiFi network, connection to the Cloud, door open, Alert management. 4.1.3 State icons and meanings State icon Meaning Door Open porta aperta inoltro di chiamata attivo Do not disturb mode ON... -
Page 31: Settings
Tab 5S UP - 40515 4.1.4 Controls Swipe from the bottom upwards to access the ringtone volume and screen brightness control menu. Ringtone mute Ringtone volume control Screen brightness control... -
Page 32: Calls And Messages
Tab 5S UP - 40515 Calls and messages Mute Ringtone If there are missed calls or unread messages, the related button in the home page shows the unread elements with a yellow badge. Mute Ringtone Press the “calls and messages” button to access the specific section. -
Page 33: Calls Made And Received
Tab 5S UP - 40515 4.2.1 Calls made and received By activating the “Calls made and received” filter, a list of only calls made and received is created. Like all the lists in this context, this list is scrolled vertically and each item can be rapidly deleted by swiping to the left. To see the whole calls list (from the most recent to the least recent), scroll from the bottom. - Page 34 Tab 5S UP - 40515 When fully swiped, the element row disappears and the list is compressed upwards, leaving room for the next element in the list or disappearing. The deleted call is no longer present in the list. Vice-versa, touch the call detail area, or swipe the whole row towards the right, to make a call. Click on the “delete”...
-
Page 35: Missed Calls
Tab 5S UP - 40515 4.2.2 Missed calls Enable the “missed calls” filter to display the history of missed calls. If they have not been viewed yet, they will be shown in red. Missed calls are marked as red automatically when exiting the screen or changing the active filter. By pressing the “delete”... -
Page 36: Video Messages
Tab 5S UP - 40515 4.2.3 Video messages Press the “video messages” button to view the list of stored video messages. If the message comes from an indoor station, such as the reception switchboard, a rapid call connection will be available. Unread video messages are highlighted with the icon and first row of the (sender’s) text in yellow. - Page 37 Tab 5S UP - 40515 After viewing, the video message will be shown in white to show it has been seen. Also in this case, swipe from left to right on the call row to scroll the whole row and display a rapid call control. The call is made by swiping the row for 30 % of its length;...
-
Page 38: Alert Messages
Tab 5S UP - 40515 4.2.4 Alert messages The “alert messages” filter shows a list of all alert messages sent. 4.2.5 System events Using the “system events” filter button, it is possible to view all the notification elements concerning the video door entry system state and operation, such as the availability of software updates or other system events. -
Page 39: Deleting The Calls And Messages History
Tab 5S UP - 40515 4.2 6 Deleting the calls and messages history Pressing the delete button, the user can delete all the objects. The system displays a pop-up window, asking for confirmation before definitively deleting the whole messages/calls/video messages history. Having deleted all the elements, the “Calls and messages”... -
Page 40: Memory Full" Warning
Tab 5S UP - 40515 4.2.7 "Memory full" warning Entering the “calls and messages” section, you can identify the nature of the warning: in this case, it refers to the memory full state, identified by the “answering machine” icon shown in red in the state bar. The first position gives a non-deletable message notifying that the memory is full. - Page 41 Tab 5S UP - 40515 The deleted video message is no longer present in the list. Once the memory has been freed, the memory full warning also disappears. By clicking on the “delete” button, a pop-up window appears requesting confirmation before definitively deleting all the messages in the memory.
-
Page 42: Operating Modes
Tab 5S UP - 40515 Operating modes Press the “Operating modes” button to access a list of functions linked to the operation of the video door entry device. Mute Ringtone The operating modes represent video door entry device operating options that can be enabled or disabled; when disabled, they are shown in grey. -
Page 43: Contacts List
Tab 5S UP - 40515 Contacts List Press the “Contacts list” button to display the list of all elements present in the system on the interface: • switchboards • entrance panels • home • cameras • entrances • lights • actuations Press the button relating to an element to enable the associated functions. -
Page 44: Apartments
Tab 5S UP - 40515 4.4.1 Home Press the "Home” aggregator button to view all the mobile devices associated with the video entryphone. Max’s telephone 4.4.2 Entrance panels Press the “Entrance panels” aggregator button to view all the entrance panels that can be reached. Select an entrance panel and self-start will be launched. -
Page 45: Cameras
Tab 5S UP - 40515 4.4.4 Cameras Press the “Camera cycle” control to view all the cameras connected to the video door entry system. The video entryphone will then show the next camera, in the order recorded in the system. Swipe upwards to access the settings. - Page 46 Tab 5S UP - 40515 Press the “Expand” button to access the full accessories and favourites control panel. The accessory control panel appears with a sliding effect from the right, colouring the area; it shows the accessory controls and the favourite elements, according to a 2 or 3 columns matrix with 2 elements, in which the first is already occupied by the controls available in standard display mode.
-
Page 47: Lights, Entrances And Actuators
Tab 5S UP - 40515 4.4.5 Lights, entrances and actuators Press the “Lights” aggregator button to view all the “light” type actuators in the video door entry system. Press the “Hall” button to enable the control in the system. The element indicates that the activation has a temporary status. Alternatively, it indicates that the operation has failed, with a temporary state;... - Page 48 Tab 5S UP - 40515 A long press on the element will activate the actions bar and add it to the favourites. If the element is already in the favourites, the following message will appear: “favourite already present”.
-
Page 49: Customisable Home Page Area (Favourites)
Tab 5S UP - 40515 Customisable Home Page area (Favourites) Any element represented on the interface (controls and actuations (round icons), complex elements (square icons)) can be selected as favourites; this way, they will be added as a link to both the home page and the call favourites panel (only if they represent an actuation). - Page 50 Tab 5S UP - 40515 On the home page, you will see the element that has just been added to the favourites in the first available position. Press and hold the element to change its position. The screen returns to edit mode, the actions area shows that it is possible to remove the object from the favourites. Moving the object onto the favourites area, on the other hand, it is possible to change its position;...
- Page 51 Tab 5S UP - 40515 Select the required element with a long press. The screen will enter the edit mode; an actions area appears at the top with the words “Remove from favourites”. When the element is dragged into the actions area, it turns yellow, to indicate that it can be released to confirm that it has been removed.
- Page 52 Tab 5S UP - 40515 The only elements that cannot be added to the favourites are the hexagonal aggregators: If you try to add one of these elements to the favourites, the words “Cannot be added to the favourites” appear in the actions area.
- Page 53 Tab 5S UP - 40515 Re-arranging the favourites If re-arranging the favourites involves a number of elements arranged on more than one page, the elements can be moved between the various pages by moving them to the right and left limits of the screen. When the dragged element reaches the side bands of the screen, the system changes the page.
-
Page 54: Cleaning The Screen
Tab 5S UP - 40515 Cleaning the Screen Mute Ringtone Select the "Operating modes" icon to access the “Screen cleaning” function. Touch the button to activate the mode. In this mode, the screen touch function is temporarily disabled for cleaning; the screen shows the time remaining to complete the operation. -
Page 55: Alert Function
Tab 5S UP - 40515 Alert function Press the alert button to make the device send an alert message to the switchboard, which will manage the message as a priority. The system will show a full-screen animation, showing the remaining time for cancelling the send. After waiting five seconds, the message will be sent to reception. - Page 56 Tab 5S UP - 40515 If the alert sending has failed or there are sending problems, the text label will change to “Sending failed” and the button will show an error signal. The alert icon in the state bar will be red. After 3 seconds, the button will return to normal state and it will be possible to send a new alert.
- Page 57 Tab 5S UP - 40515 The outcome of sending the alert can be checked in any page via the state icon. The button will then return to normal state and it will be possible to send a new alert. The list displayed no longer shows the alert message in red as it is marked as already read.
-
Page 58: Settings
Tab 5S UP - 40515 Settings The device options can be configured in the specific section, accessible from the home page when no call events are active. Click on the "Settings" icon in the navigation bar to open the options section; the screen displays the various categories: •... -
Page 59: General Information
Tab 5S UP - 40515 General Press the “General” button to call up the list of available options: for each element, the first row identifies the option, the second row shows a summary of the current setting. If the single option has detailed configuration elements, click on the whole area of the corresponding row to access the related menu. -
Page 60: Language
Tab 5S UP - 40515 5.1.1 Language Click on the “Language” row to view the list of languages available for the device interface; the active language is highlighted in yellow. The user can edit the setting by clicking the button for the required language. The list scrolls the list of available languages vertically. -
Page 61: Date And Time Format
Tab 5S UP - 40515 5.1.2 Date and Time format Click on the “Date and time format” row to view the possible viewing formats in sequence; scroll through the options and directly select the one required. 5.1.3 Time zone Click on the "Time zone" row to view a screen with the values given in sequence... -
Page 62: Manual Date And Time Settings
Tab 5S UP - 40515 5.1.4 Manual date and time settings Click on the "Manual date and time settings" row to view a screen with the values given in sequence The new value is then confirmed and applied. 5.1.5 Automatic date and time settings Click on the “Automatic date and time settings”... -
Page 63: Appearance
Tab 5S UP - 40515 Appearance Press the “Appearance” button to view the list of available settings, i.e.: • Interface graphic theme • Display brightness • Screen auto sleep • Button backlighting • Notification LED backlighting • Button backlighting in standby •... -
Page 64: Interface Graphic Theme
Tab 5S UP - 40515 5.2.1 Interface graphic theme When you click on the “Interface graphic theme” the screen offers a choice of different graphic themes available: dark or pale. The active one is framed in yellow. Change the theme by clicking the related button; a preview is shown and can be confirmed If confirmed the new theme is applied. -
Page 65: Screen Auto Sleep
Tab 5S UP - 40515 5.2.2 Screen auto sleep Click on the “Screen auto sleep” row to change the value of the time in seconds before the screen goes to stand-by. The timer is activated from the last touch of the screen. All available values are shown, the active one is highlighted; the option to disable the auto sleep is in the last position. -
Page 66: Notification Led Backlighting
Tab 5S UP - 40515 5.2.4 Notification LED backlighting Click on the “Notification LED backlighting” button to change the brightness of the LEDs in the indicated options. Click on the cancel button to return to the previous screen. Changing the selection, the user can confirm the action or cancel the change by clicking the cancel button, which will return the device to the previous screen. -
Page 67: Button Backlighting In Standby
Tab 5S UP - 40515 5.2.5 Button backlighting in Standby The “Button backlighting in standby” option on the other hand is only active or inactive. Click on the “Button backlighting in standby” row to change the state 5.2.6 Automatic element grouping Click on the “Automatic element grouping”... -
Page 68: Sounds
Tab 5S UP - 40515 Sounds Pressing the “Sounds” button, the screen will show a list of available settings, including the items for enabling and changing the volumes of the specific call sounds and ringtones from the Switchboard, Entrance panels, Indoor stations and Door bell. - Page 69 Tab 5S UP - 40515 Click on each of the ringtone items to select one of the available options Clicking on the “Call from switchboard ringtone”, the user can change the type of ringtone among those uploaded on the device. Click on the cancel button to return to the previous screen. Touch the button associated with a value to hear a preview.
-
Page 70: Calls
Tab 5S UP - 40515 Calls Press the “Calls” button to view the list of available settings: • Answering Machine Message • Voicemail activation delay • Maximum message length • End call with door release button • Professional firm function •... -
Page 71: Voicemail Message
Tab 5S UP - 40515 5.4.1 Voicemail message Changing the voicemail message allows you to record and play the message used in the video voicemail mode. You will see a time progress bar and the buttons: “Record”, “Play”, “Stop”, “Restore default message”. Press the Play button to play the message In play, the progress bar shows the position relative to the total length of the message, with the portion already played in yellow. - Page 72 Tab 5S UP - 40515 Press the “Record” button to record a new message. Recording a new message will delete the existing message, and the system will display a confirmation pop-up. Confirm to start recording. The progress bar shows the length of the recording in relation to the maximum permitted length.
-
Page 73: Voicemail Activation Delay
Tab 5S UP - 40515 5.4.2 Voicemail activation delay Click on the “Voicemail activation delay” row to select the delay from those available Click on the value to change the state to yellow, the screen will automatically confirm the new value chosen and return to the calls menu. -
Page 74: Maximum Message Length
Tab 5S UP - 40515 5.4.3 Maximum message length Similarly, click on the “Maximum message length” row to select the length among those available Click on the value to change the state to yellow, the screen will automatically confirm the new value chosen and return to the calls menu. -
Page 75: End Call With Door Release Button
Tab 5S UP - 40515 5.4.4 End call with door release button The “End call with door release button” option has direct activation The new setting is applied... -
Page 76: Professional Firm Function
Tab 5S UP - 40515 5.4.5 Professional firm function The “Professional firm mode” function leads to a specific menu Close call and open the lock The “Professional firm mode” function allows you to control several parameters and functions shown in the list. Click on the “Close call and open the lock”... - Page 77 Tab 5S UP - 40515 Automatic opening delay Click on the “Automatic opening delay” row to access the time delay setting. The available delay values are from 5” to 15” at 1” intervals, select the required value by scrolling the sequence Programmed activation mode The “Programmed activation mode”...
- Page 78 Tab 5S UP - 40515 Programmed activation configuration Click on the “Programmed activation configuration” row to access the programming management screen. The system offers the possibility to set up to six activation time bands for every day of the week, represented as yellow sectors on a wheel representing the whole day;...
- Page 79 Tab 5S UP - 40515 Click on the programming preview for a day to open a panel for adding and managing time bands, in this case where not yet created. The navigation bar at the bottom of the screen shows the selected day in yellow. Click on another day, without returning to the previous screen, to change it.
- Page 80 Tab 5S UP - 40515 When the activation time is confirmed, it is added and made visible with a summary representation. Click on an interval card to change it again, alternatively it is possible to add up to six intervals in total using the “Add” button.
- Page 81 Tab 5S UP - 40515 Returning to the programming view, the preview will be updated The intervals can be removed by pressing and holding the corresponding card and then dragging it upwards. The screen will enter the change mode and all the other elements are represented at 40% matt. In the upper part of the screen, an action bar appears with the words “Delete interval”.
- Page 82 Tab 5S UP - 40515 Returning to the programming view, the preview will be updated. The programming allows up to six different intervals. In this case, it is still possible to add an interval. The user can create the new interval, the only constraint being that the start value must be prior to the end value. Example of the creation of a new interval overlapping two or more existing intervals;...
- Page 83 Tab 5S UP - 40515 and the end result. In these cases, the system will warn of the fact that the intervals and merged in a pop-up. The user can accept the action, described in a graphic diagram, or return to the change. Proceeding to merge two overlapping intervals, the user will obtain a new time band with start and end values calculated by the operation.
- Page 84 Tab 5S UP - 40515 edit. An interval can be deleted even with the “group” function active. The top bar confirms that the interval has been deleted. Now no intervals can be seen in the programming of the selected group of days. The new configuration is applied.
- Page 85 Tab 5S UP - 40515 Having selected “Monday” in the bottom navigation bar, the system will show the programming of the selected day and the bottom bar shows Monday, rather than Friday, in yellow. Select a group to view its programming. Copy the programming of one group to another group by dragging it.
-
Page 86: Automatic Answer
Tab 5S UP - 40515 5.4.6 Automatic answer Select “Automatic answer” in the list to view a pop-up window with the various choices available. Currently the automatic answer is set to off. The selection mechanism is identical to that of other similar items: having selected the chosen value, this changes state, turning yellow and automatically confirming the action, then returning to the previous menu. -
Page 87: Network And Devices
Tab 5S UP - 40515 Network and devices xxxxxxxx The “Network and devices” section allows you to control all the video entryphone connectivity parameters; for the first item, it is possible to activate Wi-Fi. The detail of the connection state is available below, referring to the active mode, so the state of the cloud services and the list of positions for mobile devices and their connection state. -
Page 88: Wi-Fi Network Mode
Tab 5S UP - 40515 5.5.1 Wi-Fi network mode xxxxxxxx xxxxxxxx Click on the “Connection properties” row to access the detailed settings screen. In the first position, the WPS activation option is available, followed by the network to which the device is currently connected shown in first position in yellow. - Page 89 Tab 5S UP - 40515 SSID: xxxxxxxx Click on the row relating to a network to access the related options: in this case, as the device is connected to a known network, only the “Forget” control is available, used to delete the information on the network connection. SSID: xxxxxxxx By selecting “Forget”, the device disconnects from the network and deletes the configuration.
- Page 90 Tab 5S UP - 40515 The “show” button disables the encryption of the entered text The device is now connected to the new network. If the password is not correct, the system displays an error message and the password must be changed, or the connection cancelled...
-
Page 91: Wps Mode
Tab 5S UP - 40515 5.5.2 WPS mode Click on the “WPS mode” row to activate this special association method; the screen displays an animation in loop. The system waits for the connection to the router, while the cancel button is used to return to the previous screen... -
Page 92: Connection Problems
Tab 5S UP - 40515 5.5.3 Connection problems xxxxxxxx If there are connection problems on the active network, the related icon appears in red and a text string indicates the type of problem. If it is not possible to connect to the network, the only information available is the coding, the channel and the signal level. -
Page 93: Cloud Service State
If the WiFi is active but not connected to any network or connected physically but without an IP address, the connection to mobile devices will not be available and will be shown as inaccessible xxxxxxxx If the Vimar cloud services are not active on the device, the mobile device associations cannot be modified. - Page 94 Tab 5S UP - 40515 Click on the “Cloud service state” row to switch the function from active to inactive and vice versa. The cloud services activation request will generate a wait screen. Once the process is completed successfully, the interface displays a confirmation message. The message closes automatically after 4 seconds, otherwise press the “Close”...
-
Page 95: Associating A Mobile Device
Tab 5S UP - 40515 5.5.5 Associating a mobile device xxxxxxxx Click on the row corresponding to a mobile device to change the association state. The system is designed to associate a maximum of 10 devices, identified by a name and progressive number. The interface shows the QR code required to associate the mobile device using the Video Door app. - Page 96 Tab 5S UP - 40515 The mobile device now appears in the first position. Scroll downwards to access the other devices, up to a maximum of 10. The devices after the third one will not have the video call preview function. To display the video, answer the call. Click on the row corresponding to an associated mobile device to view the actions “Re-associate”...
- Page 97 Tab 5S UP - 40515 The device is now removed. The “Re-associate” option is useful when having to restore the association of a device that is already recorded...
-
Page 98: System
Tab 5S UP - 40515 System The “System” section shows information on the device configuration, as well as the configuration operations. -
Page 99: Firmware Updating
Tab 5S UP - 40515 5.6.1 Firmware updating Clicking on the “Firmware updating” row, the device will show any new software version on the network. Confirming the update request, the device will run the process and will reboot automatically at the end If there are no updates, the system shows a specific note and the function cannot be activated. -
Page 100: Network Diagnostics
Tab 5S UP - 40515 5.6.2 Network diagnostics Shows the state of the Internet connection. 5.6.3 System information The “System information” section shows details of the software and hardware versions of the device. -
Page 101: Rebooting The Device
Tab 5S UP - 40515 5.6.4 Rebooting the device Clicking on “Reboot the device”, the system will reboot. The device requires explicit confirmation of this action. Confirm to reboot the device. 5.6.5 Restoring default settings Click on “Restore default settings” button to start the process The device requires explicit confirmation of this action. -
Page 102: Installer Menu
Tab 5S UP - 40515 Installer menu 5.7.1 PIN entry To access the installer menu the PIN is required. If the entered PIN is correct, the menu is displayed after confirmation. If the PIN is incorrect, the system displays an error message. -
Page 103: Installer Menu
Tab 5S UP - 40515 5.7.2 Installer menu The installer menu has several functions, including: • Administrator PIN • Video entryphone configuration • Energy saving mode • Display alert button • Display professional firm mode • Resetting the device Scroll upwards to view the rest of the menu. The functions: “display alert button”, “professional firm mode”... -
Page 104: Administrator Pin
Tab 5S UP - 40515 5.7.3 Administrator PIN Click on the “Administrator PIN” row to view a window for entering the values required to change it To change, enter the current PIN, once, and the new PIN, twice, on the keypad Scroll to access the different fields. - Page 105 Tab 5S UP - 40515 The system explicitly confirms that the PIN has been recorded with a pop-up, which automatically disappears after 4 seconds or by pressing the “Close” button If the current PIN entered is incorrect, the screen displays an error message; change the PIN entered and proceed. If the new PIN entered is the same as the current PIN, the screen displays an error message;...
-
Page 106: Video Entryphone Configuration
Tab 5S UP - 40515 5.7.4 Video entryphone configuration ”Video entryphone configuration” is available, presenting information on the “ID of the indoor station (and any ID of the group it belongs to)”, or, if the video entryphone is not yet configured, the wording “Not configured” will be visible. The screen has two alternatives configurations: primary or secondary. -
Page 107: Primary Id Configuration
Tab 5S UP - 40515 5.7.5 Primary ID configuration Pressing the “Primary configuration” button, the choice will be highlighted by the coloured feedback and the process will start The configuration starts, showing the video from the entrance panel associated with the configuration. A confirmation or error message is shown at the end of the configuration procedure. -
Page 108: Secondary Id Configuration
Tab 5S UP - 40515 5.7.6 Secondary ID configuration Pressing the “Secondary configuration” button, the choice will be highlighted by the coloured feedback and the process will start The configuration starts, showing the video from the entrance panel associated with the configuration. A confirmation or error message is shown at the end of the configuration procedure. -
Page 109: Restoring The Factory Settings
Tab 5S UP - 40515 5.7.7 Restoring the factory settings The device requires explicit confirmation of this action. The device is then rebooted. - Page 110 Tab 5S UP - 40515...
- Page 111 Tab 5S UP - 40515...
- Page 112 Viale Vicenza 14 36063 Marostica VI - Italy 49401465A0_MU 00 2102 www.vimar.com...
Need help?
Do you have a question about the ELVOX Tab 5S UP and is the answer not in the manual?
Questions and answers