Advertisement
Available languages
Available languages
Quick Links
TOOLS REQUIRED
Phillips screwdriver
Electric drill
Installation
NOTE: The solar light is equipped with a photosensor that turns the unit on at dusk and off at dawn.
Ambient light can affect the operation of the photosensor.
IMPORTANT: Prior to use, set the ON/OFF switch located on the back plate of the solar light to the
ON position and allow it to charge for a full sunny day.
IMPORTANT: Ensure the mounting location for your solar light allows the solar panel to receive
direct sunlight. Do not locate the product in shaded areas as this will significantly reduce performance.
1
WOOD POST/FENCE MOUNTING
□ To mount the solar light to a wood post or fence, use the template
(CC) to mark the mounting screw locations. Alternatively, measure
and mark the installation locations for the mounting screws 3.86 in.
(98 mm) on-center.
□ Insert the mounting screws (AA) into the wood post or fence at the
marked locations, leaving about 1/4 in. of the screws (AA) sticking
out of the wood surface.
□ Align and place the two mounting holes on the back plate of the
solar light over the mounting screws (AA).
1
2
1 2 3 4 5
ON
OFF
Synchronizing, Turning ON, and Testing the Deck Lights
These two deck lights come with the Device Address switch (1) preset to be
synched upon initial use. When one light detects motion, both lights turn on.
To connect additional lights to this set, ensure the Device Address switches
(1) are all set to the same setting.
To turn the lights ON, set the Power switches (2) to the ON position.
When turned ON, the lights will begin a 30-60 second TEST mode, where they
will light-up for 5 seconds when motion is detected (regardless of time of
day). After 30 to 60 seconds, the lights will enter normal operation and only
light-up when motion is detected.
In normal operation, when motion is detected, the lights will activate
simultaneously, and stay on for 30 seconds.
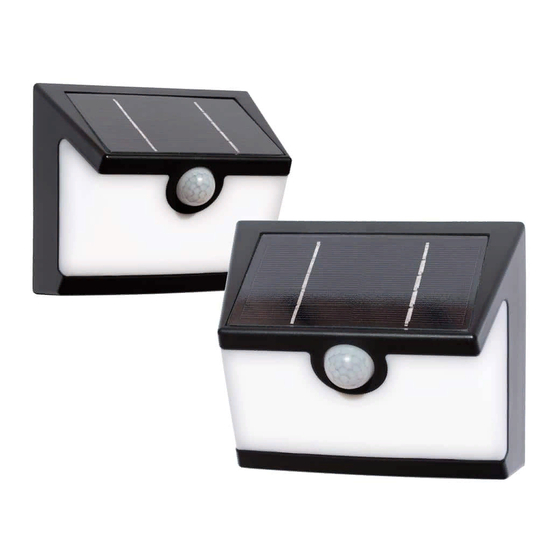
Use and Care Guide
2-Pack Connected Solar Deck Lights
HARDWARE INCLUDED
AA - Wood Screw x 4
3
4
CC
AA
BB - Plastic Anchor x 4
2
WALL MOUNTING
□ To mount the solar light to a concrete or brick wall, use the
template (CC) to mark the mounting screw locations. Alternatively,
measure and mark the installation locations for the mounting
screws 3.86 in. (98 mm) on-center.
□ Drill two holes on the wall at the marked locations.
□ Insert the plastic anchors (BB) into the holes. Insert the mounting
screws (AA) into the anchors (BB), leaving about 1/4 in. of the
screws (AA) sticking out of the wall surface.
□ Align and place the two mounting holes on the back plate of the
solar light over the mounting screws (AA).
1
2
1 2 3 4 5
ON
OFF
1
Item #1005 706 480
Model #LS-201BSOPL-2
CC - Template x 1
3
4
CC
AA
1 2 3 4 5
ON
OFF
2
Please contact 1-800-841-1350 for further assistance.
HAMPTONBAY.com
Advertisement

Related Manuals for HAMPTON BAY LS-201BSOPL-2


Summary of Contents for HAMPTON BAY LS-201BSOPL-2
- Page 1 Item #1005 706 480 Model #LS-201BSOPL-2 Use and Care Guide 2-Pack Connected Solar Deck Lights TOOLS REQUIRED HARDWARE INCLUDED Phillips screwdriver Electric drill AA - Wood Screw x 4 BB - Plastic Anchor x 4 CC - Template x 1 Installation NOTE: The solar light is equipped with a photosensor that turns the unit on at dusk and off at dawn.
- Page 2 Safety Information FCC STATEMENT WARNING: Your solar light may not function in temperatures below -14ºF NOTE: This equipment has been tested and found to comply with the limits for a Class B digital device, pursuant to (-10ºC) or above 122ºF (50ºC). part 15 of the FCC Rules.
- Page 3 Artículo n.° 1005 706 480 Modelo n.° LS-201BSOPL-2 Guía de uso y cuidado Paquete de 2 luces solares conectadas para terraza HERRAMIENTAS REQUERIDAS HERRAJE INCLUIDO Destornillador Taladro eléctrico Phillips AA - Tornillo para BB - Anclaje plástico CC - Plantilla x 1 madera x 4 Instalación...
- Page 4 Información de seguridad DECLARACIÓN DE LA FCC ADVERTENCIA: Su luz solar podría no funcionar a temperaturas NOTA: Las pruebas realizadas en este equipo permiten afirmar que cumple con los límites de un dispositivo digital por debajo de -14 °F (-10 °C) o por de Clase B, según lo estipulado en la parte 15 de las reglas de la FCC.