Advertisement
Quick Links
Ericssonstraat 2
5121 ML Rijen The Netherlands
Email:info@alcelectronics.eu
Tel:+0031 (0)85 00 80 888
1. Box Content
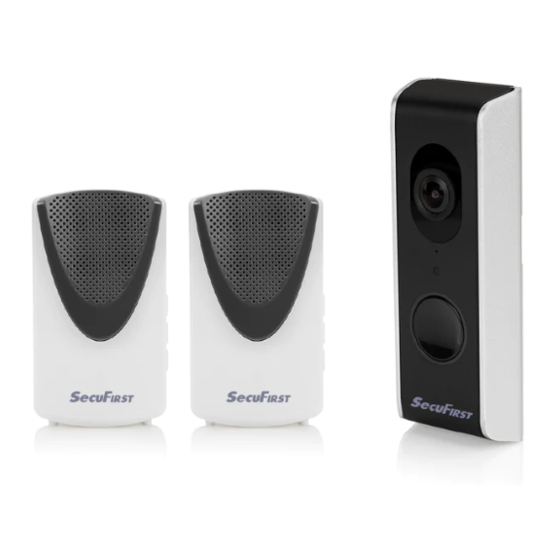
1x Wi-Fi Doorphone With Camera
1x Wireless Doorchime
1x Adaptor 12V DC /1A
16
GB
Black
1x Extension Cable For Adaptor
Red
1x Ethernet Cable (Optional Use)
1x Screw Pack With Screw Driver
2.
2.9
2.1
2.8
2.2
2.3
2.4
2.5
2.6
2.7
3.
4
3
4.
Login information Wi-Fi Doorphone.
DID Code WiFi doorphone: DGAE -...........
New Security password:
New Admin password:
App Wi-Fi Doorphone: SecuFirst HD Professional Edition
Helpdesk SecuFirst:
E-mail: info@secufirst.eu
Telephone: 0031 (0)85 00 80 888
5.
6.
Reset
7.
4
3
2
1
8.
Android
iOS
1. Doos inhoud
1x Wifi Deurbel Met Camera
2x Window security sticker
1x Draadloze Gong (voor Binnen gebruik)
1x Adapter 12V DC / 1A
1x Verlengkabel voor adapter
1x Internet kabel (Optioneel te gebruiken)
1x Micro SD Card 16GB
1x Schroevenset met schroevendraaier
(Pre-installed In The Camera)
2x Beveiliging raamstickers
1x Micro SD Kaart (Is al voor geinstalleerd in de camera)
1x Montage beugel 15°
1x 15°Bracket
1x Positie kaart voor schroef gaten af te tekenen
1x Quick start Guide
1x Position card
1x Quick Start Guide
2.
Product overzicht
Lens
2.1
Microfoon
2.2
2.13
Dag/Nacht Sensor (Automatisch)
2.3
2.14
Drukknop
2.4
2.5
Luidspreker
Micro sd kaart slot (Zijkant in de behuizing)
2.6
2.7
Rubber klepje voor draden doorvoer
2.10
2.11
2.12
3.
Connector Wifi Deurbel
3.1 Reset knop (houd deze 10 seconden ingedrukt)
3.2 Aansluiting voor een elektisch deurslot (C1 + C2 / 0V).
3.3 RJ45 internet kabel aansluiting (TD-, TD+, RD-, RD+).
Let op, een internetkabel heeft 8 aders. De wif deurbel heeft er 4 aders nodig.
2
1
TD- = Internet kabel, Oranje gekleurd draadje
TD+ = Internet kabel, Oranje / Wit gekleurd draadje
RD- = Internet kabel, Groen gekleurd draadje
RD+ = Internet kabel, Groen / Wit gekleurd draadje
Let op, bedraad internet werkt alleen als u de internetkabel aan sluit op de wifi
deurbel en router.Daarna pas de adapter in het stopcontact plaatsen.
3.4 Adapter aansluiting (V+, V- / 12V 1A)
V+ = Rode draad
Let op, sluit dit niet verkeerd aan!!!
3.5
Aansluiting bedraden gong in huis (B1, B2 / 0V contact) U kunt alleen een mechanische
gong met eigen 8V AC beltrafo aansluiten op de wifi deurbel.
Doordat de voeding AC is, maakt het niet uit welk draadje op B1 of B2 gaat.
4.
Voorbereiding op de installatie van Wifi Deurbel op uw telefoon.
Om deze wifi deurbel te installeren dient u de volgende gegevens paraat te hebben:
4.1
* Uw eigen wifi naam, en uw eigen wifi wachtwoord.
De wifi deurbel moet tijdens deze installatie worden aangemeld op uw eigen wifi netwerk.
Let op, het is onze helpdesk probleem nummer 1 dat klanten hun eigen wifi netwerk
wachtwoord verkeerd invullen tijdens deze installatie. Het resultaat is dat de camera niet kan
QR CODE
verbinden en geen beeld zal weergeven. Controleer uw wifi wachtwoord zorgvuldig
DID:DGAE................
(achterop de router / eigen documentatie).
4.2
* Bedenk alvast een nieuw beveiligingswachtwoord en documenteer deze zorgvuldig.
Beveiligingswachtwoord: Geeft toegang tot live video beelden van uw wifi deurbel.
Tijdens de installatie met de app zal u gevraagd worden om het wachtwoord aan te passen.
Bedenk alvast dit wachtwoord om sneller door de installatie te gaan.
Het beveiligingswachtwoord moeten voldoen aan een aantal eisen:
A) Minimaal 12 karakters.
C) Minimaal één kleine letter (Voorbeeld: a).
E) Minimaal één leesteken (Voorbeeld: !).
4.3
Tijdens de installatie dient uw telefoon of tablet maximaal 1 meter afstand te zijn van de
*
wifi deurbel.
4.4
* Eerst digitaal installeren op de app, daarna pas ophangen bij uw voordeur. U doet er verstandig
aan om de wifi deurbel eerst binnen aan de tafel digitaal te installeren met de app. Pas daarna
de wifi deurbel ophangen bij uw voordeur.Alle gegevens blijven gewoon opgeslagen in de
wifi deurbel na digitale installatie,ook als de adapter daarna uit de stroom wordt gehaald.
5.
Verwijder het rubber klepje (2.7) aan de achterzijde van de wifi deurbel.
Verbind de adapter (1,,,,) en verleng kabel (1,,,,,) met elkaar.
Prik met de schroevendraaier een klein gaatje in het rubber klepje. Voer de verleng kabel door
het gaatje heen.Sluit de verleng kabel aan op de wifi deurbel (rode draad V+, zwarte draad V-)
en plaats DAARNA de stekker in het stopcontact. Plaats het rubber klepje (2.7) weer terug.
Let op,GEEN internet kabel aansluiten tijdens de installatie.
6.
Plaats de wifi deurbel in installatie mode door middel van de reset knop (3.1) voor 10 seconden
ingedrukt te houden,terwijl de adapter is aangesloten in het stopcontact. U zult een stem ter
bevestiging horen, dat de wifi deurbel gereset zal worden. Wacht 1 minuut, de stem geeft aan
dat u verder kunt gaan.
7.
Download de app "Secufirst HD Professional Edition" van de Google play store (Android)
of Apple store (iOS).
8.
Voor Android smart toestellen:
Voor Android smart toestellen:
Open de app "Secufirst HD Professional Edition" en tik op "Press to add new system".
De app zal u vragen tijdens de installatie een aantal verbindingen aan of uit te zetten,
afhankelijk van de huidige instellingen.
* Locatie: AAN (Dit is alleen nodig tijdens de installatie, de wifi netwerken worden hierdoor
beter gevonden met de app)
* Wifi: AAN
* Mobiele Data: UIT
Tik op "Smart Setup".
Tik op "Confirm" als het drukknop lampje van de wifi deurbel knippert.
Tik op "Allow" om de Bluetooth aan te zetten op uw smart apparaat.
De app laat u de zoek resultaten zien.
Tik op het "DID701 Doorphone" om deze te selecteren.
Voor iOS smart toestellen:
Open de app "Secufirst HD Professional Edition" en tik op "Smart Setup".
De app zal u vragen tijdens de installatie een aantal verbindingen aan of uit te zetten,
afhankelijk van de huidige instellingen.
* Locatie: AAN (Dit is alleen nodig tijdens de installatie, de wifi netwerken worden hierdoor
beter gevonden met de app)
* Wifi: AAN
* Mobiele Data: UIT
* Bluetooth: Aan
Tik op "New Device"
Tik op "Confirm" als het drukknop lampje van de wifi deurbel knippert.
De app laat u de zoek resultaten zien.
Tik op het "DID701 Doorphone" nummer om deze te selecteren.
DID701 Doorphone
Vergrendeling voor montage beugel
2.8
2.9
Luidspreker
2.10
Volume instellen
2.11
Melodie instellen
2.12
Instellingen
2.13
Muur montage gaten
2.14
Batterij compartiment (3x AA batt. Excl.)
V- = Zwarte draad
B) Minimaal één hoofdletter (Voorbeeld: A)
D) Minimaal één cijfer (Voorbeeld: 1).
NL
1. Box Content
1x Wi-Fi Doorphone With Camera
1x Wireless Doorchime
1x Adaptor 12V DC /1A
1x Extension Cable For Adaptor
1x Ethernet Cable (Optional Use)
1x Screw Pack With Screw Driver
2x Window Security Sticker
1x Micro SD Card 16GB (Pre-installed In The Camera)
1x 15°Bracket
1x Position Card
1x Quick Start Guide
2.
Product Overview
2.1
Lens
2.2
Microphone
2.3
Day/Night Sensor (Automaticly)
2.4
Push Button
2.5
Loudspeaker
2.6
Micro SD Card Slot (Inside The Housing)
2.7
Rubber Cover For Wiring
3. Connections Wi-Fi doorphone
3.1
Reset button (Hold for 10 seconds)
Connection for electrical lock (C1 + C2 / 0V).
3.2
3.3
RJ45 internet cable connection (TD-, TD+, RD-, RD+)
Note, an internet cable has 8 wires. We only need 4 wires to connect to the Wi-Fi doorphone.
TD- = Internet cable, Orange color wire
TD+ = Internet cable, Orange / White color wire.
RD- = Internet cable, Green color wire.
RD+ = Internet cable, Green / White color wire.
Note, wired internet only works when you firstly connect the internet cable to the
Wi-Fi doorphone and router. After that, insert the adapter in the socket.
3.4
Adapter connection (V+, V- / 12V 1A)
V+ = Red Wire V- = Black wire
Note, pay attention to connect correctly!!!
3.5
Connection Wired Chime indoor (B1, B2 / 0V)It's only possible to connect
a Mechanical Chime which is powered by an 8V AC transformer.
The separet power supply is AC, so it doesnt matter which wire goes to B1 and B2.
4.
Preparation before installation on your smart device.
To install this Wi-Fi doorphone you need to prepair the following information:
4.1 *
Your own Wi-Fi name, and your own Wi-Fi password.
The Wi-Fi doorphone must be registered on your own Wi-Fi network during
this installation.
Please note, it is our help desk number 1 problem that customers enter their own
Wi-Fi network password incorrectly during this installation. The result is that the
camera cannot connect and will not display an image.
Check your Wi-Fi password carefully (on the back of the router / own documentation).
* Think of a new security password and document it carefully.
4.2
Security password: Provides access to live video images from your Wi-Fi doorphone.
During the installation with the app you will be asked to change this password.
Make up this passwords in advance to move faster through the installation.
The new password need to contain:
A) At least 12 characters.
C) At least one lowercase letter (Example: a). D) At least one digit (Example: 1).
E) At least one reading sign (Example:!).
During the installation, keep your phone or tablet close to the Wi-Fi Doorphone
4.3 *
(max. 1 meter)
4.4 *
First install digitally on the app, then mount the Wi-Fi doorphone to your front door.
We strongly advise to firstly digital install the Wi-Fi doorphone inside your house.
After the installation is complete,you can mount the hardware.
5.
Remove the rubber cover (2.7) on the backside of the Wi-Fi doorphone.Connect the adapter (1,,,,)
with the extension cord (1,,,).Use the screwdriver to punch a hole into the rubber cover.
Insert the extension cord through the rubber cover.Connect the extension cord to the wifi
doorphone (V+ red wire, V- black wire). After that, insert the adapter into the power socket.
Close the rubber cover again (2.7).
Note, dont connect an internet cable during the installation.
Set the Wi-Fi doorphone into the installation mode.
6.
Press and hold the reset button (3.1) for 10 seconds, while the power adapter is
connected to the power socket. After that, wait 1 minute before continue the installation.
7.
Download the app "SecuFirst HD Professional Edition" from the Google Play Store
(Android) or Apple Store (iOS)
8.
For Android smart devices:
Open the app "SecuFirst HD Professional Edition" and tab "Press to add new system".
The app will request you to turn on and off some connections, depending on the current
settings of your phone.
* Location: On (Only needed during the installation for better seaching preformance of the
wifi networks).
* Wi-Fi: On
* Mobile data: Off
Tab "Smart Setup"
Tab "Confirm" if the push button LED of the wifi doorphone is flashing.
Tab "Allow" to enable buetooth on your smart device.
The app will show the founded camera. Tab on the "DID701 Doorphone"number to select.
For iOS smart devices:
Open the app "SecuFirst HD Professional Edition" and tab "Smart Setup".
The app will request you to turn on and off some connections, depending on the current
settings of your phone.
* Location: On (Only needed during the installation for better seaching preformance of the
wifi networks).
* Wi-Fi: On
* Mobile data: Off
* Bluetooth: On
Tab "New Device"
Tab "Confirm" if the push button LED of the wifi doorphone is flashing.
The app will show the founded camera. Tab on the "DID701 Doorphone."number to select.
Model: DID701
Wi-Fi Doorbell With Camera
EN
2.8
Release pin for bracket and doorphone
2.9
Loudspeaker
2.10 Volume Settings
2.11 Melody Settings
2.12 Settings
2.13 Wall mount holes
2.14 Battery compartment (3x AA batt. Excl.)
B) At least one capital letter (Example: A)
Advertisement

Related Manuals for ALC SecuFirst DID701

Summary of Contents for ALC SecuFirst DID701
- Page 1 Ericssonstraat 2 5121 ML Rijen The Netherlands Email:info@alcelectronics.eu Model: DID701 Tel:+0031 (0)85 00 80 888 Wi-Fi Doorbell With Camera 1. Box Content 1. Doos inhoud 1. Box Content 1x Wi-Fi Doorphone With Camera 1x Wi-Fi Doorphone With Camera 1x Wifi Deurbel Met Camera 2x Window security sticker 1x Wireless Doorchime 1x Wireless Doorchime...
- Page 2 Ericssonstraat 2 5121 ML Rijen The Netherlands Email:info@alcelectronics.eu Model: DID701 Tel:+0031 (0)85 00 80 888 Wi-Fi Doorbell With Camera Verbind de camera met uw eigen wifi netwerk. Connect the camera to your own Wifi newtwork. De app laat u een wifi lijst zien van alle wifi netwerken die de camera zelf ziet. 9.1 The app will show you the Wi-Fi networks which the camera can see.
Need help?
Do you have a question about the SecuFirst DID701 and is the answer not in the manual?
Questions and answers