Table of Contents
Advertisement
Quick Links
Advertisement
Table of Contents

Related Manuals for Safe-n-Sound COSY PLUS RM287 Series


Summary of Contents for Safe-n-Sound COSY PLUS RM287 Series
- Page 1 BOOKLET IN A SAFE PLACE FOR FUTURE REFERENCE Series RM287 COSY PLUS 4-IN-1 TRAVEL SYSTEM STROLLER Compatible with Britax Safe-n-Sound Unity Neos, Britax Safe-n-Sound Unity isofix compatible ® ® baby capsules and Britax B Safe Series car seat (sold separately)
-
Page 2: Stroller Assembly
STROLLER SECTION STROLLER WARNINGS & IMPORTANT NOTES MANUAL HANDLING TECHNIQUES STROLLER FEATURES STROLLER ASSEMBLY OPENING THE STROLLER FRAME ATTACHING & REMOVING THE REAR WHEELS ATTACHING & REMOVING THE FRONT WHEELS ATTACHING THE STROLLER SEAT ATTACHING THE CANOPY ATTACHING THE ARM BAR ATTACHING THE SHOULDER HARNESS PADS STROLLER OPERATION USING THE BRAKES... -
Page 3: Baby Capsule Operation
BABY CAPSULE OPERATION BABY CAPSULE INSTALLING & REMOVING THE CLICK & GO ADAPTORS ATTACHING THE BRITAX SAFE-N-SOUND UNITY BABY CAPSULE ® REMOVING THE BRITAX SAFE-N-SOUND UNITY BABY CAPSULE ® ATTACHING THE BRITAX B SAFE SERIES (FOR NZ MARKET) REMOVING THE BRITAX B SAFE SERIES (FOR NZ MARKET) CARE &... - Page 4 Always follow the manufactures instructions. Read all instructions carefully before assembly and use of this stroller. The correct use and maintenance of this product is essential. TO AVOID INJURY OR DEATH ALWAYS APPLY THE BRAKES WHENEVER THE STROLLER IS STATIONARY. •...
-
Page 5: Important Notes
THIS CAUTION SYMBOL IS SHOWN AT CERTAIN STEPS IN THIS INSTRUCTION MANUAL TO HIGHLIGHT THE DANGER OF BEING INJURED BY MOVING PARTS. IMPORTANT NOTES • Use great care when using the stroller on stairs, escalators, travelators or other moving surfaces. •... -
Page 6: Lifting Technique
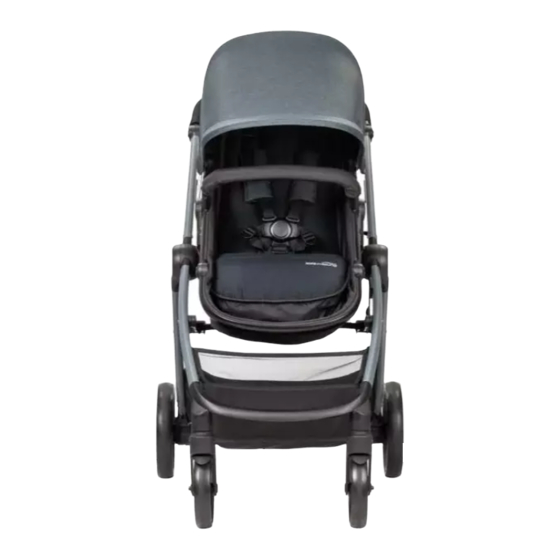
SMART LIFTING TECHNIQUE This technique can be used to pick up small light loads from low levels. SIZE UP THE LOAD • Assess the load (size, shape and weight). • Assess whether the load needs to be moved; • Where is it going to be placed, check that there are no obstructions; •... - Page 7 Viewing Window Canopy Pivotal Handle Seat Release Button Arm Bar Frame Socket Frame Lock Latch Leg Rest Adjuster Button Backrest Recline Lever Folding Lever Lay Flat Clip Tether Strap Basket Brake Instructions for Assembly, Operation and Maintenance...
-
Page 8: Opening The Stroller Frame
IMPORTANT NOTES: PLEASE REFER TO PAGE 4 FOR SMART LIFTING TECHNIQUES. • Release the storage latch with due care and open the frame. • When opening the stroller, be aware of the danger of being injured by moving parts and locking devices during the process. -
Page 9: Attaching & Removing The Rear Wheels
ATTACHING & REMOVING THE REAR WHEELS PULL AWAY CLICK HOLD PUSH A Insert wheel axle into the moulding and B To remove the rear wheels, press and hold push in until you hear a ‘click’. Pull on each the release button in the wheel housing and wheel to make sure it is securely attached. -
Page 10: Attaching The Stroller Seat
ATTACHING THE STROLLER SEAT IMPORTANT NOTES • Always remove your child from the stroller seat before installing, removing or changing the seat direction. • The seat is reversible so it can be attached to the frame in the forward facing position or the rearward facing position. -
Page 11: Attaching The Canopy
ATTACHING THE CANOPY IMPORTANT NOTE The sun is very strong. DO NOT LEAVE YOUR CHILD EXPOSED TO THE SUN. The canopy or hood on this product will not give your child total protection from the harmful rays of the sun. PUSH PUSH A Place the canopy on the stroller seat... -
Page 12: Attaching The Arm Bar
ATTACHING THE ARM BAR WHEN A CHILD IS IN THE STROLLER KEEP THE ARM BAR ATTACHED TO THE ADAPTORS AT ALL TIMES. INSERT CLICK INSERT PULL CLICK PRESS A Insert the arm bar mouldings into the B To remove the arm bar, press the button sockets on each side of the stroller frame on each side of the arm bar moulding and and push down on the arm bar until you... -
Page 13: Attaching The Shoulder Harness Pads
ATTACHING THE SHOULDER HARNESS PADS IMPORTANT NOTE Ensure that the shoulder straps are fitted through the appropriate harness slots to suit your child’s seated shoulder height. (Refer to Page 25) A Slide the shoulder harness pads onto the shoulder harness straps and adjust to the position which fits comfortably on the child. -
Page 14: Using The Front Wheel Swivel Lock
USING THE FRONT WHEEL SWIVEL LOCK PLEASE NOTE • Always lock the swivel wheels when using the stroller on rough surfaces as this will minimise wheel wobble. • The swivel wheels should only be locked when the wheels are in the trailing position (wheels under frame). -
Page 15: Adjusting The Backrest
ADJUSTING THE BACKREST • THE UPRIGHT POSITIONS ARE NOT SUITABLE FOR USE WITH CHILDREN LESS THAN 6 MONTHS OLD. • THE LOWEST RECLINE POSITION SHOULD BE USED TO TRANSPORT BABIES. THE BACKREST CAN BE ADJUSTED TO A MORE UPRIGHT POSITION AS THE CHILD GROWS OLDER AND IS ABLE TO SUPPORT ITS HEAD WITHOUT ASSISTANCE. - Page 16 ADJUSTING THE LEG REST IMPORTANT NOTES • The leg rest feature is provided for your child’s comfort. • The leg rest is not designed to support extra weight. • Do not allow children to stand or sit on the leg rest, it will disengage if extra weight is applied.
- Page 17 SECURING YOUR CHILD HARNESS • ENSURE YOUR CHILD IS SECURED WITH A CORRECTLY ADJUSTED HARNESS. • THE ADJUSTED HARNESS SHOULD CLOSELY FIT THE CHILD. • NEVER LEAVE THE HARNESS BUCKLED WHEN NOT FITTED TO A CHILD IN THE STROLLER, BECAUSE THE HARNESS CAN FORM LOOPS WHICH MAY POSE A STRANGULATION HAZARD.
-
Page 18: Adjusting The Harness
ADJUSTING THE HARNESS DO NOT SLIDE 3 BAR SLIDER OVER THE SEWN TAB ON SHOULDER HARNESS. A Tighten or loosen the shoulder straps and B Tighten or loosen the waist straps, hold crotch strap by sliding the 3 bar sliders up or and lift the 4 bar harness adjuster and pull down. -
Page 19: Adjusting The Shoulder Harness Height
ADJUSTING THE SHOULDER HARNESS HEIGHT IMPORTANT NOTE The harness can be adjusted to three different heights to accommodate the child. The shoulder straps must be positioned near the child’s shoulders. PULL PUSH A To change the shoulder harness height, B Select the appropriate shoulder harness push the shoulder harness tongue out of the height and pull each shoulder harness current harness slot and through the back of... -
Page 20: Using The Tether Strap
USING THE TETHER STRAP • THE STROLLER IS DESIGNED FOR USE ON FLAT OR GENTLY SLOPING SURFACES, AND MAY BE UNSTABLE ON HIGHER SLOPING AND UNEVEN SURFACES - USERS SHOULD BE AWARE OF THE POSSIBILITY OF THE STROLLER ROLLING AWAY OR TIPPING OVER. •... - Page 21 REMOVING & CHANGING THE STROLLER SEAT IMPORTANT NOTE • Always remove your child from the stroller seat before installing, removing or changing the seat direction. • PLEASE NOTE: The seat is reversible so it can be attached to the frame in the forward facing position or the rearward facing position.
- Page 22 CONVERTING STROLLER TO LAY FLAT MODE • USE HARNESS AT ALL TIMES. • LAY FLAT MODE IS SUITABLE FOR DAY TIME NAPPING ONLY. • DO USE LAY FLAT MODE FOR OVERNIGHT SLEEPING. • DO NOT USE THE LAY FLAT MODE ONCE THE CHILD CAN SIT UP. •...
-
Page 23: Using The Stroller
USING THE STROLLER PLEASE REFER TO PAGE 4 FOR SMART LIFTING TECHNIQUES. • Always ensure you bend your knees where appropriate and take due care when lifting the frame. • With your hand through the wrist tether strap loop, push the stroller holding the handle. -
Page 24: Folding The Stroller
FOLDING THE STROLLER PLEASE REFER TO PAGE 4 FOR SMART LIFTING TECHNIQUES. IMPORTANT NOTES • Remove the child from the stroller before commencing any folding operation. • Fold the stroller slowly and be careful where you place your hands. • When folding the stroller, be aware of the danger of being injured by moving parts and locking devices during the process. - Page 25 LIFTING & CARRYING THE STROLLER PLEASE REFER TO PAGE 4 FOR SMART LIFTING TECHNIQUES IMPORTANT NOTES • To avoid injury: bend you knees when opening, lifting, carrying, folding, unfolding or adjusting the stroller or any accessories. • To avoid damage, do not place heavy objects on top of the folded stroller. •...
-
Page 26: Baby Capsule
THIS STROLLER. • DO NOT USE ANY ACCESSORIES OTHER THAN THOSE APPROVED FOR USE WITH THIS STROLLER BY BRITAX. • THE MAXIMUM WEIGHT OF THE CHILD USING THE BRITAX SAFE-N-SOUND ® UNITY NEOS BABY CAPSULE OR BRITAX SAFE-N-SOUND UNITY BABY ®... - Page 27 INSTALLING AND REMOVING THE CLICK & GO ADAPTORS THE CLICK & GO™ ADAPTORS MUST BE ATTACHED TO THE STROLLER FRAME BEFORE INSTALLING THE BRITAX SAFE-N-SOUND UNITY NEOS BABY CAPSULE, BRITAX SAFE-N-SOUND UNITY BABY CAPSULE ISOFIX COMPATIBLE OR BRITAX B SAFE SERIES (FOR NZ MARKET) .
- Page 28 ATTACHING THE BRITAX SAFE-N-SOUND UNITY BABY CAPSULE ® PLEASE NOTE These instructions are for installing and removing the baby capsule on the stroller only. For installing and proper use of the baby capsule in the car, please follow the instructions manual provided with the baby capsule.
- Page 29 ATTACHING BRITAX B SAFE SERIES (FOR NZ MARKET) PLEASE NOTE These instructions are for installing and removing the baby capsule on the stroller only. For installing and proper use of the baby capsule in the car, please follow the instructions manual provided with the baby capsule.
- Page 30 Do not continue to use the stroller if unsafe. • All repairs should only be carried out by an authorised Safe-n-Sound ® repairer. Only Safe-n-Sound replacement parts should be used with the ®...
- Page 31 CLEANING FABRICS • Removable fabrics may be cleaned using lukewarm water and soap or mild detergent. Rinse thoroughly and allow to dry away from direct sunlight. • Non-removable fabrics can be spot cleaned using a damp sponge and soap or mild detergent.
- Page 32 Just like servicing your car or bicycle, prams and strollers also need regular maintenance checks. These checks can improve product performance, extend the life of your stroller and help to provide you and your children a safe and smooth journey. We recommend servicing your stroller every 6 months and completing an inspection once a month.
-
Page 33: Making A Warranty Claim
Did you know? Registering your product online simplifies proof of purchase in the event of a warranty claim. Head to our website to fill out the product registration form: britax.com.au MAKING A WARRANTY CLAIM Your rights under a Britax company warranty are separate from and independent of your rights under the statutory consumer guarantees. -
Page 34: Australian Consumer Law
® and workmanship (normal wear and tear excluded) that affects the normal operation of your Safe-n-Sound product. In the unlikely event that you fi nd that your Safe-n-Sound ® ® product does not satisfy this warranty, Britax will (at its option) repair or replace that product within a reasonable period of you making a claim in accordance with this policy. - Page 35 NOTES Instructions for Assembly, Operation and Maintenance...
- Page 36 In our constant pursuit of excellence we may alter this product and specification without notice. This product may be covered by Australian and International patents and designs or pending applications. Safe-n-Sound ® a registered trademark and all Safe-n-Sound model ®...
Need help?
Do you have a question about the COSY PLUS RM287 Series and is the answer not in the manual?
Questions and answers