
Related Manuals for Sony IT-M602


Summary of Contents for Sony IT-M602
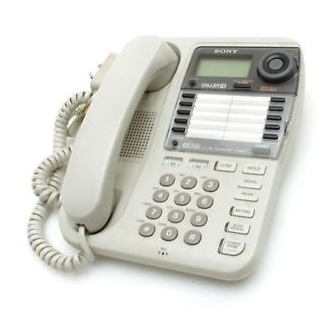
- Page 1 3-864-042-12 (1) 2-Line ID Telephone Operating Instructions Manual de instrucciones IT-M602 ©1998 by Sony Corporation...
- Page 2 The openings below. Refer to these numbers should never be blocked by placing whenever you call upon your Sony the product on the bed, sofa, rug, or dealer regarding this product. other similar surface. This product should never be placed near or over a Model No.
- Page 3 RENs, instructions. Adjust only those contact the local telephone company. controls that are covered by the 5. If your equipment (IT-M602) causes harm to operating instructions because the telephone network, the telephone improper adjustment of other controls...
- Page 4 Caution You are cautioned that any changes or modifications not expressly approved in this manual could void your authority to operate this equipment. Note This equipment has been tested and found to comply with the limits for a Class B digital device, pursuant to Part 15 of the FCC Rules.
-
Page 5: Table Of Contents
Table of contents Getting Started Caller ID Features 25 Understanding the Caller ID 6 Step 1: Checking the package contents service 7 Step 2: Setting up the phone When you receive a call 12 Step 3: Entering your area code 26 Looking at the Caller ID list Viewing the Caller ID list Saving the phone numbers... -
Page 6: Getting Started
Getting Started Step 1 Checking the package contents Make sure you have received the following items in the package. If anything is missing, contact your local Sony dealer. AC power adaptor (AC-T69) Phone Handset Handset cord Telephone line cords (3) -
Page 7: Step 2: Setting Up The Phone
Step 2 Setting up the phone Do the following steps: • Connect the phone • Choose the dialing mode Note on installation Install the unit: • on a level surface • away from heat sources, such as radiators, airducts, and sunlight •... - Page 8 Step 2: Setting up the phone (continued) To connect the phone to a single outlet having two lines Hook the cord. To an AC outlet To DC IN AC power adaptor “12V” (supplied) “DATA” jack To “LINE 1/ To the telephone LINE 1+2”...
- Page 9 To connect the phone to two separate outlets Hook the cord. To an AC outlet To DC IN AC power adaptor “12V” “DATA” jack (supplied) To “LINE 1/ To the telephone LINE 1+2” outlets To “LINE 2” Telephone line cord (supplied) Line 2 Telephone line cord (supplied) Line 1...
- Page 10 To “LINE 1/LINE 1+2” You can connect a computer or FAX, etc. to the and/or “LINE 2” “DATA” jack. IT-M602 Notes • “LINE 2” is used for receiving or sending computer or FAX data in addition to making To “DATA”...
- Page 11 Choose the dialing mode For the telephone to work properly, select an appropriate dialing mode (tone or pulse). DIAL MODE switch Depending on your dialing system, set the DIAL MODE switch as follows: If your dialing system is Set the switch to Tone Pulse If you aren’t sure of your dialing system...
-
Page 12: Step 3: Entering Your Area Code
Step 3 Entering your area code When you use this phone for the first time, or move to an area that has a different area code, you must enter your area code. Otherwise, you cannot use some functions of this phone and the Caller ID functions. -
Page 13: Basics
Basics Making calls Pick up the handset (or press (SPEAKERPHONE)). HANDSET VOLUME switch “=== TALK ===” appears on the display and you will hear a dial tone. The connected LINE 1 (LINE 2) or LINE 2 button lights up. When you want to select the line beforehand, press (LINE 1) or (LINE 2). - Page 14 Making calls (continued) Additional tasks Do this Adjust the handset volume During phone conversation, set the HANDSET VOLUME switch. You can select from three level positions. Adjust the speaker volume Slide the SPEAKER VOLUME control. Adjust the ringer volume You can adjust the ringer level of line 1 and 2 respectively.
-
Page 15: Redialing
To obtain the best speakerphone performance • You may not be able to hear the other party’s voice in a noisy place. Therefore, use the speakerphone in a quiet room. • Do not bring your hand or other objects too close to the microphone or you will hear a shrill noise (“feedback”). -
Page 16: Making Another Call While Talking
Making calls (continued) Busy redialing If the line is busy when you make a call, the phone will automatically redial the last number dialed up to 10 times every 30 seconds until the call is connected. When not making a call, press (BUSY REDIAL) . The BUSY REDIAL lamp, MUTING lamp and SPEAKERPHONE lamp light up and the last number dialed appears on the display. -
Page 17: Receiving Calls
Receiving calls When you hear the phone ring; • Pick up the handset from the phone (or press (SPEAKERPHONE)). (CALL WAITING/FLASH) • Press (LINE 1) or (LINE 2) whichever button is flashing. The SPEAKERPHONE lamp lights up and you can talk through the speakerphone. To talk through the handset, pick up it from the cradle. -
Page 18: Receiving A Call While Talking
Receiving calls (continued) Additional tasks Do this Put a call on hold Press (HOLD). The LINE 1 or LINE 2 button will flash slowly. Press (LINE 1) or (LINE 2) to resume the conversation. Switch to another call on Press (CALL WAITING/FLASH). Press (CALL WAITING/FLASH) again to return to the ("call waiting"... -
Page 19: Advanced Features
{ | } n N space ! " abc...xyz ˜ Button. # $ % & ’ ( ) * + , - . / ˜ 0 - 9 ˜ : ; < = > ? @ Enter successive characters in the same way. SONY continued Advanced Features... - Page 20 One-touch dialing (continued) Press (PROGRAM). Enter the phone number by pressing the 1234567 dialing keys. You can enter up to 16 digits, including a tone and a pause, each of which is counted as one digit. Press (PROGRAM). You will hear a long confirmation beep, and the name and the number are stored.
-
Page 21: Changing A Stored Name And/Or Phone Number
Changing a stored name and/or phone number Display the name you want to change by doing SONY steps from 1 to 3 on page 19. The cursor flashes at the first character of the name. Press Jog Button successively until the character SONY to be changed flashes. -
Page 22: Making Calls With One-Touch Dialing
One-touch dialing (continued) Making calls with one-touch dialing Pick up the handset, or press (SPEAKERPHONE). When you want to select the phone number stored in the second memory of the one-touch dial button, press (LOWER). Press the desired one-touch dial button. The phone number stored in the one-touch dial button will be dialed. -
Page 23: Having A Conference Call
Having a conference call You can talk on two lines at the same time. Making another call while talking You can talk with two parties at the same time using both line 1 and line 2. (Three-way conference) Press (HOLD) while talking on one line. -
Page 24: Receiving A Call While Talking
Having a conference call (continued) Receiving a call while talking If another call comes in while talking, the LINE 1 or LINE 2 button on which another call is coming will flash. Press (HOLD). The line in use is put on hold. Press (LINE 1) or (LINE 2), in which another call is coming. -
Page 25: Caller Id Features
Caller ID Features Understanding the Caller ID service Caller ID allows the caller’s phone number to be shown on the display before the call is answered. In order to use this feature, you must first subscribe to the Caller ID service. The name of this service may vary depending on your telephone company. -
Page 26: Looking At The Caller Id List
Looking at the Caller ID list The phone stores data for the last 50 calls received including “OUT OF AREA” and “PRIVATE” calls. It keeps track of all calls received; even if they were not answered. Viewing the Caller ID list When the phone is not in use, the display shows the following. -
Page 27: Saving The Phone Numbers In The Caller Id List
About the “REPEAT” and “SAVE” display “SAVE” appears if the call is “saved” (see below). SMITH JOHN “REPEAT” appears if there are more than two calls from the same caller. The older data will be replaced by the new data, so the calls are counted as only one call (for “NEW”... -
Page 28: Erasing Data From The Caller Id List
Looking at the Caller ID list (continued) Erasing data from the Caller ID list To erase phone numbers one by one Display the phone number you want to erase by turning Jog Dial. Press (ERASE). You will hear a confirmation beep and the data is erased. -
Page 29: Using The Caller Id List
Using the Caller ID list Using the Caller ID list, you can call back a phone number from the Caller ID list easily, or store numbers from the Caller ID list to one- touch dial buttons. Calling back a number from the Caller ID list Display the phone number you want to call by turning Jog Dial. -
Page 30: Storing A Number Of The Caller Id List Into One-Touch Dial Buttons
Using the Caller ID list (continued) Storing a number of the Caller ID list into one-touch dial buttons Display the phone number you want to store by turning Jog Dial. SMITH JOHN Confirm the number and press one of the one-touch dial buttons. -
Page 31: To Change The Number Of Digits Of The Phone Number
To change the number of digits of the phone number If the number of digits of the phone number in the Caller ID list is different from the actual phone number, you need to adjust the number of digits of the phone number to call back or store into the one-touch dialing number. -
Page 32: Using "Caller Id With Call Waiting" Service
Using “Caller ID with call waiting” service This telephone is compatible with the “Caller ID with call waiting” service. Make sure that your telephone company offers this service. Like the basic Caller ID service, you need to subscribe to “Caller ID with call waiting”... -
Page 33: Using Visual Message Waiting Service
Using visual message waiting service If you subscribe to your telephone company’s message service which includes this feature, the display will show that you have messages waiting to be retrieved. If you have messages (ERASE) Display “MESSAGE WAITING” will appear on the display. -
Page 34: Additional Information
Additional Information Mounting the phone on a wall Hang-up Remove the hang-up tab and replace it upside down. Attach the AC power adaptor cord and the telephone line cord(s) to the wall bracket. Use the shorter line cord for mounting. AC power adaptor cord Hook the wall bracket to the... -
Page 35: Using The Phone During A Power Failure
Do not use any type of abrasive pad, scouring powder or solvent such as alcohol or benzine as they may damage the finish of the cabinet. • If you have any questions or problems concerning your phone, please consult your nearest Sony dealer. Additional Information... -
Page 36: Troubleshooting
Troubleshooting If you’ve experienced any of the following difficulties while using your phone, use this troubleshooting guide to help you remedy the problem. Should any problem persist, consult your nearest Sony dealer. Remedy Symptom • Make sure the telephone line cord is securely You hear no dial tone. - Page 37 Symptom Remedy The caller’s name and/or • Make sure you have subscribed to Caller ID service. phone numbers does not • Caller ID service may not work when the phone is appear on the display. connected to a Private Branch Exchange (PBX). •...
-
Page 38: Specifications
Specifications Power source DC 12V from AC power adaptor Dial signal Tone, 10 PPS (pulse) selectable Dimensions Approx. 7 ⁄ ⁄ ⁄ inches (w/h/d) (approx. 183 x 65 x 233 mm) Mass Approx. 1 lb 14 oz (approx. 850 g) Supplied accessories See page 6. -
Page 39: Index
Index A, B P, Q Adjusting the volume Package contents 6 handset 14 Power failure 35 ringer 14 PRIVATE 25 speaker 14 Pulse dialing 11 Area code 12 Receiving calls 17 Call waiting service 18, 32 Redialing 15 Caller ID 25 REPEAT 27 Caller ID list 26 calling back 29... - Page 40 Refiérase a estos números cama, sofá, sillón o superficie similar. cada vez que se comunique con su Este producto nunca debe colocarse distribuidor Sony con respecto al cerca de un radiador o calefacción, o producto. encima de éste. Este producto no debe colocarse en una instalación...
- Page 41 5. Si su equipo (IT-M602) produce daños en la red telefónica, la compañía telefónica le exigirá trabajo extenso por un técnico notificará con antelación que es posible que se calificado para restaurar el producto a requiera la interrupción temporal del servicio.
- Page 42 Si su teléfono dispone de marcadores automáticos Cuando programe números de emergencia y (o) realice llamadas de prueba a los mismos: 1. Permanezca poco tiempo en la línea y explique a la otra parte la razón de la llamada. 2. Realice tales actividades en horas no punta, como por la mañana temprano o a últimas horas de la tarde.
- Page 43 Índice Preparativos Funciones de identificación del demandante 6 Paso 1: Comprobación del 25 Descripción del servicio de contenido del paquete identificación de demandante 7 Paso 2: Instalación del teléfono Cuando reciba una llamada 12 Paso 3: Introducción de su código 26 Lista de identificación de de área demandantes...
- Page 44 Preparativos Paso 1 Comprobación del contenido del paquete Compruebe si con el paquete ha recibido los ítemes siguientes. Si falta alguno, póngase en contacto con su proveedor Sony. Adaptador de alimentación Teléfono Microteléfono de CA (AC-T69) Cable del Cables de línea telefónica (3) Tornillos (4) microteléfono...
- Page 45 Paso 2 Instalación del teléfono Realice los pasos siguientes: • Conecte el teléfono • Elija el modo de marcación Nota sobre la instalación Instale la unidad: • sobre una superficie nivelada • alejada de fuentes térmicas, tales como radiadores, conductos de ventilación, y la luz solar •...
- Page 46 Paso 2: Instalación del teléfono (continuación) Para conectar el teléfono a una sola toma que posea dos líneas Enganche el cable. A un tomacorriente de CA Adaptador de A DC IN alimentación de CA “12V” Toma “DATA” (suministrado) A “LINE 2/ A la toma LINE 1+2”...
- Page 47 Para conectar el teléfono a dos tomas separadas Enganche el cable. A un tomacorriente de CA Adaptador de A DC IN alimentación de “12V” Toma “DATA” CA (suministrado) A las tomas A “LINE 1/ telefónicas LINE 1+2” A “LINE 2” Cable de línea telefónica (suministrado) Línea 2...
- Page 48 Conexión a un PC o facsímil A “LINE 1/LINE 1+2” Usted podrá conectar un PC o facsímil, etc. a la y/o “LINE 2” toma “DATA”. IT-M602 Notas • “LINE 2” se utiliza para recibir/transmitir datos del/al PC o facsímil además de realizar A “DATA”...
- Page 49 Elección del modo de marcación Para que el teléfono funcione correctamente, seleccione el modo de marcación apropiado (por tonos o por pulsos). Selector DIAL MODE Dependiendo de su sistema de marcación, ajuste el selector DIAL MODE de la forma siguiente: Si su sistema de marcación es Ponga el selector en Por tonos...
- Page 50 Paso 3 Introducción de su código de área Antes de utilizar este teléfono por primera vez, o después de haberse trasladado a otro lugar que posea código de área diferente, tendrá que introducir su código de área. De lo contrario no podría utilizar las funciones de este teléfono ni las funciones de identificación del demandante.
- Page 51 Operaciones básicas Realización de llamadas Descuelgue el teléfono (o presione (SPEAKERPHONE)). Selector HANDSET VOLUME En el visualizador aparecerá “=== TALK ===” y usted oirá el tono de invitación a marcar. Se (LINE 2) encenderá la tecla LINE 1 o LINE 2, dependiendo de la línea conectada.
- Page 52 Realización de llamadas (continuación) Tareas adicionales Para Realice lo siguiente Ajustar el volumen del Durante la conversación, ajuste el selector microteléfono HANDSET VOLUME. Usted podrá seleccionar el nivel de volumen entre tres posiciones. Ajustar el volumen del altavoz Deslice el control SPEAKER VOLUME. Ajustar el nivel del generador Usted podrá...
- Page 53 Para obtener el máximo rendimiento del modo de interfono • Es posible que en un lugar ruidoso no oiga la voz de su interlocutor. Por lo tanto, utilice la función de interfono en una sala silenciosa. • No acerque demasiado la mano ni ningún otro objeto al micrófono, ya que oiría un aullido (“retroalimentación acústica”).
- Page 54 Realización de llamadas (continuación) Repetición de la marcación por línea ocupada Si la línea está ocupada cuando realice una llamada, el teléfono repetirá automáticamente la marcación del último número marcado hasta 10 veces cada 30 segundos hasta que se conecte la llamada. Cuando no esté...
- Page 55 Recepción de llamadas Cuando suene el teléfono: • Descuelgue el microteléfono (o presione (SPEAKERPHONE)). (CALL WAITING/FLASH) • Presione (LINE 1) o (LINE 2), la tecla que esté parpadeando. La lámpara SPEAKERPHONE se encenderá y usted podrá conversar a través del interfono. Para hablar a través del microteléfono, descuélguelo.
- Page 56 Recepción de llamadas (continuación) Tareas adicionales Para Realice lo siguiente Poner una llamada en Presione (HOLD). La tecla LINE 1 o LINE 2 retención comenzará a parpadear lentamente. Para reanudar la conversación, presione (LINE 1) o (LINE 2). Cambiar a otra llamada Presione (CALL WAITING/FLASH).
- Page 57 " # $ % & ’ ( ) * + , - . / ˜ 0 - 9 ˜ : ; < = > ? @ Introduzca los caracteres sucesivos de la misma forma. SONY continúa Funciones avanzadas...
- Page 58 Marcación abreviada (continuación) Presione (PROGRAM). Introduzca el número de teléfono 1234567 presionando las teclas de marcación. Usted podrá introducir hasta 16 dígitos, incluyendo un tono o una pausa, que se contarán cada uno como un dígito. Presione (PROGRAM). Usted oirá un pitido largo de confirmación, y el nombre y el número se almacenarán.
- Page 59 Cambio de un nombre y/o número de teléfono almacenado Haga que se visualice el nombre que desee SONY cambiar realizando los pasos 1 a 3 de la página El cursor parpadeará en el primer carácter del nombre. Presione repetidamente el botón de lanzadera SONY hasta que parpadee el carácter que desee...
- Page 60 Marcación abreviada (continuación) Realización de llamadas con la marcación abreviada Descuelgue el microteléfono, o presione (SPEAKERPHONE). Cundo desee seleccionar el número de teléfono almacenado en la segunda memoria de una tecla de marcación abreviada, presione (LOWER). Presione la tecla de marcación abreviada deseada. Se marcará...
- Page 61 Realización de llamadas de conferencia Usted podrá conversar a través de dos líneas al mismo tiempo. Realización de otra llamada durante la conversación Usted podrá conversar con dos interlocutores al mismo tiempo utilizando las líneas 1 y 2. (Conferencia tripartita) Presione (HOLD) mientras esté...
- Page 62 Realización de llamadas de conferencia (continuación) Recepción de una llamada durante la conversación Si llega otra llamada mientras esté hablando a través de una línea, parpadeará la tecla LINE 1 o LINE 2 de acuerdo con la línea por la que llegó...
- Page 63 Funciones de identificación del demandante Descripción del servicio de identificación de demandante La identificación de demandante le permitirá hacer que el número de teléfono del que llamó (demandante) aparezca en el visualizador antes de contestar a la llamada. Para utilizar esta función, tendrá que subscribirse primero al servicio de identificación de demandante.
- Page 64 Lista de identificación de demandantes El teléfono almacenará los datos de las últimas 50 llamadas recibidas, incluyendo las de “OUT OF AREA” y “PRIVATE”. Almacenará las llamadas recibidas, incluso aunque no se hayan contestado. Vista de la lista de identificación de demandantes Cuando no esté...
- Page 65 Acerca de la visualización de “REPEAT” y “SAVE” “SAVE” aparecerá si la llamada se “guardó” (consulte más abajo). SMITH JOHN “REPEAT” aparecerá si hay más de dos llamadas del mismo Los demandante. Los datos antiguos serán reemplazados por los nuevos, de forma que las llamadas se contarán como una sola (para las llamadas “NEW”...
- Page 66 Lista de identificación de demandantes (continuación) Borrado de datos de la lista de identificación de demandantes Para borrar números de teléfono uno tras otro Haga que se visualice el número de teléfono que desee borrar girando el mando de lanzadera. Presione (ERASE).
- Page 67 Utilización de la lista de identificación de demandantes Utilizando la lista de identificación de demandantes, usted podrá llamar fácilmente a los números de dicha lista, o almacenar números de esta lista de identificación de demandantes en teclas de marcación abreviada. Marcación de un número desde la lista de identificación de demandantes Haga que se visualice el número...
- Page 68 Utilización de la lista de identificación de demandantes (continuación) Almacenamiento de un número de la lista de identificación de demandantes Haga que se visualice el número de teléfono que desee almacenar girando el mando de lanzadera. SMITH JOHN Confirme el número y presione una de las teclas de marcación abreviada.
- Page 69 Para cambiar el número de dígitos del número de teléfono Si el número de dígitos del número de teléfono de la lista de identificación de demandantes es diferente al número de teléfono real, tendrá que ajustar el número de dígitos del número telefónico para marcarlo o almacenarlo en una tecla de marcación abreviada.
- Page 70 Utilización del servicio de “Identificación de demandante con llamada en espera” Este teléfono es compatible con el servicio de “Identificación de demandante con llamada en espera”. Compruebe si su compañía telefónica ofrece este servicio. Al igual que el servicio de identificación de demandante básico, usted tendrá...
- Page 71 Utilización del servicio de espera con mensaje visual Si usted se suscribe al servicio de mensajes de su compañía telefónica, el visualizador le indicará que tiene mensajes a la espera de ser escuchados. Si tiene mensajes (ERASE) Visualizador En el visualizador aparecerá “MESSAGE WAITING”.
- Page 72 Información adicional Montaje del teléfono en una pared Lengüeta para enganchar el Extraiga la lengüeta para microteléfono enganchar el microteléfono, y dele la vuelta. Fije el cable del adaptador de alimentación de CA y el (los) cable(s) de línea telefónica al soporte para instalación mural.
- Page 73 No utilice limpiadores abrasivos, desengrasantes ni disolventes, como el alcohol o la bencina, ya que podrían dañar el acabado. • En caso de duda o problemas con el teléfono, consulte a su proveedor Sony más próximo.
- Page 74 Solución de problemas Si experimenta cualquiera de los problemas siguientes cuando utilice su teléfono, use esta guía como ayuda para solucionarlo. Si el problema persiste, póngase en contacto con su proveedor Sony. Problema Solución No se oye el tono de invitación •...
- Page 75 Problema Solución El nombre y/o el número de • Cerciórese de suscribirse al servicio de identificación teléfono del demandante no de demandante. aparecen en el visualizador. • El servicio de identificación de demandante puede no trabajar cuando el teléfono esté conectado a una centralita privada (PBX).
- Page 76 Especificaciones Fuente de alimentación 12 V CC del adaptador de alimentación de Señal de marcación Tonos y 10 PPS (pulsos por segundo), seleccionable Dimensiones Aprox. 7 ⁄ ⁄ ⁄ pulgadas (an/al/prf) (aprox. 183 x 65 x 233 mm) Masa Aprox. 1 lb 14 oz (aprox.
- Page 77 Índice alfabético A, B I, J, K, L P, Q Ajuste Identificación de PRIVATE 25 demandante 25 modo de marcación 11 almacenamiento de datos teléfono 7 de la lista de Ajuste del volumen Realización de llamadas 13 identificación de altavoz 14 Recepción de llamadas 17 demandantes 27 generador de llamada 14...
- Page 79 Para clientes en EE. UU. Guarde el recibo y únalo a su tarjeta de GARANTÍA para el caso de tener que llevar su equipo a reparar a un centro de reparaciones autorizado por Sony.
- Page 80 For the customers in the USA Be sure to save the receipt and attach it to your WARRANTY card when having your equipment repaired at an authorized Sony service station. Sony Corporation Printed in China...
Need help?
Do you have a question about the IT-M602 and is the answer not in the manual?
Questions and answers