
Subscribe to Our Youtube Channel
Related Manuals for Security-Center FU5120WB

Summary of Contents for Security-Center FU5120WB
- Page 1 Radio-controlled opening detector Installationsanleitung Installation Guide Instructions d’installation Installatie-instructies FU5120WB 497242...
- Page 2 Fig. 2 Fig. 1 Fig. 4 Fig. 3 Fig. 5...
- Page 3 Preface Dear Customer, Thank you for purchasing this radio-controlled opening detector. You made the right decision in choosing this state-of-the-art technology, which complies with the current standards of domestic and European regulations. The CE has been proven and all related certifications are available from the manufacturer upon request.
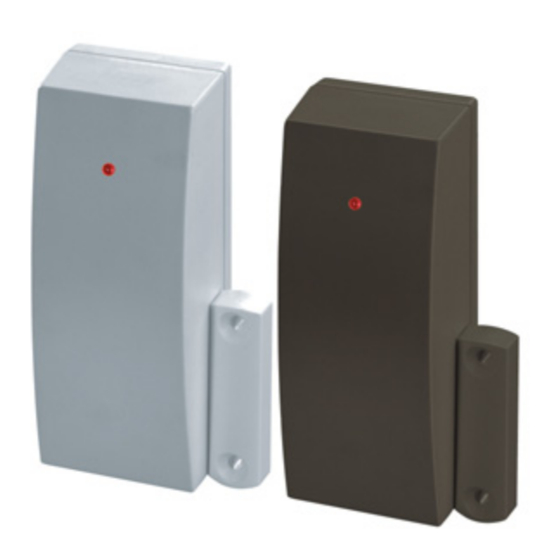
- Page 4 Fig. 1 Number Name Fixing screw Jumper connector LK4 Jumper connector LK2 Magnet switch Jumper connector LK3 Jumper connector LK1 Battery Screw clamp block Tamper protection, lid Flashing: Program mode 4x flashing: Transmit Off: Normal LK1, LK3 Operating mode of LK 1 LK 3 external contact...
-
Page 5: Installation
Programming Installation 1. Open the casing by loosening the screw and then removing the cover. 2. Remove the PCB from the housing: Loosen screw (Fig. 1, Pos. 1), then lift out the PCB. 3. Fig. 2, Pos. 1,2: Positions of screws for fixing the housing 3.1. -
Page 6: Connecting External Contacts
Learning 1. Switch your radio alarm equipment / radio receiver to learn mode. See the system instructions for advice on this. 2. Radio variant: Insert a battery in the radio-controlled opening detector (Fig. 1, Pos. 7). Check for correct polarity. Hold the tamper protection for the front panel (Pos. - Page 7 1. Switch your radio alarm equipment to learn mode. See the system instructions for advice on this. 1.1. Trigger the external detector. 1.2. Check that the alarm system has recognised the detector. Using detectors as radio modules You can also use this radio magnet contact as a radio module. 1.
- Page 8 Connecting vibration detector Connect the alarm contacts of the detector to the “ALARM” contacts (see Fig. 5) and the tamper contacts to “TAMPER”. If no tamper connections are present, jump the contacts in the radio detector. You can train the detector for an extra zone of the alarm system as described in “Teaching external contacts”.
-
Page 9: Closing The Case
3.3. Restore the original position of the jumper. 4. Deactivating LED 4.1. Short-circuit LK1 only. 4.2. Short-circuit LK4 for max. one second with a jumper and then remove the jumper. The LED is now deactivated. 4.3. Restore the original position of the jumper. Closing the case Place the cover on the base and fix it with the screw.
Need help?
Do you have a question about the FU5120WB and is the answer not in the manual?
Questions and answers