
Related Manuals for SEW-Eurodrive WOP11D-70-0

Summary of Contents for SEW-Eurodrive WOP11D-70-0
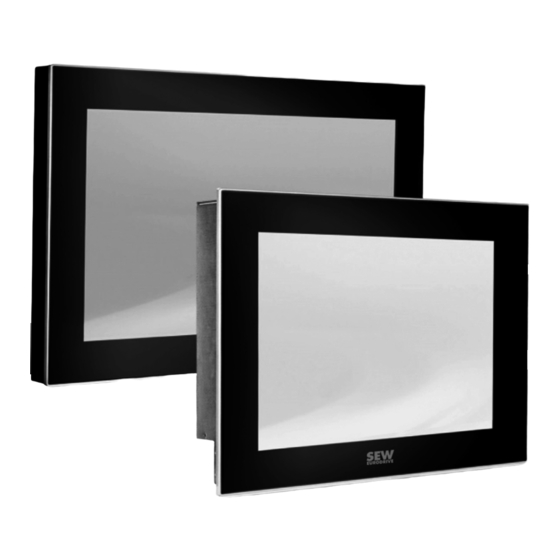
- Page 1 *26860481_0321* Drive Technology \ Drive Automation \ System Integration \ Services Operating Instructions Web Operator Panels WOP11D-70-0, WOP11D-100-0 and WOP11D-150-0 Edition 03/2021 26860481/EN...
- Page 2 SEW-EURODRIVE—Driving the world...
-
Page 3: Table Of Contents
Processor board ................... 17 3.3.4 Micro SD memory card ................ 17 3.3.5 Background lighting.................. 18 3.3.6 Ethernet interface.................. 18 3.3.7 USB interfaces ..................... 18 Scope of delivery ...................... 19 Accessories........................ 19 Mechanical installation ...................... 20 Operating Instructions – WOP11D-70-0, WOP11D-100-0 and WOP11D-150-0... - Page 4 4.2.1 UL and cUL installation ................ 21 Installation requirements.................... 22 Taking the required space into account ................ 23 4.4.1 Web operator panels WOP11D-70-0 and WOP11D-100-0...... 23 4.4.2 Web operator panel WOP11D-150-0 ............ 23 Preparing the mounting plate.................. 24 Unpacking ........................ 24 Mounting the device...................... 25 4.7.1...
- Page 5 Table of contents 10.1.7 Ambient conditions .................. 45 10.1.8 Approvals ..................... 45 10.2 Pin assignment ...................... 46 10.2.1 Web operator panels WOP11D-70-0 and WOP11D-100-0...... 46 10.2.2 Web operator panel WOP11D-150-0 ............ 47 10.3 Dimension drawings...................... 50 10.3.1 Web operator panel WOP11D-70-0 ............. 50 10.3.2 Web operator panel WOP11D-100-0 ............
-
Page 6: General Information
Severe or fatal injuries WARNING Possible dangerous situation Minor injuries CAUTION NOTICE Possible damage to property Damage to the product or its envi- ronment INFORMATION Useful information or tip: Simplifies handling of the product. Operating Instructions – WOP11D-70-0, WOP11D-100-0 and WOP11D-150-0... -
Page 7: Structure Of Section-Related Safety Notes
Read the documentation before you start working with the product. Product names and trademarks The brands and product names in this documentation are trademarks or registered trademarks of their respective titleholders. Operating Instructions – WOP11D-70-0, WOP11D-100-0 and WOP11D-150-0... -
Page 8: Copyright Notice
General information Copyright notice Copyright notice © 2021 SEW‑EURODRIVE. All rights reserved. Unauthorized reproduction, modifica- tion, distribution or any other use of the whole or any part of this documentation is strictly prohibited. Operating Instructions – WOP11D-70-0, WOP11D-100-0 and WOP11D-150-0... -
Page 9: Safety Notes
Ensure that systems in which the product is installed are equipped with additional monitoring and protection devices. Observe the applicable safety regulations and leg- islation governing technical work equipment and accident prevention regulations. Operating Instructions – WOP11D-70-0, WOP11D-100-0 and WOP11D-150-0... -
Page 10: Target Group
The purpose of the training is to give persons the ability to perform the required tasks and work steps in a safe and cor- rect manner. Operating Instructions – WOP11D-70-0, WOP11D-100-0 and WOP11D-150-0... -
Page 11: Designated Use
• Operation in a mining facility or outdoors • Operation in potentially explosive atmospheres and high fire risk areas • Use in areas with a strong magnetic field • Use in direct sunlight Operating Instructions – WOP11D-70-0, WOP11D-100-0 and WOP11D-150-0... -
Page 12: Electrical Connection
Use only spare parts and accessories manufactured according to the specifications of SEW‑EURODRIVE. SEW‑EURODRIVE is not liable for modifications, changes, addi- tions and / or alterations to the product. Clean the screen with a commercial glass cleaner and a dry and clean cloth. Operating Instructions – WOP11D-70-0, WOP11D-100-0 and WOP11D-150-0... -
Page 13: Device Structure
Screen Glass front Galvanized sheet metal Mounting element with screw Gasket Ethernet interface (→ 2 46) 2 USB interfaces (→ 2 46) DC 24 V voltage supply (→ 2 46) Grounding lug [10] Slot for micro SD memory card [11] Basic module Operating Instructions – WOP11D-70-0, WOP11D-100-0 and WOP11D-150-0... -
Page 14: Web Operator Panel Wop11D-100-0
Screen Glass front Galvanized sheet metal Mounting element with screw Gasket Ethernet interface (→ 2 46) 2 USB interfaces (→ 2 46) DC 24 V voltage supply (→ 2 46) Grounding lug [10] Slot for micro SD memory card [11] Basic module Operating Instructions – WOP11D-70-0, WOP11D-100-0 and WOP11D-150-0... -
Page 15: Web Operator Panel Wop11D-150-0
The following figure shows the front and rear of the device: 33967307531 Front Rear Screen Glass front Mounting element with screw Gasket Connections (→ 2 33) Control panel for screen (→ 2 39) PE screw Basic module Operating Instructions – WOP11D-70-0, WOP11D-100-0 and WOP11D-150-0... -
Page 16: Type Designation And Nameplates
100 = TFT/LCD display with 10.1-inch screen diagonal, 1280 × 800 pixels (16700000 colors) 150 = TFT/LCD display with 15.6-inch screen diagonal, 1920 × 1080 pixels (16200000 colors) Design Standard INFORMATION For further information on web operator panels, refer to chapter "Technical data" (→ 2 43). Operating Instructions – WOP11D-70-0, WOP11D-100-0 and WOP11D-150-0... -
Page 17: Functional Description
SD memory cards up to 2 GB and SDHC memory cards up to 32 GB. 34007556619 Micro SD memory card INFORMATION: Insert the micro SD memory card with contacts facing the back of the device. Operating Instructions – WOP11D-70-0, WOP11D-100-0 and WOP11D-150-0... -
Page 18: Background Lighting
The USB interface version depends on the device type in use. Web operator panels WOP11D-70-0 and WOP11D-100-0 The operator panel is equipped with 2 USB interfaces 2.0. Web operator panel WOP11D-150-0 The operator panel has 2 USB interfaces 2.0 and 1 USB interface 3.0. Operating Instructions – WOP11D-70-0, WOP11D-100-0 and WOP11D-150-0... -
Page 19: Scope Of Delivery
If you are not sure which accessories you need, employees at SEW‑EURODRIVE will be happy to help you make the right selection. Accessories Part number Switched-mode power supply with 2.5 A 01881817 1) Only applies to operator panels WOP11D-70-0 and WOP11D-100-0. Operating Instructions – WOP11D-70-0, WOP11D-100-0 and WOP11D-150-0... -
Page 20: Mechanical Installation
Do not apply force when tightening the screw. Adhere to the recommended torque to fasten the screws. • Be careful when using the display to avoid damage and scratches. INFORMATION Adhere to the "safety notes" (→ 2 9) during installation. Operating Instructions – WOP11D-70-0, WOP11D-100-0 and WOP11D-150-0... -
Page 21: Ul-Compliant Installation
Replace the battery with a BR 2032 battery. Use of another type of battery may present a risk of fire or explosion. Flat surface For use on a flat surface of a type 4X enclosure indoor use only. Power terminals Use minimum 75 °C copper wire only. Operating Instructions – WOP11D-70-0, WOP11D-100-0 and WOP11D-150-0... -
Page 22: Installation Requirements
The information on the nameplate of the device corresponds to the line voltage. • The device is undamaged (no damage caused by transport or storage). • The ambient temperature corresponds to the specification in the operating instruc- tions and the nameplate of the device. Operating Instructions – WOP11D-70-0, WOP11D-100-0 and WOP11D-150-0... -
Page 23: Taking The Required Space Into Account
The following figures show the required space for installing the device. 4.4.1 Web operator panels WOP11D-70-0 and WOP11D-100-0 33963632139 All dimensions are specified in mm. 4.4.2 Web operator panel WOP11D-150-0 33882503307 All dimensions are specified in mm. Operating Instructions – WOP11D-70-0, WOP11D-100-0 and WOP11D-150-0... -
Page 24: Preparing The Mounting Plate
They may cause short circuits and damage the batteries or circuits of the device. Proceed as follows when unpacking the device: 1. Unpack the delivery and check it. 2. Inform your supplier immediately in the event of damage. Operating Instructions – WOP11D-70-0, WOP11D-100-0 and WOP11D-150-0... -
Page 25: Mounting The Device
3. Insert the mounting elements into the T-shaped cut-outs provided on the back of the operator panel. 4. Push the mounting elements sideways so that they are locked in place. 33963706123 Operating Instructions – WOP11D-70-0, WOP11D-100-0 and WOP11D-150-0... - Page 26 0.2 Nm until it presses on the mounting plate. 33963710091 6. Repeat this procedure first for the crosswise opposite mounting element and only then for the remaining mounting elements. 33963714059 ð The operator panel is now mounted. Operating Instructions – WOP11D-70-0, WOP11D-100-0 and WOP11D-150-0...
-
Page 27: Web Operator Panel Wop11D-100-0
2. Place the operator panel from the front into the cut-out of the mounting plate and push it carefully up to the stop. 3. Pivot the mounting elements on the back of the operator panel so that the screws are above the mounting plate. 33969355403 Operating Instructions – WOP11D-70-0, WOP11D-100-0 and WOP11D-150-0... - Page 28 0.2 Nm until it presses on the mounting plate. 5. Repeat this procedure first for the crosswise opposite mounting element and only then for the remaining mounting elements. 33969359755 ð The operator panel is now mounted. Operating Instructions – WOP11D-70-0, WOP11D-100-0 and WOP11D-150-0...
-
Page 29: Web Operator Panel Wop11D-150-0
3. Place the operator panel from the front into the cut-out of the mounting plate and push it carefully up to the stop. 4. Place the mounting element with the screw into the housing of the operator panel. 33869329419 Operating Instructions – WOP11D-70-0, WOP11D-100-0 and WOP11D-150-0... - Page 30 5. Tighten the screw clockwise with a tightening torque of 0.8 Nm (± 0.2 Nm) until the mounting element is pressed against the housing wall. 33869333387 6. Repeat the procedure for the remaining screws. 33869337355 ð The operator panel is now mounted. Operating Instructions – WOP11D-70-0, WOP11D-100-0 and WOP11D-150-0...
-
Page 31: Electrical Installation
Always touch the connector when plugging or unplugging a cable. INFORMATION To remove the protective film, pull the protective film off the front of the device to the side. INFORMATION Adhere to the "safety notes" (→ 2 9) during installation. Operating Instructions – WOP11D-70-0, WOP11D-100-0 and WOP11D-150-0... -
Page 32: Connections
Web operator panel WOP11D-100-0 33963516043 34064676875 X3: Card slot for micro SD memory cards up to 2 GB and SDHC memory cards up to 32 GB Grounding lug for optional grounding of the device (→ 2 34). Operating Instructions – WOP11D-70-0, WOP11D-100-0 and WOP11D-150-0... - Page 33 Ethernet interface LAN 1, 1 × 10/100/1000 Mbit, shielded RJ45 (→ 2 47) IP address: 192.168.1.99 USB interface, 1 × USB host 3.0 type A (→ 2 48) USB interface, 2 × USB host 2.0 type A (→ 2 47) X3: Connection for DC 24 V voltage supply (→ 2 47) X2: not assigned [10] X1: not assigned Operating Instructions – WOP11D-70-0, WOP11D-100-0 and WOP11D-150-0...
-
Page 34: Grounding
In addition, you can optionally ground the device via the grounding lug on the rear of the housing. Use a fork or ring cable lug for this purpose. 5.3.2 Web operator panel WOP11D-150-0 Connect the grounding cable to the grounding screw of the device. Operating Instructions – WOP11D-70-0, WOP11D-100-0 and WOP11D-150-0... -
Page 35: Connecting A Voltage Supply
Ensure correct polarity when connecting the voltage supply. INFORMATION Operate the device only with a SELV voltage source (Safety Extra Low Voltage) that meets the requirements of an LPS (Limited Power Source) according to DIN EN 60950‑1. Operating Instructions – WOP11D-70-0, WOP11D-100-0 and WOP11D-150-0... -
Page 36: Web Operator Panels Wop11D-70-0 And Wop11D-100-0
Reference potential DC 24 V voltage supply (±20%) 5.4.2 Web operator panel WOP11D-150-0 The following figure shows the connection of the voltage supply: 33872158859 Terminal Signal Description socket Reference potential Functional earth DC 24 V voltage supply Operating Instructions – WOP11D-70-0, WOP11D-100-0 and WOP11D-150-0... -
Page 37: Using The 24 V Supply Connector With Ac/Dc Power Supply Unit
ð Terminal socket X3 of the WOP11D-150-0 operator panel 4. Connect a power supply cable to the power socket that meets regional require- ments. ð The voltage supply is connected. ð The operator panel starts automatically. Operating Instructions – WOP11D-70-0, WOP11D-100-0 and WOP11D-150-0... -
Page 38: Startup
CODESYS V3 WebVisu. The URL and other settings are set via system configuration, via own web server on an external web browser or via a script file on a connected USB flash drive. Operating Instructions – WOP11D-70-0, WOP11D-100-0 and WOP11D-150-0... -
Page 39: Operation
"Power" The device is switched off. Lights up green The device is switched on. Flashes green The device is in standby mode. "Drive Activity" No activity Flashes Memory access Operating Instructions – WOP11D-70-0, WOP11D-100-0 and WOP11D-150-0... - Page 40 Collect used oil and grease separately according to type. Ensure that the used oil is not mixed with solvent. Dispose of used oil and grease correctly. • Screens • Capacitors • Rechargeable batteries • Batteries Operating Instructions – WOP11D-70-0, WOP11D-100-0 and WOP11D-150-0...
-
Page 41: Waste Disposal
Waste disposal according to the Battery Directive 2006/66/EC This product contains batteries or accumulators. Dispose this product and the batter- ies or accumulators separately from the municipal waste according to the national reg- ulations. Operating Instructions – WOP11D-70-0, WOP11D-100-0 and WOP11D-150-0... -
Page 42: Maintenance
Before cleaning, switch off the operator panel because the screen display is safe to touch. To remove dust and dirt particles, clean the surface of the screen with a commercial glass cleaner and a dry and clean cloth. Operating Instructions – WOP11D-70-0, WOP11D-100-0 and WOP11D-150-0... -
Page 43: Technical Data And Dimension Sheets
1280 × 800 1920 × 1080 Format 17:10 16:10 16:9 154.21 × 86.92 mm 217 × 135.6 mm 344.2 × 193.4 mm Dimensions (W × H) (7") (10.1") (15.6") Contrast 800:1 1000:1 800:1 Brightness (cd/m Viewing angle 170°/170° 160°/160° 170°/170° (H) / (V) Screen TFT LCD Operating Instructions – WOP11D-70-0, WOP11D-100-0 and WOP11D-150-0... -
Page 44: Voltage Supply
1 × USB host 3.0 type A VGA interface 1 × VGA HDMI interface 1 × HDMI Slot for micro SD memory 1 × micro SD memory card card 1) SD memory cards ≤ 2 GB as well as SDHC memory cards ≤ 32 GB can be used. Operating Instructions – WOP11D-70-0, WOP11D-100-0 and WOP11D-150-0... - Page 45 EN 61000-6-2 EN 61000-6-2 (interference immunity) EMC tests on the device (interference immunity) EN 61000-6-4 (emission) EN 55032 (emission) 2011/65/EU RoHS-II Directives 2011/65/EU 2015/863/EU 2017/2102/EU EN 62368-1 UL approval NRTL (cTUVus) UL 62368-1 UL 62368-1 CE certification Operating Instructions – WOP11D-70-0, WOP11D-100-0 and WOP11D-150-0...
-
Page 46: Pin Assignment
X1: DC 24 V voltage supply Terminal socket, 3-pin Signal X5: Ethernet interface RJ45 socket Signal TX0+ TX0- TX1+ TX2+ TX2- TX1- TX3+ TX3- X9: USB interface 2.0 (type A) USB socket Signal USB_VCC USB_D- USB_D+ Operating Instructions – WOP11D-70-0, WOP11D-100-0 and WOP11D-150-0... -
Page 47: Web Operator Panel Wop11D-150-0
There is an Ethernet connection Activity/Link Lights up yellow to another Ethernet station. Data is currently being ex- Flashes yellow changed via Ethernet. USB interface 2.0 (type A) USB socket Signal +USB_VCC USB_D- USB_D+ Operating Instructions – WOP11D-70-0, WOP11D-100-0 and WOP11D-150-0... - Page 48 USB_TX- USB_TX+ HDMI interface HDMI socket Signal TMDS Data2+ TMDS Data2- TMDS Data1+ TMDS Data1- TMDS Data0+ [19] TMDS Data0- TMDS Clock+ TMDS Clock- [18] Reserved Reserved DDC_CLK DDC_DATA +5 V Power Hot Plug Detect Operating Instructions – WOP11D-70-0, WOP11D-100-0 and WOP11D-150-0...
- Page 49 Technical data and dimension sheets Pin assignment VGA interface VGA socket Signal Green Blue Not assigned Not assigned DDC Data Hsync Vsync DDC Clock Operating Instructions – WOP11D-70-0, WOP11D-100-0 and WOP11D-150-0...
-
Page 50: Dimension Drawings
30.7 163.5 188.7 33989278475 All dimensions are specified in mm. Cut-out for installation 189.7 34103581707 All dimensions are specified in mm. Width Height Installation Thickness of mounting depth plate 189.7 mm 121.5 mm Approx. 42.5 mm 3 – 7 mm Operating Instructions – WOP11D-70-0, WOP11D-100-0 and WOP11D-150-0... -
Page 51: Web Operator Panel Wop11D-100-0
13.3 264.5 163.5 250.5 33989282443 All dimensions are specified in mm. Cut-out for installation 34103585675 All dimensions are specified in mm. Width Height Installation Thickness of mounting depth plate 252 mm 174.5 mm Approx. 35.5 mm 3 – 7 mm Operating Instructions – WOP11D-70-0, WOP11D-100-0 and WOP11D-150-0... -
Page 52: Web Operator Panel Wop11D-150-0
Technical data and dimension sheets Dimension drawings 10.3.3 Web operator panel WOP11D-150-0 Device 69.1 67.85 29.5 29.5 34103561867 All dimensions are specified in mm. Operating Instructions – WOP11D-70-0, WOP11D-100-0 and WOP11D-150-0... - Page 53 Technical data and dimension sheets Dimension drawings Cut-out for installation 33883737355 All dimensions are specified in mm. Width Height Installation Thickness of mounting depth plate 389 mm 250 mm Approx. 70 mm 3 – 7 mm Operating Instructions – WOP11D-70-0, WOP11D-100-0 and WOP11D-150-0...
-
Page 54: Index
Web operator panel WOP11D-100-0 ..... 51 Mechanical installation ........ 20 Web operator panel WOP11D-150-0 ..... 52 Web operator panel WOP11D-70-0 .... 50 Device structure LCD display ............ 17 Web operator panel WOP11D-100-0 ..... 14 Operating Instructions – WOP11D-70-0, WOP11D-100-0 and WOP11D-150-0... - Page 55 Toolkit .............. 38 USB interface 2.0 ........ 46, 47 Touchscreen............ 17 USB interface 3.0 ........... 48 Trademarks ............ 7 VGA interface .......... 49 Transport ............. 11 Processor board .......... 17 Type designation .......... 16 Operating Instructions – WOP11D-70-0, WOP11D-100-0 and WOP11D-150-0...
- Page 56 Web operator panel WOP11D-150-0 .... 15 Connections ........... 33 Device structure .......... 15 VGA interface Web operator panel WOP11D-70-0 Connection ............. 49 Connections ........... 32 Pin assignment.......... 49 Device structure .......... 13 Voltage supply ............. 35 Operating Instructions – WOP11D-70-0, WOP11D-100-0 and WOP11D-150-0...
- Page 60 SEW-EURODRIVE—Driving the world SEW-EURODRIVE GmbH & Co KG Ernst-Blickle-Str. 42 76646 BRUCHSAL GERMANY Tel. +49 7251 75-0 Fax +49 7251 75-1970 sew@sew-eurodrive.com www.sew-eurodrive.com...
Need help?
Do you have a question about the WOP11D-70-0 and is the answer not in the manual?
Questions and answers