
Related Manuals for German pool DWR-2504

Summary of Contents for German pool DWR-2504
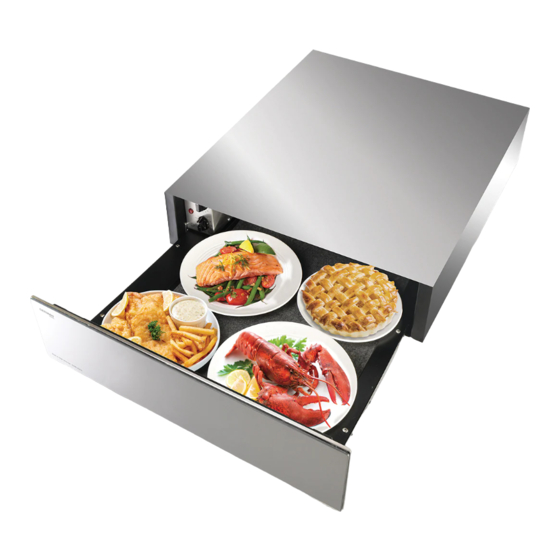
- Page 1 Built-in Dish Warmer | DWR-2504 Online Warranty Registration Please read these instructions and warranty information carefully before use and keep them handy for future reference. U S E R M A N U A L...
-
Page 2: Table Of Contents
Content Notice Before Use Note: This user manual contains important information, safety instructions and installation instructions to Notice Before Use help you become familiar with the product. Please keep it in a safe place for future reference and for anyone who is not familiar with how to use this product. Installation General Information ● This appliance is designed for domestic household use and can be built into a standard kitchen... -
Page 3: Installation
Installation Installation 1) Current standard The neutral of the heating drawer (blue wire) should be connected to neutral on the power supply. Before the Dish Warmer is plugged in, make sure that the supply voltage indicated on the rating plate matches the supply voltage of your AC power. The power system and outlets shall be capable of Blue withstanding the maximum current rating indicated by the cabinet. If the outlet and the plug do not match, have a professional electrician replace the appropriate outlet. Green / Yellow 2) Warning: This warmer cabinet must be grounded. Brown If you have to change the power cord of the warmer cabinet, the grounding conductor (yellow/green) must be 10 mm longer than the wire. Ensure that the temperature of the environment in which the AC cord is located does not exceed 50°C. If the AC cord is damaged, it must be replaced with a suitable Cabinets installation dimensions replacement cord and can be purchased from your dealer. Set the appliance into the niche in the cabinet. Make certain that the body of the appliance is positioned correctly. -
Page 4: Safety Notes
Safety Notes Product Structure Warning and safety instructions Product description ● This appliance complies with all current European safety legislation. German Pool do wish to emphasise that this compliance does not remove the fact that the appliance surfaces will become hot during use and retain heat after operation. Child Safety ● We strongly recommend that babies and young children are prevented from being near to the ④ appliance and not allowed to touch the appliance at any time. -
Page 5: Operating Instruction
Operating Instruction Operating Instruction Heating times Using the warming drawer Watch the video clip The time required to heat crockery, depends on several factors: Before first use ● The material that the crockery is manufactured from and the thickness of the crockery. ● Clean the surfaces with a soft damp cloth. ● The amount that has been loaded into the warming drawer. ● To remove any residue from the warming drawer that may have been left from ● The way in which the load has been arranged. the manufacturing process, you should turn the control knob to the maximum ● The temperature setting that has been selected. temperature setting. ● It is perfectly normal for a smell to be produced during this process. It is not possible to give an exact heating time and you should experiment to find out which heating ● You should make sure that any windows in the room are left open during this process. temperature and time are the most appropriate for particular types and amounts of crockery. As a ● It is advisable for you not to remain in the room whilst the burning off process is taking place. general guide for a temperature setting of 60°C to heat evenly: ● You should leave the warming drawer on the maximum setting for 2 hours. ● Dishes for a meal with six people take approximately 30 minutes. -
Page 6: Care & Maintenance
Care & Maintenance Troubleshooting Maintenance and cleaning The warming drawer isn’t heating crockery. Cleaning operations must only be carried out when the drawer is cool. ● Check that the appliance is switched on. The appliance should be disconnected from your mains supply before commencing any cleaning ● Check that the drawer is closed completely. process. ● Check that the crockery has been warmed for a sufficient period of time. ● Check that the drawer has not been left open for too long. ● Never clean the drawer surfaces by steam cleaning. ● Check your mains power supply. ● All surfaces of the warming drawer should only be cleaned with warm soapy water, using either a sponge or soft cloth. No abrasive cleaners should be used. The drawer does not close properly. ● IMPORTANT: The slots in the protective grill that covers the heating element and fan should not Check that the loading of the drawer allows it to shut properly. be cleaned with water. Any water penetration into this area may result in the breakdown of the appliance, short circuits and/or create a hazard for the user. -
Page 7: Technical Specifications
Technical Specifications 目錄 Product specifications 使用前須知事項 DWR-2504 Model No Voltage/Frequency 220-240V/50Hz Rated Power (Max) 410 W 安裝說明 Product Dimension(H×W×D) 140mm x 595mm x 545mm Installation Dimension(H×W×D) ≥ 138mm x ≥ 560mm x ≥ 560mm 安全事項 Net Weight 20.0 Kg Net Volume Temperature Adjustment 產品結構 30ºC to 70ºC Environmental note 操作說明 This appliance is marked according to the European directive 2002/96/EC on Waste electrical and Electronic Equipment (WEEE). By ensuring this product is disposed of correctly, you will help prevent potential negative consequences for the environment and human health, which could otherwise be caused by inappropriate waste handling of this product. 清潔與維護 The symbol on the product or on the documents accompanying the product indicates that this appliance may not be treated as household waste. Instead it shall be handed over to the applicable 故障排除 collection point for the recycling of electrical and electronic equipment. Disposal must be carried out in accordance with local environmental regulations for waste disposal. 技術規格 For more detailed information about treatment, recovery and recycling of this product, please contact your local city office or local waste management office. -
Page 8: 使用前須知事項
使用前須知事項 安裝說明 1) 電流標準 注意︰本使用說明書包含重要資訊,有安全須知和安裝說明等,幫助你熟悉本產品。請將說明書放 暖碟櫃通電前,確保定銘牌標明的供給電壓與您交流電的供給電壓一致。 置在安全地點以方便日後查閱,或者隨時給你及任何不熟悉如何使用本產品的人員查閱。 電源系統和插座應能承受本暖碟櫃標示的最大額定電流極限。如果插座和插頭不匹配,請專業電工 替換合適的插座。 重要安全事項 ● 為了使用者的安全起見,敬請在準備安裝或使用前認真閱讀說明書,如果對說明書內的信息有任 2) 警告:此暖碟櫃須接地。 何疑問,歡迎聯絡本公司的技術支持部門。 若您必須改變暖碟櫃電源線,接地導體(黃色/綠色)一定要比導線長10MM。 ● 本設備是專為家庭使用而精心設計,可以被安裝到標準的廚房櫥櫃內。當暖碟櫃在工作狀態時, 注意確保交流電線所在環境的溫度不超過50℃。 所有和暖碟櫃連接的傢俱及安裝材料必須能夠承受85℃及以上的溫度。 若交流電線損壞,須用適當的電線進行更換。 ● 某些類型的乙烯基或層壓廚房家具在低於上述指導的溫度下特別容易受到熱損壞或變色。 ● 任何由於違反溫度承受能力而安裝暖碟櫃所導致的損壞,或者是連接傢俱與暖碟櫃過近,即兩者 安裝必須由合格的人員按照以下版本進行。 間隙少於4 mm而造成的損壞,都將由暖碟櫃的使用者自己負責任。 ● 國內法規和安全標准或其當地標準替換。 ● 任何未經本公司明確同意的暖碟櫃其他使用用途或環境,將導致保修和責任賠償失效。 ● 建築法規(由環境部發布)。 ● 電力工作條例。 在將設備連接到電源之前,請檢查電氣設備的電線是否有足夠的直徑,以便正常為設備供電。安裝 的保險絲應為10安培。 有必要在電源電路中提供雙極截止裝置,其中觸點的開口大於3mm。 設備必須先完成電源接駁,才可安裝在櫥櫃中。 暖碟櫃應用帶有三個1mm 耦合器(1個單相+ 1N +接地)的(標準)電源線,連接到220-240 V單... -
Page 9: 安全事項
安全事項 安裝說明 警告和安全說明 暖碟櫃的中性線(藍色線)應連接到電源上的中性線。 ● 本產品符合所有當前的歐洲安全法規。暖碟櫃表面在使用過程中會變熱,使用後亦會有餘熱,敬 請小心使用。 藍色 兒童安全事項 綠色/黃色 ● 強烈建議防止小孩靠近暖碟櫃,切勿讓他們觸摸暖碟櫃。 ● 如果家庭裡的小孩必須在廚房裡活動,請確保他們有足夠安全距離。 啡色 通用安全事項 ● 本產品維修應當由公司的服務工程師或授權服務代理進行。 暖碟櫃與櫥櫃安裝尺寸圖 ● 本產品不適宜由感應系統或精神系統有缺陷的人,或者缺乏基本經驗和知識的人(包括兒童)使 確保暖碟櫃安全安裝於櫥櫃內,並確保正確安裝。 用,除非有負責他們安全的人進行監督或指導。 ● 不要將電線或插頭接觸到暖碟櫃的加熱區域。 打開活動櫃門,用兩個螺絲配膠套與櫥櫃固定。 ● 不要將暖碟櫃安裝窗簾附近。 ● 不要試著用暖碟櫃門或把手支撐或搬動廚房設備,因為這樣可能導致意外損壞本產品或者使用者 暖碟櫃的所有部件只能用專用工具才能拆卸。 受傷。 安裝注意事項 尺寸(mm) ● 本產品應當由具備專業資格的安裝技術人員,嚴格的按照安裝手冊正確進行安裝。 ● 任何由於不當安裝或使用暖碟櫃而導致使用者受傷及財產損失,本公司將拒絕承擔責任。 ● 如果對通風量是否足夠有疑問,請諮詢相關合資格的安裝技術人員。 ●... -
Page 10: 產品結構
產品結構 操作說明 產品描述 初次使用注意事項 觀看操作視頻 ● 用濕布拭擦暖碟櫃表面。 ● 將溫度控制旋鈕轉到最高溫度,以消除製造過程中遺留的殘留物。 ● 在此過程中產生氣味是正常的。 ● 在此過程中,應將廚房內的窗戶打開。 ● 建議您在初次使用過程中不要留在廚房內。 ● 建議初次使用時開啟2小時。 ④ ① ② ③ ⑤ 使用步驟 順時針方向開啟計時器旋鈕,此時指示燈長亮,再調節溫度,暖碟櫃開始工作。當定時器倒數完畢 時,產品會自動關機,同時會聽到「叮」的聲音。 ● 將碗碟或其他餐具放入暖碟櫃內。 ● 選擇溫度。 ● 轉動定時器旋鈕,設置加熱時間。可設置的最短時間為10分鐘,最長時間為90分鐘。 ● 電源指示燈亮起表示暖碟櫃開始運行。 ● 關閉暖碟櫃。 ● 設定時間結束後,熱風加熱系統停止。 設置暖碟溫度 控制面板 ● 將要加熱的餐具放入暖碟櫃中。 ①... -
Page 11: 清潔與維護
操作說明 清潔與維護 加熱時間 所有的清潔操作必須在暖碟櫃冷卻以後才能進行。 ● 加熱碗碟所需的時間取決於幾個因素: 在開始任何的清潔操作之前應當切斷暖碟櫃主電源。 ● 碗碟的材料和碗碟的厚度。 ● 切勿通過蒸汽清潔抽屜表面。 ● 暖碟櫃中的碗碟數量。 ● 碗碟的排列方式。 ● 可以用海綿或軟布清潔暖碟櫃內部。不要使用帶研磨劑的清潔劑。 ● 重要提示:保護格柵覆蓋加熱元件和風扇的插槽不應用水清洗。任何水滲透到該區域可能導致 ● 已選擇的溫度設置。 ● 器具故障、短路或對使用者造成危險。 加熱時間需視乎碗碟的類型和數量,您應按照其類型和份量調校適合的加熱溫度和時間。以溫度 ● 如果您在設備上使用任何形式的清潔劑,則必須向清潔劑製造商諮詢其是否適合在您的設備上 60℃為例: 使用。 ● 6人份量的碗碟大約需要30分鐘。 ● 為保持玻璃抽屜前部的外觀,應使用優質玻璃清潔劑。使用玻璃清潔劑時,請參閱製造商的說明。 ● 12人份量的碗碟大約需要40分鐘。 ● 請勿使用含有蘇打,酸或氯,研磨性清潔劑(粉末或乳霜),研磨海綿(如鋼絲海綿刷)或含有 殘留研磨劑的海綿。 負載容量 ● 如欲徹底清潔暖碟櫃,可以把櫃內的防滑底板取出來清洗。可以用溫水和溫和的洗滌劑手洗。之 重要提示:暖碟櫃可承受25公升的最大載荷。... -
Page 12: Warranty Terms & Conditions
- the serial number is modified, damaged or removed from the product. - 機身編號被擅自塗改、破壞或刪除。 4. German Pool will, at its discretion, repair or replace any 4. 總代理有權選擇維修或更換配件或其損壞部份。 defective part. 5. This warranty will be void if there is any transfer of 5. - Page 13 Fax:+86 757 2980 8318 HONG KONG TOP BRAND TEN YEAR ACHIEVEMENT AWARD © All rights reserved. Copying, reproducing or using the contents of this manual is not allowed without prior authorization from German Pool, violators will be prosecuted. www.germanpool.com P.24...
Need help?
Do you have a question about the DWR-2504 and is the answer not in the manual?
Questions and answers