Advertisement
Quick Links
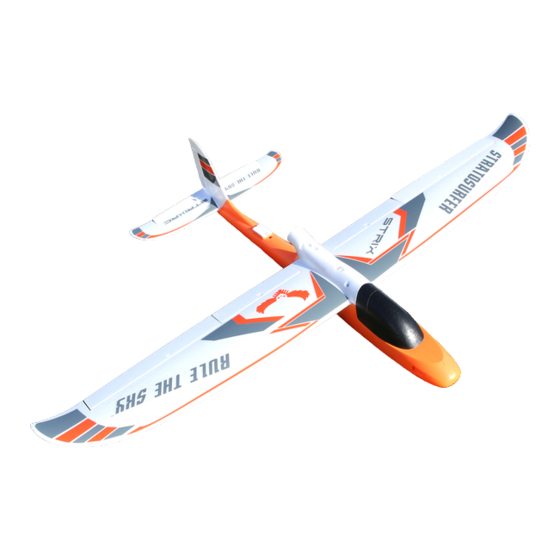
Items required for completion of Sky Surfer:
• Medium CA glue (Bob Smith Insta-Cure+, ZAP, etc.)
• Blue thread lock compound
• Small Phillips screwdriver
• Metric ruler
• 8 AA batteries
Open the box and verify all the components
listed are included.
1
2
3
5
4
8
Sky Surfer Assembly Instructions
6
7
9 10 11
© 2011/2012 Ready Made RC, LLC
14
1
1
2
3
1. Main wings
2. Main wing spar
3. Fuselage
4. Instruction manual
5. Battery charger
6. Battery charger leads
7. Propeller
8. 3S LiPo battery
9. Servo Y-connector
10. 2 of each: control horns,
connectors, screws, nuts
11. Velcro
12. Transmitter (receiver in
battery compartment)
13. Horizontal stabilizer
14. Vertical stabilizer
Advertisement

Subscribe to Our Youtube Channel
Related Manuals for ReadyMadeRC Sky Surfer


Summary of Contents for ReadyMadeRC Sky Surfer
- Page 1 Sky Surfer Assembly Instructions Items required for completion of Sky Surfer: • Medium CA glue (Bob Smith Insta-Cure+, ZAP, etc.) • Blue thread lock compound • Small Phillips screwdriver • Metric ruler • 8 AA batteries Open the box and verify all the components listed are included.
- Page 2 Dispose of the instruction manual (4). Caution: Using with a chimney starter for grilling is not recommended as the stench from the paper is overwhelming. Pull the receiver out of the battery compartment in the transmitter (12). While the battery cover is off, install 8 AA batteries following the polarity shown in the compartment.
- Page 3 Connect the charger leads (6) to the battery charger (5). To charge the LiPo battery (8), connect the charger leads to the terminals of a car battery. The red lead clamps to the positive terminal and the black lead clamps to the negative terminal.
- Page 4 In a few cases, the control surfaces may be very stiff and can cause premature servo failure. To alleviate the problem, flex the control surfaces back and forth gently about 5 times. This should be performed for the rudder, elevator, and both ailerons. The images above and to the right show the rudder being flexed.
- Page 5 Note: Before gluing the stabilizers in place, pre-fit each to familiarize yourself with how it should be aligned. At the end of the fuselage (3), add a thin layer of CA to the three labeled surfaces to glue the horizontal stabilizer (13) to the fuselage. Position the horizontal stabilizer to the fuselage where the CA was previously applied.
- Page 6 To attach the control horns (10) to the control rods, make sure you have two each of the screws, rod connectors, control horns, and nuts. Although not a requirement, it is highly recommended to use thread locker on the nut to keep it from coming loose due to vibrations.
- Page 7 As an important rule for any r/c system, always turn on the transmitter before plugging in power to the airplane. A common rule is the transmitter on first, off last. Make sure the throttle stick (left) is in the lowest position. Caution: If the prop has already been installed, remove the prop for safety purposes during these steps.
- Page 8 Thread the control rod through the rod connector that was installed on the control horn previously. The rod should pass over the top of the horn. Note: the flat edge of the control horn should be facing the front of the plane. Apply a thin layer of CA to the rudder where the control horn will be installed.
- Page 9 Remove the tape and packaging material from the main wings (1). Install the main wing spar (2) into one of the wings and install the wing into the fuselage. Route the servo wire through the hole in the fuselage. Install the other wing into the fuselage. The servo wire for the second wing should be routed into the fuselage before the wing is fully installed.
- Page 10 Install the aileron Y-connector into channel 1, following the same convention as before on the orientation of the wires. Once again, turn on the transmitter, then apply power to the ESC by plugging in the battery. After the ESC arms, take a look at the control surfaces (mainly the ailerons) to see if they line up properly.
- Page 11 Connect the rod end back to the control horn and check the alignment to ensure it lines up closely. Iterate through the previous two steps until it is aligned as close as possible. Disconnect the battery from the ESC. Apply the small velcro to the ESC and receiver.
- Page 12 To install the propeller (7), remove the end of the prop adapter. Install the propeller onto the motor shaft. Verify the propeller has been installed properly. The part of the propeller closest to the hub that facing the front of the plane should be rounded.
- Page 13 The center of gravity is measured 60 mm back from the leading edge of the main wing. This is the location right next to the fuselage. Make a small mark 60 mm back on both sides of the airplane. Once everything has been installed and is ready to go, including the canopy, the center of gravity should be checked.
- Page 14 BIND INSTRUCTIONS: This is a bind plug. It pulls the signal pin to ground so the receiver can be bound to the transmitter. In almost every case, there should not be a reason to re-bind as the transmitter and receiver are bound together from the factory.
Need help?
Do you have a question about the Sky Surfer and is the answer not in the manual?
Questions and answers