Table of Contents
Advertisement
Quick Links
Advertisement
Table of Contents

Related Manuals for ERA Protect 20275


Summary of Contents for ERA Protect 20275
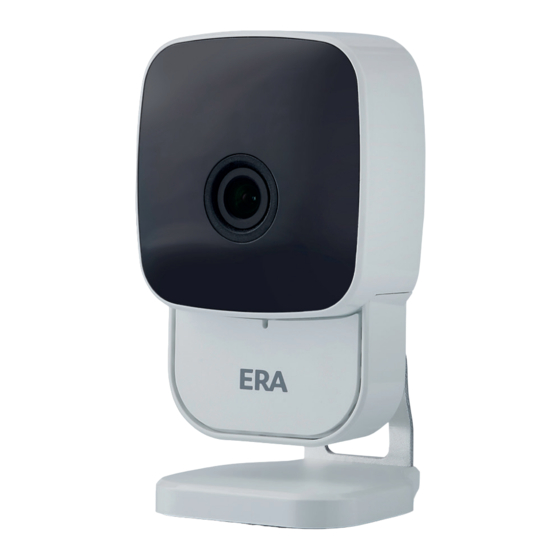
- Page 1 SERIOUS ABOUT SECURITY Unique Camera INDOOR WIFI CAMERA QUICK START GUIDE...
-
Page 2: Table Of Contents
TABLE OF CONTENT About your Indoor WiFi Camera What’s in the box Exploring your ERA Protect Camera Getting the best from your Indoor Camera ERA Protect Indoor Camera placement tips Motion alert and notification tips Setting up your Camera LED status Specifications... -
Page 3: About Your Indoor Wifi Camera
Your camera is protected using 128 bit SSL security encryption. Even if your camera is vandalised or stolen, your video clips are stored in the ERA cloud. Save your clips for 30 days by upgrading to ERA Protect Plus. EASY TO USE Your camera can be accessed using the ERA Protect app on your smartphone or tablet. -
Page 4: What's In The Box
WHAT’S IN THE BOX Camera Power Supply Fixing Kit & Stand Reset Pin Window Sticker Quick Start Guide QUICK START GUIDE Page 4... -
Page 5: Exploring Your Era Protect Camera
EXPLORING YOUR CAMERA Night vision LED’s Light sensor Speaker Status Lens Magnet Microphone connector for stand Micro USB power connector Stand Page 5... -
Page 6: Getting The Best From Your Indoor Camera
GETTING THE BEST FROM YOUR INDOOR CAMERA Questions you may want to consider What do I want to see in the field of view? What kind of scenarios do I want to trigger a motion recording? When do I want to have motion recorded? Do I want a notification sent to me when motion recording is triggered? Make sure when setting up your Camera, you:... -
Page 7: Era Protect Indoor Camera Placement Tips
Outside of this range, we recommend using a WiFi signal extender or repeater. • The ERA Protect Indoor Camera is only compatible with the 2.4 GHz WiFi frequency. • Make sure your camera is securely attached to the magnetic stand. -
Page 8: Motion Alert And Notification Tips
MOTION ALERT & NOTIFICATION TIPS Your ERA Protect Indoor Camera uses a sophisticated motion algorithm which detects when motion is happening, and can alert you instantly by push notification. To receive alerts every time motion is detected*, you may wish to consider... -
Page 9: Setting Up Your Camera
SETTING UP YOUR CAMERA It is important your ERA Indoor Camera Set up is configured according to your individual requirements. Once you have completed the set up process it is advisable to test the camera to ensure it is working. -
Page 10: Led Status
LED STATUS Solid LED and 4 Night Vision LED's – Booting Up. Red Light Flashing (3 pulses) – Camera in Pairing Mode. Continuous Red Light Flashing - Firmware update. Red light flash – Will flash once when motion is detected, or settings have been changed. -
Page 11: Create Your Account
Download the ERA Protect app on your smartphone (search for “ERA Protect” on Google Play or the iOS App Store) then follow the steps on the screen. If you’re having problems finding the app please scan the QR code below with your smartphone. -
Page 12: Adding Your Indoor Camera To Your
Power on the camera. Wait for the camera to boot up, and then the status LED to pulse three times. Go to the ERA Protect app, and select Add new from the Camera dashboard. Select the ERA Protect Indoor Camera. -
Page 13: Factory Reset
FACTORY RESET To factory reset your Camera, please do the following: Open the ERA Protect app. From the menu select Settings. Choose your Camera. Scroll to the bottom, and press Delete Camera. Press OK to confirm you want to delete the Camera. -
Page 14: Need Support
NEED SUPPORT? Your ERA product is designed to be up and running in minutes. Please contact us for assistance or support. A more detailed installation and operation manual is available on our website. www.eraprotect.com Visit 0345 257 2500 or phone us... -
Page 15: Era Protect Product Guarantee
ERA PROTECT PRODUCT GUARANTEE We at ERA firmly believe in the quality of our goods. Our technology achieves outstanding performance and durability and we can therefore offer, in addition to your statutory rights, an additional limited guarantee. In the event of any... - Page 16 ERA Home Security Ltd Valiant Way, Wolverhampton, West Midlands, WV9 5GB Customer Helpline: 0345 257 2500 www.eraprotect.com...
Need help?
Do you have a question about the Protect 20275 and is the answer not in the manual?
Questions and answers