Table of Contents
Advertisement
Available languages
Available languages
Quick Links
Advertisement
Table of Contents

Related Manuals for Elan 83562


Summary of Contents for Elan 83562
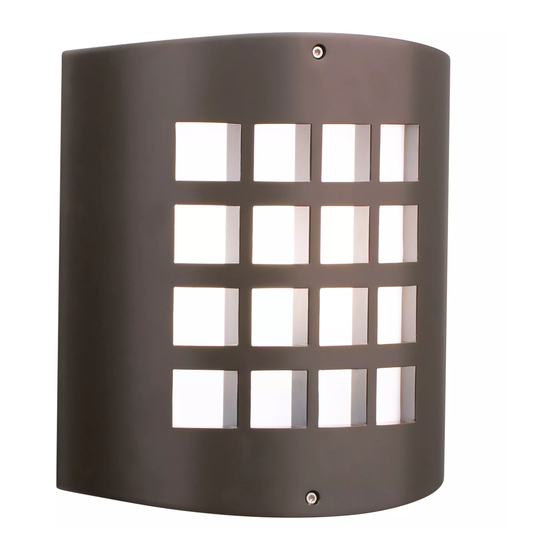
- Page 1 1-LIGHT OUTDOOR WALL FIXTURE MODEL #83562 Français p. 9 ATTACH YOUR RECEIPT HERE Serial Number Purchase Date Questions, problems, missing parts? Before returning to your retailer, call our customer service department at 1-855-226-7169, 8 a.m. - 4 p.m., EST, Monday - Friday.
-
Page 2: Package Contents
PACKAGE CONTENTS PART DESCRIPTION PART DESCRIPTION Fixture Body Hex Nut Mounting Bracket Rubber Seal Socket Diffuser Threaded Nipple Shade... -
Page 3: Hardware Contents
HARDWARE CONTENTS Threaded Allen Wire Screw Short Connector Qty: 1 Machine Qty: 2 Qty: 3 Diffuser Screw Screw Qty: 2 Qty: 4 Wrench Qty: 1 SAFETY INFORMATION Please read and understand this entire manual before attempting to assemble, operate or install the product. - Page 4 ASSEMBLY INSTRUCTIONS 1. Orient mounting bracket (B) so the raised center portion protrudes into the outlet box (not included). Remove hex nut (E) from threaded nipple (D) before screwing threaded nipple (D) into the mounting bracket (B). Temporally pass fixture body (A) over the threaded nipple (D). Adjust threaded nipple (D) until 1/4th of the threads are exposed past the fixture body (A).
- Page 5 ASSEMBLY INSTRUCTIONS Pass fixture body (A) over the threaded nipple (D) protruding from the mounting bracket (B) and secure in place with threaded cap (CC). Hardware Used Threaded Insert 60-watt max. medium-base bulb (not included) into socket (C). Insert the rubber seal (F) into the cut out on the fixture body (A) to make the fixture water tight.
-
Page 6: Care And Maintenance
ASSEMBLY INSTRUCTIONS Raise shade (H) to the fixture body (A) and secure with allen screws (EE). An allen wrench (FF) has been provided to help create a tight seal. Hardware Used Allen Screw Wrench CARE AND MAINTENANCE • Always be certain that electric current is turned off before cleaning this item. •... -
Page 7: Warranty
IMPLIED, INCLUDING THOSE OF MERCHANTABILITY, FITNESS FOR ANY PARTICULAR PURPOSE OR INFRINGEMENT. ORIGINAL PURCHASER SHALL IN NO EVENT BE ENTITLED TO, AND ELAN LIGHTING SHALL NOT BE LIABLE FOR, INDIRECT, SPECIAL, INCIDENTAL OR CONSEQUENTIAL DAMAGES OF ANY NATURE, INCLUDING, BUT NOT LIMITED TO LOSS OF PROFIT, PROMOTIONAL AND/OR MANUFACTURING EXPENSES, OVERHEAD, INJURY TO REPUTATION AND/OR LOSS OF CUSTOMERS. -
Page 8: Replacement Parts List
REPLACEMENT PARTS LIST For replacement parts, call our customer service department at 1-855-226-7169, 8 a.m. - 4 p.m., EST, Monday - Friday. PART DESCRIPTION PART # Mounting Bracket XBAR01 Threaded Nipple TN18200 Hex Nut NUT18 Wire Connector WC001 Short Machine Screw SCR832X050 Threaded Cap TC83562... - Page 9 APPLIQUE MURALE D'EXTÉRIEUR À 1 LUMIÈRE MODÈLE #83562 JOIGNEZ VOTRE REÇU ICI Numéro de série Des questions, des problèmes, des pièces manquantes? Avant de retourner l’article au détaillant, appelez notre service à la clientèle au 1 855 226-7169, entre 8 h et 16 h (HNE),...
-
Page 10: Contenu De L'emballage
CONTENU DE L’EMBALLAGE PIÈCE DESCRIPTION QTÈ PIÈCE DESCRIPTION QTÈ Corps du luminaire Écrou hexagonal Support de fixation Joint en caoutchouc Douille Diffuseur Raccord fileté Abat-jour... -
Page 11: Quincaillerie Incluse
QUINCAILLERIE INCLUSE Capuchon Capuchon fileté de connexion Allen Vis à Qté : 1 Qté : 3 métaux Qté : 2 Vis du courtes diffuseur Qté : 2 Qté : 4 Clé Qté : 1 CONSIGNES DE SÉCURITÉ Veuillez vous assurer de lire et de comprendre l’intégralité du présent guide avant d’assembler, d’utiliser ou d’installer ce produit. -
Page 12: Instructions Pour L'assemblage
INSTRUCTIONS POUR L'ASSEMBLAGE 1. Orientez le support de fixation (B) de sorte que la partie centrale surélevée fasse saillie dans la boîte de sortie (non fournie). Retirez l'écrou hexagonal (E) du raccord fileté (D) avant de visser le raccord fileté (D) dans le support de fixation (B). - Page 13 INSTRUCTIONS POUR L'ASSEMBLAGE Enfilez le corps du luminaire (A) sur le raccord fileté (D) sortant du support de fixation (B) et fixez-le à l'aide du capuchon fileté (CC). Quincaillerie utilisée Capuchon fileté IInsérez une ampoule à culot moyen de 60 watts max.
-
Page 14: Entretien
INSTRUCTIONS POUR L'ASSEMBLAGE Placez l'abat-jour (H) sur le corps du luminaire (A) et fixez à l'aide des vis Allen (EE). Une clé Allen (FF) est fournie pour bien serrer afin d'obtenir une fermeture étanche. Quincaillerie utilisée Vis Allen Clé ENTRETIEN •... -
Page 15: Garantie
GARANTIE élan Lighting garantit que ses produits seront libres de tout vice de fabrication ou défaut matériel pendant un (1) an à compter de la date d'achat par l'acheteur initial. Pour remplacer un produit porteur d'un défaut couvert par la garantie, l'acheteur initial doit retourner tout produit ou pièce supposés défectueux au distributeur élan agréé... -
Page 16: Liste Des Pièces De Rechange
LISTE DES PIÈCES DE RECHANGE Pour obtenir des pièces de rechange, appelez notre service à la clientèle au 1 855 226-7169, entre 8 h et 16 h (HNE), du lundi au vendredi. PIÈCE Nº DE PIÈCE DESCRIPTION Support de fixation XBAR01 Raccord fileté...
Need help?
Do you have a question about the 83562 and is the answer not in the manual?
Questions and answers