Table of Contents
Advertisement
Advertisement
Table of Contents

Subscribe to Our Youtube Channel
Related Manuals for AMG EVOS fl


Summary of Contents for AMG EVOS fl
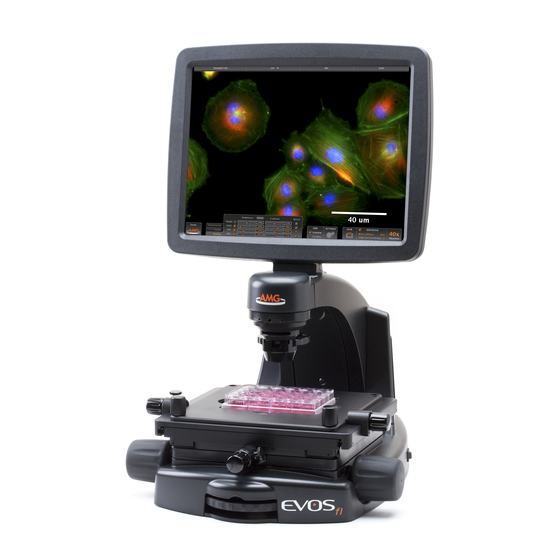
- Page 1 USER GUIDE USER GUIDE Digital Inverted Microscope Digital Inverted Microscope for Fluorescence and Fluorescence Transmitted Light Applications Transmitted Light Applications amgmicro.com | info@amgmicro.com | 866-614-4022 (01-425-368-0444 outside the U.S.)
-
Page 2: Table Of Contents
Mechanical Issues ............33 QUICK-REFERENCE DIAGRAMS ........8 CUSTOMER & TECHNICAL SERVICE ......34 BASIC OPERATION ............9 AMG Contact Information ........... 34 Fluorescence Operation ..........9 EVOS Distributor Information ........34 Brightfield or Phase Contrast Operation ....11 Service and Warranty Information ......34 ADVANCED OPERATION ..........13... -
Page 3: Setup
Contact your distributor if anything is missing. Note: If you do not have your distributor information, you can look it up at the AMG website or contact AMG Customer Service (see p. 34). EVOS microscope, per order LED light cube lock LED light cubes (in place under fl... -
Page 4: Moving/Transporting Evos
SETUP MOVING/TRANSPORTING EVOS ALWAYS lock stage with the stage lock pin before moving microscope. When transporting or shipping EVOS , secure the LED fl light cubes in place with the light cube lock Lift the microscope by grasping it firmly with both hands under the support arm , balancing the weight Stage lock pin... -
Page 5: Led Light Cubes
SETUP LED LIGHT CUBES IMPORTANT! Before changing light channels, ALWAYS be sure the light cube lock has been removed. Applying force to the light cube selection lever while the lock is in place may seriously damage the mechanism. This type of damage is not covered by the manufacturer’s warranty. -
Page 6: Uv Shield
SETUP UV SHIELD WARNING! UV LIGHT HAZARD! This microscope uses a Class 3B ultraviolet LED for the DAPI channel. Avoid exposure to the UV beam and use protective shields. NEVER look directly at light. For your protection, follow this procedure to install the UV safety shield before using the DAPI fluorescence channel. -
Page 7: Installing Evos In A Cell Culture Hood
SETUP INSTALLING EVOS IN A CELL CULTURE HOOD EVOS’ small footprint, simple power connection, and easily-viewed display make it quick to install and convenient to use in a cell culture hood. DIMENSIONS EVOS will fit in cell culture hoods that are at least 20 ½ inches (520 mm) deep. -
Page 8: Quick-Reference Diagrams
QUICK-REFERENCE DIAGRAMS Channel indicator bar 2. Active channel (highlighted) 3. Login button 4. Control bar 5. Control bar tabs: Find & Focus Actual Overlay 6. LIGHT ON/OFF button Illumination slider 8. Exposure time slider 9. Image capture button 10. Color/boost options 11. -
Page 9: Basic Operation
BASIC OPERATION The EVOS microscope uses both mechanical and software fl controls for operation. Mechanical controls include the stage X-Y axis knobs, focusing knobs, objective selection wheel, and the light cube selection lever. Software controls are located in the control bar at the bottom of the screen. - Page 10 BASIC OPERATION Fluorescence Operation, continued Note: When the Color option is off, overexposed pixels will appear red. Dim the illumination until the red highlights disappear to get the maximum level of brightness without any overexposed areas. See p. 27 for instructions on changing the overexposed pixel display.
-
Page 11: Brightfield Or Phase Contrast Operation
BASIC OPERATION BRIGHTFIELD OR PHASE CONTRAST OPERATION Turn on the microscope using the power switch the right side of the microscope base. Plug a USB flash drive into one of the USB ports the right side of the microscope arm. Power switch and data ports Light cube selection lever... - Page 12 BASIC OPERATION Brightfield or Phase Contrast Operation, continued When switching from fluorescence to transmitted light with the light shield box on the stage, remove the light shield box cover so the light from the condenser can pass through. Adjust the illumination intensity if necessary, using the Illumination slider on the control bar or the mouse scroll wheel.
-
Page 13: Advanced Operation
LOG IN WITH AN EXISTING PROFILE Click the login button at the bottom left of the screen. (This is the AMG logo with the current user profile indicated above.) Select the desired user profile and click OK Note: No password is necessary to log in. -
Page 14: Saving Images & Working With Files
ADVANCED OPERATION SAVING IMAGES & WORKING WITH FILES When you click the Save button , the Save File dialog box appears. If there is no USB flash drive or network connection in place, an information message will appear. Click the Cancel button to clear this message. -
Page 15: Using The Quicksave Option
ADVANCED OPERATION USING THE QUICKSAVE OPTION QuickSave allows you to save multiple images under a single base file name. Simply specify the settings and select the QuickSave option (in the Overlay tab), and EVOS will save each image with a single click of the Save button. Settings button and Save button Click the Settings button... -
Page 16: Recording Time Lapse Images
ADVANCED OPERATION RECORDING TIME LAPSE IMAGES With EVOS, you can set up your cells and program the microscope to record time lapse images. To use this feature, open the Time Lapse tool in the toolbar, specify the settings, and click Start. You may pause or cancel sessions in progress. START A TIME LAPSE SESSION X-axis and Y-axis stage brakes Once the specimen is focused and ready, tighten the... -
Page 17: Using The Transfection Tool
ADVANCED OPERATION USING THE TRANSFECTION TOOL EVOS’ Transfection tool expedites the capture and overlay of images for transfection analysis. Choose a light cube, focus on the sample, and adjust the lighting. See steps 1-13 of Fluorescence Operation (p. 9) for detailed instructions. Open the Toolbar and expand the Transfection tool Note: The “Pause after first image”... -
Page 18: Counting Cells
ADVANCED OPERATION COUNTING CELLS The Count tool streamlines cell counting by marking items with up to 6 labels onscreen. As you tag items, EVOS will keep a running tally of counts with percentages for each label assigned. Document your results simply by saving the tagged image, with the Count tool displaying the totals. -
Page 19: Reviewing Images
ADVANCED OPERATION REVIEWING IMAGES The Image Review tool allows you to review still images or play video files from the USB drive or network connection. You may also use this tool to rename or delete saved files. Open the Toolbar and expand the Image Review tool The preview list displays thumbnail images for all... -
Page 20: Using Digital Zoom
ADVANCED OPERATION USING DIGITAL ZOOM EVOS can zoom the image onscreen, quickly allowing a closer look. Simply double-click live or captured images to zoom them. In the images below, the numbered arrows indicate click points. Also note that the zoom factor display appears over the selected objective display. -
Page 21: Connecting Evos To A Network
Be sure you are logged in under your own EVOS user ID. The current user ID is displayed above the AMG logo in the bottom left corner of the screen. See Logging In/ Creating New User Logins (p. 13) for more information. - Page 22 ADVANCED OPERATION Connect EVOS to a Network, continued The upper list box of the Network page will display the top level (available domains) of the Windows/SMB network file tree. Click the triangle icon, or double-click the domain name, to expand a domain and display the available servers Note: If a domain, server, or shared file appears on the...
-
Page 23: Changing Led Light Cubes
ADVANCED OPERATION CHANGING LED LIGHT CUBES INSTALL LIGHT CUBE Optional LED light cubes are available; see PARTS & ACCESSORIES (p. 35) for details. Each LED light cube is coded so EVOS will automatically recognize it in any position. WARNING! UV LIGHT HAZARD! This microscope uses a Class 3B ultraviolet LED for the DAPI channel. -
Page 24: Updating Software
Download the current user guide for EVOS from the fl AMG website. The updated user guide covers the new software functionality when features are added. Alternatively, you can get the latest software and Settings: Service Tab documentation updates from your local EVOS distributor. -
Page 25: Controls Glossary
Lever position 4 (DAPI in example; closest to back) See also Light Cube Selection Lever (p. 30). LOGIN BUTTON The Login button (AMG logo, bottom left) allows for logging in and creating or changing user profiles. This Login button (set to Guest profile) button also displays the current user profile. - Page 26 CONTROLS GLOSSARY ACTUAL TAB Use the Actual tab with fluorescence channels to view the image at the actual exposure time used for high- Actual tab quality image capture. With Actual tab selected, EVOS responds more slowly to stage position and focus changes, depending on the user-selected exposure time for the camera.
- Page 27 CONTROLS GLOSSARY IMAGE REVIEW TOOL The Image Review tool allows you to review still images or play video files from the USB drive or network connection. You may also use this tool to rename or delete saved files. See Reviewing Images (p. 19) for more details. SETTINGS BUTTON The Settings button (bottom center) opens the Image Review...
- Page 28 CONTROLS GLOSSARY SAVE FILE DIALOG BOX The Save File dialog box (popup) allows options for naming and filing captured images. The following options are available in the Save File dialog box: Save File Name text field: Click to enter a file name. New Folder...
-
Page 29: Mechanical Controls
CONTROLS GLOSSARY MECHANICAL CONTROLS This controls glossary is not alphabetized. Mechanical controls are listed in the order they are normally used. POWER INPUT JACK Plug the power adaptor into the power input jack POWER SWITCH Set the power switch to “—” to turn the microscope on or “O”... - Page 30 CONTROLS GLOSSARY LIGHT CUBE SELECTION LEVER Move the light cube selection lever to change light channels. The lever will click into place for each of the following positions: Position (closest to front) Position (second from front) Position (second position from back) Position (furthest position to the back) Light cube selection lever in position...
-
Page 31: Care & Maintenance
If liquid spills on the microscope, turn off the power immediately and wipe dry. Do not exchange objectives between microscopes unless you know that the components have been approved and recommended by AMG. After using, cover the microscope with the supplied dust cover. -
Page 32: Troubleshooting
TROUBLESHOOTING IMAGE QUALITY ISSUES PROBLEM POSSIBLE SOLUTIONS Misaligned overlay image Re-capture images in each channel. Set the phase annuli selector to the BF position. Transmitted light image is too dim Remove condenser slider, if one is in place. (at higher magnifications) Remove light shield box, if it is in place. -
Page 33: Mechanical Issues
Tighten the stage brakes (on the stage knobs) as desired to increase tension. Note: For additional technical support, contact your local EVOS distributor. If you do not have your distributor information, you can look it up at the AMG website or contact AMG Customer Service (see p. 34). www.amgmicro.com EVOS User Guide fl... -
Page 34: Customer & Technical Service
No part of this document may be reproduced, stored in a retrieval system, or transmitted in any form or by any means for reasons other than personal use without the express written consent of AMG. Information in this document is provided in connection with AMG products. -
Page 35: Parts & Accessories
AMEP-4688 Note: To place an order, contact your local EVOS distributor. If you do not have your distributor information, please look it up at the AMG website or contact AMG Customer Service (see p. 34). www.amgmicro.com EVOS User Guide fl... -
Page 36: Specifications
SPECIFICATIONS Optics Infinity-corrected optical system; RMS-threaded objectives with 45 mm parfocal distance LWD; actual objectives included vary per order. Part Number Mag. Description N.A. W.D. (mm) AMEP-4601 Plan N INF/- FN22 0.06 AMEP-4602 UPlan N Ph INF/-/FN22 0.13 Objectives AMEP-4622 PlanFluor INF/1.2 0.13 19.7... - Page 37 www.amgmicro.com | info@amgmicro.com | 866-614-4022 (01-425-368-0444 outside the US)
Need help?
Do you have a question about the EVOS fl and is the answer not in the manual?
Questions and answers