Table of Contents
Advertisement
Available languages
Available languages
Quick Links
Advertisement
Table of Contents

Subscribe to Our Youtube Channel
Related Manuals for Nilox 17NXGCON38001

Summary of Contents for Nilox 17NXGCON38001
- Page 1 MANUALE UTENTE...
-
Page 2: Garanzia
Il vostro UPS è coperto da una garanzia di due anni sulle parti elettroniche. La batteria ha una garanzia massima di sei mesi. Verificare sul sito http://www.nilox.com i centri assistenza più vicini. Avvertenze importanti per la sicurezza (CONSERVARE QUESTE ISTRUZIONI IN UN LUOGO SICURO) ATTENZIONE! Per prevenire il rischio di incendi o scosse elettriche, installare sempre l'unità... - Page 3 ATTENZIONE! La manutenzione delle batterie deve essere effettuata da personale qualificato, esperto nell'uso delle batterie e a conoscenza dei rischi. Non permettere al personale non autorizzato di intervenire sulle batterie. ATTENZIONE! Questo UPS non è progettato per l’uso all’aperto. ATTENZIONE! Installare sempre lo stesso numero e tipo di batterie sostitutive.
-
Page 4: Installazione
Manuale dell’utente 2 cavi IEC 1 cavo di alimentazione AC per l’ingresso (non presente nel modello 17NXGCON38001 da 1KVA) Software di comunicazione UPS con cavo RS232/USB (UPSilon 2K) Kit di accessori per montaggio Tower/Rack (illustrato qui di seguito):... - Page 5 Considerazioni sull’Installazione Rack Seguire attentamente i passaggi seguenti per un’installazione in modalità Rack dell’apparato. L’installazione RACK, dato il peso dell’apparato, richiede necessariamente che questo venga appoggiato su un ripiano dell’armadio. Rivolgersi al proprio fornitore di armadi Rack per acquistare tale ripiano. Step1: Step2: Step3:...
- Page 6 Pannello Posteriore 1KVA 2KVA 3KVA N° Significato Ingresso EPO per lo spegnimento istantaneo di emergenza. Quando il circuito viene chiuso, immediatamente l’UPS smette di alimentare tutte le prese di uscita, emette un fischio continuo, la scritta ALARM inizia a lampeggiare ed il LED Fault viene acceso di colore rosso fisso. Viene mostrato il codice errore 07.
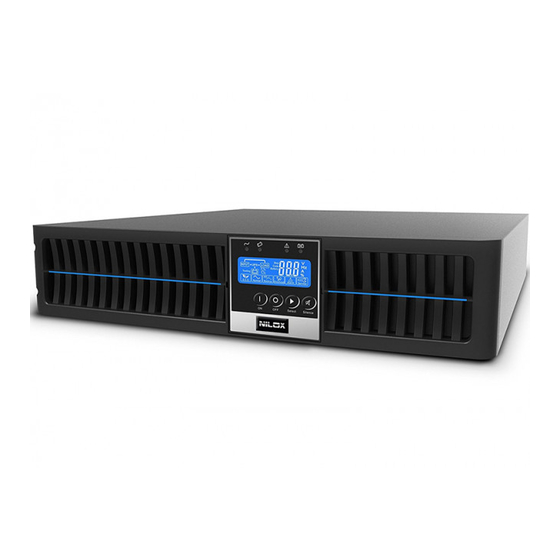
- Page 7 Presa di alimentazione per il collegamento alla rete elettrica 220V/50Hz. AC Input Breaker. Output Breaker. Disponibili nel solo modello 17NXGCON12001. 10/11 Prese di uscita. Nel solo modello 17NXGCON12001 sono presenti 2 prese di uscita programmabili. Le immagini potrebbero essere leggermenti differenti dal prodotto reale. Descrizione LCD Tasto di accensione.
- Page 8 Per attivare la modalità ByPass premere contemporaneamente, per 3 secondi, i tasti Il dispositivo segnalerà la modalità di funzionamento nel Power Flow Chart ed emetterà immediatamente una doppia segnalazione acustica. Dalla modalità ByPass, seguendo la stessa procedura, è possibile tornare alla modalità di funzionamento normale (il voltaggio in ingresso deve però essere entro i limiti di tolleranza).
- Page 9 Avvio UPS Avvio in modalità normale Collegare l’UPS alla presa a muro (verificare che la presa sia a massa). L’UPS partirà immediatamente facendo un test iniziale, di diversi secondi, di autodiagnostica. Tutti LED verranno inizialmente accesi per indicare che sia l’alimentazione di rete che il ByPass funzionano correttamente.
- Page 10 Avvio in modalità batteria (Avvio a freddo / Cold Start) Tenere premuto per circa 3 secondi il pulsante ON di avvio dell’UPS per accendere l’unità. L’avvisatore acustico suonerà due volte. Rilasciare il pulsante ON ed entro 10 secondi ripetere la procedura, tenendo premuto di nuovo il pulsante ON di avvio dell’UPS per circa 3 secondi.
- Page 11 Spegnere l’UPS Tenere premuto il tasto per circa 3 secondi sino a che il dispositivo non emette un doppio beep. Il carico non verrà più alimentato (l'inverter è disattivato). Il dispositivo entra in modalità standby, le ventole continueranno a funzionare e le batterie saranno caricate, se la rete elettrica è disponibile. Se invece la rete è assente, l’UPS, dopo alcuni secondi, si spegnerà...
- Page 12 Configurazione Avanzata via RS232 (opzionale) Scaricare dal sito www.nilox.com (alla pagina di prodotto) e lanciare (in ambienti Windows) il software “UPS Setting Tool”. Immediatamente verrà visualizzata la schermata sotto riportata. Selezionare la COM Port, tramite la combo box, e cliccare su Connect. Dopo qualche secondo verrà mostrata la scritta Connected. Cliccare poi su Read per visualizzare i parametri di funzionamento del dispositivo.
- Page 13 Prese programmabili Il modello 17NXGCON12001 è equipaggiato con 2 blocchi di prese programmabili che possono essere utilizzate per alimentare i carichi meno critici. Queste prese infatti si possono disabilitare per interrompere l’alimentazione ai carichi meno critici quando è attiva la modalità backup o in condizioni di sovraccarico, al fine di aumentare l’autonomia dei carichi maggiormente importanti connessi all’UPS.
-
Page 14: Battery Bank
Battery Bank Nei modelli 17NXGCON11001(2KVA) / 17NXGCON12001(3KVA) è possibile, utilizzando l’apposito connettore, aggiungere sino a 2 Battery Bank esterni. Il Battery Bank permette di estendere, in maniera importante, l’autonomia operativa in caso di prolungati blackout. Modello 17NXBAON12001 17NXBAON11001 Stripes Sino a 2 stripes da 6 batterie l’una Sino a 2 stripes da 4 batterie l’una (2 x 72V) (2 x 48V) - Page 15 Installazione RACK Installazione Desktop B1/B2/S1/S2 A1/S3 Utilizzare Utilizzare Pannello Anteriore / Posteriore Rimuovere le viti di fissaggio (identificativo 1) poste nel pannello frontale ed installare le batterie (12V@7Ah). Connettore di ingresso (identificativo 2). Questo connettore va usato quando è presente un secondo Battery Bank, oppure quando è...
- Page 16 In figura un esempio di installazione: Il numero massimo di Battery Bank utilizzabili è di 2 unità. Questo permette, nel caso in cui ogni Battery Bank disponga del numero massimo di stripes (2), di quintuplicare la durata del tempo di backup normalmente offerta dal solo UPS.
- Page 17 Nella dotazione dell’UPS sono previsti sia il cavo RS232 che il cavo USB. Il software accluso al dispositivo è prodotto da Megatec. Il software UPSilon2000, ove presente, è dato in licenza. Nilox non offrirà supporto sull’utilizzo né potrà essere ritenuta responsabile per malfunzionamenti e/o altre problematiche da questo generate.
-
Page 18: Sostituzione Batterie
Le batterie utilizzate sono 2 per il modello da 1KVA (17NXGCON38001 ), 4 per il modello da 2KVA (17NXGCON11001) o 6 per il modello da 3KVA (17NXGCON12001), da 12V/7Ah rispettivamente. - Page 19 USER MANUAL...
-
Page 20: Warranty
Thank you for purchasing a Nilox UPS Nilox. Please carefully read the installation instructions and security warnings ATTENTION Please use the UPS in dry places only. Do not use it outdoors. UPS contains high voltage batteries, which can cause serious problems in case of contact. - Page 21 ATTENTION! Only qualified staff, experts in battery usage and informed of the risks, can perform battery maintenance. Do not permit unauthorised personnel to work on batteries. ATTENTION! This UPS is not designed for outdoor usage. ATTENTION! Always install the same number and type of substitute batteries. ATTENTION! Internal battery voltage is 12V DC.
-
Page 22: Installation
Gently remove the UPS from the box. Check box contents. User manual 2 IEC cables 1 AC power cable (not supplied with 1KVA 17NXGCON38001 model) UPS communication software with RS232/USB (UPSilon 2K) cable. Tower Rack assembly accessory kit (illustrated below):... - Page 23 Considerations on Rack installation Carefully follow the steps below to install the device in Rack mode. Rack installation, given the weight of the equipment, must be placed on a shelf rack. Contact the rack manufacturer to purchase this shelf. Step1: Step2: Step3:...
- Page 24 Back panel 1KVA 2KVA 3KVA Meaning EPO input for emergency shutdown. When the circuit is closed, the UPS immediately stops powering all output outlets, emits a continuous whistle, the word ALARM starts flashing and Fault LED Fault turns red. Error code 07 appears. To exit the generated state, turn the device off.
- Page 25 Images may slightly differ from the real product. LCD Description On key. Press (and hold down) for several seconds until the system beeps twice. Off key. Press (and hold down) for several seconds until the system beeps twice. Press (with the UPS on) and hold down for several seconds until the UPS beeps twice to start the self-test mode.
- Page 26 To start ByPass mode, press and hold down keys for three seconds simultaneously. The device will indicate Power Flow Chart operating mode and beep twice. You can return to Normal operating mode from ByPass mode, following the same procedure (input voltage must be within tolerance limits).
- Page 27 UPS start Start in normal mode Connect the UPS to the wall outlet (make sure the outlet is grounded). The UPS will immediately start running a preliminary self-diagnostics test that lasts several seconds. All LED will initially be on to indicate that power is on and that ByPass is correctly operating.
- Page 28 Battery mode start (Cold Start) Hold down the UPS ON button for about 3 seconds to turn on the unit. The buzzer will beep twice. Release the ON button and repeat the procedure within 10 seconds, holding down the ON button again at UPS start for about 3 seconds.
- Page 29 UPS shutdown Press the button and hold down for 3 seconds until the device beeps twice. The load will no longer be powered (inverter off). The device enters standby mode, the fans will continue to run and the batteries will be charged if the mains are available.
- Page 30 Advanced settings via RS232 (optional) Visit www.nilox.com (product page) and download and launch (in Windows environment) the “UPS Setting Tool” software. The following screen is immediately displayed. Select the COM Port from the combo box and click Connect. Connected will appear after several seconds. Click Read to view device operating settings System settings ...
- Page 31 Programmable outlets The 17NXGCON12001 model is equipped with 2 programmable outlet blocks that can be used to power less critical loads. In fact, these outlets can be disabled to cut off power to less critical loads when in backup mode or in overload conditions, to increase more important load autonomy.
-
Page 32: Battery Bank
Battery Bank Up to 2 external battery banks can be added to models 17NXGCON11001(2KVA) / 17NXGCON12001(3KVA) using the specific connector. The battery bank significantly extends operating autonomy in the event of prolonged blackout. Model 17NXBAON12001 17NXBAON11001 Stripes Up to 2 stripes with 6 batteries each Up to 2 stripes with 4 batteries each (2 x 72V) (2 x 48V) - Page 33 RACK installation Desktop installation B1/B2/S1/S2 A1/S3 Front/Back panel Remove the fastening screws (ID 1) in the front panel and install the batteries (12V@7Ah). Input connector (ID 2). This connector should be used when a second battery bank is installed or when there is an external charger.
- Page 34 An example of an installation is illustrated below: The maximum number of battery banks that can be used is 2 units. This increases the backup time normally offered by the UPS alone by 5 if the maximum number of stripes (2) are installed for each battery bank.
-
Page 35: Upsilon2000 Installation
Both the RS232 cable and USB cable are supplied with the UPS. The device software is produced by Megatec. UPSilon2000 software, where applicable, is licensed. Nilox does not provide support on use nor can be held liable for malfunctions and/or other problems it may... -
Page 36: Battery Replacement
Follow the steps below to replace the device batteries (follow the recommendations in this manual or have them followed by specialised personnel). There are 2 batteries used for the 1KVA model (17NXGCON38001 ), 4 for the 2KVA model (17NXGCON11001) or 6 for the 3KVA model (17NXGCON12001), 12V/7Ah respectively. - Page 38 MANUAL PARA EL USUARIO...
- Page 39 Garantía Su SAI está cubierto por una garantía de dos años en componentes electrónicos. La batería tiene una garantía de hasta seis meses. Combrobar en la web http://www.nilox.com los centros de asistencia más cercano. Advertencias de seguridad importantes (GUARDE ESTAS INSTRUCCIONES) ¡ATENCIÓN! Para prevenir riesgos de incendio y descarga eléctrica, instale la unidad en un ambiente cubierto con temperatura...
- Page 40 de la batería deberían desconectarse de los conectores rápidos de la batería a la hora de realizar reparaciones o mantenimiento en la unidad SAI. ¡ATENCIÓN! La reparación de baterías debería ser realizada o supervisada por personal experto en baterías tomando las precauciones pertinentes.
-
Page 41: Instalación
Manual del usuario 2 cables IEC 1 cable de alimentación AC de entrada (no suministrado en el modelo 17NXGCON38001 de 1KVA) Software de comunicación SAI mediante el cable RS232/UBS (UPSilon 2K) Kit de accesorios para el montaje Tower/Rack (mostrado debajo): Instalación RACK... - Page 42 Consideraciones sobre la instalación Rack Seguir con atención los siguientes pasos para instalar en modalidad Rack el aparato. Para la instalación RACK, considerando el peso del aparato, es necesario que sea apoyado en un estante de un mueble. Contacte a su proveedor de armarios Rack para adquirir el estante adecuado. Paso 1: Paso 2: Paso 3:...
- Page 43 Panel posterior 1KVA 2KVA 3KVA N° Significado Entrada EPO para apagarlo en caso de emergencia. Cuando el circuito se cierra, inmediatamente el SAI deja de alimentar todas las tomas de salida y emite un sonido continuo, la escritura ALARM inicia a parpadear y el LED Faul se enciende fijo de color rojo. Se muestra el código de error 07. Para salir definitivamente de este estado debe apagar completamente el dispositivo.
- Page 44 Puerto para Battery Bank externo. Disponible en los modelos 17NXGCON11001/17NXGCON12001. el código 17NXBAON11001 (17NXBAON12001) permite de agregar otras 4/8 (6/12) Baterías de 7Ah y de duplicar/triplicar la autonomía. Es posible agregar hasta 2 17NXBAON11001 (17NXBAON12001) para extender hasta 5 veces la autonomía máxima respecto a la que ofrece el SAI. Slot de expansión para una tarjeta adicional (SNMP).
- Page 45 Se muestran los enchufes de salida activados. En el modelo (17NXGCON12001) de 3KVA, son programables. Por lo tanto, superadas ciertas condiciones preestablecidas, puede que no sean alimentadas para conservar la potencia restante para las cargas criticas. Power Flow Chart: Indica el estado de funcionamiento del SAI. Para activar la modalidad ByPass pulsar contemporáneamente, por 3 segundos, los botones , el dispositivo señalará...
- Page 46 Encendido del SAI Encendido en modalidad normal Conectar el SAI a la toma eléctrica (verificar la puesta a tierra). El SAI comenzará inmediatamente haciendo un test inicial, de varios segundo para diagnosticar. Todos los LED se encenderán inicialmente para indicar que la alimentación de red y el ByPass funcionan correctamente.
- Page 47 Encendido en modalidad batería (encendido frío /cold start) Pulsar por 3 segundos el pulsante ON [ ] para encender el SAI. Emitirá 2 señales sonoras. Soltar el botón ON y antes de 10 segundos repetir el proceso, teniendo nuevamente presionado el botón de encendido ON por 3 segundos.
- Page 48 Apagar el SAI Pulsar el botón por 3 segundos hasta que el dispositivo no emita una doble señal sonora. La carga no será más alimentada (el inversor estará desactivado). El dispositivo entrará en modalidad standby, los ventiladores continuarán a funcionar y las baterías serán recargadas, si la red eléctrica estará disponible. Si la red eléctrica no estará...
- Page 49 Configuración avanzada mediante RS232 (opcional) Descargar el software “UPS Setting Tool” (desde la pagina del producto) en la página web www.nilox.com lanzarlo. Inmediatamente se visualizará una ventana como en la imagen siguiente. Seleccionar la COM Port, en el menú desplegable, y hacer clic en Connect. Después de algunos segundos se mostrará la escritura Connected.
- Page 50 Una vez guardados los nuevos ajustes (es necesario que el dispositivo emita una doble señal) es conveniente apagar completamente el SAI y desconectar el enchufe de alimentación. Solo después de reiniciarse el SAI utilizará los nuevos ajustes. CF50/CF60 = Modalidad convertidor de frecuencia (de 60Hz a 50Hz o viceversa). Algunos ajustes podrían no estar disponibles en el SAI comprado.
- Page 51 Battery Bank En los modelos 17NXGCON11001(2KVA) / 17NXGCON12001(3KVA) es posible utilizando el conector adapto agregar hasta dos Battery Bank externas. La Battery Bank permite aumentar considerablemente la autonomía operativa en casos de prolongados apagones. Modelo 17NXBAON12001 17NXBAON11001 Paquetes de Hasta 2 paquetes de 6 baterías cada Hasta 2 paquetes de 4 baterías cada uno baterías (2 x 48V)
- Page 52 Instalación RACK Instalación Desktop B1/B2/S1/S2 A1/S3 Utilizar Utilizar Panel anterior / posterior desenroscar los tornillos de fijación (identificación 1) puestos en el panel frontal e instalar las baterías (12V@7Ah). Conector de entrada (identificación 2). Este conector debe ser empleado para utilizar un segundo Battery Bank o cuando haya un cargador externo.
- Page 53 En la imagen se muestra un ejemplo de instalación: El número máximo de Battey Bank utilizable es de 2 unidades. Permitiendo en caso de que cada Battery Bank disponga del numero máximo de 2 paquetes de baterías, de quintuplicar la duración del tiempo de backup (copia de seguridad) normalmente ofrecida por un solo SAI.
- Page 54 El software suministrado con el dispositivo es producido por Megatec. El software UPSilon2000, donde sea presente, se da con licencia. Nilox no ofrecerá soporte para su utilizo ni podrá ser acusada como responsable de malfuncionamientos y/o otros problemas de este tipo.
- Page 55 Las baterías utilizadas son 2 en el modelo de 1KVA (17NXGCON38001), 4 en el modelo de 2KVA (17NXGCON11001) o 6 en al modelo de 3KVA (17NXGCON12001), de 12V/7Ah respectivamente.
- Page 56 Appendix [Technical Features]: Model 17NXGCON38001 17NXGCON11001 17NXGCON12001 8059616333608 8059616333615 8059616333622 Name UPS Online Pro 1000 UPS Online Pro 2000 UPS Online Pro 3000 Power Rating(W) Vin=210-265 1800 2700 Power Rating (VA) 1000 2000 3000 Input Voltage 170-276V Frequency 50Hz±5% Output Voltage 200/208/220/230/240±1%...
- Page 57 Output Connections (Battery Output 3xIEC (10A, Output 6xIEC (10A, IEC 320-C13) Power Supplied) IEC 320-C13) PC Connections RS232 (Read and write) USB (Read only) Extended SNMP Interface Slot Yes (17NXGCSN00001) Extended Battery Connector Battery Bank 17NXBAON11001 17NXBAON12001 Programmable Outlet Yes (2) Noise Level Less than 55dB (Active FAN) Mechanical...
Need help?
Do you have a question about the 17NXGCON38001 and is the answer not in the manual?
Questions and answers