
Related Manuals for Prowise Touchscreen One


Summary of Contents for Prowise Touchscreen One
- Page 1 This user manual applies to the Prowise Touchscreen One with the following model numbers: 65": PW.1.16065.0001 75": PW.1.16075.0001 86": PW.1.16086.0001 ...
- Page 2 5.3. Connecting to a network 31 Ethernet 31 Wi-Fi connection 32 5.4. Adjusting the volume 33 6. Prowise Central 33 6.1. Prowise Central home 33 6.2. The Prowise Central menu 34 www.prowise.com 2 / 53 ...
- Page 3 41 10.1.2 VGA 42 10.1.3 DP 42 10.1.4 AV 42 10.1.5 YPBPR 42 10.2. Connecting the Prowise touchscreen to audio equipment 43 10.2.1. Connecting headphones 43 10.2.2. Connecting an amplifier 43 10.2.3. Connecting using the HDMI port (CEC) 44 Appendix 45 ...
-
Page 4: Important Safety Instructions
2.2. Placement ● We recommend not to install the touchscreen yourself or by a third party. Let Prowise or a certified Prowise partner install or mount the touchscreen to avoid possible damage. Prowise can not be held responsible for any damage or injury caused by incorrect installation by third parties. Damage due to ... - Page 5 This can cause injuries or damage to yourself and/or the touchscreen. Always contact Prowise or a certified partner in case of a defect, to avoid damage. Contact information can be found at: w ww.prowise.com/en/contact . ...
-
Page 6: Recycling And Disposal
2.5 Recycling and disposal If you have questions about the correct disposal of your touchscreen, please contact Prowise or a certified partner. Packaging The device is packaged to prevent transport damage. Packaging is made of resources that can be reused or ... -
Page 7: Place Of Installation
The Prowise Touchscreen can be used at an ambient temperature from 0 °C to +38 °C (32 °F to 100,4 °F) and relative humidity from 10% to 90% (without condensation). When switched off, the touchscreen can be stored at ... - Page 8 3.2. Cabling Only use the power cable supplied by Prowise to connect the Prowise Touchscreen to the mains power supply. The touchscreen must be placed close to the electrical outlet and the electrical outlet should be easy to reach. ...
-
Page 9: Wifi Module
3.3. WiFi module The Prowise Touchscreen is equipped with a WiFi module. Follow the steps below to successfully install the WiFi module. HAZARD WARNING! S uffocation hazard. This product contains small parts that form a choking hazard for children. Keep this product out of reach for children when not installed into the ... - Page 10 (Please note the OPS PC module is optional) CAUTION! Please ensure the power cable is not connected to the main power supply while installing the OPS PC module. Unscrew the screws www.prowise.com 10 / 53 ...
- Page 11 2. Remove the cover plate 3. Insert the OPS PC module into the slot www.prowise.com 11 / 53 ...
- Page 12 4. Becoming familiar with your product We recommend not to install the touchscreen yourself or by a third party. Have Prowise or a certified partner install or mount your touchscreen to avoid possible damage. Always adjust the screen to the correct height before use. Avoid standing in a stooped or bent posture and ...
-
Page 13: Product Specifications
Brightness 350 cd/m2 (65”) 400 cd/m2 (75” and 86”) Number of colours 10 Bit (1.07B) Viewing angle 178º Refresh rate 60Hz PC module slot Yes, OPS module LIfespan 50,000 hours www.prowise.com 13 / 53 ... - Page 14 Number of pens 2 Simultaneous writing with multiple colours Yes Simultaneous writing with multiple line thicknesses Yes Windows Ink support Yes Prowise Central (4K) Android version Android 8.0 Storage 16GB/32GB Memory 3GB www.prowise.com 14 / 53 ...
- Page 15 1 HDMI (HDMI 2.0 Type A HDCP2.2) 1 TYPE-C (HDMI 2.0+ 15W +Touch USB2.0) USB 2.0 A 1 USB 2.0 B (Touch) 1 USB 3.0 A 1 www.prowise.com 15 / 53 ...
- Page 16 Dimensions of the packaging (W x H x D) 65": 1660 x 240 x 1045 mm 65.35 x 41.14 x 9.45 inches 75": 1895 x 240 x 1160 mm 74.61 x 45.67 x 9.45 inches www.prowise.com 16 / 53 ...
- Page 17 VESA arrangement for external devices VESA 100 x 100 mm Certification CE: EMC + LVD + RED / FCC-IC- VOC / RoHS / REACH/ RCM / WEEE and Energy Star Warranty 5 years www.prowise.com 17 / 53 ...
- Page 18 4.2. In the box Prowise Touchscreen www.prowise.com 18 / 53 ...
- Page 19 Wi-Fi module Wi-Fi antenna (2x) ProWrite® pen dual writing pen including pen points (2x) Pen tips (4x) Quick start guide and safety instructions Prowise Touchscreen One 10. Power cord - EU 11. USB touch cable 12. HDMI cable 13. VESA plate 100 x 100 mm ...
-
Page 20: Product Overview
4.3. Product overview Side ports (left - motherboard) 1 HDMI output 2.0 2 Optical Audio input; S/PDIF 3 USB 2.0 Type B (Touch port) 4 USB 2.0 Type A www.prowise.com 20 / 53 ... -
Page 21: Touchscreen Control
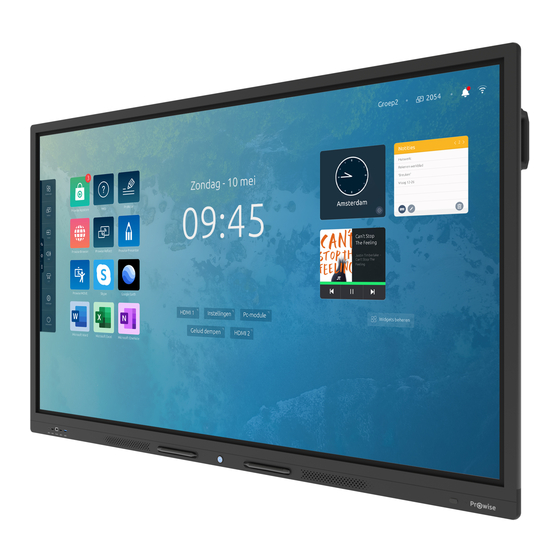
OPS Slot (Left) Wi-Fi Module Slot (Left) 4.4. Touchscreen control The Prowise Touchscreen is fitted with 20-points multi-touch. The screen recognises up to 20 simultaneous touch points. This allows you to use the touchscreen with multiple people at once. ... - Page 22 Tap with one finger on the item that you want to move Drag and drag it to the new location without releasing your finger from the screen. Opening Prowise Central Place five fingers of one hand on the screen for at least 2 menu seconds. The menu will appear. ...
- Page 23 ON or OFF or to open the Central menu. 4.5. The control button The control button can be found in the middle of the speaker bar of the touchscreen. www.prowise.com 23 / 53 ...
- Page 24 ● 4.8. ProWrite® technology The Prowise Touchscreen is equipped with two pens. These are conveniently located at the front of the screen and will automatically click into place when you hold a pen in front of the docking location. ...
- Page 25 Clean the screen with a dry, lint-free, microfibre cloth. Ensure this cloth is free of impurities. If you wish to use a cleaning agent, always use one recommended by Prowise. Do not use any aggressive cleansers as these can cause damage to the screen. ...
-
Page 26: Getting Started
There are a few different options to turn on the touchscreen once activated: Press the control button located in the middle of the speaker bar of the touchscreen ● ● Press the on/off button on the supplied remote control www.prowise.com 26 / 53 ... - Page 27 PLEASE NOTE! Turn the touchscreen off completely when moving the screen by turning off the power switch and removing the power cable from the screen. www.prowise.com 27 / 53 ...
-
Page 28: Starting Your Device For The First Time
5.2. Starting your device for the first time When starting up the Prowise touchscreen for the first time after installing Prowise Central 3.0, we take you through several important steps. Press 'Start' to begin. Country and language ... - Page 29 Select a network to connect with. You can choose between a Wi-Fi network or Ethernet connection Terms and conditions Read and accept our general terms and conditions www.prowise.com 29 / 53 ...
-
Page 30: Connecting To A Network
Personalise your Prowise touchscreen by giving it a name or title Press 'Finish' to complete the settings. You can now get started with Prowise Central. 5.3. Connecting to a network Connect your touchscreen to a wireless Wi-Fi network or via a network cable. ... - Page 31 Follow the steps below to view the specifications of the network: Place five fingers on the screen for at least 2 seconds to launch the Prowise Central menu Press 'Settings' and then select 'Connectivity' The network specifications will be displayed ...
-
Page 32: Adjusting The Volume
With the Central Menu: Adjust the volume with this feature of the Prowise Central menu. Drag the dot to the right to increase the volume and to the left to decrease the volume. Click on the mute button to turn off all sound at ... - Page 33 6.2. The Prowise Central menu Three icons are always visible on the left-hand side of the Prowise touchscreen. ProNote icon: open ProNote, the integrated whiteboard software Home icon: go to Prowise Central home Three dots: open the Prowise Central menu ...
-
Page 34: Changing The Settings
● Power button 7. Changing the settings The Central settings menu is located in the menu. Here you can adjust multiple settings of your Prowise touchscreen, such as: display and audio settings, connectivity and other settings. For more information about adjusting the settings in Prowise Central, please read the Prowise Central manual. ... -
Page 35: Remote Control
9. Remote control 9.1. Schematic overview and explanation of the buttons www.prowise.com 35 / 53 ... - Page 36 Navigation button – Down 7 Ok Confirm selection. 8 If an input other than Prowise Central home is active, this button can be used to return to Prowise Central home. 9 Freeze button: pause the screen 10 ...
- Page 37 Before using the remote control for the first time, you must insert the two (1.5V AAA) batteries, supplied with the remote control. Once the batteries are running out and the remote control is no longer working properly, you must change the batteries. You can do this as follows: www.prowise.com 37 / 53 ...
- Page 38 The leaking chemicals are toxic and must never come into contact with the mouth, skin or eyes. PLEASE NOTE! Only use 1.5 V AAA batteries. Insert them as shown by the instructions on the remote control. www.prowise.com 38 / 53 ...
-
Page 39: Connecting Auxiliary Equipment
HDMI source. PLEASE NOTE! W e recommend using a cable that is as short as possible for the best connection quality and is no longer than 3 metres. www.prowise.com 39 / 53 ... - Page 40 VGA source. 10.1.3 DP You can also connect an external device to the Prowise Touchscreen via a DP port. Connect a USB touch cable if you also want to use the touch feature. Connect a cable to the DP port of the external PC and to the DP input of the touchscreen. ...
- Page 41 The composite video signal is a signal that emits transmits both video and audio. You can connect the composite video with the Prowise Touchscreen with a 3.5mm Jack plug (Male with 3 rings) in the AV in port (Audio L, Audio ...
- Page 42 10.2. Connecting the Prowise Touchscreen to audio equipment 10.2.1. Connecting headphones Connect headphones by plugging them into the analogue audio output “headphones”. Use the touchscreen’s volume control to adjust the headphones volume. 10.2.2. Connecting an amplifier ...
- Page 43 CEC. This allows these devices to be controlled via the touchscreen’s remote control. Connect a device via CEC by inserting an HDMI cable in the touchscreen’s HDMI port. www.prowise.com 43 / 53 ...
- Page 44 PC or other control unit with RS232 protocol. Pin2 is TXD Pin3 is RXD. Pin to Pin connection as below. www.prowise.com 44 / 53 ...
-
Page 45: Protocol Description
None (fixed) Protocol description Command format Version 0.9 Command Head AA BB CC Command Body 3 bytes + 1 byte checksum (of leading 3 bytes) Command Tail DD EE FF www.prowise.com 45 / 53 ... - Page 46 Subcommand 6 0x00 Length Valid Data 7 checksum Checksum Sum from No.4 to No.6 8 0xDD Fixed value 9 0xEE End Fixed value 10 0xFF Fixed value www.prowise.com 46 / 53 ...
- Page 47 AA BB CC 03 04 value value -50 <-> 50 (hex Balance checksum DD EE FF code) Default audio setting: AA BB CC 03 06 00 09 DD Standard EE FF www.prowise.com 47 / 53 ...
- Page 48 Language: Swedish EE FF AA BB CC 38 02 07 41 DD Language: Norwegian EE FF AA BB CC 38 02 08 42 DD Language: Danish EE FF www.prowise.com 48 / 53 ...
- Page 49 EE FF AA BB CC 09 01 00 0A PC PC Power ON DD EE FF AA BB CC 09 00 00 09 DD PC Power OFF EE FF www.prowise.com 49 / 53 ...
- Page 50 DD EE FF AA BB CC 07 41 00 48 DD VOL- EE FF AA BB CC 07 09 value Custom Custom checksum DD EE FF www.prowise.com 50 / 53 ...
- Page 51 AA BB CC 39 01 00 3A DD EE FF AA BB CC 40 01 01 42 DD EE FF IR lock active status AA BB CC 40 01 00 41 DD EE FF IR lock inactive www.prowise.com 51 / 53 ...
- Page 52 AA BB CC 40 0F 02 51 DD EE FF German AA BB CC 40 0F 03 52 DD EE FF French AA BB CC 40 0F 04 53 DD EE FF Italian www.prowise.com 52 / 53 ...
- Page 53 AA BB CC 40 13 01 54 DD EE FF RS232 active status xx=from 0-100, for Volume, Bass Treble Brightness Contrast Hue and Sharpness yy=From -50 to 50, for balance www.prowise.com 53 / 53 ...
Need help?
Do you have a question about the Touchscreen One and is the answer not in the manual?
Questions and answers