
Summary of Contents for Jäger ADwin
- Page 1 ADwin Installation Manual for the Installation of ADwin Systems PCMCIA Ethernet ADwin Installation, manual version 2.1, December 2005...
- Page 2 For any questions, please don’t hesitate to contact us: Hotline: +49 6251 96320 Fax: +49 6251 5 68 19 Jäger Computergesteuerte E-Mail: info@ADwin.de Messtechnik GmbH Rheinstraße 2-4 Internet www.ADwin.de D-64653 Lorsch Germany ADwin Installation, manual version 2.1, December 2005...
-
Page 3: Table Of Contents
6 ADwin-light-16 system with USB interface ........ -
Page 4: Typographical Conventions
Courier New and are printed in color (see also the editor of the ADbasic development environment). Bits in data (here: 16 bit) are referred to as follows: Bit No. … Bit value … Synonym ADwin Installation, manual version 2.1, December 2005... -
Page 5: Information About This Manual
Information about this manual 1 Information about this manual With this manual you are starting the installation of your ADwin system: – Software installation of the drivers for Windows 9x, ME, NT, 2000 and Depending on the Windows version, some discrepancy to the following descriptions (mostly formal) may occur. - Page 6 ⇒ manual ADbasic 3. First steps in ADbasic. ⇒ tutorial ADbasic 4. Introduction to ADbasic programming For installation step 2 choose the suitable chapter for your ADwin system in the table: ADwin system chapter – Systems with ADlink PC ISA board...
-
Page 7: Installation Of The Adwin Cdrom
Installation of the ADwin CDROM 2 Installation of the ADwin CDROM Please, connect your ADwin system with your PC only if told to do so. The same applies for the connection of the inputs and outputs, in order to avoid damages at the ADwin system or at your device. - Page 8 The license key is necessary to include processes written in ADbasic into your application program. Without license key it is also possible to generate programs in ADbasic and to transfer them to your ADwin sys- tem. 7. Continue with the installation of the interface drivers (page 2, installation step no.
-
Page 9: Adwin Isa Link Interface
ADwin ADwin ISA link interface 3 ADwin ISA link interface The first step to install your ADwin system is always the installation of the The first step ADwin-CDROM (chapter 3 of this manual). Please pay attention to the version number of the CDROM, especially if you have an update. -
Page 10: Installation Of Software And Configuration Of The Pc
If you do not wish to set the base address (= link address) to the standard address 0150 (= 150h), as described in the example above, please make a note of it. You have to set this address on the ADwin board, ADwin-light board or ADlink-PC-ISA board per DIP switch. - Page 11 ADwin ADwin ISA link interface Select for each ADwin system with ISA interface, which is to be installed, a separate address. Now check the configuration of the DIP switches (page 18). 3.1.2 Windows 2000 The following installation routine applies to the ADwin CDROM version from CDROM version 3.00.2360 onward.
- Page 12 ADwin ADwin ISA link interface Next The search for new hardware may take some moments. Add a new device Next No: select hardware from a list Next ADwin Installation, manual version 2.1, December 2005...
- Page 13 A few minutes may pass until this window appears. Continue with: Have Disk… Select the path with "Browse" (or during standard installation enter "C:\ADwin" and skip one picture in this documentation. Choose: C:\ADwin\ADIsaW2K.inf Continue with Open ADwin Installation, manual version 2.1, December 2005...
- Page 14 ADwin ADwin ISA link interface Next ADwin Installation, manual version 2.1, December 2005...
- Page 15 Note the link address above, please note this different base address (=link address). You have to set this address later with the DIP switches on the ADwin board, ADwin-light board or ADlink-PC-ISA. Choose a separate link address for each ADwin system.
- Page 16 Finish Choose "No", because you have to restart your PC anyway for the hardware installation. For the installation of another ADwin system with ISA interface repeat the instructions in this subsection. Continue now with chapter 3.2 on page 18. ADwin Installation, manual version 2.1, December 2005...
- Page 17 ADwin ADwin ISA link interface 3.1.3 Windows XP The following installation routine applies to the ADwin CDROM version from ADwin-CD Version 3.20.0101 onward. Install your ADwin board, ADwin-light board or your ADlink-PC-ISA board into the PC only after you are requested to do so.
- Page 18 ADwin ADwin ISA link interface Next Add a new device Next Select hardware from list Next ADwin Installation, manual version 2.1, December 2005...
- Page 19 ADwin ADwin ISA link interface Show all devices Next Here you must wait a few minutes until Windows has found all existing drivers. Have Disk Select: C:\ADwin\ADIsaW2K.inf Open ADwin Installation, manual version 2.1, December 2005...
- Page 20 ADwin ADwin ISA link interface Next Next ADwin Installation, manual version 2.1, December 2005...
- Page 21 Then call the device manager under "Control Panel" (see first picture in this section). Open the directory <ADwin> in the device manager, select the new ISA link and the symbol "Properties" (or use the context menu, clicking the right mouse button).
-
Page 22: Setting The Dip Switches
If you don’t use the standard base address 0150 (= 150h) as in the example above, please take note of this different base address (=link address). You have to set this address later with the DIP switches on the ADwin board, ADwin-light board or ADlink-PC-ISA. Confirm with "OK". - Page 23 Now call the program ADconfig under the Windows start menu: Programs ADconfig ADwin, in order to allocate a Device No. to your ADwin system. More detailed information about the program can be found in the online help of ADconfig. ADwin Installation, manual version 2.1, December 2005...
-
Page 24: Settings In Adbasic And Hardware Installation
ADbasic are now finished. 3.3.2 Installation of the hardware Hardware initialization Before you connect your PC with the ADwin system, please read your hard- ware manual including the chapter "Initialization of the hardware". Do not yet connect any inputs or outputs. - Page 25 Start ADbasic and boot the ADwin system by clicking on the boot button Booting The blinking of the green LED on the ADwin-Gold system or on the CPU mod- ule of the ADwin-Pro system as well as the display in the status line: "ADwin is booted"...
-
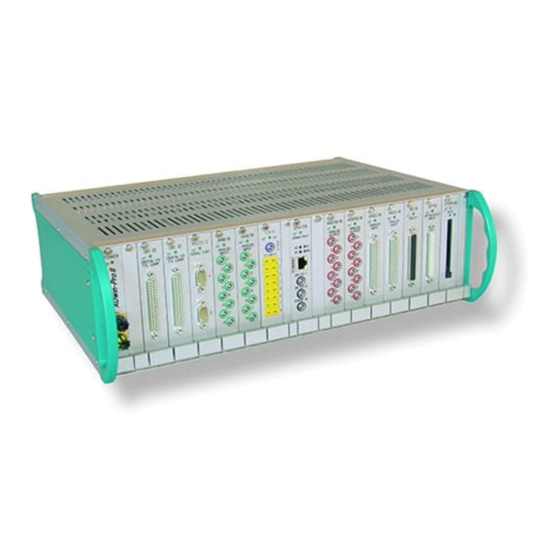
Page 26: Adlink Pci Adapter
PC - unlike a notebook - has no interface. It is available for all stan- dard Windows computers and operating systems. With the adapter you can operate (one or two) ADwin systems in a PC, even if the PC has no more ISA interfaces and you cannot or do not want to use an USB or Ethernet interface. -
Page 27: Installation Of The Adlink-Pci Adapter
Protection against ESD has to be made in an environment without any electro-statical discharges. Do not make a connection to the ADwin system. Wait until you read the corre- sponding information in this manual. Installation of the ADlink PCI adapter:... - Page 28 PCI device manufacturer (e.g. SCM). Please follow the advice in the <readme.txt> file. The installation of the ADlink PCI adapter is now finished. Continue with the he installation of the ADpcmcia adapter described in chapter 5. ADwin Installation, manual version 2.1, December 2005...
-
Page 29: Adpcmcia Adapter
– Driver installation – Initialization of the hardware – See also chapter 6.3 on page 29 if you want to operate several ADwin systems with an ISA or PCI interface. ADwin Installation, manual version 2.1, December 2005... -
Page 30: Initialization Of The Drivers
„Next“. The device manager automatically finds the driver file fitting for the operating system – Windows 9x, ME: <ADwin.inf>. It doesn’t matter, if the file selection dialog shows a different file name. – Windows 2000, XP: <ADpcmW2K.inf>. Driver update If the driver installation has not been successful, you can activate the driver later in the Windows startmenu: Settings Control panel System. - Page 31 Now call the program ADconfig under the Windows start menu: Programs ADconfig ADwin, in order to allocate a Device No. to your ADwin system. More detailed information about the program can be found in the online help of ADconfig. ADwin Installation, manual version 2.1, December 2005...
- Page 32 ADwin ADpcmcia adapter Checking the settings in ADbasic Open ADbasic (in the Windows start menu: Programs ADwin ADbasic) and check first the settings in the dialog window "Options\Compiler". Set the options in the window: "Compiler Options" from top to bottom –...
- Page 33 The device manager displays the ADPCMCIA board of Jäger Messtechnik at "PCMCIA socket" (under Windows 2000 and XP in the newly created directory: Computer\ADwin). Select it by dou- ble-clicking. Under the tab: "Resources" the base address of the ADpcmcia card is displayed as first number.
-
Page 34: Initialization Of The Hardware
Start ADbasic and boot the ADwin system by clicking on the boot button The blinking of the green LED on the ADwin-Gold system or on the CPU mod- ule of the ADwin-Pro system as well as the display in the status line: "ADwin is booted"... - Page 35 ADwin board or ADwin-light board by using the hardware wizard, see chapter 3.1.2 and 3.1.3. In order not to have conflicts with an already existing ADwin system that has Checking the address an ISA slot using the link address 150h, there are two possibilities to change...
- Page 36 & play of the PCMCIA interface remain. In chapter 3 "ADwin ISA link interface" in this manual (page 18) or in your hard- ware manual there is a list of addresses and a description of how the DIP switch is set to the corresponding address.
- Page 37 Now call the program ADconfig under the Windows start menu: Programs ADconfig ADwin, in order to allocate a "Device No." to your ADwin system. You find more detailed information in the online help of ADconfig. ADwin Installation, manual version 2.1, December 2005...
-
Page 38: Adwin-Light-16 System With Usb Interface
PC, you must switch the PC off and on again - do not only restart it. If you switch off an ADwin system with USB interface, you must at least wait 5 seconds before you power it up again. -
Page 39: Installation Of The Hardware
– USB cable (length 1.8 m) If there is a great distance between the ADwin system and the PC, we recommend that you use an ADwin-light-16 system with Ethernet inter- face. -
Page 40: Installation Of The Drivers
– Connect the power supply with the VG edge connector. – Connect the ADwin board via USB cable with the PC. To ensure USB communication be as failure-free as possible, we recommend to establish a low-impedance (short, very thick) ground connection between PC-casing and the ADwin USB-device. - Page 41 No.“. The serial numbers of all connected ADwin USB systems are listed there. Select the number of the ADwin system you want to work with. You find the serial number on a label on every ADwin USB adapter or on every ADwin USB system.
- Page 42 ADbasic are now finished. Booting Start ADbasic and boot the ADwin system by clicking on the boot button The display in the status line: "ADwin is booted" shows that the operating system has been loaded properly and that ADbasic can access the ADwin sys- tem (if not, first check the connections).
- Page 43 ADwin ADwin-light-16 system with USB interface – The programming of your ADwin system is described in detail in the Programming with ADbasic manual. ADbasic – Start programming with the examples in the ADbasic tutorial. ADwin Installation, manual version 2.1, December 2005...
-
Page 44: Adwin-Gold System With Usb Interface
PC, you must switch the PC off and on again - do not only restart it. If you switch off an ADwin system with USB interface, you must at least wait 5 seconds before you power it up again. -
Page 45: Installation Of The Usb Linkadapter
– Power supply cable (length approx. 2 m) – USB cable (length 1.8 m) If there is a great distance between the ADwin system and the PC, we recommend that you use an ADwin-Gold system with Ethernet inter- face. -
Page 46: Installation Of The Drivers
Connecting If you have installed your ADwin system according to the notes in your hard- ware manual, you can switch on the system. The operating systems Windows 9x, ME, 2000 and XP recognize the new hardware and start the device manager in order to install the drivers. - Page 47 No.“. The serial numbers of all connected ADwin USB systems are listed there. Select the number of the ADwin system you want to work with. You find the serial number on a label on every ADwin USB adapter or on every ADwin USB system.
- Page 48 Confirm with "OK" in order to return to ADbasic. The driver installation and the main settings in ADbasic are now finished. Booting Start ADbasic and boot the ADwin system by clicking on the boot button ADwin Installation, manual version 2.1, December 2005...
- Page 49 The blinking of the green LED next to the "POWER" switch as well as the d i s - play in the status line: "ADwin is booted" shows that the operating system has been loaded properly and that ADbasic can access the ADwin system (if not, first check the connections).
-
Page 50: Adwin-Pro Module With Usb Interface
PC, you must switch the PC off and on again - do not only restart it. If you switch off an ADwin system with USB interface, you must at least wait 5 seconds before you power it up again. -
Page 51: Installation Of The Pro-Usb Module
ADwin ADwin-Pro module with USB interface If there is a great distance between the ADwin system and the PC, we recommend that you use an Pro-CPU module with Ethernet interface. – When you are using a Pro-USB module: Link cable with two micro connectors (length approx. 0.2 m) from the Pro-USB module to the Pro-CPU-T9 module. - Page 52 No.“. The serial numbers of all connected ADwin USB systems are listed there. Select the number of the ADwin system you want to work with. You find the serial number on a label on every ADwin USB adapter or on every ADwin USB system.
- Page 53 Confirm with "OK" in order to return to ADbasic. The driver installation and the main settings in ADbasic are now finished. Start ADbasic and boot the ADwin system by clicking on the boot button Booting The blinking of the green LED on the CPU module as well as the d is p la y in the status line: "ADwin is booted"...
-
Page 54: Adwin System With Ethernet Interface
9 ADwin System with Ethernet Interface The first step The first step to install your ADwin system is always the installation of the ADwin-CDROM (chapter 3 of this manual). Please pay attention to the version number of the CDROM, especially if you have an update. -
Page 55: Basic Information About Ethernet Operation
ADwin Ethernet interface and cannot be changed later. This address is only necessary during installation of the program ADconfig for precise identification. It is to be found on a label on the ADwin Ethernet inter- face. 9.1.2 Host-IP and Subnet Mask... - Page 56 Example 1: Intranet If you want to operate the ADwin Ethernet interface in an intranet, ask your sys- tem administrator for the subnet mask and a free IP address for your module. Example 2: Own network card If you connect the ADwin Ethernet interface with a network card in your PC via a so-called "cross-over"...
- Page 57 255.255.255.0 192.168.0.3 192.168.0 ADwin ENET 3 255.255.255.0 192.168.0.4 192.168.0 For more PCs or ADwin Ethernet interfaces you can simply use the same sub- net mask and the same network identification. For the host identification you choose the next higher value.
- Page 58 Default Gateway If several networks with different network identifications are connected with each other by a router (gateway) and if the ADwin Ethernet system is to be accessed by a different network, then you have to indicate the "default gate- way".
-
Page 59: Hardware Configurations And Displays
ADconfig, the ADwin Ethernet interface can- not be accessed any more. If the ADwin Ethernet interface is used in a network with a DHCP server, although the DHCP support is not activated on the ADwin Ethernet module, the IP address of the ADwin Ethernet interface has to be entered/indicated in the DHCP server. - Page 60 Place the module with the front plate to the left side, so that the handle is closer to you. This description refers to the DIL switch block at the lower right of the ADwin Ethernet interface printed circuit board (only with the older Pro module T9+ENET: the DIL switch block at the upper right must not be changed).
- Page 61 Place the module with the front plate to the left side, so that the handle is closer ENET-2 to you. This description refers to the DIL switch block at the top of the ADwin Ethernet interface printed circuit board. The DIL switch number 1 is at right, the position OFF is upwards.
-
Page 62: Configuration With Adconfig
Ethernet interface and should be left on the standard (default) value 150h. The difference Do not mix up the allocation of the "Device No." to the ADwin Ethernet interface with the configuration of the ADwin Ethernet interface itself! The configurations made in this menu are saved on the PC and these settings are transferred to the ADwin driver (ADwin32.dll) saying which "Device No."... - Page 63 Host TCP/IP Port: page 55 Password: page 55 Send configuration + Close The LED "ST" and "BU" show that the configuration of the ADwin Ethernet inter- Checking the face has been successful (see also chapter 9.2.1). configuration ADwin Installation, manual version 2.1, December 2005...
-
Page 64: Settings In Adbasic
The blinking of the green LED on the ADwin-Gold system or the CPU module of the ADwin-Pro system as well as the display in the status line: "ADwin is booted" shows that the operating system has been loaded properly and that ADbasic can access the ADwin system (if not, first check the connections). - Page 65 ADwin ADwin System with Ethernet Interface – For the details about the initialization of your ADwin system, please see your hardware manual. – The programming of your ADwin system is described in detail in the Programming with ADbasic manual. ADbasic –...
-
Page 66: Application-Specific Features
Configurating the system with the program ADconfig tells the DLL via which interface the ADwin system is accessed. If the communication to the ADwin system is made via ethernet (i.e. via ADwin Ethernet interface), the following items have to be considered: Data integrity –... -
Page 67: Bootloader Option For The Adwin Ethernet Interface
You reprogram the bootloader by using the program ADethflash. The operating Programming with system of the ADwin system (<ADwin9.BTL>) and up to 10 processes can be ADethflash programmed into the bootloader. Reprogramming can be made in the normal operating mode of the ADwin Eth- ernet interface. - Page 68 ADwin ADwin System with Ethernet Interface ADwin Installation, manual version 2.1, December 2005...
-
Page 69: Annex
Digital Signal Processor Transistor-Transistor Logic End Of Conversion Voltage collector-collector Electro-Magnectic Compati- bility Voltage emitter-emitter Electro-Static Discharge FPGA Field Programmable Gate Array Full Scale Range GrouND Manufacturer Analog Devices Burr-Brown Linear Technology Texas Instruments ADwin Installation, manual version 2.1, December 2005...
Need help?
Do you have a question about the ADwin and is the answer not in the manual?
Questions and answers