
Related Manuals for Sego Lily SL-FT-2-BLK

Summary of Contents for Sego Lily SL-FT-2-BLK
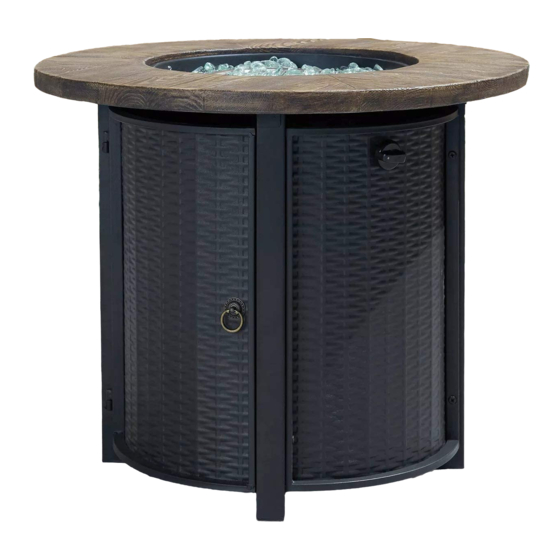
- Page 1 OWNER'S INSTRUCTIONS MANUAL Gas Fire Table User's Guide and Instruction Manual SL-FT-2-BLK SL-FT-2-GRY 5010198...
-
Page 2: Limitation Of Warranty And Liability
LIMITATION OF WARRANTY AND LIABILITY NOTICE: Read this Limitation of Warranty and Liability Before Using This Product. If the Terms Are Not Acceptable, Return the Product at Once, Unopened, and the Purchase Price Will Be Refunded. It is impossible to eliminate all risks associated with the use of this product. Such risks arise from weather conditions, the manner of use or application, or other unknown factors, all of which are beyond the control of the Seller and Manufacturer. - Page 3 FOR OUTDOOR USE ONLY ! If you smell gas and/or hear a gas hissing sound: 1.Immediately, SHUT OFF gas to the appliance. 2.Extinguish ALL open flames. 3.If odor continues, keep away from the appliance and immediately call your Gas Supplier or Fire Department. DO NOT store or use gasoline or other flammable vapors and liquids in the vicinity of this unit and or any other appliance.
-
Page 4: Safety Information
SAFETY INFORMATION Part A. Before you assemble or operate this unit, please read carefully this entire Owner's Manual. Failure to do so may result in a fire, explosion, injury or death. The installation of this unit must adhere to local codes or either the National Fuel Gas Code, ANSI Z223. - Page 5 • DO NOT fill tank over 80% full. • The tank system must be set up for vapor with drawal. • STOP using if any part of the Propane Gas Tank is damaged. Rust and dents in tank may be hazardous and should be inspected by a Gas Supplier. •...
- Page 6 • Keep the appliance area clear and free from combustible material, gasoline and other flammable vapors and liquids. • If the flame goes out while burning, turn the gas valve off. Wait 5 minutes before repeating the initial lighting procedure. Once you have a flame started, hold down the control knob for 1 minute.
- Page 7 • Children and adults should be alerted to the hazards of high surface temperatures and should stay away to avoid burns or clothing ignition. • Young children MUST BE carefully supervised at all times when they are in the area of this appliance. •...
- Page 8 User's Guide to Parts and Accessories of The Regulator, Charge Valve of the Cylinder and Steps to Connecting the Gas Tank to the Fire Part B. Table. This Safety Information section contains information concerning: 1)The Regulator (pre-connected to the Fire Table). 2)The Charge Valve of the Gas Tank and its relevant Valves.
- Page 9 Connecting the Fire Table to the Gas Cylinder. Part C. This next step guides you to connect the Fire Table Regulator to the Gas Cylinder. Step1: Connect the Black Coupling Nut on the Regulator to the Cylinder Valve. Step2: Turn the Black Coupling Nut, fully CLOCKWISE until fully locked into position.
- Page 10 Part D. FIRE TABLE PARTS INTRODUCTION Here is an introduction to all the parts that forms your Fire Table. Each part is different and holds its own function. DO NOT attempt to change and or remove any part(s). In the event of servicing and/or if there are operation issues, contact Qualified Services Technical Support and or seek Qualified Service Technician.
- Page 11 Item Picture Description Guard IgnitionPin Main Frame of Fire Table Lava Rock Burner SwitchingValve Regulator Valve with Gas Hose Control Knob...
- Page 12 Parts and Accessories of Fire Table Part E. Here is the User's Guide to various Parts and Accessories to form your complete Fire Table. Before you start to assemble this product, make sure all parts are present. Compare parts with package contents list. If any parts are missing or damaged, DO NOT attempt to assemble the product.
- Page 13 Part G. Hardware Item Picture Description ① Bolt (M6*20MM) M6 Washer ② ③ Screwdriver...
- Page 14 Part H. ASSEMBLY INSTRUCTIONS Attach panel (D) and steel foot (F) together using 4pcs of Bolts (1) and 4pcs M6 Washer (2) with Screwdriver (3). Do not fully tighten. Attach the other panel (D) and steel foot (F) together using 4pcs of Bolts (1) and 4pcs M6 Washer (2) with Screwdriver (3).
- Page 15 5.Put the metal base on the bottom of top using 4pcs of Bolts (1) and 4pcs M6 Washer (2) with Screwdriver (3). make sure the panel (C) face the valve rod. Tighten the Bolts. Hang the panel with door (E) on the steal foot. Put the control konb on the valve rod.
- Page 16 USER'S INSTRUCTIONS Part I. Below are the basic steps to help you light and use your Fire Table / Column. STEP1 1. Check that the Control Knob (13) for the gas supply system is turned to the “OFF” position before starting any assembly.
- Page 17 STEP 7 Subject to your preference, you may pour Lava Rocks / Pumice stones over the Burer Ring. The Guard MUST NOT BE BLOCKED. Refer to guidance below : Note : Do not place more than 1/4 inch depth of lava rocks above the burner holes. Doing so will suffocate the flame.
- Page 18 STEP 5 Subject to your preference, you may pour Lava Rocks over the Burner Ring. The Guard MUST NOT BE BLOCKED. Refer to guidance below: Do not place more than 1/4 inch depth of lava rocks above the burner holes. Doing so will suffocate the Do not place more than 3KG of lava rocks above the burner holes.
- Page 19 SAFETY INFORMATION : SHUTTING DOWN YOUR FIRE Part J. TABLE /COLUMN To Shut Down your Fire Table, please do the following: 1. Turn Control Knob(13) clockwise to the “OFF” position. 2. Close the Cylinder Valve(21)on the Propane Gas tank if you DO NOT intend to use it for a long time. MAINTENANCE- FIRE TABLE Part K.
- Page 20 MAINTENANCE : FIRE TABLE SURFACE CARE Part L. • Our Fire Table material has been sealed with a treatment that prevents staining and moisture absorption, and for product longevity this Fire Table would still require proper care and maintenance to ensure the integrity of the surface. •...
Need help?
Do you have a question about the SL-FT-2-BLK and is the answer not in the manual?
Questions and answers