
Subscribe to Our Youtube Channel
Related Manuals for Gradall XL4000


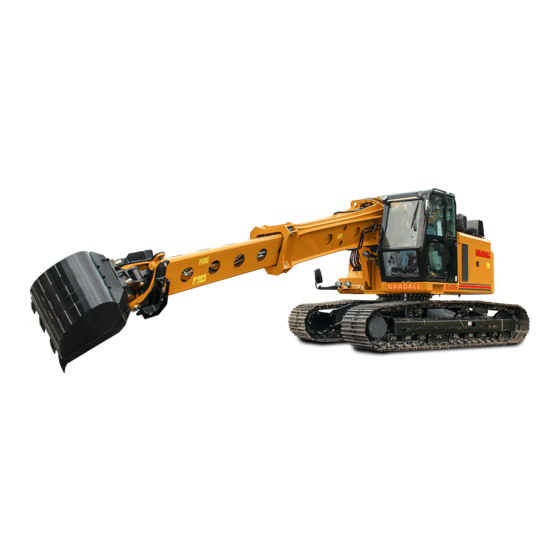
Summary of Contents for Gradall XL4000
- Page 1 EXCAVATOR TECHNICAL MANUAL VOLUME 2 XL4000 Starting S/N 0415225/0428225 XL5000 Starting S/N 0518110/0526110 2460-4144 July, 2002 GRADALL 406 Mill Avenue, S.W. New Philadelphia, OH, 44663, USA Telephone: (330) 339-2211 Fax: (330) 339-3579...
- Page 74 ® Hydraulic Excavators ©...
-
Page 147: Important Safety Notice
Any procedure not specifically recommended by GRADALL must be thoroughly evaluated from the standpoint of safety before it is placed in practice. If you are not sure, contact your GRADALL Distributor before operating. Do not modify this machine without written... - Page 148 GRADALL XL 4100 machines use pressures that are unique for the particular model. Use this procedure to set pressures on these machines. GRADALL Test Kit (P/N 7713-4197) contains all gauges, hoses and adapters required to test machine functions. In addition to normal mechanic’s hand tools, metric wrenches (box, open end, and allen) are required.
- Page 149 II. Reservoir Air Pressure II. Reservoir Air Pressure Build air pressure up in the upperstructure for remote operation. Shut engine off. At reservoir breather located next to the engine, push release plunger to expel all air pressure in the hydraulic tank.
- Page 150 III. Joystick Pilot Pressure Put low pressure gauge (1,000 psi) on pilot manifold on pilot test port (pilot manifold is above heat exchanger valve; test port is lower rear). See Figure 2. Run engine at full RPM. Pressure should be 480 - 500 psi. Adjust relief as needed. See Figure 2. FIGURE 2 IV.
- Page 151 IV. Saving Charge and Pilot Pressure (continued) FIGURE 5 FIGURE 3 FIGURE 4 From No. 296020 2/97...
- Page 152 V. Swing Circuit Pressure Adjustment Assemble two GRADALL gauge hoses from test kit together with connector. Route across machine so that gauge is in cab and hose will reach swing pump test ports. Carefully bleed hose into a bucket to get air out of gauge hose.
- Page 153 VI. Main Pump Standby Pressure Put low pressure gauge (1,000 psi) on test port of pump supply line to bucket, hoist and tilt valve bank (large valve bank). With the engine running, gauge hose can be installed and then tightened down after the engine starts.
- Page 154 VII. Tilt Valve Adjustment Put high pressure gauge (10,000 psi) on load sense test port. Set tilt speed controller on distribution controls box in cab to maximum speed. Run engine at full RPM, tilt boom clockwise and stall tilt. Pressure should be 2,800 - 3,000 psi.
- Page 155 IX. Hoist Valve Adjustment Move high pressure gauge (10,000 psi) to front hoist test port. Run engine at full RPM, lower boom to ground and stall hoist. Pressure should be 2,200 - 2,400 psi. Adjust front port relief as required. See Figure 10. Move high pressure gauge (10,000 psi) to rear test port.
- Page 156 X. Boom Valve Adjustments Put high pressure gauge (10,000 psi) on rear boom test port. Run engine at full RPM. Fully retract boom. Pressure should be 3,200 - 3,250 psi. Adjust section regulator as required. See Figure II Move high pressure gauge (10,000 psi) to front boom test port. Run engine at full RPM and extend boom fully until stalled.
- Page 157 XI. Remote Travel Pressures Place carrier transmission in “LL4”. Place carrier into remote operation. Set carrier brakes in upper cab to locked position. Put high pressure gauge (10,000 psi) on load sense test port. Run engine at full RPM and depress travel pedal for forward travel.
- Page 158 XII. Remote Steering Pressure Place high pressure gauge (10,000 psi) on pilot manifold on upper front test port. Use two gauge hoses and connector to allow gauge to be in cab. See Figure 13. Run engine at full RPM and steer chassis fully in one direction with foot pedal. Pressure should be 2,100 psi. Adjust as required by removing cap from steering relief.
- Page 159 XIII. Hydraulic System Pressures Function Pressure (psi) Reservoir Air Pressure 6 - 8 Pilot Pressure 480 - 500 Swing Circuit Swing Charge Pressure 380 - 420 Swing Makeup Pressure 320- 350 Swing Torque Pressure 5,450 - 5,750 (Maximum swing pressure) Swing Cushioning 3,300- 3,500 Main Pump...
-
Page 163: Important Safety Notices
Any procedure not specifically recommended by GRADALL must be thoroughly evaluated from the standpoint of safety before it is placed in practice. If you are not sure, contact your GRADALL Distributor before operating. Do not modify this machine without written... -
Page 164: Testing And Adjusting
I.Testing and Adjusting GRADALL XL 4200 machines use pressures that are unique for the particular model. Use this procedure to set pressures on these machines. GRADALL Test Kit (P/N 7713-4197) contains all gauges, hoses and adapters required to test machine functions. In addition to normal mechanic’s hand tools, metric wrenches (box, open end, and allen) are required. - Page 165 II. Reservoir Air Pressure This step requires that the compressor relay be bypassed to set the air pressure regulator. Remove cover NOTE! from the power box and place a jumper across the large terminals of the compressor relay. Remove jumper after the regulator is adjusted. Refer to XL Series Upperstructure Electrical Manual Form No. 29301. At reservoir breather located next to the engine, push release plunger to expel all air pressure in the hydraulic tank.
- Page 166 III. Joystick Pilot Pressure Put low pressure gauge (1,000 psi) on pilot manifold on pilot test port (pilot manifold is above heat exchanger valve). Run engine at full RPM. Pressure should be 480 - 500 psi. Adjust relief as needed. See Figure 2. FIGURE 2 LP PILOT TEST PORT PILOT RELIEF VALVE...
- Page 167 IV. Swing Charge and Pilot Charge Pressure (continued) FIGURE 5 FIGURE 3 FIGURE 4 Left side of machine Form No. 29621 2/97...
- Page 168 V. Swing Circuit Pressure Adjustments Assemble two GRADALL gauge hoses from test kit together with connector. Route across machine so that gauge is in cab and hose will reach swing pump test ports. Carefully bleed hose into a bucket to get air out of gauge hose.
- Page 169 VI. Main Pump Standby Pressure Put low pressure gauge (1,000 psi) on test port of pump supply line to bucket, hoist and tilt valve bank (large valve bank). With engine running, gauge hose can be installed and then tighten down after engine starts. (Will prevent spike damage to gauge).
- Page 170 VII. Tilt Valve Adjustments Put high pressure gauge (10,000 psi) on load sense test port. Set tilt speed controller on distribution controls box in cab to maximum speed. Run engine at full RPM, tilt boom clockwise and stall tilt. Pressure should be 2,800 - 3,000 psi.
- Page 171 IX. Hoist Valve Adjustments Move high pressure gauge (10,000 psi) to front hoist test port. Run engine at full RPM, lower boom to ground and stall hoist. Pressure should be 2,200 - 2,400 psi. Adjust front port relief as required. See Figure 10. Move high pressure gauge (10,000 psi) to rear test port.
- Page 172 X. Boom Valve Adjustments1 Put high pressure gauge (10,000 psi) on rear boom test port. Rotate section regulator adjusting screw clockwise one and one-half turns. Fully retract boom, use procedure for “cracking” pressure. See Page 1. Pressure should be 3,400 - 3,550 psi. Adjust port relief as required. See Figure 11. Leave high pressure gauge (10,000 psi) on test port, turn section regulator adjusting screw back to original position.
- Page 173 XI. Crawler Drive Pressures Place high pressure gauge (10,000 psi) on load sense test port. Switch crawler travel speed to high speed. See Figure 12. Run engine at full RPM. Depress left hand travel pedal for forward travel. Stall the track, pressure should be 4,300 - 4,500 psi.
- Page 174 XII. Hydraulic System Pressures Function Pressure (psi) Reservoir Air Pressure 6 - 8 480 -500 Pilot Pressure Swing Circuit Swing Charge Pressure 380 - 420 Swing Makeup Pressure 320 -350 Swing Torque Pressure 5,450 - 5,750 (Maximum swing pressure) 3,330 - 3,500 Swing Cushioning Main Pump 300 - 350...
- Page 179 Any procedure not specifically recommended by GRADALL must be thoroughly evaluated from the standpoint of safety before it is placed in practice. If you are not sure, contact your GRADALL Distributor before operating. Do not modify this machine without written permission from GRADALL.
- Page 180 GRADALL XL 5100 machines use pressures that are appropriate for the application. Use this procedure to set pressures on these machines. GRADALL T est Kit (P/N 7713-4197) contains all gauges, hoses and adapters required to test machine functions. In addition to normal mechanic’s hand tools, metric wrenches (box, open end, and allen) are required.
- Page 181 Build air pressure up in the upperstructure for remote operation. Shut engine off. At reservoir breather located next to the engine, push release plunger to expel all air pressure in the hydraulic tank. See Figure 1 Observe reservoir pressure gauge as pressure builds up. Reservoir pressure should be at least 6 but preferably 8 psi.
- Page 182 Put low pressure gauge (1,000 psi) on pilot manifold on pilot test port (pilot manifold is above heat exchanger valve; test port is lower rear). See Figure 2. Run engine at full RPM. Pressure should be 480 - 500 psi. Adjust relief as needed. See Figure 2. Put low pressure gauge (1,000 psi) on upper test port (to inside of machine) on pilot charge valve assembly (mounted on the counterweight) at left rear of upperstructure.
- Page 183 Left side of machine Form No. 29622 2/97 XL 5100 HYDRAULIC PRESSURE SETTING MANUAL...
- Page 184 Assemble two GRADALL gauge hoses from test kit together with connector. Route across machine so that gauge is in cab and hose will reach swing pump test ports. Carefully bleed hose into a bucket to get air our of gauge hose.
- Page 185 Put low pressure gauge (1,000 psi) on test port of pump supply line to bucket, hoist and tilt valvebank (large) valve bank). With engine running, gauge hose can be installed and then tightened down after the engine starts. (Will prevent spike damage to gauge). See Figure 7. Leave right hand armrest up, run engine at full RPM.
- Page 186 Put high pressure gauge (10,000 psi) on load sense port. Set tilt speed controller on distribution controls box in cab to maximum speed. Run engine at full RPM, tilt boom clockwise and stall tilt. Pressure should be 3,000 - 3,200 psi. Adjust front port relief as required. See Figure 9. Leave high pressure gauge (10,000 psi) on load sense test port and repeat for counterclockwise boom tilt.
- Page 187 Move high pressure gauge (10,000 psi) to front hoist test port. Run engine at full RPM, lower boom to ground and stall hoist. Pressure should be 3,000 - 3,200 psi. Adjust front port relief as required. See Figure 10. Move high pressure gauge (10,000 psi) to rear test port. Rotate section regulator adjusting screw clockwise one and one-half turns.
- Page 188 Put high pressure gauge (10,000 psi) on rear boom test port. Run engine at full RPM. Fully retract boom. Pressure should be 3,650 - 3,700 psi. Adjust section regulator as required. See Figure 11. Move high pressure gauge (10,000 psi) to front boom test port. Run engine at full RPM and extend boom fully until stalled.
- Page 189 Place carrier transmission in “LL4”. Place carrier into remote operation. Set carrier brakes in upper cab to locked position. Put high pressure gauge (10,000 psi) on load sense test port. Run engine at full RPM and depress travel pedal for forward travel. Gauge should read 4,700 - 4,800 psi. Adjust front port relief as required. See Figure 12. Leave high pressure gauge (10,000 psi) on load sense test port and repeat for reverse travel.
- Page 190 Place high pressure gauge (10,000 psi) on pilot manifold on upper test port. Use two gauge hoses and connector to allow gauge to be in cab. See Figure 13. Run engine at full RPM, and steer chassis fully in one direction with foot pedal. Pressure should be 2,100 psi. Adjust as required by removing cap from steering relief.
- Page 191 Function Pressure (psi) Reservoir Air Pressure 6 - 8 Pilot Pressure 480 - 500 Swing Charge Pressure 380 - 420 Swing Makeup Pressure 320 - 350 Swing Torque Pressure 5,550 - 5,850 (Maximum swing pressure) Swing Cushioning 3,300 - 3,500 Main Pump 300 - 350 Main Pump Standby Pressure...
- Page 195 Any procedure not specifically recommended by GRADALL must be thoroughly evaluated from the standpoint of safety before it is placed in practice. If you are not sure, contact your GRADALL Distributor before operating. Do not modify this machine without written permission from GRADALL.
- Page 196 GRADALL XL 5200 machines use pressures that are unique for the particular model. Use this procedure to set pressures on these machines. GRADALL Test Kit (P/N 7713-4197) contains all gauges, hoses and adapters required to test machine functions. In addition to normal mechanic’s hand tools, metric wrenches (box, open end, and allen) are required.
- Page 197 NOTE! This step requires that the compressor relay be bypassed to set the air pressure regulator. Remove cover from the power box and place a jumper across the large terminals of the compressor relay. Remove jumper after the regulator is adjusted. Refer to XL Series Upperstructure Electrical Manual Form No.
- Page 198 Put low pressure gauge (1,000 psi) on pilot manifold on pilot test port (pilot manifold is above heat exchanger valve). Run engine at full RPM. Pressure should be 480 - 500 psi. Adjust relief as needed. See Figure 2. LP PILOT TEST PORT PILOT RELIEF VALVE 480-500 PSI Put low pressure gauge (1,000 psi) on upper test port (to inside of machine) on pilot charge valve assembly...
- Page 199 Left side of machine Form No. 29623 2/97...
- Page 200 Assemble two GRADALL gauge hoses from test kit together with connector. Route across machine so that gauge is in cab and hose will reach swing pump test ports. Carefully bleed hose into a bucket to get air out of gauge hose.
- Page 201 Put low pressure gauge (1,000 psi) on test port of pump supply line to bucket, hoist and tilt valve bank (large valve bank). With engine running, gauge hose can be installed and then tightened down after engine starts. (Will prevent spike damage to gauge). See Figure 7. Leave right hand armrest up, run engine at full RPM.
- Page 202 Put high pressure gauge (10,000 psi) on load sense test port. Set tilt speed controller on distribution controls box in cab to maximum speed. Run engine at full RPM, tilt boom clockwise and stall tilt. Pressure should be 3,000 - 3,200 psi.
- Page 203 Move high pressure gauge (10,000 psi) to front hoist test port. Run engine at full RPM, lower boom to ground and stall hoist. Pressure should be 3,000 - 3,200 psi. Adjust front port relief as required. See Figure 10. Move high pressure gauge (10,000 psi) to rear test port. Rotate section regulator adjusting screw clockwise one and one-half turns.
- Page 204 Put high pressure gauge (10,000 psi) on rear boom test port. Rotate section regulator adjusting screw clockwise one and one-half turns. Fully retract boom, use procedure for “cracking” pressure. See Page 1. Pressure should be 3,650 - 3,700 psi. Adjust port relief as required. See Figure 11. Leave high pressure gauge (10,000 psi) on test port, turn section regulator adjusting screw back to original position.
- Page 205 Place high pressure gauge (10,000 psi) on load sense test port. Switch crawler travel speed to high speed. See Figure 12. Run engine at full RPM. Depress left hand travel pedal for forward travel. Stall the track, pressure should be 4,500-4,700 psi.
- Page 206 FUNCTION PRESSURE(psi) 6 - 8 Reservoir Air Pressure 480 - 500 Pilot Pressure Swing Circuit 380 - 420 Swing Charge Pressure 320 - 350 Swing Makeup Pressure 5,550 - 5,850 Swing Torque Pressure (Maximum swing pressure) 3,330 - 3,500 Swing Cushioning Main Pump 300 - 350 Main Pump Standby Pressure...
- Page 209 ®...
- Page 228 ®...
- Page 231 Any procedure not specifically recommended by GRADALL must be thoroughly evaluated from the standpoint of safety before it is placed in practice. If you are not sure, contact your GRADALL Distributor before operating. Do not modify this machine without written permission from GRADALL Read and understand this manual, along with the Upperstructure and Carrier Operator’s Manuals, EMI Excavator User’s Safety...
- Page 232 GRADALL XL 5100 machines use pressures that are unique for the particular model. Use this procedure to set pressures on these machines. GRADALL Test Kit (P/N 7713-4197) contains all gauges, hoses and adapters required to test machine functions. In addition to normal mechanic’s hand tools, metric wrenches (box, open end, and allen) are required.
- Page 233 Build air pressure up in the upperstructure for remote operation. Shut engine off. At reservoir breather located next to the engine, push release plunger to expel all air pressure in the hydraulic tank. See Figure 1. Observe reservoir pressure gauge as pressure builds up. Reservoir pressure should be at least 6 and preferrably 8 psi.
- Page 234 Put low pressure gauge (l,000 psi) on pilot manifold on pilot test port (pilot manifold is above heat exchanger valve). See Figure 2. Run engine at full RPM. Pressure should be 480 - 500 psi. Adjust relief as needed. See Figure 2. FIGURE 2 IV.
- Page 235 FIGURE 4 FIGURE 3 FIGURE 5 Form No. 29627 2/97...
- Page 236 Assemble two GRADALL gauge hoses from test kit together with connector. Route across machine so that gauge is in cab and hose will reach swing pump test ports. Carefully bleed hose into a bucket to get air out of gauge hose.
- Page 237 Put low pressure gauge (1,000 psi) on test port of pump supply line to bucket, hoist and tilt valve bank (large valve bank). With engine running, gauge hose con be installed and then tightened down after engine starts. (Will prevent spike damage to gauge). See Figure 7. Leave right hand armrest up, run engine at full RPM.
- Page 238 Put high pressure gauge (10,000 psi) on front tilt test port. Set tilt speed controller on distribution controls box in cab to maximum speed. Run engine at full RPM, tilt boom clockwise and stall tilt. Pressure should be 3,000 - 3,100 psi. Adjust front port relief as required. See Figure 9. Put high pressure gauge (10,000 psi) on rear tilt test port and repeat for counterclockwise boom tilt.
- Page 239 Move high pressure gauge (10,000 psi) to front hoist test port. Run engine at full RPM, lower boom to ground and stall hoist. Pressure should be 500 - 550 psi. Adjust front port relief as required. See Figure 10. Move high pressure gauge (10,000 psi) to rear test port. Rotate section regulator adjusting screw clockwise one and one-half turns.
- Page 240 Move high pressure gauge (10,000 psi) to front boom test port. Remove hose from front boom extend port relief and plug hose. Fully extend boom, use procedure for “cracking” Pressure. See Page 1. Pressure should be 1,600 - 1,700 psi. Adjust front port relief as required. Replace hose on relief when completed. See Figure 11. Put high pressure gauge (10,000 psi) on rear boom test port.
- Page 241 Switch machine travel speed to high speed (range). Put high pressure gauge (10,000 psi) on front test port of propel valve. Run engine at full RPM and depress travel pedal for forward travel. Gauge should read 4,800 - 4,900 psi. Adjust on counter balance valve relief as required. See Figures 12, 13 and 14.
- Page 242 Place high pressure gauge (10,000 psi) on steering test port on steer cylinder. Use two gauge hoses and connector to allow gauge to be in cab. See Figures 16 and 18. Run engine at full RPM, and steer chassis fully in one direction with foot pedal. Pressure should be 650-700 psi. Adjust as required by removing cap from steering relief, which is the lower of the two on the rear of the pump.
- Page 243 FIGURE 17 FIGURE 16 NOTE: BACK OUT RELIEF VALVE COMPLETELY AT ASSEMBLY TURN IN (3) THREADS MAX. TIGHTEN JAM NUT RELIEF TO BE SET AT FINAL TEST FIGURE 18 Form No. 29627 2/97...
- Page 244 Function Pressure (psi) Reservoir Air Pressure 6 - 8 480 - 500 Pilot Pressure Swing Circuit 380 - 420 Swing Charge Pressure Swing Makeup Pressure 320 - 350 2,800 - 3,100 Swing Torque Pressure (Maximum swing pressure) Swing Cushioning 1,900 - 2,100 Main Pump Main Pump Standby Pressure 300 - 350...
- Page 249 Any procedure not specifically recommended by GRADALL must be thoroughly evaluated from the standpoint of safety before it is placed in practice. If you are not sure, contact your GRADALL Distributor before operating. Do not modify this machine without written permission from GRADALL Read and understand this manual, along with the Upperstructure and Carrier Operator’s Manuals, EMI Excavator User’s Safety...
- Page 250 Reseal swing pump begin point screws after adjustment. Assemble two sets of GRADALL gauge hoses from test kit with a connector. On one set of hoses, place a 10,000 psi gauge. Place a 1,000 psi gauge on the other set. Route both sets of hoses across machine so that both gauges may be laid on the cradle stop at the front of the frame on the left hand side of the cab.
- Page 251 Form No. 29626 2/97...
- Page 252 Each valve bank has a clipper relief located in the inlet section of the valve bank. This relief is provided to protect against momentary pressure rises. These reliefs are not pump reliefs and do not handle full flow. These reliefs should only be checked if low pressures exist throughout the valves. This may be accompanied by a high pitched squeal from the valve banks and/or the hydraulic system running hotTer than normal.
- Page 253 Form No. 29626 2/97...
- Page 254 The main pump cutoff pressure should only be checked if low valve pressures cannot be increased. Check the clipper relief settings to be sure they are not the source of the low pressures (see Clipper Relief Testing and Adjusting section). If main pump cutoff pressure is altered, it is necessary to install a new seal cap on the pump cutoff valve.
- Page 255 Form No. 29626 2/97...
- Page 256 The following procedure is for checking and setting the pump horsepower adjustment. The pump horsepower affects the point the pump destrokes to keep from drawing more horsepower than can be delivered. If the pump horsepower adjustment is altered, a new seal cap must be installed on the pump horsepower adjustment screw. All pressures must be checked and correct before checking pump horsepower.
- Page 257 The swing pump has adjustments for mechanical centering of the swash plate. This adjustment should be made with the bucket firmly on the ground and all controls in neutral. Use two high pressure gauges (10,000 psi) on test ports on top of torque valve on swing pump. Put low pressure gauge (1,000 psi) on upper test port of pilot charge valve assembly.
- Page 258 A small amount of hoist drift occurs due to normal leakage in the hydraulic system. Use the following procedure if excessive hoist drift is suspected. Before checking the actual hoist drift, always make sure the hoist circuit pressures are set correctly (see XL 5110 Hydraulic Pressure Setting Manual). Warm oil to at least 120°F,the same as used for setting pressures.
- Page 259 System Dump Pressure is a check of the back pressure valve in return fine to the main hydraulic tank. Pressure can only be checked with a definite return to the tank. With no functions being operated, no flow will exist in this line.
- Page 260 The Diverter Valve (8063-4028) is located in the front valve bank, next to the inlet section. The diverter valve is connected to the rear valve bank inlet off the “B” port of the diverter valve. The diverter valve performs a very important function in the hydraulic system by controlling the flow path of oil from the two pump groups of the main pump.
- Page 261 Measure 100 feet and mark it on a flat, smooth open area. Shift the machine to high range. Get machine to full speed before entering measured distance. Using a stopwatch, check time to cover distance. The machine should cover the distance no faster than 8.5-9.0 seconds.
- Page 262 Make sure that the propel pressures are correct. Set park brake. Put high pressure gauge (10,000 psi) on front test port of propel valve. Put another high pressure gauge (10,000 psi) on the right motor test port. See Figure 142. Run engine at full RPM and slowly depress travel pedal for forward travel.
- Page 263 The brake system and brake accumulators should be checked if the brake pedal appears to be spongy when applied. The accumulators and accumulator charge valve are located near the swing transmission in the left front compartment of the upperstructure. See Figure 15. Checking the brake accumulators’...
- Page 264 Put low pressure gauge (1,000 psi) on pilot manifold on auxiliary hydraulic oil cooler fan test port (pilot manifold is above heat exchanger valve). See Figure 17. Remove small hose that is fan circuit supply line and plug hose. Cap fitting out of top of pilot manifold. See Figure 17 Run engine at full rpm.
- Page 269 Safe operation depends on reliable equipment and proper operating procedures. Performing the checks and services described in this manual will help to keep your GRADALL XL Series Excavator in reliable condition. Use of the recommended operating procedures can help you avoid accidents. Because some procedures may be new to even the experienced technician, we recommend that this manual be read, understood and followed by all who service this unit.
- Page 270 I. Testing and Adjusting GRADALL XL 5200 machines use pressures that are appropriate for the application. Use this procedure to set pressures on these machines. GRADALL Test Kit (P/N 7713-4197) contains all gauges, hoses and adapters required to test machine functions. In addition to normal mechanic’s hand tools, metric wrenches (box, open end, and allen) are required.
- Page 271 II. Reservoir Air Pressure This step requires that the compressor relay be bypassed to set the air pressure regulator. Remove cover from the power box, and place a jumper across the large terminals of the compressor relay. Remove jumper after the regulator is adjusted. (Refer to XL Series Upperstructure Electrical Manual Form No.
- Page 272 III. Joystick Pilot Pressure Put low pressure gauge (1,000 psi) on pilot manifold on pilot test port (pilot manifold is above heat exchanger valve). See Figure 2. Run engine at full RPM. Pressure should be 480 - 500 psi. Adjust relief as needed. See Figure 2. FIGURE 2 LP PILOT TEST PORT PILOT RELIEF VALVE...
- Page 273 IV. Swing Charge and Pilot Charge Pressure (continued) Figure 3 Figure 5 PILOT CHARGE VALVE ASSEMBLY LP SWING CHARGE RELIEF 380-420 PSI PILOT CHARGE Figure 4 Left side of machine RELIEF 320-350 PSI LP PILOT CHARGE TEST REPORT LP PILOT CHARGE TEST PORT Form No.
- Page 274 V. Swing Circuit Pressure Adjustments Assemble two GRADALL gauge hoses from test kit together with connector. Route across machine so that gauge is in cab and hose will reach swing pump test ports. Carefully bleed hose into a bucket to get air out of gauge hose.
- Page 275 VI. Main Pump Standby Pressure Put low pressure gauge (1,000 psi) on test port of pump supply fine to bucket, hoist and tilt valve bank (large valve bank). With engine running, gauge hose can be installed and then tightened down after engine starts. (Will prevent spike damage to gauge.) See Figure 7.
- Page 276 VII. Tilt Valve Adjustments Put high pressure gauge (10,000 psi) on load sense test port. Set tilt speed controller on distribution controls box in cab to maximum speed. Run engine at full RPM, tilt boom clockwise and stall tilt. Pressure should be 3,000 - 3,200 psi.
- Page 277 X. Boom Valve Adjustments Put high pressure gauge (10,000 psi) to front boom test port. Remove hose from front port relief and plug. Run engine at 1,000 RPM. Use procedure for “cracking” pressure (See Page 1) and extend boom fully until stalled. Pressure should be 1,250 - 1,300 psi.
- Page 278 XI. Crawler Drive Pressures Place high pressure gauge (10,000 psi) on load sense test port. Switch crawler travel speed to high speed. See Figure 12. Run engine at full RPM. Depress left hand travel pedal for forward travel. Stall the track, pressure should be 4,500-4,600 psi.
- Page 279 XII. Hydraulic System Pressure FUNCTION PRESSURE(psi) Reservoir Air Pressure 6 - 8 480 - 500 Pilot Pressure Swing Circuit Swing Charge Pressure 380 - 420 Swing Makeup Pressure 320 - 350 Swing Torque Pressure 2,800 - 3,100 (Maximum swing pressure) Swing Cushioning 2,600 Main Pump...
- Page 283 Safe operation depends on reliable equipment and proper operating procedures. Performing the checks and services described in this manual will help to keep your GRADALL XL Series Excavator in reliable condition. Use of the recommended operating procedures can help you avoid accidents. Because some procedures may be new to even the experienced technician, we recom- mend that this manual be read, understood and followed by all who service this unit.
- Page 284 Reseal swing pump begin point screws after adjustment. Assemble two sets of GRADALL gauge hoses from test kit with a connector. On one set of hoses, place a 10,000 psi gauge. Place a 1,000 psi gauge on the other set. Route both sets of hoses across machine so that both gauges may be laid on the cradle stop at the front of the frame on the left hand side of the cab.
- Page 285 FIGURE I Form No. 29625 2/97...
- Page 286 Each valve bank has a clipper relief located in the inlet section of the valve bank. This relief is provided to protect against momentary pressure rises. These reliefs are not pump reliefs and do not handle full flow. These reliefs should only be checked if low pressures exist throughout the valves.
- Page 287 Figure 3 Form No. 29625 2/97...
- Page 288 The Main Pump Cutoff Pressure should only be checked if low valve pressures cannot be incresead. Check the clipper relief settings to be sure they are not the source of the low pressures (see “Clipper Relief Testing and Adjusting” section). If main pump cutoff pressure is altered, it is necessary to install a new seal cap on the pump cutoff valve.
- Page 289 FIGURE 5 Form No. 29625 2/97...
- Page 290 The following procedure is for checking and setting the Pump Horsepower Adjustment. The pump horsepower affects the point the pump destrokes to keep from drawing more horsepower than can be delivered. If the pump horsepower adjustment is altered, a new seal cap must be installed on the pump horsepower adjustment screw. NOTE! All pressures must be checked and correct before checking pump horsepower.
- Page 291 The swing has adjustments for mechanical centering of the swash plate. This adjustment should be made with the bucket firmly on the ground and all controls in neutral. Use two high pressure gauges (10,000 psi) on test ports on top of torque valve on swing pump. Put low pressure gauge (1,000 psi) on upper test port of pilot charge valve assembly.
- Page 292 A small amount of hoist drift occurs due to normal leakage in the hydraulic system. Use the following procedure if excessive hoist drift is suspected. Before checking the actual hoist drift, always make sure the hoist circuit pressures are set correctly (see hydraulic testing and adjusting manual). Warm oil to at least 120°...
- Page 293 System Dump Pressure is a check of the back pressure valve in return line to the main hydraulic tank. Pressure can only be checked with a definite return flow to the tank. With no functions being operated, no flow will exist in this fine.
- Page 294 The Diverter Valve (8063-4028) is located in the front valve bank, next to the inlet section. The diverter valve is connected to the rear valve bank inlet off the “B” port of the diverter valve. The diverter valve performs a very important function in the hydraulic system by controlling the flow path of oil from the two pump groups of the main pump.
- Page 295 Adjustments for crawler undercarriage travel speed is performed on the control valves, with the stroke limiters provided on each crawler propel valve end cap. Use the following tests to set both free-running track speed and actual travel speed. A stopwatch and paint (for marking the tracks) will be required for these tests. Before checking crawler travel speed, make sure the tracks are run to clear mud, dirt, and other debris from track chains and rollers.
- Page 296 FIGURE 13 The crawler undercarriage is allowed a small deviation from straight travel. If this deviation is excessive, it can be adjusted using the crawler propel valve stroke limiters. Whenever tracking is adjusted, the free-running travel speed of the undercarriage must be checked to ensure it does not exceed specifications for the model being tested.
- Page 305 XL 4000/5000 C ENTER EBUILD Form No. 20026 Part No. 2460-4164...
- Page 306 EVISIONS u may determine that this Manual is complete and current with respect to Gradall This page is provided so yo Engineering Specifications. Page Date Revision Part No. 2460-4164...
- Page 307 XL 4000/5000 ENTER EBUILD ABLE OF ONTENTS ECTION Introduction Safety Nomenclature Preparing the Machine Identifying the Machine: Hydraulic Hose Machines Hydraulic Tubing Machines Removing the Clamps (Tube Machines Only) Center Pin Removal Center Pin Disassembly Installing the Seals: Top Gland Lower Gland Center Pin Reassembly Center Pin Installation...
- Page 308 NTRODUCTION This Manual details Center Pin removal, rebuild and reinstallation pro- cedures for all Gradall XL 4000 and XL 5000 Series Hydraulic Excava- tors. Components are referenced in full in the appropriate Gradall Parts Manual. Pressure Settings are referenced in the Gradall Hydraulic Ex- cavator Technical Manual.
- Page 309 NTRODUCTION Remove only the guards/covers on the area being serviced. Replace all guards/covers immediately upon completion of the task. If the Excavator has special optional equipment, make sure that the appropriate maintenance and operational require- ments are understood by everyone who operates and services the machine.
- Page 310 Any procedure not specifically recommended by Gradall must be thoroughly evaluated from the standpoint of safety before it is placed in practice. If you are not sure, contact your Authorized Gradall Distributor.
- Page 311 SING ANUAL This Manual is a guide for maintenance technicians for removing, rebuilding and/or reinstalling a center pin on an XL 4000 or XL 5000 Series Excavator. In every instance, there are certain basic precautions and steps you should take before commencing the procedure. These precautions are outlined in the “Introduction”...
- Page 312 1.0 N OMENCLATURE Stabilizer (current design - front mount) Note! A-1 Stabilizer (old style - side mount) See the appropriate Gradall Top Cap Parts Manual for more Top Gland detailed information on all Lower Gland these components. Center Pin Mounting Plate...
-
Page 313: Preparing The Machine
REPARING ACHINE Before starting any center pin procedure, perform the following opera- tions: Correct positioning of the upperstructure is a vital part of machine preparation. If you are working on a wheeled excava- tor, lift the boom out of the rack, close the bucket, retract the telescope boom fully and position the boom with the bucket on the ground at the right front of the carrier. -
Page 314: Identifying The Machine
3.0 I DENTIFYING ACHINE YDRAULIC ACHINES XL4100: Serial Number 0411200 through 0414225 XL4200: Serial Number 0421200 through 0427225 XL5100: Serial Number 0511100 through 0517110 XL5200: Serial Number 0522100 through 0525110 Before starting any center pin procedure, you need to determine whether the machine you are working on has hydraulic hoses or tubes. - Page 315 EMOVING LAMPS (T ACHINES To remove all hydraulic and air lines, you will first need to remove all the relevant clamps. Note! Remember to cap or plug all hydraulic fittings, hoses and tubes upon disassembly to reduce the possibility of hydraulic system contami- nation due to dirt and dust.
- Page 316 5.0 C ENTER EMOVAL Remove the top cap, allowing the stabilizer bar to be removed. At this point, a lifting device capable of lifting 300 lbs. may be attached to the top of the center pin assembly. There is a threaded hole in the middle of the pin post which accepts a lifting eye.
- Page 317 ENTER ISASSEMBLY When breaking down the center pin assembly, make sure you mark the gland assemblies in relation to the center pin post. This will make re- assembly and re-installation much easier. To properly perform this operation, you will need a small flat-blade screwdriver and an O-ring pick.
- Page 318 7.0 I NSTALLING EALS After you have taken the center pin assembly apart, clean and inspect everything. Installing the seals is the first part of the center pin rebuild process. Lay everything out on a clean, neat workbench. Make sure all the correct parts are there.
- Page 319 NSTALLING EALS OWERGLAND Carefully inspect the lower gland. Use a wire buffing wheel to Note! clean out all the areas which house the seals. Blow off the gland When using a wire buffer wheel with low-pressure air, making sure it is absolutely clean. and/or air hose to clean compo- nents, always wear eye protec- Install the high pressure seals (“L, M, N”) into the housing of the...
- Page 320 8.0 C ENTER EASSEMBLY First, make sure your work area is as clean as possible. You will be handling all components of the center pin and they must be kept as free of contaminants as possible. Once you open the seals and install them into the glands, make every effort to get the glands onto the post as soon as possible.
- Page 321 ENTER NSTALLATION TAGE Install a lifting eye on top of the center pin assembly. Secure lifting tackle of sufficient capacity to lift 300 lbs. and bring the center pin assembly back to the machine. Once the center pin assembly is in place, secure the mounting Note! See comments in Section 9, “Hy- plate to the frame of the machine.
- Page 322 9.1 C ENTER NSTALLATION (continued) Operate the machine in a clear, open area until the hydraulic oil reaches operating temperature. When you have verified that the machine is operating correctly and that all the hydraulic circuits are properly connected with- out leaks, the center pin assembly installation is complete.
-
Page 323: Hydraulic Plumbing
10.0 YDRAULIC LUMBING HEELED XCAVATORS The lower ports of the center pin deliver hydraulic oil to the remote drive motor and the remote steering valve. Ports “1” and “2” are used for remote drive routings. Ports “3” and “4” are used for remote steering routings. This oil supplies the remote steering valve, located behind the right front wheel. - Page 324 PPENDIX ASTENER ORQUE HARTS UBRICATED NGLISH OLTS GRADE 8 BOLTS GRADE 5 BOLTS Torque Tolerance Clamp Torque Tolerance Clamp + or - Load + or - Load BOLT SIZE (ft-lb) (ft-lb) (lb) (ft-lb) (ft-lb) (lb) +3-0 2,700 +3-0 3,000 1/4 - 20 +3-0 3,300 +3-0...
- Page 325 5870.59 4329.93 6886.66 5079.34 Note! Use 50% of listed values for aluminum fasteners. Note! To check Gradall torque values, set the torque wrench at 95% of rated torque value and check the fastener. If the torque wrench releases before fastener moves, assume that fastener torque is correct.
- Page 326 PPENDIX ITTING ORQUE HARTS CODE 61 4-BOLT SPLIT FLANGE BOLT TORQUE SAE FITTINGS; STRAIGHT & ADJUSTABLE FLANGE BOLT BOLT THREAD PORT SIDE DASH SIZE SIZE TORQUE DASH SIZE ASSEMBLY SIZE ft-lb SIZE TORQUE ft-lb 3/8-16 25+/-4.5 3/8-16 31+/-4.5 5/16-24 7.5+/-.5* 1 1/4 7/16-14 41+/-5...
- Page 327 Specifications are correct at time of publication. However, Gradall reserves the right to make any necessary changes without prior notice. Gradall is a registered trademark for Hydraulic Excavators, Material Handlers, Industrial Maintenance Machines, Attachments and other Components manufactured and marketed by The Gradall Company.
Need help?
Do you have a question about the XL4000 and is the answer not in the manual?
Questions and answers