Table of Contents
Advertisement
Quick Links
v
20V Cordless Lithium-Ion Tiller
WEV20TIL
1938262001
en - Original Instructions
ASSEMBLY REQUIRED
Minimum Two Persons
Battery must be fully charged before use.
Sales & Support: 01793 333212
Before use please read & understand this manual; paying particular attention to the safety instructions before use.
Incorrect use of the product could put the operator or machine in danger.
Whilst every eff ort has been made to ensure the accuracy of information contained in this manual, our policy of continuous improvement
determines the right to make modifi cations without prior warning.
Images are used for illustration purposes only.
Advertisement
Table of Contents

Subscribe to Our Youtube Channel
Related Manuals for Webb WEV20TIL

Summary of Contents for Webb WEV20TIL
- Page 1 20V Cordless Lithium-Ion Tiller WEV20TIL 1938262001 en - Original Instructions ASSEMBLY REQUIRED Minimum Two Persons Battery must be fully charged before use. Sales & Support: 01793 333212 Before use please read & understand this manual; paying particular attention to the safety instructions before use.
- Page 2 INSTRUCTION MANUAL 21 May 2020 Copyright Notice Copyright © Handy Distribution Permission is granted to reproduce this publication for personal & educational use only. Commercial copying, redistribution, hiring or lending is prohibited. No part of this publication may be stored in a retrieval system or transmitted in any other form or means without written permission from Handy Distribution.
-
Page 3: Table Of Contents
CONTENTS INTENDED USE SAFETY INSTRUCTIONS SPECIFICATION KNOW YOUR MACHINE COMPONENTS ASSEMBLY BATTERY & CHARGER OPERATION MAINTENANCE TROUBLE SHOOTING PARTS DIAGRAM & LIST DECLARATION OF CONFORMITY WARRANTY... -
Page 4: Intended Use
INSTRUCTION MANUAL INTENDED USE The basic version of the equipment is a cordless garden tiller intended for private use, i.e. for use in home and gardening environments. It is designed to turn soil and vegetation in small to medium gardens or allotments. The tiller is for private use, whose annual operating time generally does not exceed 25 hours. -
Page 5: Safety Instructions
SAFETY INSTRUCTIONS Read and understand the owner’s manual and labels affixed to the machine. Learn its application and limitations as well as the specific potential hazards. Retain these instructions for future reference. The operator is responsible for following the warnings & instructions in this manual and on the product. Read &... - Page 6 INSTRUCTION MANUAL GENERAL SAFETY RULES WARNING Before you put the machine into operation, you must read this instruction manual. When using this machine, observe the following safety instructions to exclude the risk of personal injury or material damage. Please also observe the special safety instructions in the respective chapters. Where applicable, follow the legal directives or regulations for the prevention of accidents in relation to the use of this machine.
- Page 7 17. The trigger is a safety device. Never attempt to bypass its operation. Doing so makes the safety device inoperative and may result in personal injury through contact with the rotating tines. The trigger must operate easily in both directions and automatically return to the disengaged position when released. 18.
- Page 8 INSTRUCTION MANUAL General Service: 1. Before cleaning, repairing, or inspecting, make certain the tines and all moving parts have stopped. Disconnect the battery to prevent unintended starting. 2. Check the tines and bolts at frequent intervals for proper tightness. Also, visually inspect tines for damage. Replace with the original equipment manufacture’s (O.E.M.) parts only, listed in this manual.
-
Page 9: Specification
SPECIFICATIONS Model WEV20TIL Product Number 1938262001 Voltage 20v max Battery 2.0Ah Charging Time Up to 90 mins Run Time Up to 30 mins Idle Speed 160rpm Working Width 19cm Max. Working Depth 15.5cm Protection IPX1 Sound Power Level L 93 dB(A) Weight 4.36kg... -
Page 10: Know Your Machine
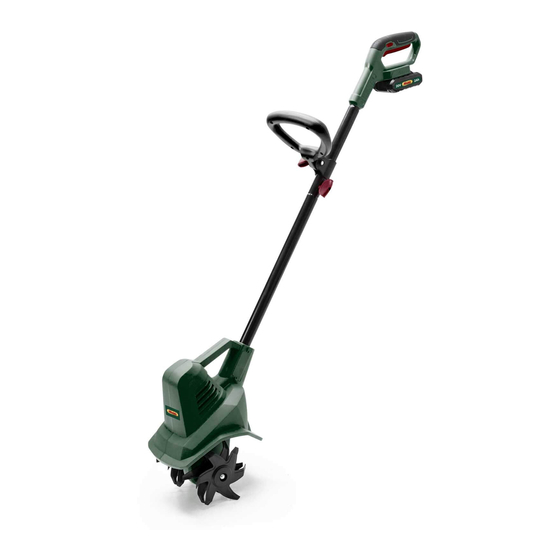
INSTRUCTION MANUAL KNOW YOUR MACHINE Trigger Safety Button Front Handle Upper Shaft Wing Nut Fixing Lower Shaft Side Cover Motor Housing Tine 1 (Right) Tine 2 (Left) 18v 2Ah Battery Battery Charger... -
Page 11: Components
COMPONENTS This product must be assembled correctly before use. Carefully remove the product and any accessories from the carton. Make sure all items listed below are included. If you require assistance with regards to the contents or operation of the machine, please contact us: TEL: 01793 333212 EMAIL: customerservice@handydistribution.co.uk (MON –... -
Page 12: Assembly
INSTRUCTION MANUAL ASSEMBLY Remove the machine and contents from the carton. Be sure the carton is empty before discarding. If you require assistance with regards to the contents or operation of the machine, please contact us: Tel: 01793 333212 - Email: customerservice@webbgardenpower.co.uk Opening hours weekdays: February to October 8:30am - 5:30pm / November to January 8:30am - 5:00pm (Closed Bank Holidays) UPPER &... - Page 13 WARNING DO NOT attempt to start this machine without it first being FULLY assembled. When connecting the tilling head and lower handle using the two self-tapping screws supplied, make sure the screws are securely tightened. Screw heads should be recessed below the surface. DO NOT START THE UNIT UNTIL TILLING HEAD AND LOWER HANDLE ARE SECURELY CONNECTED.
-
Page 14: Battery & Charger
INSTRUCTION MANUAL BATTERY & CHARGER By pressing the button on the battery, the LED display will show the battery capacity. LED LIGHTS BATTERY STATUS LED x4 Battery is 75-100% charged LED x3 Battery is 50-75% charged LED x2 Battery is 25-50% charged LED x1 Battery is 0-25% charged BATTERY CHARGER... -
Page 15: Operation
OPERATION THE BATTERY MUST BE FULLY CHARGED BEFORE THE FIRST USE OF THE PRODUCT. SEE STARTING & STOPPING WARNING The tines start rotating immediately after the tiller is switched on. Keep hands and feet away from the tines. 1. To switch ON, hold the tiller firmly with two hands. One hand should be placed on the top trigger handle, with your other hand firmly holding the front handle. - Page 16 INSTRUCTION MANUAL For preparing seed beds, we recommend using one of these tilling patterns: Tilling Pattern A – Make two passes over area to be tilled, the second at a right angle to the first. Tilling Pattern B – Make two passes over area to be tilled, the second overlapping the first. Clearing foreign objects: During operation, a stone or root could become lodged in the tines, or tall grass or weeds may become wrapped around the tine shaft.
- Page 17 BATTERY & CHARGER By pressing the button on the battery, the LED display will show the battery capacity. LED LIGHTS BATTERY STATUS LED x4 Battery is 75-100% charged LED x3 Battery is 50-75% charged LED x2 Battery is 25-50% charged LED x1 Battery is 0-25% charged BATTERY CHARGER...
-
Page 18: Maintenance
INSTRUCTION MANUAL MAINTENANCE WARNING Before carrying out maintenance operations, disconnect power supply (Remove Battery). Before each use of the charger, check the cable for signs of damage or ageing. Replace the cable if it is cracked, split or otherwise damaged. Check the condition of the tines and ensure that all threaded connections are securely tightened. - Page 19 TINE INSTALLATION 1. Install the new tine by pressing it onto the hub. The side with stamped part number must face outward. Be sure to install tines in the same sequence as shown in Fig 7. Position the hub so that the larger diameter whole is facing outward.
-
Page 20: Trouble Shooting
INSTRUCTION MANUAL TROUBLE SHOOTING PROBLEM POSSIBLE CAUSE SOLUTION Motor does not start Safety lock button not fully Check that safety lock button on handle is fully depressed depressed before pulling the trigger. Battery not installed properly Check battery installation. Battery has low charge Charge the battery. - Page 21 Notes...
- Page 22 INSTRUCTION MANUAL PARTS DIAGRAM – WEV20TIL (1938262001) PARTS NOTE: Parts Lists are supplied for information purposes only, not all parts are stocked individually & we recommend you contact our Spares Team on 01793 333212 for expert advice...
- Page 23 PARTS LIST – WEV20TIL (1938262001) PARTS LIST – WEV20TIL PARTS LIST – WEV20TIL (1938262001) (1938262001) HANDY PART NO. DESCRIPTION TH250-181018012200 Left Adapter HANDY PART NO. DESCRIPTION HANDY PART NO. DESCRIPTION WE181-182018201200 Left Handle TH250-202818101000 Worm TH250-181018012200 Left Adapter WEV20B2 20v 2Ah Battery...
- Page 24 Please find on the following pages, parts lists and drawings for your machine. Should you require a replacement part, please call our Spares Team on 01793 333212, option 1 for assistance. Webb recommends the use of Handy Parts oils, fuel additives, nylon lines pre-packed parts for all our machines.
- Page 25 EC DECLARATION OF CONFORMITY We Handy Distribution Ltd - SN3 5HY (Importer) declare that the product: Designation: 20v Cordless Lithium-Ion Tiller Model(s): WEV20TIL Product No.: 1938262001 Type/Serial No. As per rating label on machine Idle Speed: 160rpm Protection: IPX1 Max Voltage: 20v d.c...
- Page 26 INSTRUCTION MANUAL This Service Book is provided with your Webb, to help you look after your purchase to our recommendations and enable you to take advantage of the conditional manufacturer domestic warranty*. Present this service book to your authorised Webb repair dealer, whenever a service or a warranty appraisal is required.
- Page 27 2. Period of Warranty - valid from 1 January 2020 Webb (excludes Dynamic, Legacy & Heritage), 2 year conditional warranty from the original date of sale to the fi rst domestic user.
-
Page 28: Warranty
It is the owner’s responsibility to ensure that their Webb machine is maintained at specifi c intervals. Any approved Webb service dealer can undertake a service, which are specialised in our products and will be aware of your particular machine and any technical updates which will save valuable time &... - Page 29 SERVICE BOOK Your servicing Webb approved dealer will stamp & date the below relevant sections, when the correct service actions have been completed. PLEASE ENSURE THE SERVICE BOOK IS AVAILABLE FOR THE DEALER, DURING SERVICE WORK. 1st Service This must be stamped by an approved service dealer to qualify for a free second year warranty.
- Page 30 Service Record INSTRUCTION MANUAL 48 Months 60 Months Date Date 72 Months 84 Months Date Date 96 Months 108 Months Date Date 120 Months 132 Months Date Date...
- Page 31 Email From time to time Webb, its associated companies, authorised dealers or third parties working on our behalf may wish to contact you regarding our products, services, off ers or just opinions, which may be used for marketing, research or analysis purposes.
- Page 32 Webb Lawnmowers Murdock Road Dorcan Swindon Wiltshire SN3 5HY...
Need help?
Do you have a question about the WEV20TIL and is the answer not in the manual?
Questions and answers