
Related Manuals for diversey Taski balimat 6500


Summary of Contents for diversey Taski balimat 6500
- Page 1 balimat 6500 ___________________________________________________ Instruction Manual (Translation of the Original Version) 2021-04-28...
-
Page 3: Table Of Contents
CONTENTS CONTENTS, GENERAL ….3 BATTERIES ….19 CONTENTS ….3 CHARGING THE BATTERIES ….19 PROPER USE ….4 BRAKE ….20 EC CONFORMITY DECLARATION ….4 ADJUSTING THE BRAKE ….20 RATING PLATE ….4 BRAKE TEST ….21 AUTOMATIC SAFETY DEVICE ….21 EXPLANATION OF SYMBOLS ….4 CONSTRUCTION, FUNCTION, TECHNICAL DATA ….5 STEERING ….22... -
Page 4: Proper Use
PROPER USE RATING PLATE The rating plate is attached on the frame. Only use the sweeper according to the specifications in this operating manual. The sweeper is only intended for sweeping hard standing areas (e.g.: car parks, pavements, warehouses). The sweeping environment must not be wet. -
Page 5: Construction, Function, Technical Data
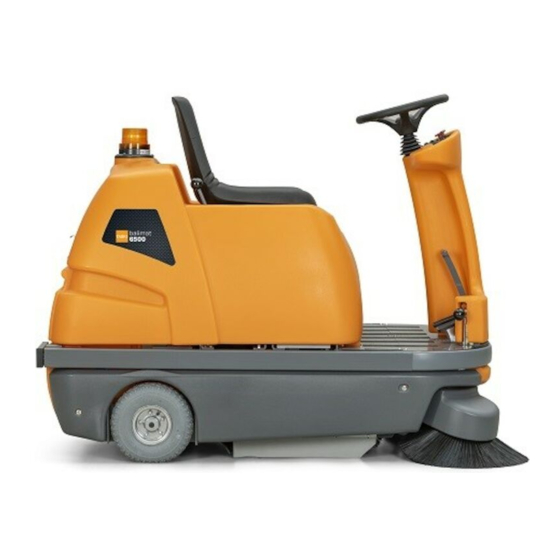
CONSTRUCTION, FUNCTION, TECHNICAL DATA The balimat 6500 is a battery-operated, ride-on vacuum sweeper vacuum sweeper fitted with the tandem roller system (TRS). The TRS allows large sweeping materials to be swept up without difficulty. The sweeper has a powerful vacuum function. FUNCTION * The version of the machine may differ from the illustration... -
Page 6: Operating And Functional Components
OPERATING AND FUNCTIONAL COMPONENTS OVERVIEW: CONTROL PANEL A. Side brush switch K. Side brush lever (standard right) B. Main brush switch L. Side brush lever (optional left) C. Vacuum/filter cleaner switch M. Driver’s seat D. Battery condition display N. Main cover E. -
Page 7: Technical Data
TECHNICAL DATA ELEKTRIK DIMENSIONS AND WEIGHT Item Measure Fuse electric circuit Measure Length 1420 mm Vacuuming System/ Width 900 mm Filter cleaning Height at 1140 mm Roller brush 25 A steering wheel Side brush 10 A (20 A) Weight: without batteries 220 Kg Horn, reverse signal, Weight: with batteries 350 Kg... -
Page 8: Safety
• To avoid damage to health, smoking, eating and drinking SAFETY in the area of the battery charging station is to be avoided. SAFETY INSTRUKTIONS • The battery must only be charged with the front panel open and secured by the cover holder. As well as the operating manual and the binding regulations for accident prevention applicable in the country of usage and •... -
Page 9: Safety Instruktions-Attachement Sticker
SAFETY INSTRUKTIONS - ATTACHEMENT STICKER The following safety labels are mounted on the Machine in the locations indicated. If any Label becomes damaged or illegible, install a new label in ist place. Battery charging lable- located in battery compartment FOR SAFETY LABEL − LOCATED ON THE SIDE OF THE OPERATOR COMPARTMENT. -
Page 10: Safety Equipment
SAFETY EQUIPMENT The Sweeper is ready for use. WARNING! Use a unit ramp. The ramp must be This sweeper can only be started if - the ignition key is set to the ON position; designed in such a way as to allow the rear - the emergency switch is deactivated. -
Page 11: Operation
OPERATION Press the brake pedal. ADJUSTING THE DRIVER`S SEAT Release the parking brake. Loosen the seat adjuster and shift the seat on the seat NOTE: An audible signal will sound when backing support to adjust the seat position. the machine. STARTING SWEEPER 1•... -
Page 12: Sweeping Operation
SWEEPING OPERATION STOPPING THE ROLLER BRUSH 1. Place the main brush switch in the OFF position. MUST BE FOLLOWED! 2. Raise the main brush with the main brush lever. You must only carry out the work described in this chapter if you have completely read and understood the operating manual, particularly page 8-11. -
Page 13: Operating The Filter Shaker Mechanism
OPERATING THE FILTER CLEANING TURNING OF THE SWEEPER 1. Press and hold the brake pedal. 2. Lock the brake by pulling the locking lever towards the driver’s seat. The flat-pleat filter collects fine dust during sweeping operation. The filter cleaning cleans the dust and prevents the panel filter from being blocked by debris. -
Page 14: Emptying The Sweepings Conainer
3. Lower the debris hopper to the ground. EMTYING THE DIRT-HOPPER 4. Remove the debris hopper completely from the sweeper. The dirt container is where the debris is collected. It is positioned at the back of the sweeper. The dirt hopper 5. -
Page 15: Replacing The Dust Filter
REPLACING THE FLAT-PLEAT FILTER INSTALLING THE FLAT-PLEAT FILTER 1. Open the hood. 1. Place the filter into the lower angular bracket. 2. Lock hood securely using the hood prop. 2. Swing the upper bracket over the filter. 3. Tighten the top star handles slightly. 4. -
Page 16: Side Brush
SIDE BRUSHES SEITENBESEN ADJUSTING THE SIDE BRUSH Normal wear requires additional adjustment of the side brushes. 1. Turn off the sweeper. 2. Lower the side brush with the side brush lever. REMOVING THE SIDE BRUSH 3. Loosen the bolts of the front panel. 4. -
Page 17: Roller Brush
ROLLER BRUSH INSTALLING THE ROLLER BRUSH REMOVING THE ROLLER BRUSH − Push the sweeping rollers under the machine. Observe the sweeping rollers' sense of rotation while sliding them in. − Turn off the sweeper. − Lower the main brush with the main brush lever. Forward drive −... -
Page 18: Check The Sweep
ADJUSTING THE ROLLER BRUSH CLEARANCE KEHRWALZEN FOR SAFETY: Before leaving or servicing machine, stop on a level surface, set parking brake, turn off machine and remove key. 1.Switch off the Sweeper. 2. Lower the main brush. Threaded rods Sweeping roller keyway 3. -
Page 19: Batteries
BATTERY KEHRWALZEN KEHRWALZEN CHARGING THE BATTERIES Safety Instructions on Batteries DANGER Risk of injury, the charger must only be You must note the following warning instructions for put into operation if the mains cable is handling batteries. not damaged. A damaged mains cable is to be replaced without delay by the manufacturer, Customer Services or a qualified person. -
Page 20: Brake
BRAKE The brake (drum brake) acts on the front wheel and is controlled via the brake cable by the brake pedal. The brake adjustment is situated on the right side of the front wheel facing in driving direction. KEHRWALZEN ADJUSTING THE BRAKE CAUTION! RISK OF CRUSHING (Fig. -
Page 21: Automatic Safety Device
BRAKE CHECK SAFETY EQUIPMENT The resetable circuit breakers are positioned on the right CAUTION! side under the hood, facing in driving direction. RISK OF CRUSHING WHEN CLOSING THE FOR SAFETY: Before leaving or servicing machine, stop on FILTER BOX. a level surface, set parking brake, turn off machine and remove key FREE MOVEMENT OF FRONT WHEEL You must be able to move the sweeper by pushing when... -
Page 22: Steering
STEERING TRANSPORTING THE MACHINE The steering transferal to the front wheel is managed by For the safe transport of the sweeper in a crate or on a a chain and two chain sprockets. pallet: tie down the machine by fixing two straps as shown below. -
Page 23: Troubleshooting
MACHINE TROUBLESHOOTING PROBLEM CAUSE REMEDV No operating display at control EMERGENCY STOP SWITCH activated Turn EMERGENCY STOP SWITCH panel clockwise Key switch not switched on Turn key switch clockwise and check correct load Fault in electrical wiring Check plug connections Battery charge empty Charge battery No operation of traction drive... -
Page 24: Contact Data
IMPORTANT SPARE PARTS AND CONSUMABLES Flat filter Item No. 103853 Sweeping Roller PA 0.4 V Item No. 106240 Item No. 104256 Side Brushes PA 0.6 CONTACT DATA Manufacturer: Stolzenberg GmbH & Co. KG Hamburger Straße 15-17 49124 Georgsmarienhütte T: +49 (0) 5401 / 8353-0 F: +49 (0) 5401 / 8353 - 11 service@stolzenberg.de... -
Page 25: Maintenance Work
MAINTENANCE WORK / MAINTENANCE TABLE RISK! Risk of Injury The motor(s) need(s) to overrun for several seconds after being shut off. In this time, you must keep clear of the drive area CAUTION! - Allow the equipment to cool down sufficiently before all maintenance and repair work - Unplug the charger from the socket. -
Page 26: Shutdown, Dismantling, Disposal
SHUTDOWN, DISMANTLING, DISPOSAL TOPPAGE OF THE WEEPER • INSTRUCTION If it is stopped for a long period, the batteries must charge at intervals of approximately 2 months so they are not damaged by a deep discharge. • Set down the sweeper onto a level, dry and protected surface. -
Page 27: Circuit Diagram
CIRCUIT DIAGRAM schwarz 24V-Battery S1 (Key) Charging Plug grey violet white 24V/25A black S2(a) green pink brown Battery Indicator Not-Aus(a) Seat green Traction drive Reverse Warning yellow blue Signal Drive Control S-Drive (controller) Driving Direction 5K-lin Filter Cleaner yellow orange S2(b) violet Emergency-Stop (b)
Need help?
Do you have a question about the Taski balimat 6500 and is the answer not in the manual?
Questions and answers