Advertisement
Quick Links
02
Features
• When the built-in chip of motor is matched with Hobbywing XeRun XR8 series of ESC, the ESC can automatically identify the motor and build a pure sensor mode power system, providing better manipulating
performance and more delicate manipulating feel.
• When this motor is used together with Hobbywing XERUN XR8 PRO G2 ESC can start more effective turbo timing than the last generation of system. The motor can release maximum power instantly. The maximum
speed can be promoted by 50%. Easily win your rival.
• The motor adopts the patent technology of "error-free" Hall sensor system, the independent high-speed and high-precision encoder always outputs pure rotor position signal, which effectively avoids the interference
of sensor signal and makes the motor work stably in sensor state.
• The mechanical turbo timing of motor can be adjusted from 20-40°. It is convenient for driver to calibrate accurately output power of motor and meet power requirements of various application.
• The motor has low cogging effect and small torque pulse. It is very smooth at low speed and has superb manipulating performance.
• The protection grade of Off-Road motor is IP5X. Its excellent dustproof performance can easy to deal with various Off-Road dusty track environment.
• On the premise of improving the performance, the design of 4268SD G3 is optimized which extremely reduce the weight of motor. The weight of 1900KV / 2200KV is 20g / 45g lighter than peers. The light motor is
convenient for the driver to adjust the balance performance of the vehicle.
03
Specifications
PN
Model
30401906
XERUN-4268SD-1900KV-G3-OffRoad
30401907
XERUN-4268SD-2200KV-G3-OffRoad
30401908
XERUN-4268SD-2000KV-G3-OnRoad
30401909
XERUN-4268SD-2800KV-G3-OnRoad
30405001
XERUN-4274SD-2250KV-G3
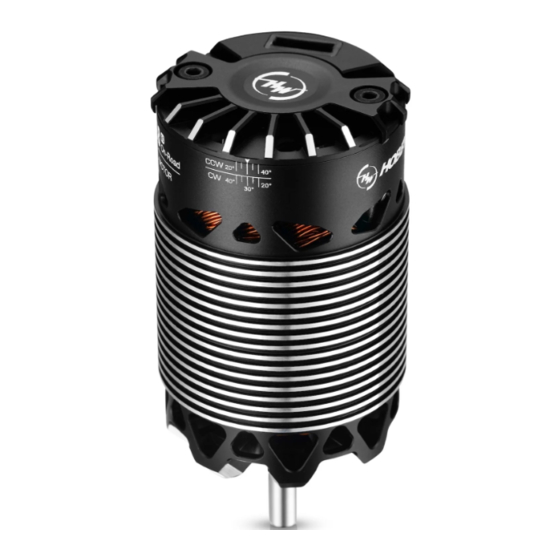
C.C.W
4-M4
Ø25.40
XERUN 4268/4274
04
Installation & Connection
Motor A
Motor B
Motor C
05
Timing Adjustment
1. With the motor direction set to CCW, take the graduation/value after "CCW" on the motor case as the
starting point when adjusting the timing. With the reversed triangle pointing at a value /graduation,
the smaller/bigger the value, the smaller/bigger the timing. The timing is 40 degrees in picture 1.
2. With the motor direction set to CW, take the graduation/value after "CW" on the motor case as the
starting point when adjusting the timing. (With the reversed triangle pointing at a value/graduation,
the smaller/bigger the value, the smaller/bigger the timing. The timing is 20 degrees in picture 1.
3. The motor timing is 30 degrees by default (as shown in picture 2). The motor timing should be within
30 to 40 degrees if you want to activate the Turbo timing. And the timing can be within 20 to 40
degrees if you have no intention to activate the Turbo timing.
06
Gearing
Reasonable selection of gear ratio is very important. Improper gear ratio may bring you great loss. Please according to the following points to select the correct gear ratio!
1. The working temperature of the motor
The motor temperature should be lower than 100 degrees Celsius (212 degrees Fahrenheit) in operation. Because high temperature may cause the magnets to get demagnetized, the coil to get melt and short
circuited, and the ESC to get damaged. A suitable gearing ratio can effectively prevent the motor from overheating.
2. The principle of selecting gear ratio
To avoid the possible damage to ESC and motor caused by the overheat, please start with a small pinion/a big FDR and check the motor temperature regularly. If the motor and ESC temperature always stay at a low
level during the operation, change a big pinion/a low FDR and also check the motor temperature regularly to ensure that the new FDR is suitable for your vehicle, local weather and track condition. (Note: For the
safety of electric devices, please check the ESC and motor temperature regularly.)
07
Assembly and Disassembly
In order to make the motor have longer service life and higher efficiency, we suggest to regularly check the bearing and clean the dirt in the
motor. The specific time depends on the frequency of using the motor and the site conditions.
When installing, please follow the steps in the following assembly drawing; when disassembling, follow the reverse steps.
1
Mount the motor rotor
USER MANUAL
Sensored Brushless Motor
XERUN 4268/4274 G3
KV
Internal
LiPo
(No-load)
resistance
1900KV
2-6s
0.0075Ω
2200KV
2-6s
0.0069Ω
2000KV
2-6s
0.0069Ω
2800KV
2-4s
0.0035Ω
2250KV
2-6s
0.0037Ω
4-M3
16
18.50
XERUN 4268
Sensor wire
Brushless Electronic Speed Controller
XERUN 4268
2
3
Mount the back end bell set
Thank you for purchasing this HOBBYWING product! The power of brushless power
system is powerful. Any improper use may cause personal injury and damage to the
product and related devices. We strongly recommend reading through this user manual
ATTENTION
before use and strictly abide by the specified operating procedures. We shall not be liable
for any liability arising from the use of this product, including but not limited to
reimbursement for incidental or indirect losses. Meanwhile, we do not assume any
CAUTIONS
responsibility caused by unauthorized modification of the product. We have the right to
change the product design, appearance, performance and use requirements without
notice.
01
Warnings
• Never leave this unit unsupervised when it is powered on.
• All wires and connections should be well insulated. Short circuits can possibly damage the products.
• Avoid incorrect connections between the electronic speed controller(ESC)and the motor.
ATTENTION
• Never allow this product to come in contact with water, oil, fuel or other electro-conductive liquids.
If this happens, stop the use of your product immediately and let it dry carefully.
• Please carefully check power devices and manual of car frame to ensure the power pairing is
reasonable. Avoid wrong pairing to overload and damage the motor.
• Never apply full throttle if the pinion is not installed. Due to the extremely high RPMs without load,
the motor can get damaged.
• Always wire up all the parts of the equipment carefully. If any of the connections come loose as a
result of vibration, your model RC may lose control.
• Never allow the motor case to get 100 degrees Celsius(212 degrees Fahrenheit) because the
magnets maybe demagnetized by high temperature.
20201120
No-load
Outer diameter/Length
current
4A
4.1A
42mm(1.654in)
4.2A
67.8mm(2.669in)
6.1A
5A
42mm(1.654in) 74mm(2.913in)
16
67.80
18.50
1. Install the motor
The motor mounting screw specifications are two groups of M3 and two groups of M4. The motor screw hole can
be locked into the depth of 5.5mm. Before installing the motor on the vehicle, please carefully confirm whether
the specification of the matching screw is appropriate, so as to avoid damaging the motor by using too long or
too thick screw. Generally, it is recommended to use m3 / M4 screw with length not longer than 8mm, which is
determined according to the thickness of frame motor mounting base.
2. Motor connection
• When welding / connecting the motor and the electronic speed controller (ESC), please pay attention to the ESC
marking to ensure that the terminals on the ESC and the motor are one-to-one, that is, wire A of the ESC matches
wire A of the motor, wire B of the ESC matches wire B of the motor, wire C of the ESC matches wire C of the motor.
• Make sure the sensor wire is clean and undamaged, and pay attention to the orientation of the sensor wire.
Connect the sensor wire to the terminal of the motor and ESC in the correct direction.
3. Inspection
Before power on the remote control vehicle, please check the reliability of the motor installation and the
correctness of all connections.
4
Mount screws for fastening
the back end bell
Bearing
Shaft diameter/
Pole
size(mm)
Exposed shaft length
Front:D16*D5*T5
5mm(0.197in)
4
Rear:D11*D5*T5
18.5mm(0.728in)
74
XERUN 4274
XERUN 4268/4274
picture 1
5
Picture of the
assembled motor
Weight
Application
315g
1/8 Off-load
285g
285g
1/8 On-road
300g
354g
1/8 Truck, Monster truck
Ø42
24.6
picture 2
Parts List
Stator Set x 1Pcs
Rotor x 1Pcs
Back End Bell x 1Pcs
Screws for Fastening the
Back End Bell x 2Pcs
M3*10
Advertisement

Related Manuals for Hobbywing XERUN 4268 G3


Summary of Contents for Hobbywing XERUN 4268 G3
- Page 1 • When this motor is used together with Hobbywing XERUN XR8 PRO G2 ESC can start more effective turbo timing than the last generation of system. The motor can release maximum power instantly. The maximum speed can be promoted by 50%.
- Page 2 感谢您购买本产品!无刷动力系统功率强大,错误的使用可能造成人身伤害 和设备损坏。在使用设备前,请务必仔细阅读本说明书,并严格遵守规定的 ATTENTION 操作程序。我们不承担因使用本产品而引起的任何责任,包括但不限于对附 带损失或间接损失的赔偿责任;同时,我们不承担因擅自对产品进行修改所 引起的任何责任。我们有权在不经通知的情况下变更产品设计、外观、性能 CAUTIONS 及使用要求。 车用有感无刷电机 使用说明书 注意事项 XERUN 4268/4274 G3 ・在产品处于通电状态时,请勿分散精力去处理其他事情。 ・连接电机前,请确保需要绝缘的部位处理良好,短路会毁坏产品。 ・连接电机前,务必认真核对电子调速器与电机的线序,避免线序错误的情况发生。 ATTENTION ・请勿让本产品与水、油、燃料或其他导电液体接触,因为这些可能含有对电子电路有害 的物质。如果发生以上情况,请立即停用您的产品,并小心进行清洁和干燥处理。 ・使用此电机前,请认真查看各动力设备以及车架说明书,确保动力搭配合理,避免因错 误的动力搭配导致电机超载而损坏。 ・齿轮未安装前,禁止全油门操作。无负载情况下高速运转可能会损坏电机。 ・请务必仔细连接好各部件,若连接不良,遥控模型车可能无法正常控制,或出现部件损 坏等其他不可预知的情况。 ・勿使电机外壳温度超过100摄氏度(212华氏度),高温可能导致转子退磁并最终对电 机造成不可恢复的损坏。 20201120 产品特色 ・电机中内置芯片,与好盈XeRun XR8系列电调搭配时,电调可自动识别出此电机,并构建纯有感模式的动力系统,提供更出色的操控性能和更细腻的操控手感。 ・该电机与好盈XERUN XR8 PRO G2电调搭配可开启比上一代系统更加明显的Turbo进角效果,让电机瞬间释放最大的动力,最高车速可提升50%,轻松超越对手。 ・电机采用“无错”霍尔传感系统专利技术,独立的高速高精度编码器始终输出纯净的转子位置信号,有效地避免了传感器信号干扰,使电机稳定工作于有感状态。 ・电机机械进角可做双向20-40°调整,便于车手更为精准地调校电机输出功率,满足各种应用的动力需求。 ・电机齿槽效应低,力矩脉动小,低速时非常顺滑,极佳的操控性能。 ・越野版电机防护等级为IP5X,出色的防尘性能,轻松应对各种Off-Road多尘赛道环境。 ・4268SD G3在保障性能提升的前提下,优化设计,极致地减轻了电机重量,1900KV/2200KV分别比同行低20g/45g。低重量电机便于车手进行车辆的平衡性能调教。 产品规格...
Need help?
Do you have a question about the XERUN 4268 G3 and is the answer not in the manual?
Questions and answers