Table of Contents
Advertisement
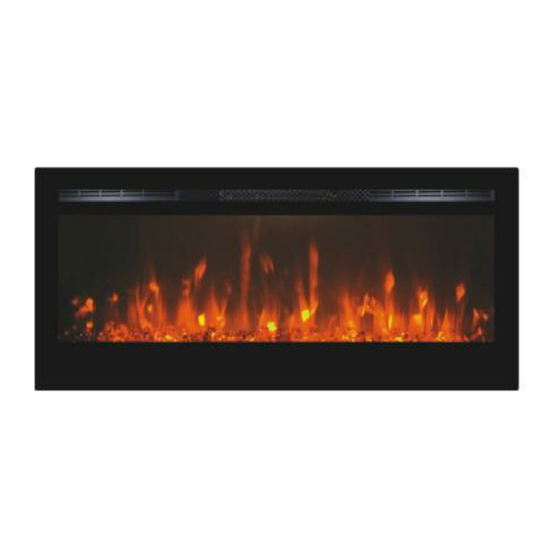
Model# BG-36B
36"L WALL MOUNT/RECESSED ELECTRIC
FIREPLACE- FRONT VENT WITH REMOTE
CONTROL- ORANGE FLAME COLOR
IMPORTANT SAFETY INFORMATION: Always read this manual first
before attempting to install or use this fireplace. For your safety , always
comply with all warnings and safety instructions contained in this manual
to prevent personal injury or property damage.
Model# BG-50B
50"L WALL MOUNTED/RECESSED ELECTRIC
FIREPLACE-FRONT VENT WITH REMOTE
CONTROL - ORANGE FLAME COLOR
AC 120V 60Hz 1500W
Advertisement
Table of Contents

Subscribe to Our Youtube Channel
Related Manuals for CSA BG-36B

Summary of Contents for CSA BG-36B
- Page 1 Model# BG-36B 36"L WALL MOUNT/RECESSED ELECTRIC FIREPLACE- FRONT VENT WITH REMOTE CONTROL- ORANGE FLAME COLOR Model# BG-50B 50”L WALL MOUNTED/RECESSED ELECTRIC FIREPLACE-FRONT VENT WITH REMOTE CONTROL - ORANGE FLAME COLOR AC 120V 60Hz 1500W IMPORTANT SAFETY INFORMATION: Always read this manual first before attempting to install or use this fireplace.
-
Page 2: Table Of Contents
Table of Contents IMPORTANT INSTRUCTIONS ......Quick Reference Guide.......... Fireplace Installation ........... Wiring Diagram ............... Hard wire Installation..............................Wiring Front Glass Removal / Installation ...........10 Wall Mount Installation ............11-12 Framing..................Fully Recessed Installation ............... 14 Partially recessed installation ............15 Media Installation ................16 Operation............... -
Page 3: Important Instructions
IMPORTANT INSTRUCTIONS ④ Young children should be When using electrical appliances, supervised to ensure that they do basic precautions should always not play with the appliance. be followed to reduce the risk of ⑤ The appliance is not intended fire, electric shock, and injury to persons, including the following: for use by young children or ①... - Page 4 ⑬ To prevent a possible fire, do not block air intakes or exhaust ⑰ Do not burn wood or other in any manner. materials in the electric fireplace ⑭ A heater can produce arc ⑱ Do not strike the fireplace flashes or sparks when electric glass.
-
Page 5: Quick Reference Guide
② For dimensions of your fireplace, refer to below diagram PRODUCT DIMENSIONS Model Number Description 36"L WALL MOUNT/RECESSED 36" 21.46" 5.51" 32.48" ELECTRIC FIREPLACE- FRONT BG-36B 91.5cm 54.4cm 14cm 82.5cm VENT WITH REMOTE CONTROL- ORANGE FLAME COLOR 50"L WALL MOUNT/RECESSED 50" 21.46" 5.51"... -
Page 6: Fireplace Installation
Fireplace Installation Site Selection and ensure that the power cord is stored or secured to avoid Review and consider all of the fol- tripping or snagging to reduce lowing conditions for installation: the risk of fire, electric shock o 1.Unit requires a minimum of two injury topersons. - Page 7 Fireplace Installation MINIMUM CLEARANCE Measurements are taken from the glass front. Bottom 0" (can be put on the floor) 11.8" (300mm) to mantel Sides 0" (can go to the edge of the wall) 11.8" (300mm) to ceiling 25" (635mm) to TV Back 0"...
-
Page 8: Wiring Diagram
Fireplace Installation Wiring Diagram BG-36/50B Hard wire Installation The fireplace is packaged with a three prong plug installed for plug-in convenience. Hard wiring the fireplace is also an option for any installation. WARNING: Do not attempt to wire your own new outlets or circuits. To reduce the risk of fire, electric shock or injury persons, always usea licensed electrician. -
Page 9: Wiring
This appliance must be electrically connected and grounded in accordance with local codes, if hard wired. In the absence of local codes, use the current CSA C22.1 CANADIAN ELECTRICAL CODE in Canada or the current ANSI/NFPA 70 NATIONAL ELECTRICAL CODE in the United States. -
Page 10: Front Glass Removal / Installation
Fireplace Installation Front glass removal / installation With one hand on the front glass to prevent it from falling, remove the two screws (1 per side) from the side of the appliance (Fig. 4-1). Set the screws aside. Carefully lift the front glass up and away from the appliance (Fig. 4-2 and 4-3). -
Page 11: Wall Mount Installation
Fireplace Installation There are 3 OPTIONS TO INSTALL THE FIREPLACE: i. SURFACE WALL MOUNT INSTALLATION Due to the many different materials used on different walls, it is highly recommended that you consult your local builder before you install this appliance on the wall. Select a location that is not prone to moisture and is located at least 36"... - Page 12 Fireplace Installation Wall Fig. 5-2 With the wall mounting bracket installed, have two people lift the appliance up and insert the hooks on the bracket into the slots on the back of the appliance (Fig. 5-3). Wall Fig. 5-3 Check the appliance for stability ensuring that the bracket will not pull free from the wall.
- Page 13 C. Remove the front glass (see “front glass removal / installation” section). D. Hold the appliance up to ensure it will fit into the framing. Finishing Material (Non-Load Bearing) Framing Size Model Number BG-36B 33” (83.82CM) 20.75” (52.71CM) BG-50B 47.17” (119.80CM) 20.75” (52.71CM)
-
Page 14: Fully Recessed Installation
Fireplace Installation ii. FULLY RECESSED WALL MOUNT INSTALLATION A. Remove power cord and complete hard wiring (see “hard wiring installation” section). B. Insert the appliance into the rough-in frame, and then secure it by installing 6 screws (supplied) through the side flanges (Fig. 5-4). C. -
Page 15: Partially Recessed Installation
Fireplace Installation iii. PARTIALLY RECESSED WALL MOUNT INSTALLATION A. Install 4 metal brackets (2 per side) (supplied) onto the sides of the appliance (Fig. 5-5) B. Remove the power cord and complete hard wiring (see “hard wiring installation” section). C. Insert the appliance as far into the rough-in frame as possible/ desired, and then secure it by installing 4 screws (supplied) through the metal brackets (Fig. -
Page 16: Media Installation
Fireplace Installation Log-set / Crystal Media Installation This fireplace style comes with 2 media options: log-set and crystals A. Glass front must be removed and the appliance must be mounted in its final location before the log-set / crystal embers are installed. B. -
Page 17: Operation
Operation Read and understand this entire owner’s manual, including all safety information, before plugging in or using this product. Failure to do so could result in electric shock, fire, serious injury, or death. Power Plug the power cord into a 110~120 Volt 15 Amp grounded outlet (see IMPORTANT SAFETY INFORMATION on Pages 3 and 4). - Page 18 Operation 1.Press once. Flame effect gets brighter. FLAME “+”: Makes flame effect brighter. NOTE: Flame effect stays on until power 2.Press again until desired setting is button is turned off. Flame effect must be reached. Flame effect continues to get on for heater to turn on.
- Page 19 Operation Temperature Limiting Control This heater is equipped with a Temperature Limiting Control. Should the heater reach an unsafe temperature, the heater will automatically turn OFF. To reset: Unplug the power cord from the outlet. Turn the ON/OFF switch on the CONTROL PANEL to OFF. Wait 5 minutes. Inspect the fireplace to make sure no vents are blocked, or clogged with dust or lint.
-
Page 20: Maintenance
• Energy-saving LED light strip is built into the product and is NOT replaceable by the consumer. Model# LED strip quantity LED lumens Life span LED power BG-36B 2 PIECES 800lm 25000 hours BG-50B 2 PIECES 800lm 25000 hours Storage: •... - Page 21 Troubleshooting WARNING DISCONNECTED THE APPLIANCE COMPLETELY AND LET COOL PRIOR TO ANY SERVICE. ONLY A QUALIFIED SERVICE PERSON SHOULD SERVICE AND REPAIR THIS ELECTRIC APPLIANCE. Problem Possible Cause Solution 1. Fireplace turns off 1. Fireplace has overheated 1. Reset switch by turning main and will not turn on.
- Page 22 7.Heater does not Thermal switch has been 1.Turn unit off and unplug unit provide heat when tripped. for 10 minutes. Plug back in and turned on. turn unit on. If plug cannot be reached, follow directions for tripped circuit breaker. Wiring is loose.
Need help?
Do you have a question about the BG-36B and is the answer not in the manual?
Questions and answers