Table of Contents
Advertisement
Quick Links
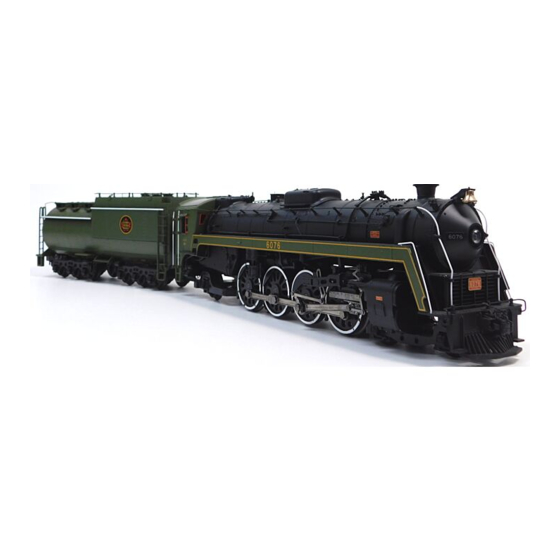
Premier 4-8-2 U1F Mountain
Steam Engine
OPERATOR'S MANUAL
Compatibility
This engine will operate on
any traditional O-54 Gauge
track system, including
M.T.H.' s RealTrax® or
ScaleTrax™ or traditional
tubular track. It is also
compatible with most standard
AC transformers. (See page
23 for a complete list of
compatible transformers and
PSA
wiring instructions.)
PLEASE READ BEFORE USE AND SAVE
Advertisement
Table of Contents

Subscribe to Our Youtube Channel
Related Manuals for MTHTrains 20-3276-1


Summary of Contents for MTHTrains 20-3276-1
- Page 1 Premier 4-8-2 U1F Mountain Steam Engine OPERATOR’S MANUAL Compatibility This engine will operate on any traditional O-54 Gauge track system, including M.T.H.’ s RealTrax® or ScaleTrax™ or traditional tubular track. It is also compatible with most standard AC transformers. (See page 23 for a complete list of compatible transformers and wiring instructions.)
-
Page 2: Table Of Contents
Table of Contents Set Up Checklist....................Lubrication..................... Priming The Smoke Unit..............Wireless Drawbar..................Basic Operation....................Activating Features................Proto-Sound 2.0 Operating Instructions............Activating Proto-Sound 2.0 Conventional Mode Features....Freight Yard Sounds (FYS) Passenger Station Announcements (PSA)......... Proto-Coupler® Operation..............Speed Control..................Locking Locomotive Into A Direction..........Reset To Factory Default.............. -
Page 3: Set Up Checklist
Set Up Checklist Lubricate the locomotive Prime the smoke unit Check to see whether the battery needs to be charged for full sound effects Apply power to run as described in the Basic Operating Section of this manual Lubrication You should lubricate the engine to prevent it from squeaking. Use light household oil and follow the lubrication points marked “L”... -
Page 4: Wireless Drawbar
Placing the Engine on Track Your Premier Steam Engine is equipped with a tetherless drawbar. There is no unsightly cable or box showing between the engine and tender to detract from the appearance of the model. The electrical connections pass through conductors within the drawbar, so it is important that the connector be properly inserted. -
Page 5: Basic Operation
Basic Operation The Throttle knob controls how fast your train will travel. Turn the throttle knob up ½-way, until the engine and caboose lights shine bright. Put the engine into motion by pressing the Direction button on your transformer once. (hold it for approximately 1 second) If the engine does not begin to move as soon as you firmly press the Direction button, you may not have sent enough voltage to the track to make the train move. - Page 6 Manual Volume Control To adjust the volume of all sounds made by this engine, turn the master volume control knob, located under the water hatch on the tender, clockwise to increase the volume and counter-clockwise to decrease the volume. Proto-Sound 2.0 Volume Adjustment Knob Figure 4: Manually Adjusting the Volume 4-8-2 U1F Mountain Steam Locomotive...
-
Page 7: Proto-Sound 2.0 Operating Instructions
Proto-Sound 2.0 Operating Instructions This manual contains the operating instructions for Proto-Sound 2.0 in conventional mode only. Instructions for accessing DCS command mode features accompany the DCS Remote Control System equipment. Activating Proto-Sound 2.0 Conventional Mode Features Proto-Sound 2.0 features are activated by sequences of Bell a nd Horn button pushes described below. -
Page 8: Freight Yard Sounds (Fys)
Freight Yard Sounds (FYS) or Passenger Station Announcements (PSA): Your engine is equipped with a sound package of either freight yard or passenger station sounds that you can play. Each sequence described below will play as long as it is left on, randomly generating sounds, but be sure to allow approximately 30 seconds between the button pushes described below to allow the FYS/PSA sufficient time to run through each sequence. -
Page 9: Proto-Coupler Operation
Tips on Using FYS/PSA ! You can terminate FYS/PSA at any time by turning off power to the track for 15 seconds. ! You do not have to be in Forward to use FYS/PSA. At the conclusion of the full sequence, the train will pull away from the station in whatever direction you were going when you activated the feature. -
Page 10: Speed Control
Front Coupler: To fire the front coupler (if your engine has one), quickly tap the Bell button once followed by four quick taps of the Hor n/Whistle button, allowing approximately ½ second to lapse between each quick button press. The sound of the liftbar and air line depletion will play, and the knuckle will be released. -
Page 11: Reset To Factory Default
Reset to Factory Defaults: To override the settings you currently have assigned to the engine and reset it to its factory defaults, while in Neutral tap the Horn/Whistle button quickly once, followed by five quick taps of the Bell button, allowing approximately ½ second to lapse between each quick button press. -
Page 12: Maintenance
Maintenance Lubricating and Greasing Instructions The engine should be well oiled and greased in order to run properly. DO NOT DO NOT DO NOT OVER OIL OVER OIL OVER OIL You should regularly lubricate all side rods, linkage components and pickup rollers to prevent them from squeaking. -
Page 13: Cleaning The Wheels, Tires And Track
body mount screws body mount screws body mount screw Remove to find the last body screw Grease (G) Grease (G) Figure 6: Removing the Body and Lubricating the grease points You should also grease the leading and trailing locomotive truck tongues to enhance their ability to slide on the chassis. -
Page 14: Traction Tire Replacement Instructions
Traction Tire Replacement Your locomotive is equipped with two neoprene rubber traction tires on the rear set of flanged drivers. While these tires are extremely durable, you may need to replace them at some point. 1. Remove the side rods from the wheels in order to slip the new tire over the grooved drive wheel. - Page 15 To Replace Headlights 1. Remove the boiler shell from the chassis by removing the mounting screws shown in (Fig. 6). 2. Disconnect the wire harness between the chassis and the boiler shell by removing the plug on the chassis and also removing the wire nut on the large blue wire and untwisting the ends of the large blue wire 3.
-
Page 16: Self Charging Battery Back Up
Self Charging Battery Back-Up The two special AA size 1.5v NiCad self-charging batteries recharges continuously during train operation and should last for up to five years. The batteries are dry battery that should not leak or cause any damage to your engine. Depending upon when your engine was built, they may need to be charged right out of the box. - Page 17 tender shell screws Figure 10 battery Figure 11 AC Battery Recharging Jack Figure 12 4-8-2 U1F Mountain Steam Locomotive...
-
Page 18: Protosmoke® Unit Operation
ProtoSmoke® Unit Operation This Premier steam locomotive contains a self-powered smoke unit that outputs smoke through the smokestack on the roof of the engine. The smoke unit is essentially a small heating element and add smoke fluid wick that soaks up and then heats a mineral oil-based fluid that emits a harmless smoke. - Page 19 Remove mounting screws Remove mounting screws Remove mounting screws Remove mounting screws Figure 15 ProtoSmoke® Unit Operation 1. Unplug the two wiring harnesses from the board mounted to the inside of the boiler and behind the smoke unit. 2. Remove the two screws securing the smoke unit inside the shell as seen in Fig. 16. 3.
-
Page 20: Troubleshooting Proto-Sound® 2.0 Problems
Troubleshooting Proto-Sound® Problems Although Proto-Sound 2.0 has been designed and engineered for ease of use, you may have some questions during initial operation. The following table should answer most questions. If your problem cannot be resolved with this table, contact M.T.H. for assistance (telephone: 410-381-2580; fax: 410-423-0009; service@mth-railking.com, 7020 Columbia Gateway Drive, Columbia MD 21046-1532). - Page 21 Cab Chatter Remedy Sometimes the Cab Chatter Cab Chatter plays only in neutral sounds don’t play. at random intervals. Lock-out Remedy I can’t get the engine to run after I The engine is locked into the power up the transformer. It sits neutral position.
- Page 22 FYS/PSA Remedy Once in FYS/PSA, the engine So that FYS/PSA effects can be as doesn’t go into reverse. realistic as possible, Proto-Sound 2.0 disables the reversing unit whenever FYS/PSA is enabled. This way the engine remains still at its stop as the operator cycles through the FYS/PSAsequences.
-
Page 23: Transformer Compatibility And Wiring Chart
Transformer Compatibility and Wiring Chart Proto-Sound 2.0 is designed to work with most standard AC transformers. The chart below lists the many compatible transformers. Note that many of the operational commands described in these instructions require a bell button, so if your transformer does not have its own bell button, you should consider adding one to get the full benefit of the system. -
Page 24: System
Additional Features Accessible With The DCS Remote Control System (Additional equipment required) While conventional mode operation of a Proto-Sound 2.0 engine yields wonderfully realistic sound and several train control features, command mode operation allows the user to access a world of command functions never before accessible to O Gauge railroaders. -
Page 25: Service & Warranty Information
Service & Warranty Information How to Get Service Under the Terms of the Limited One-Year Warranty When you suspect an item is defective, please check the operator's manual for standard operation and trouble- shooting techniques that may correct the problem. Additional information may be found on the M.T.H. Website. Should you still require service, follow the instructions below to obtain warranty service.
Need help?
Do you have a question about the 20-3276-1 and is the answer not in the manual?
Questions and answers