Table of Contents
Advertisement
Quick Links
USER MANUAL
POWER ASSISTED BICYCLES
WARNING: You are the only person responsible for your personal safety. Do not (or let anyone) operate your Urban
Ryder™ bicycle without reading the user manual, as you/they could be seriously injured or killed. All riders
!
must: Familiarize yourself un l you understand and are competent with all the controls and braking systems
to correctly and safely operate the Urban Ryder™ in any riding condi ons. Green Light Cycle Ltd.™ assumes
no responsibility for your personal safety and by opera ng this electric bicycle you acknowledge that you
are competent with its opera on and controls, have read the User Manual, are responsible for your own
personal safety and accept Green Light Cycle Ltd.'s terms and agree to be bound by them. Do not operate or
ride any Power Assisted Bicycle unless you are already a competent bicycle rider. The bike can quickly reach
high speeds and cau on must be exercised when opera ng the Urban Ryder™. Carefully read this manual
(even if you are an experienced rider) before riding your Urban Ryder™! You must wear a helmet and safety
equipment, and obey all Provincial and Federal motor vehicle laws. An unprotected head is highly suscep ble
to injury, even from the lightest contact, but wearing a helmet that meets UL or CSA tes ng standards may help
prevent injury.
By
™
2020
Advertisement
Table of Contents

Related Manuals for Green Light Cycle URBAN RYDER

Summary of Contents for Green Light Cycle URBAN RYDER
- Page 1 User Manual, are responsible for your own personal safety and accept Green Light Cycle Ltd.’s terms and agree to be bound by them. Do not operate or ride any Power Assisted Bicycle unless you are already a competent bicycle rider. The bike can quickly reach high speeds and cau on must be exercised when opera ng the Urban Ryder™.
-
Page 2: Table Of Contents
Assembly: Front Wheel & Pedals ........................6 Assembly: Seat Installation & Tire Pressure ......................8 Urban Ryder™ Operation: Battery Removal & Installation, Precautions, Charging, and Storage ......9 Removal & Install the Battery ..........................9 Charging the Battery ............................10 Long Term Battery Care ............................. -
Page 3: Parts Identification Diagram
USER MANUAL - URBAN RYDER™ PARTS IDENTIFICATION DIAGRAM Parts Identifi cation Diagram 1. Tektro® Front Disc Brake 17. Ba ery 2. Tire Valve Stem 18. Rear Fender 3. Front Suspension 19. Rear Brake Calliper 4. Front Fender 20. Tektro® Rear Disc Brake 5. -
Page 4: Assembly Instructions
Assembly Instructions Congratula ons on receiving your Urban Ryder™ Electric Bicycle! If for any reason you do not have the proper tools or are not confi dent in safely assembling the bike yourself, we recommend that you take the bike to a local bike shop for assistance or have them assemble it. -
Page 5: Assembly: Handlebars
Angle (green) Quick Release Lever on the Front Wheel Urban Ryder™ uses a Quick Release Lever to lock the front wheel into the fork dropouts (Fig. 1.8). Quick Release Levers are safe and convenient when adjusted properly. Before riding your bicycle you must understand how they work and how to use them properly to prevent serious injury or death from a fall. -
Page 6: Assembly: Front Wheel & Pedals
USER MANUAL - URBAN RYDER™ ASSEMBLY: FRONT WHEEL & PEDALS Assembly: Front Wheel & Pedals CAUTION: The full force of the cam ac on is needed to clamp the wheel securely. Holding the nut with one hand and turning the lever like a wing nut, is NOT a safe or eff ec ve way to close a quick release and will not clamp the wheel safely to the forks. - Page 7 USER MANUAL - URBAN RYDER™ ASSEMBLY: FRONT WHEEL & PEDALS Assembly: Front Wheel & Pedals To ghten the Quick Release and axel into the fork dropout, ensure the Quick Release is in the open posi on with the lever parallel to the ground (the lever should be at a 90°...
-
Page 8: Assembly: Seat Installation & Tire Pressure
USER MANUAL - URBAN RYDER™ ASSEMBLY: SEAT INSTALLATION & TIRE PRESSURE Assembly: Seat Installation & Tire Pressure 4. Seat Installa on Iden fy the “Minimum Insert Line” on the seat post (Fig. 4.1). Insert the seat post into the seat tube so the Minimum Insert Line is not visible (Fig. -
Page 9: Urban Ryder™ Operation: Battery Removal & Installation, Precautions, Charging, And Storage
USER MANUAL - URBAN RYDER™ URBAN RYDER™ OPERATION: BATTERY Urban Ryder™ Operation: Battery Removal & Installation, Precautions, Charging, and Storage 6. Remove & Install the Ba ery CAUTION: Fully charge the ba ery before the fi rst use! Failure to do this can result in decreased ba ery performance for the life of the bike and void your ba ery warranty. -
Page 10: Charging The Battery
URBAN RYDER™ OPERATION: BATTERY Urban Ryder™ Operation: Battery Removal & Installation, Precautions, Charging, and Storage As lithium ba eries do not suff er from Memory Eff ect, it is not required for the ba ery to be empty to begin a charge. Top up charging every me you have completed your ride is recommended. - Page 11 USER MANUAL - URBAN RYDER™ URBAN RYDER™ OPERATION: BATTERY Urban Ryder™ Operation: Battery Removal & Installation, Precautions, Charging, and Storage • Turn the key to “OFF” and remove the key from the ba ery (Fig. 7.1). • Locate the charging port on the ba ery on the top right side and turn the dust cover to the side to expose the charging port (Fig.
-
Page 12: Long Term Battery Care
USER MANUAL - URBAN RYDER™ URBAN RYDER™ OPERATION: BATTERY Urban Ryder™ Operation: Battery Removal & Installation, Precautions, Charging, and Storage Long Term Ba ery Care When storing your ba ery for a long period of me (more than 60 days): Charge the ba ery to about 75%, then recharge every 60 days as needed to maintain this level. -
Page 13: Urban Ryder™ Operation: System & Battery Power "On/Off
USER MANUAL - URBAN RYDER™ URBAN RYDER™ OPERATION: SYSTEM Urban Ryder™ Operation: System & Battery Power “ON/OFF” Introduc on To ensure be er performance of your E-Bike, please read through the J-LCD product introduc on carefully before using or star ng your bike. -
Page 14: Using The King Meter
USER MANUAL - URBAN RYDER™ URBAN RYDER™ OPERATION: SYSTEM Urban Ryder™ Operation: System & Battery Power “ON/OFF” 9. Using the King Meter® To turn the bike motor on and illuminate the King Meter® Display. Iden fy the “30 Bu on” on the handlebar, beside the King Meter®... -
Page 15: Display Units
Press the Up or Down Arrow to choose a corresponding wheel diameter to ensure the accurate display of speed and distance on the LCD. The Urban Ryder™ wheel size is 26 inches. Press the Mode bu on to confi rm the se ng. -
Page 16: Pedal Assist Level & Throttle Power Off /On Selection
USER MANUAL - URBAN RYDER™ URBAN RYDER™ OPERATION: SYSTEM Urban Ryder™ Operation: System & Battery Power “ON/OFF” 11. Pedal Assist Level & Thro le Power Off /On Selec on When the King Meter® is illuminated, pressing the UP or DOWN Arrows will change the output power of the motor for the pedal assist, or turn off... -
Page 17: Display Malfunction Codes
USER MANUAL - URBAN RYDER™ URBAN RYDER™ OPERATION: SYSTEM Urban Ryder™ Operation: System - System and Battery Power “ON/OFF” Display Malfunc on Codes Should there be something wrong with the electronic controls, motor, or ba ery, the King Meter® will automa cally show... -
Page 18: Urban Ryder™ Operation: Pre-Ride Checklist
We want you to have a fun ride, but also a safe one. Carefully read the following informa on, even if you are an experienced rider. The Urban Ryder™ can quickly reach high speeds; cau on must be exercised when opera ng the bike. -
Page 19: Urban Ryder™ Operation: Usage
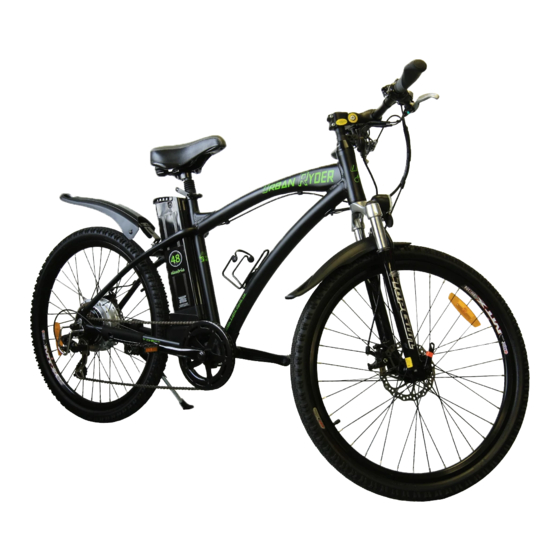
Ride defensively, keep alert, and have fun! The Urban Ryder™ Electric Assisted Bicycle has a 48 volt ba ery at 13 amp hours, supplying the power to a 500 wa electric brushless 8FUN rear hub motor. This is a powerful electric assisted bicycle in a pass-through shaped frame and special care must be taken when ge ng to know it. -
Page 20: Urban Ryder™: Troubleshooting
Charger is plugged in, but will only show green light Ba ery is fully charged. illuminated: Charger fuse may be burnt. If the above symptoms do not relate to your malfunc on, please call Green Light Cycle Ltd.™ or your local E-Bike shop for assistance. 1-855-GRN-RYDE www.greenlightcycle.com... -
Page 21: Urban Ryder™: Care & Maintenance
CAUTION: Make absolutely certain that the bike rack on your car is suitable for the increased weight and the frame style of your Urban Ryder™ E-Bike. A rack that is not suitable for the increased weight can be damaged or even break during the transport. Remove the ba ery and protect the electronics from inclement weather;... -
Page 22: Cleaning
USER MANUAL - URBAN RYDER™ URBAN RYDER™: CLEANING, KEYS & SERIAL NUMBERS Urban Ryder™: Cleaning, Keys & Serial Numbers Cleaning Never use a high pressure washer or a garden hose to clean your bike. The force of the water jet could damage the electrical components. -
Page 23: Urban Ryder™: Warranty
Warranty Green Light Cycle Ltd.™, to the original purchaser, with proof of purchase, for a period of one year from the date of purchase, warrants all parts and assemblies as to workmanship and materials used in their manufacture. Green Light Cycle Ltd.™... -
Page 24: Warranty Registration Information Card
USER MANUAL - URBAN RYDER™ URBAN RYDER™: WARRANTY REGISTRATION Urban Ryder™: Warranty Registration Warranty Registra on Please record the following informa on, should you ever require parts or service, or to begin a warranty claim. The frame serial number is located on the underside of the bike frame, where the crank arms a ach and should begin with the le ers LM, SS or HR.
Need help?
Do you have a question about the URBAN RYDER and is the answer not in the manual?
Questions and answers