Table of Contents
Advertisement
TROUBLESHOOTING AND
SERVICE MANUAL
Covering SELVRF
Disclaimer: By performing any service on the intended equipment of this manual, you agree to assume all risks involved with performing the service including but not limited to damage to
property, personal injury and loss of income. Pitco/Magikitch'n/Anets/Perfect Fry recommends all service to be performed by a qualified service agent. Improper service or maintenance
can cause serious property damage, personal injury or death. It is the responsibility of the person servicing the equipment to follow all safety procedures and verify proper operation of the
equipment after performing service. Read the operations manual prior to operating or servicing any equipment. Ensure to review all notices, cautions, warnings and dangers noted in the
operations manual.
+1 (603) 225-6684
L22-405 R0
http://www.pitco.com
1
4/18
Advertisement
Table of Contents
Troubleshooting

Related Manuals for Pitco SELVRF

Summary of Contents for Pitco SELVRF
- Page 1 Disclaimer: By performing any service on the intended equipment of this manual, you agree to assume all risks involved with performing the service including but not limited to damage to property, personal injury and loss of income. Pitco/Magikitch’n/Anets/Perfect Fry recommends all service to be performed by a qualified service agent. Improper service or maintenance can cause serious property damage, personal injury or death.
-
Page 2: Table Of Contents
BEFORE SERVICING, REFER TO PAGE 3 AND 4 OF THIS DOCUMENT FOR IMPORTANT NOTICES Table of Contents SAFETY WARNINGS……...……………………..………….……………………3-4 SERIAL NUMBER BREAKDOWN.……………………….………………………5 THEORY OF OPERATION……………..…………………….……………………..6 BASIC TROUBLESHOOTING..…………………………….………………………7 PREPAIRING TO SERVICE APPLIANCE……………….……………………….8 COMPONENT IDENTIFICATION……………………….……………………..8-9 COMPUTER DISPLAYS…………………………………….…………………10-11 COMPONENT TROUBLESHOOTING…………….……………………..12-18 Temperature Probe ……………………………………………………………………………………………………………..…12 ... -
Page 3: Safety Warnings
Authorized Service and Parts (ASAP) companies, the Potential fire danger exists if the cooking oil level is below the warranty will be void. In addition, Pitco and its affiliates will not minimum indicated level. The cooking oil level should NOT be... - Page 4 BEFORE SERVICING, REFER TO PAGE 3 AND 4 OF THIS DOCUMENT FOR IMPORTANT NOTICES HOT SURFACES HIGH VOLTAGE ALLOW UNIT TO COOL TO ROOM DISCONNECT ELECTRICAL SUPPLY TEMPERATURE BEFORE SERVICING BEFORE SERVICING SOME TROUBLESHOOTING STEPS REQUIRE THE AUTOMATIC FILTERING PROCESS ELECTRICAL SUPPLY TO BE CONNECTED.
-
Page 5: Serial Number Breakdown
BEFORE SERVICING, REFER TO PAGE 3 AND 4 OF THIS DOCUMENT FOR IMPORTANT NOTICES SERIAL NUMBERS Serial numbers contain a date code that can identify the approximate date of manufacture. Below is a breakdown of serial number E18XY000000 000000 MONTH OF E = ELECTRIC WEEK OF SEQUENTIAL... -
Page 6: Theory Of Operation
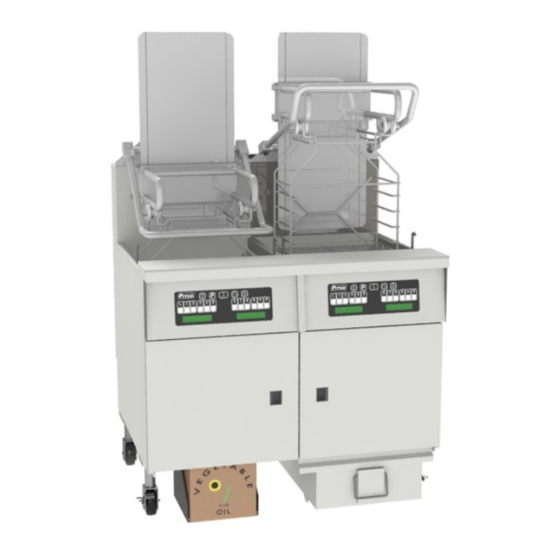
SELVRF is equipped with a lift rack system that assists users by reducing the effort needed to lower and raise large amounts of food product into and out of the oil. The SELVRF fryer also comes equipped with an integral filter system and a state of the art cooking controller that allows the user to program and control cook times and temperatures for several products. -
Page 7: Basic Troubleshooting
BEFORE SERVICING, REFER TO PAGE 3 AND 4 OF THIS DOCUMENT FOR IMPORTANT NOTICES TROUBLESHOOTING ISSUE CAUSE STEPS TO RESOLVE ISSUE 1. No power to the appliance 1. Check circuit breaker in store to make sure it 2. Power cord unplugged is not tripped Unit will not turn on and has no display 3. -
Page 8: Prepairing To Service Appliance
BEFORE SERVICING, REFER TO PAGE 3 AND 4 OF THIS DOCUMENT FOR IMPORTANT NOTICES PREPAIRING TO SERVICE THE APPLIANCE 1. Turn the appliance off by pressing the power button on the controller 2. Unplug the power cord. If the appliance is hardwired, shut off and lock out the circuit breaker. - Page 9 BEFORE SERVICING, REFER TO PAGE 3 AND 4 OF THIS DOCUMENT FOR IMPORTANT NOTICES COMPONENT IDENTIFICATION (CONTINUED) Figure 4 6. Main Power Terminal Block (TB1) 9. Safety (Side On) Contactor (K10) 11. Hi-Limit Switch (HL1) 7. 40 Amp Fuse Quantity 6 (FB1, FB2) 10.
-
Page 10: Computer Displays
BEFORE SERVICING, REFER TO PAGE 3 AND 4 OF THIS DOCUMENT FOR IMPORTANT NOTICES COMPUTER DISPLAYS • After every filter cycle, the equipment will be put into an energy savings mode. This mode will drop the set temperature to the programmed setback temperature. ... - Page 11 BEFORE SERVICING, REFER TO PAGE 3 AND 4 OF THIS DOCUMENT FOR IMPORTANT NOTICES COMPUTER DISPLAYS • During the filter cycle, the system automatically closes the drain. If there is debris or tools in the drain when it attempts to close it, the drain will not close correctly and give you this message. ...
-
Page 12: Component Troubleshooting
BEFORE SERVICING, REFER TO PAGE 3 AND 4 OF THIS DOCUMENT FOR IMPORTANT NOTICES COMPONENT TROUBLESHOOTING Temperature Probe: To check the temperature probe resistance reading: 1. Turn the appliance off. Disconnect the electrical supply. 2. Open the front panel to gain access to the temperature probe connection. 3. -
Page 13: Dc Power Supply
BEFORE SERVICING, REFER TO PAGE 3 AND 4 OF THIS DOCUMENT FOR IMPORTANT NOTICES COMPONENT TROUBLESHOOTING (CONTINUED) DC Power Supply: The DC power supply has a built in overload protection circuit. If a short or over amp condition is detected, the DC power supply will stop outputting DC power until the short or over amp condition is resolved. -
Page 14: Actuators
BEFORE SERVICING, REFER TO PAGE 3 AND 4 OF THIS DOCUMENT FOR IMPORTANT NOTICES COMPONENT TROUBLESHOOTING (CONTINUED) When changing actuators, make sure the valve is in a closed position before installing the new actuator. All replacement actuators are shipped in a closed position. Return/Divert/Waste/Smart Oil Sensor Actuators: To check the operation of the return, divert, waste oil or smart oil sensor actuator: 1. - Page 15 BEFORE SERVICING, REFER TO PAGE 3 AND 4 OF THIS DOCUMENT FOR IMPORTANT NOTICES COMPONENT TROUBLESHOOTING (CONTINUED) 1. Auto Filter Board Heat Circuit: Refer to Figure 6. Verify the auto filter board has DC voltage by checking for the flashing green led (LED7). If the LED is not flashing, then no DC power is present.
-
Page 16: Auto Filter Board
BEFORE SERVICING, REFER TO PAGE 3 AND 4 OF THIS DOCUMENT FOR IMPORTANT NOTICES COMPONENT TROUBLESHOOTING (CONTINUED) Auto Filter Board Filter Circuits: Refer to Figure 7. Verify the auto filter board has DC voltage by checking for the flashing green led (LED7). If the LED is not flashing, then no DC power is present. - Page 17 BEFORE SERVICING, REFER TO PAGE 3 AND 4 OF THIS DOCUMENT FOR IMPORTANT NOTICES COMPONENT TROUBLESHOOTING (CONTINUED) Auto Filter Board Flash Codes: The auto filter board has two status lights, one for filtering status and one for the oil level Code Description probe status.
-
Page 18: Filter Pump And Motor
BEFORE SERVICING, REFER TO PAGE 3 AND 4 OF THIS DOCUMENT FOR IMPORTANT NOTICES COMPONENT TROUBLESHOOTING (CONTINUED) Filter Pump: • Adjusting the pressure relief valve on the pump head (Check if there is no suction from the filter pump) 1. Turn the appliance off and allow to cool to room temperature. 2. -
Page 19: Temperature Probe Resistance Chart
BEFORE SERVICING, REFER TO PAGE 3 AND 4 OF THIS DOCUMENT FOR IMPORTANT NOTICES PROBE RESISTANCE CHART L22-405... -
Page 20: Schematics
BEFORE SERVICING, REFER TO PAGE 3 AND 4 OF THIS DOCUMENT FOR IMPORTANT NOTICES SCHEMATICS L22-405 RO... - Page 21 BEFORE SERVICING, REFER TO PAGE 3 AND 4 OF THIS DOCUMENT FOR IMPORTANT NOTICES L22-405...
- Page 22 BEFORE SERVICING, REFER TO PAGE 3 AND 4 OF THIS DOCUMENT FOR IMPORTANT NOTICES L22-405 RO...
- Page 23 BEFORE SERVICING, REFER TO PAGE 3 AND 4 OF THIS DOCUMENT FOR IMPORTANT NOTICES L22-405...
- Page 24 BEFORE SERVICING, REFER TO PAGE 3 AND 4 OF THIS DOCUMENT FOR IMPORTANT NOTICES L22-405 RO...
-
Page 25: Notes
BEFORE SERVICING, REFER TO PAGE 3 AND 4 OF THIS DOCUMENT FOR IMPORTANT NOTICES NOTES L22-405... -
Page 26: Contact The Factory
TECHNICAL SUPPORT PARTS IDENTIFICATION 24 HOURS Monday through Friday, 7AM—9PM EST Phone: +1 (603) 225-6684 Option 2 Phone: +1 (603) 225-6684 Option 3 E-mail: techservice@pitco.com E-mail: parts@pitco.com Pitco Frialator P.O. Box 501 Concord, NH 03302-0501 Web: http://www.pitco.com Authorized Service and Parts Distributors Locator: https://www.pitco.com/english/service/get-in-touch/service...
Need help?
Do you have a question about the SELVRF and is the answer not in the manual?
Questions and answers