Advertisement
Quick Links
Advertisement

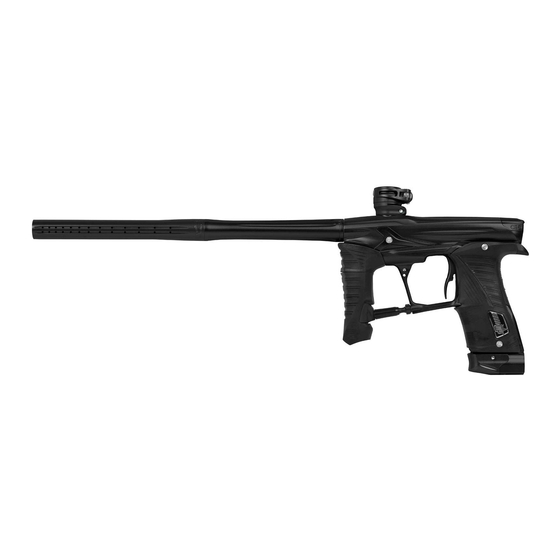
Related Manuals for Eclipse GEO3.5


Summary of Contents for Eclipse GEO3.5
- Page 1 ECLIPSE USER MANUAL...
- Page 2 Never look into the barrel or from the GEO3.5 for transport and storage. breech area of the GEO3.5 whilst the marker is switched on and able to fire. • Always follow guidelines given with your first stage regulator for safe •...
- Page 3 CO2. you must seek expert advice. • Always follow instructions, warnings and guidelines given with any first stage regulator you use with the GEO3.5. Le mode d’emploi est en Anglais. Il contient des instructions et mesures de sécurité •...
- Page 4 USING THE GEO3.5 (06-26) ADVANCED SET-UP (27-41) Details on setting up the GEO3.5 and information on the user interface. In depth information on setting up the GEO3.5. This section is essential reading for everyone. Accessing the menu system Factory set-up guide...
- Page 5 TRIGGER - The trigger parameter FAULT FINDING (61-65) SOLENOID - The solenoid power parameter Information on how to resolve any problems that might arise with your GEO3.5. SOUND - The sound parameter TONES - The tones parameter SERVICE CENTRES (66)
- Page 6 Before using the GEO3.5 it is important to make sure the SL4 inline regulator, solenoid flow restrictor (SFR) and all electronically controlled parameters are set FIG 1A correctly. ANY of these can have a negative effect on the performance of the marker if set incorrectly.
- Page 7 Ensure that the GEO3.5 is switched off. Lay the marker on a flat surface in front of you with the feed tube furthest away and with the barrel pointing to the right. FIG 2A Use a 5/64” (2mm) hex key to remove the two countersunk screws that hold the...
- Page 8 SWITCHING ON THE GEO3.5 To switch on the GEO3.5 press the button twice in quick succession, referred to elsewhere in this manual as ‘double-clicking’. The GEO3.5 can also be switched on by pushing and holding the button (see figure 3A).
- Page 9 The Break Beam Sensor System, referred to elsewhere in this manual as ‘BBSS’ is used to detect when a paintball is ready to be fired from the GEO3.5. If no FIG 4A paintball is ready then the BBSS will inhibit the GEO3.5 from firing. This prevents the GEO3.5 from “chopping”...
- Page 10 PREVIOUS / RAISE At the rear of the GEO3.5 grip frame you will find the navigation console (see figure 5A) which is used for: SELECT • Turning the GEO3.5 on and off using the button. • Scrolling through menus with the buttons.
- Page 11 Always fit a barrel-blocking device to the GEO3.5 when not in use. 1 The Eclipse barrel sock that comes with the GEO3.5 may differ from that pictured in this manual. 2 Instruction on using the Eclipse barrel sock can be found on the Eclipse barrel sock warning label.
- Page 12 The GEO3.5 provides the user with the option to use either a micro-switch or an OPTO sensor (default OPTO) as the means for detecting trigger pulls. Before you FIG 7A begin to adjust and set your trigger, you must first select the method of trigger detection that you wish to use by entering the main menu and making your selection from the hardware menu (see page 37).
- Page 13 FIG 7D The magnet return strength screw is used to adjust the amount of force with which the trigger is returned to its rest position by the magnet. Turn the screw clockwise to increase the amount of force. Do not turn the screw too far or it will negate the position of the front stop screw.
- Page 14 FIG 8B You have now attached a loader to your GEO3.5. Once you have filled your loader and air tank you will then be ready to begin using your GEO3.5. WARNING!
- Page 15 There is no need to unscrew or remove the gas pipe assembly during day to day usage of the marker. FIG 9A Compressed gas is transferred from the frame to the inline regulator via gas pipe assembly (see figure 9A), comprising of a gas pipe section and pipe nut section .
- Page 16 Do not pressurise the GEO3.5 without the bolt system correctly installed, as high pressure gas will be released. • Do not install a compressed air system or load paintballs into the GEO3.5 until you feel completely confident with your ability to handle the marker safely and responsibly.
- Page 17 You have now installed a pre-set air system onto your GEO3.5. FIG 10C 1 High, mid and low pressure output pre-set air systems can be used with the GEO3.5, providing the GEO3.5 has the SL4 inline regulator originally supplied with the marker.
- Page 18 When using your GEO3.5, you may wish to change the velocity at which your GEO3.5 is firing. This is done by inserting a 1/8" hex key into the adjuster screw FIG 11A at the bottom of your GEO3.5 inline regulator and adjusting it accordingly...
- Page 19 The following section covers direct adjustment of the solenoid valve which should The SFR has a minimum and maximum exhaust flow setting. only be used by users with a sound knowledge of the GEO3.5 firing cycle. The maximum exhaust flow setting can be achieved by turning the SFR dial Built into the left side of the fame is the solenoid flow restrictor “SFR”...
- Page 20 1 Instruction on using the Eclipse barrel sock can be found on the Eclipse barrel sock warning label. 2 0 GE O 3.5 MA N UAL...
- Page 21 GEO3.5 (or any other paintball marker) in a suitable marker case such as the one in which it was supplied. It may be a good idea to remove the battery when storing your Eclipse GEO3.5 to prevent unauthorized use. Protect your Eclipse GEO3.5 from excessive heat during transportation.
- Page 22 The marker is still able to fire when this screen is displayed. INDICATOR 1 The layout of the run screen is correct at time of printing. However newer versions of the GEO3.5 software may have a different layout of the run screen from what is printed in this manual.
- Page 23 The system is disabled. The GEO3.5 can only be fired at a maximum The GEO3.5 can be fired at a maximum rate of fire as set by the BS rate of 2 bps less than the maximum rate of fire, up to a maximum of OFF ROF parameter (see page 30).
- Page 24 OPTO sensor selected, reading 0% OPTO Sensor selected, reading mid-range The GEO3.5 is configured to use the OPTO sensor to detect trigger The GEO3.5 is configured to use the OPTO sensor to detect trigger pulls. The OPTO sensor is currently reading 0%, i.e. the trigger is fully pulls.
- Page 25 THE LOCK INDICATOR The GEO3.5 has a Tournament Lock which prevents the user from making This feature is necessary in order to make the GEO3.5 legal for tournament play. changes to any parameter that affects the way in which the GEO3.5 shoots, To enable or disable the tournament lock see Accessing the Menu System on without the need for tools.
- Page 26 THE ACTUAL RATE OF FIRE When the actual ROF is selected for display the run screen The value below it is the maximum actual rate of fire that will look something like the screen to the right. The value has been achieved. The graph below this number shows displayed in the top left of the screen represents the number the actual rates of fire achieved over time where each bar of full cycles completed in a second - the actual rate of fire...
- Page 27 ACCESSING THE MENU SYSTEM FIG 14A To access the Main menu from the run screen double-click the button and the first item on the Main menu will be displayed. Alternatively, push and hold the button for 2 seconds. Some of the parameters in the menu system can have a tournament lock applied to them. This lock can be toggled on and off by pressing the tournament lock button on the circuit board (see in figure...
- Page 28 1 The layout of the main menu is correct at time of printing. However newer versions of the GEO3.5 software may have a different layout of the main menu, sub-menus and parameters immediately turn off the GEO3.5, preventing it from firing.
- Page 29 In order to simplify the set up of the GEO3.5 a number of pre-set configurations are available for selection. Choosing one of these pre-sets will cause all of the necessary parameters to be set in such a way as to make the GEO3.5 comply with the rules governing a particular paintball league1.
- Page 30 ROF CAP PARAMETER The ROF CAP parameter is used to specify whether or not the GEO3.5 should have a limited / capped rate of fire. When the ROF CAP is enabled (and the BBSS is enabled), the maximum achievable rate of fire is set by the BS ON ROF parameter.
- Page 31 > STEP: Step ramping will cause the GEO3.5 to shoot in semi-automatic until a number of trigger pulls, set by SEMI SHOTS, have been made at a minimum pull rate, set by KICK IN. At this point the rate of fire will step up to the maximum rate of fire as set by BS ON ROF (or the maximum loader speed if the ROF CAP parameter is set to off).
- Page 32 SUSTAIN PARAMETER Once the GEO3.5 is ramping the user has to continue to pull the trigger at a minimum rate in order to maintain the ramping. This parameter sets this rate and can be between 3.3 and 10.0 pulls per second in 0.1 pulls per second increments.
- Page 33 The DWELL parameter sets the amount of time that the solenoid is energized and therefore the amount of gas that is released with each shot of the GEO3.5. Setting this parameter too low will result in low velocity shots and/or excessive shot to shot velocity fluctuations.
- Page 34 Tumbling paintballs can take time to settle in the breech before they can be successfully fired. This parameter is used to set the amount of time that a paintball has to be in the breech before the GEO3.5 is allowed to fire. This parameter can be set between 1.0 and 20 milliseconds in 0.1ms increments.
- Page 35 PULL TM PARAMETER The PULL TM parameter is used to set the minimum amount of time that the trigger must be pulled before it is recognised as a valid trigger pull. This parameter can be set between 3.0 and 20.0 milliseconds in 0.1ms increments. RELEASE TM PARAMETER The RELEASE TM parameter is used to set the minimum amount of time that the trigger must be released before it is recognised as a valid trigger release.
- Page 36 Set the magnet return strength screw and the spring return strength screw as required, making both the spring tension and the return force as strong as possible without compromising the “feel” of the trigger. HARDWARE MENU This menu comprises parameters that control low level functionality of the GEO3.5 electronic hardware. 3 6 GE O3. 5 MA N U AL...
- Page 37 TRIGGER PARAMETER The GEO3.5 is fitted with a dual trigger pull detection system. The choices available are as follows: A non-contact OPTO-Electronic trigger sensor arrangement is > OPTO: Select the OPTO sensor for trigger pull detection. used to detect trigger movement whilst a micro-switch is used to provide a more traditional tactile feedback for the trigger.
- Page 38 BACKLIGHT PARAMETER This parameter sets the time that the LCD backlight is illuminated after a push-button is pressed. The parameter can be set between 00:00 and 00:20 (20 seconds). If set to 00:00 then the backlight will not be illuminated. RED LEVEL PARAMETER This parameter sets the percentage of red light in the LCD backlight and can be set between 0% and 100% in 10% increments.
- Page 39 CANCEL: Cancel editing and leave the parameter unchanged. AUTO OFF PARAMETER This parameter sets the time that has to elapse before the GEO3.5 switches itself off if not used. The parameter can be set between 05:00 and 20:00 minutes. G E O 3 . 5 MAN UAL 3 9...
- Page 40 TRAINING PARAMETER In training mode the GEO3.5 simulates the firing cycle so that the user may practice pulling the trigger without wasting air and making lots of noise. The BBSS is overridden in order to simulate paintballs entering the breech and the beeper indicates when a shot is fired.
- Page 41 GAME TIMER MENU This menu is comprised of parameters that control the operation of the Game Timer. GAME PARAMETER This parameter is used to set the Game Time, the time from which the game timer counts down to zero. This parameter can be set between 00:00 and 60:00 minutes in 10 second increments. The factory default is 07:10 (7 minutes 10 seconds).
- Page 42 Lift the Break Beam Sensor unit free from the GEO3.5 body and using another dry cotton bud, remove any grease or debris build-up from the front of the sensor...
- Page 43 GEO3.5 body, replacing the detent if it is damaged (see figure 15D). Reinsert the detent back into the GEO3.5 body and place the BBSS back into the designated slot in the body (see figure 15E). Ensure that the sensor is face down in the body i.e.
- Page 44 (see figure 16H). Using a dry cotton bud, clean the internal 008 NBR70 o-ring that sits inside the top section of the adjuster top. Then using a small hex key gently apply Eclipse Grease to the o-ring (see figure 16I).
- Page 45 (see page 15). FIG 16M FIG 16N Basic cleaning of the SL4 inline regulator is complete. Reset the input pressure to the factory default before supplying the GEO3.5 with compressed air. WARNING! WARNING FIG 16O If you are unsure about performing a maintenance procedure please contact your nearest service centre.
- Page 46 (see figure 17E). Ensure is it re- installed correctly, failure to do so may seriously damage the GEO3.5 solenoid. With the regulator seal, purge valve and spring installed back into the adjuster screw, replace the adjuster top (see figure 17F).
- Page 47 FIG 18A Remove the inline regulator as covered on page 44. Turn the GEO3.5 upside down to reveal the body filter inside the body (see figure 18A). Using a 5/64” hex key unscrew and remove the retaining screw (see figure 18B).
- Page 48 FIG 19A FIG 19B The GEO3.5 comes with two bolts. A soft nosed ST3 Bolt and an all metal ST Bolt (see page 72). To install the ST bolt follow the maintenance procedure below, swapping over the bolts. After installation, re-chronograph the GEO3.5 and adjust the SL4 inline regulator...
- Page 49 (see figure 19J), replacing if necessary. rubber bolt tip for any signs of damage Apply a light film of Eclipse Grease to cover the front end of the bolt and also the internal rear bore of the bolt (see figure 19K &19L).
- Page 50 Check the 14x2 o-ring at the back of the prop shaft, and clean or replace then re- lubricate with Eclipse Grease as necessary. Check the rear bumper for signs of wear, replace as necessary (see figure 20B) Check the 5x1 o-ring seated on the plunger, clean or replace as necessary.
- Page 51 Disconnect any hosing and unscrew the inline regulator from the Front Regulator Mount (FRM) as detailed in the ‘Cleaning the inline regulator’ section of this Maintenance Guide. Using a 5/64” hex key, remove the four screws that attach the GEO3.5 rubber grips to the GEO3.5 frame (see figure 21A).
- Page 52 (see figure 22F). FIG 22E FIG 22F Attach the GEO3.5 rubber grips to the frame using a 5/64” hex key to replace the four grip screws (see figure 22G). Screw the inline regulator back into the Front Regulator Mount and connect any hosing...
- Page 53 FIG 23A FIG 23B The stages below on SFR maintenance do not require the frame to be removed, and can be followed for SFR removal/ blanking plug installation. Using a small hex key push the SFR body out of the left side of the frame (see figure 23A).
- Page 54 FIG 24A FIG 24B Having removed the frame completely from the GEO3.5 body (see page 51). Unscrew the two M2.5x5 retaining screws which hold the bearing carrier in the frame (see figure 24A). Gently lift the bearing carrier and trigger assembly free from the frame taking...
- Page 55 24J). DO NOT over-tighten the retaining screws. Doing so may damage the trigger FIG 24I spring and threads in the frame. You have now stripped and cleaned your GEO3.5 trigger assembly. FIG 24J WARNING! WARNING If you are unsure about performing a maintenance procedure please contact your nearest service centre.
- Page 56 GEO3.5 solenoid valve then please contact your Eclipse Service Centre. See page 66 for Eclipse Service Centre details. With the frame separated from the GEO3.5 body and the solenoid and BBSS wires unplugged from the circuit board (see page 51) use a 5/64” hex key to...
- Page 57 Replace the top and bottom gaskets into their respective grooves in the solenoid manifold as shown in figures 25K and 25L. Applying a small amount of Eclipse Grease to the surface of the solenoid manifold and gaskets. FIG 25K FIG 25L...
- Page 58 Place the solenoid valve over the solenoid manifold (see figure 25P), making sure the location holes line up with the threads in the GEO3.5 body (see figure 25Q). Replace the retaining screws which hold the solenoid onto the GEO3.5 using a 5/64”...
- Page 59 FIG 26A FIG 26B There is no need to remove the POPS from the GEO3.5 frame for general maintenance. IF the POPS is removed, ensure the o-ring is correctly seated before POPS re-attachment. Fully depress the latch button then slide the bonnet forward while continuing to...
- Page 60 26I). Lubricate this o-ring liberally using Eclipse Grease. Lubricate the narrow end of the POPS pin with a smear of Eclipse Grease and push the pin, narrow end first, into the POPS insert so that it sits in the POPS insert and pokes through to the front (see figures 26J&...
- Page 61 The fault finding guide covers common symptoms, causes and solutions that are likely to be encountered by the average user. If an issue with the GEO3.5 cannot be solved using the fault finding guide, contact your nearest Eclipse Service Centre for assistance.
- Page 62 Reduce the Dwell The Solenoid Flow Restrictor is set too low Increase the amount of flow on the SFR The GEO3.5 has low rate of fire The force setting on the loader is too low Adjust the loader force feed setting...
- Page 63 Check the inline regulator output pressure and consequent velocity. Adjust accordingly The GEO3.5 leaks from the solenoid assembly GEO3.5 solenoid assembly is over-pressurising Strip and clean the SL4 inline regulator. Replacing the seals as necessary...
- Page 64 Damaged rubber bolt tip Replace the rubber bolt tip The FSDO parameters are set too low to overcome The GEO3.5 has low velocity on the first shot Adjust FSD COMP and FSD DLY parameters o-ring stiction The FSDO parameters are set too high Adjust FSD COMP and FSD DLY parameters The GEO3.5 has high velocity on the first shot...
- Page 65 The fault finding guide covers common symptoms, causes and solutions that are likely to be encountered by the average user. If a issue with the GEO3.5 cannot be solved using the fault finding guide, contact your nearest Eclipse Service Centre for assistance.
- Page 66 Are you unsure of where to send your GEO3.5 to be repaired or serviced? If your local Eclipse dealer can’t assist you, why not contact your nearest certified Eclipse Service Centre and arrange for them to undertake any work that you require.
- Page 67 FIG 27A Below is a brief overview of what happens when you fire your GEO3.5. The location of parts discussed in the text below can be found on pages 68-69. AIR SUPPLY FROM SOLENOID Assuming the GEO3.5 is gassed up and turned on...
- Page 68 6 8 GE O 3.5 MA N UAL...
- Page 69 Clamping feed tube assembly Push-button strip Body Display window Bolt assembly PCB screw Rubber detent Navigation console BBSS unit POPS assembly Front frame screw POPS seal Rear frame screw Foregrip crown Solenoid assembly Foregrip sleeve SL4 inline regulator assembly Rubber grip Gas pipe Body plug Pipe nut...
- Page 70 Replace and lubricate these o-rings with Eclipse Grease as necessary. 1 The bore size of your Shaft4 may vary according to the model of GEO3.5 you have. 2 The GEO3.5 will only accept Cocker threaded barrels.
- Page 71 Regulator Piston 2 Only use the SL4 inline regulator with the GEO3.5. 3 Only use the SL4 GEO spring with the GEO3.5 SL4 inline regulator. Adjuster external o-ring (011 NBR70) 4 If the Purge Poppet assembly is removed for maintenance ensure is it re-installed correctly, failure to do so may seriously damage the GEO3.5 solenoid valve.
- Page 72 Bolt bonnet Prop shaft Back Cap Bolt pin 20x2 NBR70 Rear Bumper Plunger Plunger Spring 14x2 NBR70 3x1 NBR70 ST3 Bolt Prop shaft 14x2 NBR70 7x1 NBR70 14x2 NBR70 015 NBR90 Prop shaft Tip 22x1 NBR90 ST3 Bolt Tip 14x2 NBR70 020 NBR70 015 NBR90 013 NBR70...
- Page 73 NON-SERVICEABLE. Any attempt to strip, dismantle or service the M2.5x12 Mounting Screws solenoid valve will immediately void your warranty. For more information on the GEO3.5 solenoid valve please see page 56. G E O 3 . 5 MAN UAL 7 3...
- Page 74 007 NBR70 005 NBR90 004 NBR70 Pops body Insert Pops bonnet Push rod 004 NBR70 Pops screw 10-32 UNF x 1” cap head socket Latch spring Latch button 7 4 GE O 3. 5 M A NU AL...
- Page 75 Bearing carrier screw (M2.5x5 cap head socket) Micro-switch screw (6-32 UNC x1/2” socket set) Spring adjuster screw (6-32 UNC x3/16” socket set) Leaf spring Trigger pin locking screw (6-32 UNC x1/8” socket set) Sprocket Bearing carrier Short clamping feed screw (10-32 UNF x1/2”...
- Page 76 Aux socket Solenoid valve socket Trigger micro switch BBSS socket Trigger OPTO sensors Push - buttons E-portal connector Positive (+) battery terminal Negative (-) battery terminal Tournament lock button LCD display 7 6 GE O 3.5 MA N UAL...
- Page 77 SCREW TYPE DESCRIPTION PCB screw (3), bearing carrier screw (2), navigation console (1) (M2.5 X 5 cap head socket) Solenoid screw (2) (M2.5 X 12 cap head socket) Rubber grip screw (4), BBSS covers screw (2) (6-32 UNC x 5/16” countersunk socket) Short feed neck screw (10-32 UNF x 1/2”...
- Page 78 SL4 swivel Bolt bumper (middle) NBR90 18x2 POPS Seal ST bolt tip SL4 Inline regulator piston 14x2 Propshaft (x2) Bolt external SL4 inline regulator adjuster outside Propshaft retaining screw rear Bolt can external (x2) Prop shaft back cap SL4 inline regulator adjuster inside Gas transfer pipe POPS insert external Body plug...
- Page 79 See ‘accessing the menu system’ on page 27 for instruction on releasing the Tournament Lock. will only become available if the ROF CAP parameter is set to on). MAIN MENU TURN OFF Turn off the GEO3.5 PRE-SET LOAD USER 1 Load the USER 1 settings...
- Page 80 Time in milliseconds (ms) that the breech must remain empty before the BBSS looks for a paintball. (Default 4.0ms) FULL 1.0 - 20.0 ms Time in milliseconds (ms) that a paintball must be in the breech for the GEO3.5 to be ready to fire. (Default 4.0ms) PULL TM 3.0 - 25.0 ms Time in milliseconds (ms) that the trigger must be pulled for a shot to be fired.
- Page 81 AUX socket output on CANCEL Cancel AUX socket selection AUTO OFF 05:00 - 60:00 Time in minutes after which the GEO3.5 automatically powers off. (Default 20:00) DBL CLICK NONE Double click is disabled entirely POWER UP Double click for power up only...
- Page 82 BACK EXIT From time to time the software of the GEO3.5 may be updated, resulting in changes to the default values for some parameters. For the most up to date default values please consult the online version of this manual at www.planeteclipse.com...
- Page 83 And any other 1 If you already own an Eclipse E-portal kit (such as the kit included with the Eclipse SLS or CSL Eclipse E-Portal Ego and GSL GEO), this kit will be compatible with the GEO3.5.
- Page 84 Actual rate of fire..22, 26 Contrast..39, 81 Advanced trigger filter setup..36 DBL CLICK..39, 81 Air system..6, 16, 17, 18, 20 DE-BOUNCE..34, 36, 66, 80 ALARM..25, 41, 82 DWELL..33, 62, 80 AUTO OFF..39, 81 E-Portal..83 AUX OUT..22, 23, 39, 81 EMPTY..34, 80 BACKLIGHT..10, 38, 81 EXIT..82 Basic trigger filter set-up..36, 64...
- Page 85 Lock indicator..22, 25, 27, 79 ROF CAP..30, 79 Magnet return strength screw..13, 77, 79 Rubber detent..43, 69 Main menu..27, 28, 79 Rubber grip screw..77 Menu system..26, 28, 79-82 Run screen layout..22 Menu tree..79-82 SL4 inline regulator..69 Micro-switch activation screw..13, 76, 77 SAVE..29, 79 MS 10..29, 79 SEMI..30, 79...
- Page 86 13/334575; 13/165234. Additional U.S. and International Patents may be pending. © 2014 Copyright Planet Eclipse Ltd. Eclipse, Planet Eclipse, the Estar Logo Device, Ego, Geo, Etek, Etha and EMC are all either design trademarks, registered trademarks or trademarks of Planet Eclipse Ltd. All other trademarks are property of their respective owners.
Need help?
Do you have a question about the GEO3.5 and is the answer not in the manual?
Questions and answers