
Related Manuals for Revibe ReLog S

Summary of Contents for Revibe ReLog S
- Page 1 ReLog vibration data logger User manual & quick start guide for ReLog S, ReLog M & ReLog L...
- Page 2 Important information Copyright© ReVibe Energy AB 2020. All rights reserved. Manual version: Firmware version: 0002 VibInspect version: For the latest version of the User Manual & Quick start guide, please scan the QR-code to the right Safety instructions When this product has reached the end of its life it must be treat- ed as Waste Electrical &...
-
Page 3: Table Of Contents
Table of Contents 1. Quick start guide 2. Technical specifications 3. Product overview – Dimensions – User interface – What is included in the box? – LED indications 4. Using the ReLog – Charging the ReLog – ReLog settings – Mounting –... -
Page 4: Quick Start Guide
1. Quick start guide PLUG IN TO CHARGE Plug in your ReLog to a PC or wall outlet adapter by using the USB cable found in the delivery box. Allow the ReLog to charge until the battery indicator shows green light (up to 9 hours when connected to a USB 2.0 port). SET SAMPLE RATE The default sample rate is 32,000 Hz. -
Page 6: Technical Specifications
2. Technical specifications PHYSICAL & ENVIRONMENTAL Weight 220 g Dimensions 103 x 61 x 25.8 mm Operating temperature -20°C – 60°C (-4°F to 140°F) Calibrated temperature -20°C – 60°C (-4°F to 140°F) Recommended storage temperature +10°C – 30°C (50°F to 86°F) Charging temperature 0°C –... - Page 7 Type of storage Internal SD card Transfer of data Via USB cable to PC Storage size ReLog S: 32 GB ReLog M: 64 GB ReLog L: 128 GB Max. recording length with 32,000 Hz ReLog S: 46 hours sample rate...
- Page 8 2. Technical specifications PRIMARY ACCELEROMETER Accelerometer Capacitive MEMS Main features High frequency, high G and low noise Sample rate per axis 32,000 Hz 16,000 Hz 8,000 Hz 4,000 Hz Bandwidth -3 dB at 10 kHz Measurement range +/- 50 g Shock resistance 10,000 g Resolution...
- Page 9 SECONDARY ACCELEROMETER Accelerometer Capacitive MEMS Main features DC accurate, long-term stability and minimal drift versus temperature Sample rate per axis 4,000 Hz 2,000 Hz 1,000 Hz 500 Hz 250 Hz 125 Hz Bandwidth -3 dB at 550 Hz Measurement range +/- 2.048 g +/- 4.096 g +/- 8.192 g...
- Page 10 2. Technical specifications BATTERY SPECIFICATIONS Chemistry Rechargeable Lithium-Ion Nominal capacity ReLog S: 2,600 mAh ReLog M: 3,000 mAh ReLog L: 3,400 mAh Minimum capacity ReLog S: 2,500 mAh ReLog M: 2,900 mAh ReLog L: 3,300 mAh Operating temperature -20°C – 60°C (-4°F to 140°F) Storage temperature 1 month: -20°C –...
-
Page 12: Product Overview
3. Product overview Dimensions n 4,5 n 4,5 94,5 Designed by Approved by Date 9/8/202 Andreas Josefsson Name... -
Page 13: What Is Included In The Box
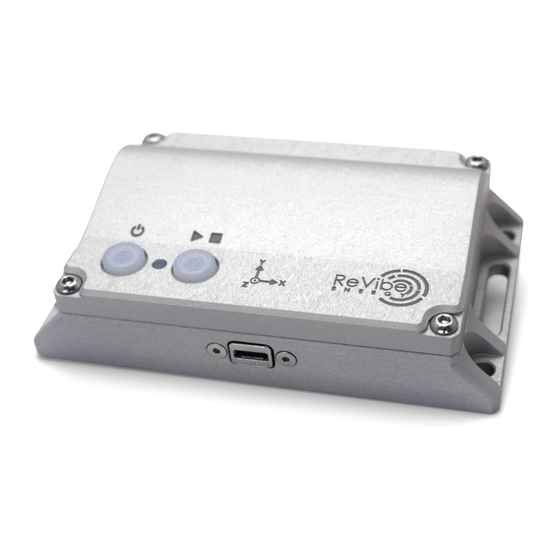
Interface Interface legend A = On/Off button B = Start/stop button C = Holes for mounting screws D = USB interface for file transfer and charging E = LED indicator What is included in the box? When you receive your ReLog, you will find the following items in the box: •... - Page 14 3. Product overview Battery LED indicator COLOUR BATTERY CHARGE STATE Over 80 % 20 % - 80 % Under 20 % LED functionality indicator STATE INDICATION Powering on (1 s) Stand-by (solid) + (flashing every 3 s) Starting measurement (flashing) Measuring (flashing every 3 s) Stopping measure-...
-
Page 16: Using The Relog
4. Using the ReLog ReLog settings Charging the ReLog In the box in which you received the There are two ways of setting the ReLog, you will also find a USB cable sample rate and choosing accelerom- that you should use to connect the eter for the ReLog: ReLog to a PC. - Page 17 Option 2 - use the _settings file Once completed, a new dialogue box will appear where you can set When connecting the ReLog to a PC, different measurement parameters. you can find the settings file in the First, you can choose to use either ReLog root folder (“_settings”).
-
Page 18: Mounting
4. Using the ReLog Mounting Done? Then you are ready to proceed How you mount the ReLog is the to the next step! most important aspect for you as a user when it comes to making sure Mounting methods that the measurements will be as good as they possibly can be. - Page 19 Mounting by double-sided tape Mounting with wax/glue This will most likely be the go-to op- If none of the above fits your pur- tion for most users of the ReLog as it pose you can always use wax/glue to is likely that you do not wish to drill mount the ReLog.
- Page 20 4. Using the ReLog Measuring Below, you will find an instruction on how to proceed to get started with your measurements. Turn the ReLog on Turning on the ReLog is a simple task! Simply press the On/off button ( and the LED indicator will show a steady green light, followed by a steady blue light with battery status indication every 3 seconds.
-
Page 22: Vibinspect Configuration And Analysis Software
5. VibInspect software Installation & updating “Open” - Press this button to open a dialogue window where you can Start by downloading the VibInspect choose which file you want to open. software from revibeenergy.com/vib- If it is a file that has been recorded inspect-analysing-software/. -
Page 23: Updating The Relog
Updating the ReLog “PSD” - The PSD is based on the FFT algorithm, but normalizes the val- Firmware upgrades that improve ues to frequency bin width. Practi- battery life, introduce functionality, cally, this reduces the influence of increase stability and fix potential sampling duration on the spectrum. -
Page 24: Troubleshooting And Warranty
If the ReLog still is unresponsive after you also include your product serial this, make a note of the measures you number. have taken and contact us at ReVibe for further support at contact@re- vibeenergy.com. Please describe the problem as detailed as possible and... - Page 25 The ReLog shows a bright red light A bright red light indicates that the ReLog has entered a general error state. This should not occur and might be due to a firmware bug or faulty hardware. By pressing the On/ off button ( ), the ReLog resets, hopefully without any errors.
- Page 28 Copyright© ReVibe Energy AB 2020...
Need help?
Do you have a question about the ReLog S and is the answer not in the manual?
Questions and answers