
Subscribe to Our Youtube Channel
Related Manuals for Acard ATA-133


Summary of Contents for Acard ATA-133
- Page 1 ACARD ATA-133 RAID AEC-6880M PCI-to-IDE ATA-133 RAID Controller for Macintosh User’s Manual Version:2.0 © Copyright 2003 ACARD Technology Corp.
- Page 2 ACARD and SCSIDE are the trademarks of ACARD Technology Corp. IBM is a trademark of the International Business Machine Corporation. Apple and the PowerMac Logo are registered trademarks of Apple Corpo- ration.
-
Page 3: Table Of Contents
2.1 Quick start hardware installation ............. 6 2.2 ACARD AEC-6880M adapter compatibility ........8 2.3 What you should know before the installation ........ 8 2.4 ACARD AEC-6880M cable & power installation ......10 2.5 Configuring ACARD AEC-6880M ............ 11 Chapter 3 System Installation ..........12 3.1 Normal Mode Installation .............. -
Page 4: Chapter 1 Introduction
7200rpm big capacity drive. Compared with the original G4, the improvement can be as high as 300%. For PowerMac G4, ACARD AEC-6880M allows Mac to add more IDE drives or to use Hardware RAID by adjusting the easy RAID DIP Switch setting. -
Page 5: Feature
Supports OS: Mac OS 8.5, OS 9.x and OS X Cost-effective and high-performance 1.3 Specification 1.3.1 Packing List When you open the ACARD AEC-6880M cabinet, please check the following things. One ACARD AEC-6880M Two ATA-133 Cables One Y-splitter Power Cord Two hard disk mounting kits and eight screws One User’s Manual... -
Page 6: Chapter 2 Hardware Installation
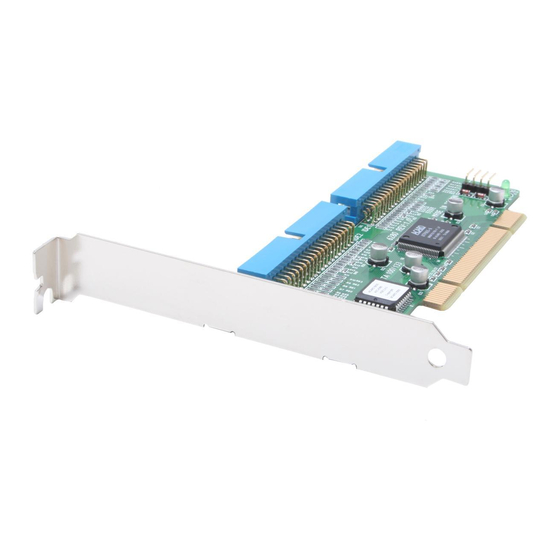
2. Choose an empty PCI slot and plug in ACARD AEC-6880M. 3. Install the hard drive into the Mac. 4. Connect the adapter and the hard drive with an ATA-133 cable. 5. Close the Mac case. Connect 2 hard drives in the same channel, check the Master / Slave jumper. - Page 7 ACARD AEC-6880M Board Layout: CN1 (IDE1): The Primary IDE port CN2 (IDE2): The Secondary IDE port CN2 (IDE2) CN1 (IDE1) ATA-133 Cable Layout: Connect to ACARD Connect to IDE AEC-6880M Adapter Connect to IDE hard hard drive (Slave) IDE ports (CN1/CN2) drive (Master) For the hard drive’s Jumper setting (Master / Slave), refer to hard drive’s...
-
Page 8: Acard Aec-6880M Adapter Compatibility
Before installing the ACARD AEC-6880M, please follow the instructions below to get the best performance: Striping Mode If two hard drives are in different storage capacity, ACARD AEC- 6880M will treat the smaller one as standard capacity, and double the standard capacity as total disk capacity. - Page 9 In order to get a better performance, use Ultra ATA 66, 100 or 133 hard drive in same model . Mirroring Mode If two hard drives are in different storage capacity, ACARD AEC- 6880M will treat the smaller one as standard capacity, and double it as total available disk capacity.
-
Page 10: Acard Aec-6880M Cable & Power Installation
ACARD AEC-6880M 2.4 ACARD AEC-6880M cable & power installation The cable connection methods: Step 1. Find out pin 1 of the IDE connector on the IDE hard drive. Step 2. Find out a color line of the internal IDE cable indicating pin 1of the connector. -
Page 11: Configuring Acard Aec-6880M
ACARD AEC-6880M 2.5 Configuring ACARD AEC-6880M (Jumper Setting) RAID DIP Switch Setting RAID configurations must be set up on ACARD AEC-6880M. Set RAID Mode by adjusting ON/OFF DIP Switch. R AID D IP Switch Please follow the instructions below and decide a suitable RAID DIP Switch setting. -
Page 12: Chapter 3 System Installation
ACARD AEC-6880M Chapter 3 System Installation 3.1 Normal Mode Installation 3.1.1 Mac OS 9.x installation 1. Be sure the hardware is installed correctly. 2. Insert Mac OS CD-ROM to Macintosh. 3. Power on Macintosh and press ‘C’ key. 4. Wait for Mac OS and the appearance of Mac OS CD window. - Page 13 ACARD AEC-6880M 7. Choose the hard drive connected to ACARD AEC-6880M, then press “Initialize” button. For more detailed information of “Drive Setup“, refer to Mac OS manual. 8. Start to install a new OS on the hard drive.
-
Page 14: Mac Os X Installation
ACARD AEC-6880M 3.1.2 Mac OS X installation 1. Be sure your hardware is install correctly. 2. Insert Mac OS X CD-ROM into your Macintosh. 3. Power on your Macintosh and press ‘C’ key. 4. After Mac OS X boots up, select “Installer” from the top selection tools. - Page 15 ACARD AEC-6880M 8. Update your driver to version 1.5.1, which is on the support CD. Note: For more information about Mac OS X installation guide, please refer to Mac OS X installation manual.
-
Page 16: Verify System Profiler
ACARD AEC-6880M 3.1.3 Verify System Profiler For Mac OS 9 Environment Make sure that the computer “initialize” the hard drive successfully. When you initialize the hard drive successfully, on the Mac window a new “Un- titled” hard drive icon will appear. - Page 17 ACARD AEC-6880M Step 2. Under the “Apple System Profiler”, you will see the “System Profiler”. Choose “Devices and Volumes” to see the devices status. Step 3. Under “Devices and Volumes”, please choose “PCI” item. You will find the SCSI card installation status.
- Page 18 ACARD AEC-6880M For Mac OS X Environment Make sure that the computer “initialize” the hard drive successfully. When you initialize the hard drive successfully, on the Mac window a new “Un- titled” hard drive icon will appear. For advanced Mac users, find the system information under the Apple Logo pop up.
- Page 19 ACARD AEC-6880M Step 2. Find the “Application” sign on the top of the screen and click it. Step 3. Under the “Application”, find out the “Utilities” item and click it.
- Page 20 ACARD AEC-6880M Step 4. Under the “Utilities”, you will see the “Apple System Profiler”. Click on “Apple System Profiler” to see the devices status. Step 5. Under “Devices and Volumes”, please choose “PCI” item. You will find the SCSI card installation status.
-
Page 21: Striping Mode (Raid 0) / Mirroring Mode (Raid 1) Installation
ACARD AEC-6880M 3.2 Striping Mode (RAID 0) / Mirroring Mode (RAID 1) Installation Use clean hard drives for the ACARD AEC-6880M striping mode. Before doing the striping mode/ mirroring mode installation, do the “initialize” under normal mode first, then turn off the computer to set the DIP Switch as striping mode. - Page 22 ACARD AEC-6880M 7. Choose the hard drive connected to ACARD AEC-6880M, then press “Initialize” button. For more detailed information of “Drive Setup”, refer to Mac OS manual 8. Start to install a new OS on the hard drive.
-
Page 23: Mac Os X Installation
ACARD AEC-6880M 3.2.2 Mac OS X installation 1. Be sure the hardware is installed correctly. 2. Insert Mac OS X CD-ROM to Macintosh. 3. Power on your Macintosh and press ‘Option’ key. (Don’t skip the step otherwise RAID mode will be wrongly detected.) 4. - Page 24 ACARD AEC-6880M 8. Update your driver to version 1.5.1, which is on the support CD. Note: For more information about Mac OS X installation, please refer to Mac OS X installation manual.
-
Page 25: Verify System Profiler
ACARD AEC-6880M 3.2.3 Verify System Profiler For Mac OS 9.x Environment Make sure the computer “initialize” hard drive successfully. When you initialize the hard drive successfully, on the Mac window a new “Untitled” hard drive icon will appear. For advanced Mac users, find the system information under the Apple Logo. - Page 26 ACARD AEC-6880M Step 2. Under the “Apple System Profiler”, you will see the “System Profiler”. Choose “Devices and Volumes” to see the devices status. Step 3. Under “Devices and Volumes”, please choose “PCI” . You will find the SCSI card installation status.
- Page 27 ACARD AEC-6880M For Mac OS X Environment Make sure the computer “initialize” hard drive successfully. When you initialize the hard drive successfully, on the Mac window a new “Untitled” hard drive icon will appear. For advanced Mac users, find the system information under the Apple Logo.
- Page 28 ACARD AEC-6880M Step 2. Find the “Application” on the top of the screen and click it. Step 3. Under the “Application”, find out the “Utilities” and click it. Step 4. Under the “Utilities”, you will see the “Apple System Profiler”.
- Page 29 ACARD AEC-6880M Step 5. Under “Devices and Volumes”, please choose “PCI”. You will find the SCSI card installation status.
-
Page 30: Aec-6880M Raid Utility Installation
AEC-6880M RAID Utility must be used together with AEC-6880M firmware Ver. 2.42 or later. You may find them in ACARD Support CD. Delete Array When a disk failes in disk array under RAID 1 (Mirror Mode), please re- place it with a new one, then delete the original array setting. - Page 31 ACARD AEC-6880M Rebuild Copy data from an existing data disk in the array into a blank drive. When a failed drive has been replaced with a new one as part of a mirror array, the operation will be resumed. Quick Erase It can erase the data on hard drive content quickly.
-
Page 32: Chapter 4 Troubleshooting
1. Check power supply. Whenever the device is malfunctioned, check the power status(ON/OFF)first. 2. Verify the IDE device. Always let the IDE device function in proper mode before installing ACARD AEC-6880M. 3. Check host adapter. Verify if the adapter is firmly inserted into the slot on the motherboard. - Page 33 ACARD AEC-6880M Appendix 1 Technical Support Form Email: support@acard.com http://www.acard.com Model: F/W Version: AEC-6880M System Configuration Computer Memory SCSI adapter Other I/O card Other Storage Device MAC OS version Hard Disk Configuration Model Type Manufacturer Firmware Rev Problem Description MALAEC6880ME20-0...
Need help?
Do you have a question about the ATA-133 and is the answer not in the manual?
Questions and answers