Table of Contents
Advertisement
Quick Links
Advertisement
Table of Contents

Related Manuals for Papago VP668


Summary of Contents for Papago VP668
- Page 1 User Manual (VP668 Multifunctional Dash Cam)
-
Page 2: I Safety Precautions
I Safety Precautions Warnings Do not install or operate the dash cam with wet hands; Do not install the dash cam in the high-temperature, high-humidity, flammable and combustible environments, liquid and any area that may block the driver’s line of sight and endanger their life; ... -
Page 3: Product Overview
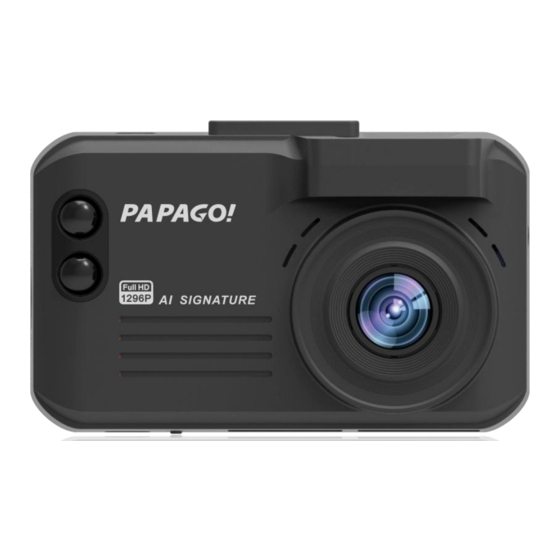
II Product Overview Packing Content ● Multifunctional Dash Cam ● Power Cable ● Suction Mount ● Adhesive Mount ● Magnetic Round Connector ● Magnetic Connecting Slide Buckle ● CPL polarizing filter improves the recording ● Quick Guide effect in the bright light (optional accessory) ※... - Page 4 Component Guide USB DC 5V Power Input Port Power Key 1. Set the main body’s menu in the menu Menu Key Sensor interface, and press the key to return to the upper (enter the interface interface involving the menu option 2.
- Page 5 Reset 1296 HD Camera Double laser reception, center Microphone frequency A:900nm, B:1020nm III Installation Guides Installation Positions ● Do not install the dash cam in the area that may block the driver’s line of sight and endanger life ● Try to install the dash cam near the inside rearview mirror to ensure the best image vision; ●...
- Page 6 Installation Methods Aim the magnetic transfer slide buckle at the mount buckle on the main engine. ① Hold the main body and mount with your hands, and aim the mount at the buckle on the main engine; ② Select a proper position (such as the right rear side or center of the rearview mirror), attach the suction mound to the windshield and rotate the mount clockwise to lock;...
- Page 7 IV Introduction to the Main Interface and Icons Display brightness value: 1-9 A shows auto photosensitivity Satellite positioning status. Display brightness Green: positioned; white: not Daytime/night state position Voice broadcasting mode Recording status. Red flashes Radar Reception indicate that it is recording ON/OFF status current time...
- Page 8 Manual Shutdown Please ensure that the main engine has been powered on. At this time, long press the key (power switch) for 3s to power the main engine off Warm Note: Remove the memory card after the main engine is completely powered off to avoid any file damage. VI Detailed Menu Instructions 1、...
- Page 9 Laser Signature radar Broadcast at 800 meters in advance Driving speed>100km/h GPS fixed point MTR K frequency X frequency Ka frequency Enhanced Mode (test Laser mode) ...
- Page 10 Flexible Radar Speed ON/OFF, the default option is to be on Measurement Point Interval Speed Measurement ON/OFF, the default option is to be on Point Speed Measurement ON/OFF, the default option is to be on Point at the Traffic Light Not Drive the ...
-
Page 11: Recording Mode
Allow to exceed the speed limit (for example, if the current speed limit value on the road is 120km/h, the set value that is allowed to be Driving Speed exceeded is 10km/h. If the driving speed is Allowed higher than 130km/h (≧130km/h), the product will give early warning) ... -
Page 12: Image Mode
Selection Range: 5 seconds/10 seconds/ 30 seconds/1 minute Sound settings during recording Sound Settings Selection Method: On/off MIC sensitivity during recording MIC Sensitivity Selection Method: Standard/low Scene selection during recording Recording Scene Selection Method: Selection Auto/sports/portrait/scenery/snow/beach/firework ... -
Page 13: Media Tools
Delete files saved on the memory card File Deletion Selection Method: delete one/all images Lock or unlock files saved on the memory card File Protection Selection Method: Lock file/lock files/unlock one file/unlock all files Image Storage Type Image Type ... -
Page 14: Product Specifications
VII Product Specifications Master Control Chip MSC8336 HD Camera Chip Sensor OV4689 Display IPS Full View Angle 3.0 Inch LCD Display Connect to the memory card (up to 128G). Its capacity can’t be lower than 8g Memory Card (recommended) and the reading speed should be higher than C6 Prime Lens Angle Horizontal: 110°... - Page 15 the camera will adjust time according to GPS. It also records and keeps the driving coordinate and speed. WMGPS player on the PC can show GPS information while playing videos, and meanwhile connect to Google Map to show your driving path.
- Page 16 Warm Notes: Please remove the machine and car charge if you will leave your car for a long time; Do not save the device in the humid or high-temperature environment; Remove the memory card if you don’t intend to use it for a long time to ensure its working performance. IX Termly Update GPS Data Points Download the corresponding data software on the specified website, and copy to the memory card.
-
Page 17: Troubleshooting
XII Troubleshooting Fail to power on Check whether the main engine is normally electrified; Remove the power USB cable, then reboot the main engine; Press the rest key on the bottom of the main engine once, then insert into DC5V power again. ... - Page 19 This device complies with Part 15 of the FCC Rules. Operation is subject to the following two conditions: (1) this device may not cause harmful interference, and (2) this device must accept any interference received, including interference that may cause undesired operation NOTE: This equipment has been tested and found to comply with the limits for a Class B digital device, pursuant to Part 15 of the FCC Rules.