Advertisement
Available languages
Available languages
Quick Links
Drehdimmer / Rotary Dimmer / Variateur rotatif /
Regulador giratorio / Dimmer rotativo
5180
DE
Bedienungsanleitung
EN
User manual
FR
Mode d'emploi
ES
Instrucciones de uso
IT
Istruzioni per l'uso
shop.dotlux.de --> item-no --> Downloads
05/2021
Advertisement

Related Manuals for DOTLUX 5180

Summary of Contents for DOTLUX 5180
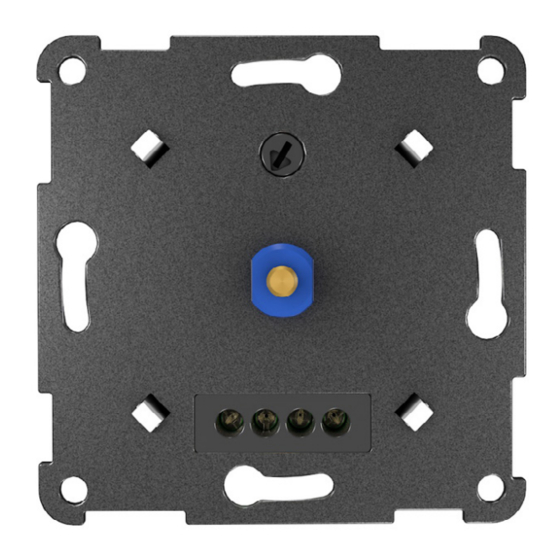
- Page 1 Drehdimmer / Rotary Dimmer / Variateur rotatif / Regulador giratorio / Dimmer rotativo 5180 Bedienungsanleitung User manual Mode d‘emploi shop.dotlux.de --> item-no --> Downloads Instrucciones de uso Istruzioni per l‘uso 05/2021...
- Page 2 Anschluss / Connection / Connexion / Conexión / Connessione (DE) Einwegschaltung (EN) One-way-switching (FR) Circuit à sens unique (ES) Circuito unidireccional (IT) Circuito unidirezionale (DE) Wechselschaltung (EN) Two-way-switching (FR) Circuit alternatif (ES) Circuito alterno (IT) Circuito alternato...
- Page 3 Installation / Installation / Installation / Instalación / Installazione (DE) MIN Lichtleistung einstellen Verwenden Sie den MIN-Dreher, um die minimale Lichtstärke und Stabilität einzustellen. Schalten Sie die Beleuchtung mit dem Dimmschacht ein. Drehen Sie dann die Dimmerwelle so weit wie möglich nach links (minimale Lichtleistung). Blinken die Lampen? Dann drehen Sie das MIN-Potentiometer mit einem Schraubendreher langsam im Uhrzeigersinn auf stabiles Licht.
- Page 4 loin que possible vers la gauche (puissance lumineuse minimale). Les lampes clignotent-el- les ? Tournez ensuite lentement le potentiomètre MIN dans le sens des aiguilles d‘une mon- tre à l‘aide d‘un tournevis pour obtenir une lumière stable. La lumière est-elle déjà stable ? Tournez ensuite lentement le potentiomètre MIN dans le sens inverse des aiguilles d‘une montre pour une meilleure gradation jusqu‘à...
- Page 5 geeignet für Abdeckplatten: suitable for cover plates: convient pour les plaques de recouv- rement: apto para placas de recubrimiento: adatto per piastre di copertura: Adapter 6 mm Berker by Hager Busch-Jaeger GIRA JUNG Merten by Schneider NIKO PEHA Busch-Jaeger Exxact ELKO RS Weiteres Zubehör/ Additional accessories/ Accessoires supplémentaires/ Accesorios adicionales/ Accessori aggiuntivi...
- Page 6 Internet- ten! adresse verfügbar: https://www.dotlux.de/konformitaetserk- Konformität laerungen/ Hiermit erklärt DOTLUX GmbH, dass dieses Produkt den EU-Richtlinien EMC 2014/30/ Weitere Symbole EU, LVD 2014/35/EU, RoHS 2011/65/EU ent- Beachten Sie immer die Symbole auf der spricht. Verpackung und in dieser Montageanleitung.
- Page 7 Luft, Reinigungsmittel, Dünger einen wichtigen Beitrag. (inbesondere in Blumenbeeten), Streusalz, andere chemische Substanzen (z.B. Pflan- Serviceadresse zenschutzmittel). DOTLUX GmbH Richard-Stuecklen Str. 7, 91781 Weissenburg Sicherheits- und Tel: +49 9141 / 4051 0 Unfallverhütungsvorschriften Fax: +49 9141 / 4051 999 Beachten Sie für die Montage und die War-...
- Page 8 Symbole Schutzart / Schutzklasse Das Gerät hat einen Schutzleiteranschluss. Schließen Sie den Schutz- Schutzleiter (grün-gelbe Ader) an die gekennzeichnete Er- klasse I dungsschraube an. Schutz- Das Gerät ist besonders isoliert und darf nicht an einen Schutz- klasse II leiter angeschlossen werden. Schutz- Das Gerät darf nur an Sicherheitskleinspannung angeschlossen klasse III...
- Page 9 Other Symbols Always follow the symbols on the packaging Conformity and in the instructions. The characters and DOTLUX GmbH hereby declares that this symbols are explained below: product complies with the EU Directives EMC 2014/30/EU, LVD 2014/35/EU, RoHS This manual assumes knowledge 2011/65/EU.
- Page 10 (especially in flower Service Address beds), road salt, other chemical substances (e.g. pesticides). DOTLUX GmbH Richard-Stuecklen Str. 7, 91781 Weissenburg Safety Precautions Tel: +49 9141 / 4051 0 Fax: +49 9141 / 4051 999...
- Page 11 Symbols IP protection / Protection class The device has a connection for a protective earth conductor. Protection Connect the protective earth conductor (green-yellow wire) to class I the corresponding marked earth screw. Protection The device has special insulation and must not be connected to class II a protective earth conductor.
- Page 12 à l‘adresse inter- parallèle ! net suivante: https://www.dotlux.de/konformitaetserk- Conformité laerungen/ DOTLUX GmbH déclare par la présente que ce produit est conforme aux directives euro- Symboles utilisès péennes EMC 2014/30/EU, LVD 2014/35/EU, Veuillez toujours prêter attention aux sym- RoHS 2011/65/EU.
- Page 13 (par exemple, que. les pesticides). Adresse du service Recommendation de sécurité et pré- DOTLUX GmbH vention Richard-Stuecklen Str. 7, 91781 Weissenburg Pour le montage, l‘entretien et la mise en Tel: +49 9141 / 4051 0 service, veuillez observer la règlementation Fax: +49 9141 / 4051 999 nationale en vigueur en matière de montage...
- Page 14 Symboles Protection IP/ classe de protection Classe de L‘appareil dispose d‘une connexion de conducteur de protec- protection tion. Connectez le conducteur de protection (fil vert-jaune) à la vis de mise à la terre marquée. Classe de L‘appareil est spécialement isolé et ne doit pas être relié à un protection conducteur de protection.
-
Page 15: Instrucciones De Uso
UE está disponible en la sigui- ralelo. ente dirección de Internet: https://www.dotlux.de/konformitaetserk- Conformidad laerungen/ DOTLUX GmbH declara por la presente que este producto cumple con las directivas de Otros símbolos la UE EMC 2014/30/UE, LVD 2014/35/UE, Observe siempre los símbolos del embalaje RoHS 2011/65/UE. - Page 16 Dirección de servicio limpieza, fertilizantes (especialmente en los parterres), sal de carretera, otras sustanci- DOTLUX GmbH as químicas (por ejemplo, pesticidas). Richard-Stuecklen Str. 7, 91781 Weissenburg Tel: +49 9141 / 4051 0 Normas de seguridad y prevención de...
- Page 17 Símbolos Grado de protección/ Clase de protección Clase de El dispositivo tiene una conexión de conductor de protección. protección Conecte el conductor de protección (cable verde-amarillo) al tornillo de conexión a tierra marcado. Clase de El aparato está especialmente aislado y no debe conectarse a protección un conductor de protección.
-
Page 18: Istruzioni Per L'uso
Altri simboli Conformitá Osservare sempre i simboli sull‘imballaggio DOTLUX GmbH dichiara che questo prodotto e nelle presenti istruzioni di montaggio: è conforme alle direttive UE EMC 2014/30/ EU, LVD 2014/35/UE, RoHS 2011/65/UE. Queste istruzioni richiedono cono- Istruzioni per l‘uso... - Page 19 (spe- ambiente. cialmente nelle aiuole), sale stradale, altre sostanze chimiche (per esempio pesticidi). Indirizzo del servizio Norme di sicurezza e prevenzione degli DOTLUX GmbH Richard-Stuecklen Str. 7, 91781 Weissenburg incidenti Tel: +49 9141 / 4051 0 l‘installazione manutenzione...
- Page 20 Simboli Grado di protezione / Classe di protezione Classe di Il dispositivo è dotato di un collegamento del conduttore di pro- protezione tezione. Collegare il conduttore di protezione (filo verde-giallo) alla vite di messa a terra contrassegnata. Classe di Il dispositivo è appositamente isolato e non deve essere colle- protezione gato a un conduttore di terra di protezione.
Need help?
Do you have a question about the 5180 and is the answer not in the manual?
Questions and answers