Table of Contents
Advertisement
Quick Links
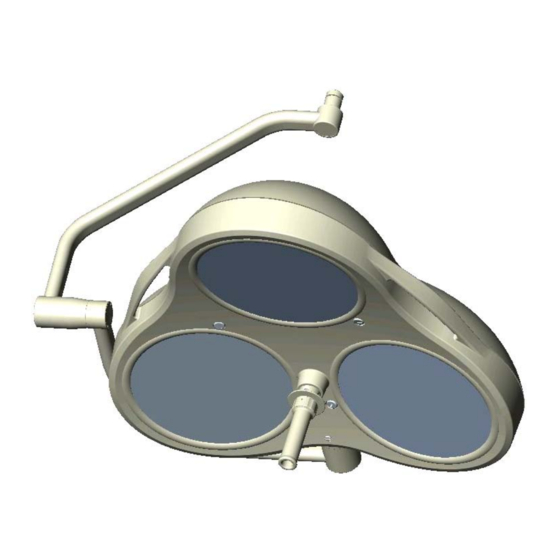
Mach M5
Mach M5 ceiling lamp for room heights up to 2,8m, F- / F/H / DF- / DF/H-model
Mach M5 ceiling lamp for room heights between 2,8m – 3m, F- / F/H / DF- / DF/H-model
Dr. Mach
59270001
Instructions for use
MACH M5
GmbH u. Co., Floßmannstrasse 28, D-85560 Ebersberg
Tel.: +49 (0)8092 2093 0, Fax +49 (0)8092 2093 50
Internet: www.dr-mach.com, E-Mail:
Edition 06
Dr. Mach
Lamps and Engineering
info@dr-mach.de
28.09.2004 / Bak page 1/26
Advertisement
Table of Contents

Related Manuals for Dr. Mach Mach M5


Summary of Contents for Dr. Mach Mach M5
- Page 1 MACH M5 Mach M5 ceiling lamp for room heights up to 2,8m, F- / F/H / DF- / DF/H-model Mach M5 ceiling lamp for room heights between 2,8m – 3m, F- / F/H / DF- / DF/H-model Dr. Mach GmbH u. Co., Floßmannstrasse 28, D-85560 Ebersberg Tel.: +49 (0)8092 2093 0, Fax +49 (0)8092 2093 50...
-
Page 2: Table Of Contents
Mach M5 Lamps and Engineering List of contents 1. Safety instructions ..................page 4 2. Operating the lamp MACH M5..............page 5 2.1 Brief description of the lamp ...............page 5 2.1.1 Merging of light fields (F-model) ..........page 5 2.1.2 Focusing (DF-model)..............page 5 2.1.3 Light intensity control (/H-model) ..........page 5... - Page 3 Mach M5 Lamps and Engineering Dear customer! Congratulations for acquiring our new OT-lamp MACH M5. The MachVISION optical system provides an illuminated field with improved contrast and excellent homogenity. Combined with the Duo-Focus feature this offers a unique possibility for adaptation to the wound area.
-
Page 4: Safety Instructions
The external transformer (Order No. 6701 0208) must be tested and validated ac- cording to IEC 60601-1. If the external transformer is not tested and validated according to IEC 60601-1, it is not allowed to use it with Dr. Mach OT-lamps. 59270001 Edition 06... -
Page 5: Operating The Lamp Mach M5
Lamps and Engineering 2. Operating the lamp MACH M5 2.1 Brief description of the lamp The OT-lamp MACH M5 is available in following versions: Standard OT-lamp (F) with merging of light fields Duo-Focus OT-lamp (DF) with merging of light fields and focusing F- or DF- lamps with light intensity control (/H) 2.1.1 Merging of light fields... -
Page 6: Turning The Lamp On/Off
Dr. Mach Mach M5 Lamps and Engineering 2.2 Turning the lamp ON/OFF The F- and DF-models are switched ON/OFF at the main switch of the OT or at the ON/OFF switch at the cardan bow (if ordered). The F/H and DF/H models are switched ON/OFF with the touch-button 1 at the key-pad of the lamp. -
Page 7: Merging Of Light And Focusing
Dr. Mach Mach M5 Lamps and Engineering 2.5 Overview of the lamp functions Merging of light fields and focusing MERGING OF LIGHT FIELDS Ring (2) Merging the individual light fields of each reflector is done by swivelling the reflectors. The light fields overlap. -
Page 8: Adjusting The Light Intensity
Dr. Mach Mach M5 Lamps and Engineering 2.6 Adjusting the light intensity Key pad (for F/H- and DF/H-models only) Select the desired light intensity before the opera- tion. At these models the adjustment is done by the key- pad at the cardanic bow. The intensity can be ad- justed continuosly between 50% and 100%. -
Page 9: Positioning
Dr. Mach Mach M5 Lamps and Engineering 2.7 Positioning Use the sterile handle 2 or the handle rails 1 to position the lamp. Use the handle rail to position the lights before the operation. Use the sterile handle for positioning during the operation. -
Page 10: Cleaning
Dr. Mach Mach M5 Lamps and Engineering 3. Cleaning 3.1 Sterilisable handle At delivery the lamp is equipped with the handle sleeve 1. The handle sleeve is removable and ster- ilisable. Before using the first time and before every use the handle sleeve must be cleaned, disinfected and sterilised. - Page 11 Dr. Mach Mach M5 Lamps and Engineering When cleaning / disinfecting, the following procedures must be followed: Process Time (sec.) Zone 1 Pre-rinse, external, cold, 10 – 15°C Washing, acidic, external 35°C Draining time Re-rinse, external approx. 80°C Draining time Re-rinse, external approx.
-
Page 12: Lamp Housing, Dispersing Lens And Support System
Alc. ≤ 20 % 4. Maintenance DR. MACH lamps are supplied with brakes on the suspension fixture and on the lamp housing. Adjust these brakes, if necessary, after installation. If the lamp is difficult to move or if it does not keep its position, the brake forces should be adjusted. -
Page 13: Changing Of Spare Parts
Mach M5 Lamps and Engineering 4.2 Changing of spare parts 4.2.1 Changing the halogen bulbs Dr. Mach uses special halogen bulbs as illumi- nants. Only original Dr. Mach replacement bulbs may be used. The use of other bulbs can lead to a considerable reduction of the light power and increase in the thermal load. - Page 14 Dr. Mach Mach M5 Lamps and Engineering • Now you can see the open reflector 3 in front of you. ATTENTION: Do not touch the inner surface of the reflector, otherwise the surface can be damaged. • Tilt the shadower 4 off-center, until it snaps in in the provided groove.
-
Page 15: Changing The Filter Disk
Dr. Mach Mach M5 Lamps and Engineering 4.2.2 Changing the filter disk The filter disk between reflector and protective disk prevents a damaging heating of the illuminated area. ATTENTION! The lamps must not be used without this filter. Always place the filter disk on a soft, non- scratching base to preserve its surface. - Page 16 Dr. Mach Mach M5 Lamps and Engineering • The filter disk 3 is held by six retaining angles 4, the retaining angles are fixed with six re- cessed head screws. • Loosen the screws at three adjacent retaining angles 4 and turn these angles as shown in the left drawing.
-
Page 17: Changing The Dispersing Lens
Dr. Mach Mach M5 Lamps and Engineering 4.2.3 Changing the dispersing lens The dispersing lens is made of a high-quality plas- tic. In case the dispersing lens looses its optical characteristics, this can reduce the luminous inten- sity and the light quality provided. - Page 18 Fix the optic ring by turning the screw 1 clock- wise. On request of the customer there are spare parts lists and wiring diagrams available for the lamps Mach M5 F / Mach M5 DF. 59270001 Edition 06 28.09.2004 / Bak page 18/26...
-
Page 19: Data
Dr. Mach Mach M5 Lamps and Engineering 5. Data 5.1 Technical data Mach M5 DF / M5 DF/H Central light intensity 160.000 Lux at a distance of 1 meter Light field diameter d 172,5 mm Light field diameter d 96 mm Light intensity with one shadower 127.500 Lux... -
Page 20: Electrical Data
Dr. Mach Mach M5 Lamps and Engineering 5.2 Electrical data Mach M5 DF / M5 DF/H Power consumption 231 W Voltage AC/DC 22,8 V Current 10,1 A Halogen bulb 22,8 V / 77 W Frequency 50/60 Hz Degree of protection... -
Page 21: Ce-Mark
Lamps and Engineering 6. CE-mark The products Mach M5 comply with the standards 93/42/EEC for medical products of the European Community’s Council. Dr. Mach applies the standard EN 60601-2-41. Dr. Mach GmbH is certified according to DIN EN 46001:1996 and DIN EN ISO 13485:2001. -
Page 22: Spare Parts
Dr. Mach Mach M5 Lamps and Engineering 8. Spare parts 15,16 23,24 20,21,22 12,13 59270001 Edition 06 28.09.2004 / Bak page 22/26... - Page 23 Dr. Mach Mach M5 Lamps and Engineering 30,31 35,36 59270001 Edition 06 28.09.2004 / Bak page 23/26...
-
Page 24: Spare Parts List
Dr. Mach Mach M5 Lamps and Engineering 9. Spare parts list Item Qty. Name EDVNO Remarks Lower housing part for lamp without camera 27012201 Lower housing part for lamp with camera 27012203 Upper housing part 27011201 Cover for lamp without camera... -
Page 25: Appendix: Setting The Primary Voltage
Dr. Mach Mach M5 Lamps and Engineering 10. Appendix Setting the primary voltage at the block transformer 300VA Clamps on the transformer Pos.1 earthing connection at the trans- former Pos.2 primary side Pos.3 secondary side • Connect the transformer to earth. Use the provided clamps pos.1 at the transformer, respectively at the transformer plate. - Page 26 Dr. Mach Mach M5 Lamps and Engineering Setting for 230V Setting for 247V 59270001 Edition 06 28.09.2004 / Bak page 26/26...
Need help?
Do you have a question about the Mach M5 and is the answer not in the manual?
Questions and answers