
Related Manuals for QQZM T5008

Summary of Contents for QQZM T5008
- Page 1 User Manual Full HD Cube Wireless IP Network Camera Model: T5008 Copyright © Shenzhen Quick Zoom Technology Co., Ltd., All Rights Reserved...
- Page 2 www.zmvideo.com STATEMENT This user manual may not describe some technical item in details / correctly or there is some typographical error. If you can’t solve your problem according to this manual, please call / email us directly. This manual will be updated aperiodically without any prior notice. PRECAUTIONS FOR USE 1.
-
Page 3: Table Of Contents
www.zmvideo.com Table of Contents 1 Overview ..........................4 2. Access the Wireless IP Camera ..................6 2.1 Access the Wireless IP Camera through App................6 2.1.1 Download and Install App: ..................6 2.1.2 Connect Camera to Wi-F i with Smart Link Function ............6 2.1.3 Connect Camera to Wi-F i with Access Point Function ............ -
Page 4: Overview
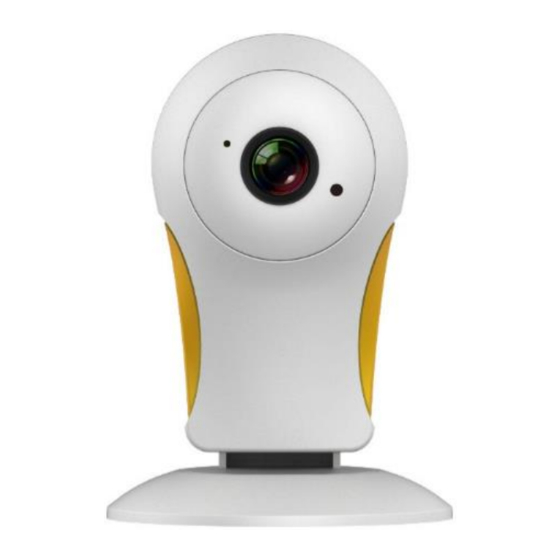
www.zmvideo.com 1 Overview The N5008 Cube Wireless IP Camera is an integrated wireless IP Network Digital Camera with a 2.0MP (1920*1080) CMOS sensor, Wireless unit, IR Board etc. It works basing on the TCP/IP protocol and P2P technology, help to bring the quality video to your PC/Tablet/Laptop/Smart Phone in real time both in Local Network and over the Internet simply. - Page 5 www.zmvideo.com 1.2 Read Before Use Please check all contents received are complete according to the Package Contents below. Before the Wireless IP Camera is installed, please read this manual intensively and follow instructions step by step to avoid damage due to faulty assembly or transportation. 1.3 Package Contents ×...
-
Page 6: Access The Wireless Ip Camera
www.zmvideo.com 2. Access the Wireless IP Camera 2.1 Access the Wireless IP Camera through App 2.1.1 Download and Install App: Download and install “Qvision” from CD Or scan QR Code to install below: IOS App Android App 2.1.2 Connect Camera to Wi-Fi with Smart Link Function ... - Page 7 www.zmvideo.com Press “Configure Wi-Fi Network” button and click “Hear the Voice” button Enter Wi-Fi Password, operate according to the device voice prompt like below: Copyright © Shenzhen Quick Zoom Technology Co., Ltd., All Rights Reserved...
-
Page 8: Connect Camera To Wi-Fi With Access Point Function
www.zmvideo.com 2.1.3 Connect Camera to Wi-Fi with Access Point Function Set your smart phone as a portable hotspot device (SSID:qqzm1224 and Password:12345678) like below: Power on camera. Then the camera will connect to the portable hotspot automatically. Then open “Qvision” app, scan to Add the Camera to App ... - Page 9 www.zmvideo.com Click “Setting” and Select the “Configure Wi-Fi” Tag to search the Wi-Fi SSID Select the right Wi-Fi and Input the Password to set it up. After setting, close app and connect your smart phone to wireless router. Open “Qvision”...
-
Page 10: Access The Wireless Ip Camera Via Pc Cms
www.zmvideo.com 2.2 Access the Wireless IP Camera via PC CMS 2.2.1 Download and Install PC CMS The Wireless IP Camera supports the Windows OS system; you can get the installation package on the CD. The name of Windows CMS is “IpCamV” And we will show how to use the “IpCamV”... -
Page 11: Adding Ip Camera Device
www.zmvideo.com 2.2.3 Adding IP Camera Device 2.2.3.1 Add Camera in LAN After set up camera connecting to Wi-Fi, just click “Add” button, cameras connected to router will be shown in the list: 1. Click “Add“Button 2. Tick the Check box of Cameras that Connected in LAN 3. - Page 12 www.zmvideo.com 2.2.3.2 Using Context Menu to Add Camera in WAN You can use this function to add the cameras in LAN or WAN 1. Right Click folder “Devices” 2. Click “Add Device through ID” 5. Fill in 3. Fill in a name of Device ID camera and any information you...
-
Page 13: Operation Of Wireless Ip Camera By Cms
www.zmvideo.com 3. Operation of Wireless IP Camera by CMS 3.1 Wi-Fi Setting 1. Select the video of the camera you want to set Wi-Fi, right click the mouse, and click “Setup” 2. Click “Wi-F i” 4. Select your Wi-Fi SSID 5. -
Page 14: And Color Setting
www.zmvideo.com 3.2 PT and Color Setting 3.2.1 PT Control Panel 1. PT Control Arrow 2. Zoom In and Zoom Out 3. PT Speed Control. Larger NO. means faster 4. Cruise Setting 3.2.2 Color Control Panel 1. Brightness Adjustment 2. Saturation Adjustment 3. -
Page 15: Record, Snapshot And Two Way Audio
www.zmvideo.com 3.3 Record, Snapshot and Two way Audio 3.3.1 Operation of alarm, snapshot and two way audio ① ② ③ ④ ⑤ ⑥ ⑦ ⑧ Function Icon Description Full Definition Video Quality Monitor in Best Video Quality Smooth Monitor in Medium Video Quality Top Speed Monitor in Medium in Best Video Fluency Record Folder... -
Page 16: Schedule Record
www.zmvideo.com 3.3.3 Schedule Record 5. Set the schedule of recording, red square means the 4. Select Camera 1. Click “Manage” camera will record video at this selected time 2. Click “Record Manage” 3. Click “Schedule Record” 6. Click “Save” to save the schedule 8. -
Page 17: Playback Video
www.zmvideo.com 3.4 Playback Video 3.4.1 Playback Video Recorded onto Local Computer 4. Set start time and end time, and then click “Search” 1. Click “Manage” 3. Select Camera 2. Click “Record onto Computer” 5. The video recorded during the selected time will be shown up, click “Play”... -
Page 18: Osd Setting
www.zmvideo.com 3.5 OSD Setting 2. Time OSD 1. OSD 2. Select the video of the camera you want to set OSD, right click the mouse, and click “Setup” 2. Switch on the Time and OSD 3. Input the Letter (Within 18 characters) 4. -
Page 19: Time Setting
www.zmvideo.com 3.6 Time Setting 1. Select “Time Setting ”” 2. Tick “NTP”, ”Manual” or “From PC” 3. Click “Setting” 3.7 Camera Password and Factory Reset 3.7.1 Password of Camera The camera ID & Password are shown on the label attaching at the bottom of camera house. -
Page 20: Factory Reset
www.zmvideo.com 3.7.2 Factory Reset You can reset the camera to the factory setting like below 1. Select the camera you want to Restore, then right click the mouse, and then click “Setup” 2. Click “Advance Setting ” 3. Click “Res Default” to reboot the camera 3.7.3 Password of Client Software The default password of the client software is “123456”, we recommend user change... -
Page 21: Operation Of Wireless Ip Camera By App
www.zmvideo.com 4. Operation of Wireless IP Camera by App 4.1 Wi-Fi Setting You can change to another Wi-Fi SSID. Please kindly refer to “2.1.3Connect Camera to Wi-Fi with Access Point Function” on Page 9 for now to set up Wi-Fi; 4.2 Basic Operation 1. -
Page 22: Zoom
www.zmvideo.com 4.4 Zoom 4.5 Alarm Setting 4.6 Reverse P/T You can reverse the PT control direction of the camera rotation direction. Copyright © Shenzhen Quick Zoom Technology Co., Ltd., All Rights Reserved... -
Page 23: Schedule Alarm
www.zmvideo.com 4.7 Schedule Alarm 4.8 More Setting Copyright © Shenzhen Quick Zoom Technology Co., Ltd., All Rights Reserved... -
Page 24: Network Setting
www.zmvideo.com 4.8.1 Network Setting 4.8.2 OSD Setting 4.8.3 Restore to Factory Setting Copyright © Shenzhen Quick Zoom Technology Co., Ltd., All Rights Reserved... -
Page 25: Sd Card Management
www.zmvideo.com 4.8.4 SD Card Management 4.9 Picture preview and video playback Copyright © Shenzhen Quick Zoom Technology Co., Ltd., All Rights Reserved... -
Page 26: Alarm Push Setting And Live Stream
www.zmvideo.com 4.10 Alarm Push Setting and Live Stream Note: The live steam function is only available for charged user. Thanks for your reading, if you have any question, please don’t hesitate to contact us! Copyright © Shenzhen Quick Zoom Technology Co., Ltd., All Rights Reserved...
Need help?
Do you have a question about the T5008 and is the answer not in the manual?
Questions and answers