Advertisement
Quick Links
Advertisement

Related Manuals for WOOD Akupanel


Summary of Contents for WOOD Akupanel
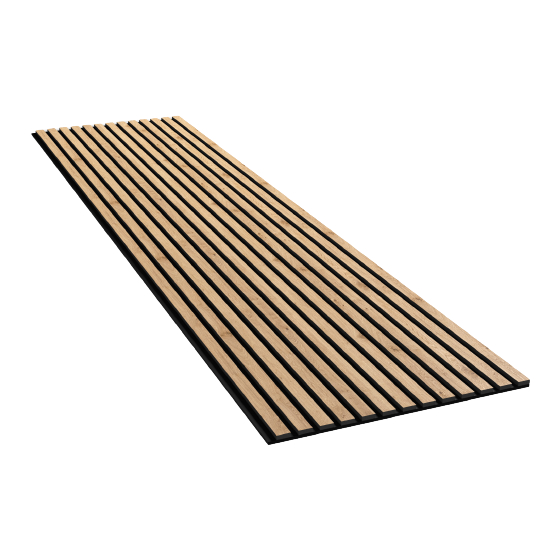
- Page 1 Installment Guide Akupanel How to install the Akupanels - step by step...
- Page 2 The tools you will need: • A saw - either a circular saw or a normal saw (foxtail). • A screwdriver. • Screws for the Akupanels and the underlying battens. » Black screws approximately 35 mm. for mounting the Akupanels. »...
-
Page 3: Preparing The Wall
Step 1 | Preparing the wall: Start by preparing the wall. Clean the wall and remove any screws, nails and other obsticles on the wall. - Page 4 Step 2 | Mounting the underlying battens: The first thing you need to do is to mount battens on the wall. This enables you to drill the screws throgh the felt of the akupanels and into the battens. Depending on the wall you will need plugs and and screws that fits accordingly to your wall type.
- Page 5 Step 3 | Insert mineral wool between the battens: Insert a 45 mm. mineral wool between the battens. The mineral wool can be cut using a knife. The mineral wool is then squeezed in between the battens.
- Page 6 Step 4 | Mounting the akupanels: Mount the Akupanels on the wall by drilling the black screws (35 mm.) through the black felt and into the battens. We recommend 15 screws per Akupanel.
- Page 7 The panels have a felt side and a lamella side. When you mount the panels in continuation of each other you need to make sure that the felt side from one panel is flush with the lamella side on another panel so that there is about 12 mm between the lamellas in the jointing.
- Page 8 Step 5 | Cutting the Akupanels in width: When reaching the end of the wall you might need to adjust the panels in order to make the panels fit.
- Page 9 Adjusting the akupanels sideways is done by cutting the panel in the felt using a knife.
- Page 10 Then mount the last piece on the wall - again by using black screws through the felt.
- Page 11 Mark the cutting line on the panel with a pencil. Once you have cut the Akupanel it is a good idea to fasten the lamellas to the felt. This is done by drilling a screw (approximately 15 mm.) into the lamellas through the felt on the...
- Page 12 Step 7 | You are done: Congratulations! You wall is now fully installed. The wall will significantly improve the genral acoustics of the room and remove reverberation, so that you will be able to relax and hear what your guests are saying. If you need any guidance in terms on installment then you are more than welcome to reach out to us.
Need help?
Do you have a question about the Akupanel and is the answer not in the manual?
Questions and answers