Table of Contents
Advertisement
Quick Links
Advertisement
Table of Contents

Related Manuals for UNELL SN-F22-B


Summary of Contents for UNELL SN-F22-B
- Page 1 Bi-spectrum Network Camera User Manual Issue V 1.0 Data 2020-10-19...
-
Page 3: Precautions
Bi-spectrum network camera User Manual Precautions Precautions Precautions Fully understand this document before using this device, and strictly observe rules in this document when using this device. If you install this device in public places, provide the tip "You have entered the area of electronic surveillance" in an eye-catching place. Failure to correctly use electrical products may cause fire and severe injuries. - Page 4 Bi-spectrum network camera Precautions User Manual ⚫ Strictly conform to local electrical safety standards and use power adapters which are marked with the LPS standard when installing and using this device. Otherwise, this device may be damaged. ⚫ Use accessories delivered with this device. The voltage must meet input voltage requirements for this device.
- Page 5 Bi-spectrum network camera User Manual Precautions ⚫ Do not jam the ventilation opening. Follow the installation instructions provided in this document when installing the device. ⚫ Keep the device away from heat sources such as radiators, electric heaters, or other heat equipment. ⚫...
-
Page 6: Table Of Contents
Bi-spectrum network camera Contents User Manual Contents Precautions ........................I Contents ........................IV 1 Product Overview ....................7 1.1 About Product ......................... 7 1.2 Features .......................... 7 1.3 Device Dimension ......................8 1.4 Installation ........................9 1.5 Cable Connection ......................10 2 Quick Configuration ..................... - Page 7 Bi-spectrum network camera User Manual Contents 4.5 Exposure ........................46 4.6 WB ..........................47 4.7 DayNight ........................48 4.8 Noise Reduction ......................50 4.9 Enhance Image ......................50 5 Thermal Sensor Configuration................53 5.1 Accessing the Sensor Interface ..................53 5.2 Mode ..........................
- Page 8 Bi-spectrum network camera Contents User Manual 8.2.4 Snapshot ......................88 8.3 Device .......................... 89 8.4 External Device ......................89 8.5 Privacy Masking ......................90 8.6 Network Service ......................90 8.7 Privacy Manager ......................90 8.8 Protocol ........................91 8.9 Device Log ........................91 8.10 Maintenance .......................
-
Page 9: Product Overview
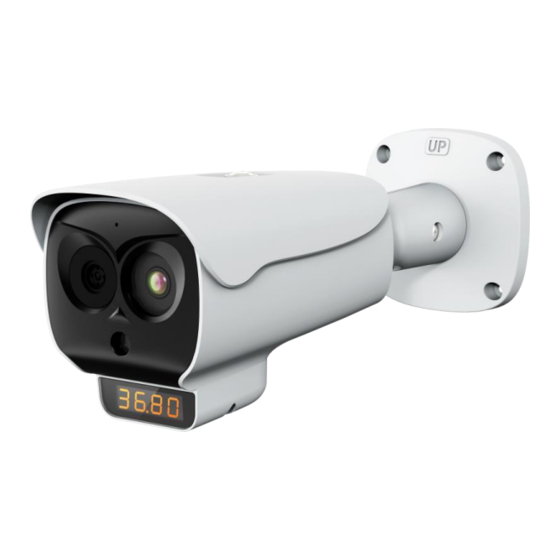
Bi-spectrum network camera User Manual Product Overview Product Overview 1.1 About Product ⚫ The Bi-spectrum network camera is integrated with the thermal imaging and temperature measuring, visible fusion, core image intelligent analysis, etc. ⚫ Unique double registration mechanism, visible light and thermal imaging is reflecting the same scene. -
Page 10: Device Dimension
Bi-spectrum network camera Product Overview User Manual ⚫ Over-temperature warning, temperature difference alarm and over-temperature alarm. ⚫ Outputting three code streams in real time, and satisfying local storage and network transmission of the video. ⚫ 1-channel audio input and 1-channel audio output, supporting bidirectional voice talkback. ⚫... -
Page 11: Installation
Bi-spectrum network camera User Manual Product Overview 1.4 Installation Step 1 Stick the installation location sticker on ceiling or wall, drill four holes based on the marks on the sticker. Drive the swell plastic buttons into holes. Step 2 Loosen screw 1 to free the body to easy to install the fixed screws of camera. This step before mount is highly suggested to make it convenient to use electric screwdriver, as shown in Figure 1-2. -
Page 12: Cable Connection
Bi-spectrum network camera Product Overview User Manual Figure 1-3 Fix camera Step 4 Connect the multi-connector cable and monitor, loosen the screw 2 to adjust the position so that the camera face the monitored area, as shown in Figure 1-4. Tighten the screw 1 and screw 2. - Page 13 Bi-spectrum network camera User Manual Product Overview Figure 1-5 Multi-connector combination cable Table 1-1 Multi-connector combination cable Core of Cable Functions Video Connect the BNC connector. Power interface, connects to the 12 V DC power DC12V (2A) supply. Audio Input Inputs the audio signal and receives the analog audio signals from the sound pick-up device.
- Page 14 Bi-spectrum network camera Product Overview User Manual Yellow :alarm OUT 2 Grey :alarm IN COM 2 Purple : alarm IN 2 ALARM1 Alarm in/ alarm out 1 Brown :alarm OUT COM 1 Blue :alarm OUT 1 White :alarm IN COM 1 Green : alarm IN 1 RS485 RS485 interface connects to the external pan &...
-
Page 15: Quick Configuration
Bi-spectrum network camera User Manual Quick Configuration Quick Configuration 2.1 Login and Logout You must use Internet Explorer 8 or a later version to access the web management system; otherwise, some functions may be unavailable. Login system Step 1 Open the Internet Explorer, enter the IP address of camera (default value is 192.168.0.121) in the address box, and press Enter. -
Page 16: Homepage Layout
Bi-spectrum network camera Quick Configuration User Manual ----End logout To logout of system, click in the upper right corner of the homepage, the login page is displayed after you logout of the system. 2.2 Homepage Layout On the homepage, user can view real-time video, playback and configuration. User can set parameter, Video parameter, Video control, PTZ control, PTZ Configure and logout of the system. - Page 17 Bi-spectrum network camera User Manual Quick Configuration Element Description Alarm icon When the device generates an alarm, the alarm icon is displayed. You can click to view the alarm information. When the device accepts an alarm signal, the alarm icon will display within 10s in the web management system.
-
Page 18: Changing The Password
Bi-spectrum network camera Quick Configuration User Manual 2.3 Changing the Password Description User can click to change the password for logging in to the system. Procedure Step 1 Click in the upper right corner of the main page. The Change Password dialog box is displayed, as shown in Figure 2-3. Figure 2-3 Change password dialog box ⚫... -
Page 19: Browse Video
Bi-spectrum network camera User Manual Quick Configuration 2.4 Browse Video User can browse the real-time video in the web management system. Preparation To ensure the real-time video can be played properly, you must perform the following operations when you log in to the web for the first time: Step 1 Open the Internet Explorer. -
Page 20: Install Plugins
Bi-spectrum network camera Quick Configuration User Manual Figure 2-5 Configuring ActiveX control and plug-ins Step 3 Download and install the player control as prompted. ⚫ The login page is displayed when the control is loaded. 2.4.1 Install Plugins You will be prompted with a message “click here to use short delay Plugin for Live Video”... -
Page 21: Setting Local Network Parameters
Bi-spectrum network camera User Manual Quick Configuration Procedure Step 1 Click the message, download and install the plugin follow the prompts. Step 2 Reopen the browser after installation. Step 3 On live video page, you can operate these buttons as shown in live video. ⚫... - Page 22 Bi-spectrum network camera Quick Configuration User Manual Figure 2-7 Local Network Step 2 Set the parameters according to Table 2-2. Table 2-2 Local network parameters Parameter Description Setting IP Protocol IPv4 is the IP protocol that uses [Setting method] an address length of 32 bits. Select a value from the drop-down list box.
- Page 23 Bi-spectrum network camera User Manual Quick Configuration Parameter Description Setting IP Address Device IP address that can be [Setting method] set as required. Enter a value manually. [Default value] 192.168.0.121 Subnet mask of the network Subnet Mask [Setting method] adapter. Enter a value manually.
- Page 24 Bi-spectrum network camera Quick Configuration User Manual ⚫ If you set only the Subnet Mask, Default Gateway, Preferred DNS Server, and Alternate DNS Server parameters, you do not need to login to the system again. ⚫ You can click Reset to restore the previous parameters if required. ----End Issue V 1.0(2020-10-19)...
-
Page 25: Temperature Measurement
Bi-spectrum network camera User Manual Temperature Measurement Temperature Measurement 3.1 Parameter Configure Operation Procedure Step 1 Choose Configuration > Temperature Measurement > Parameter configure. The parameter configure page is displayed, as shown in Figure 3-1. Figure 3-1 Temperature Parameters interface Issue V 1.0(2020-10-19)... - Page 26 Bi-spectrum network camera Temperature Measurement User Manual Step 2 Set the parameters according to Table 3-1. Table 3-1 Parameter of face detection Parameter Description Setting Face detection Detect face of human [Setting method] Enable [Default value] Display trace Display the information of tracing. [Setting method] The frame will be blue if the Enable the button...
- Page 27 Bi-spectrum network camera User Manual Temperature Measurement be red if the temperature is high. Mode 1 Mode 1:show temperature on snapshot frame. Mode 2: without temperature on snapshot frame. Mode 3: the char will show on the trace frame(char +++ means normal, char --- means high.) Show detection area Enable, the live video will show area...
- Page 28 Bi-spectrum network camera Temperature Measurement User Manual Upload image interval The snapshot mode is timing or timer [Setting method] optimal, set the interval. Input a number from 1 to 10 [Default value] Snapshot count At optimal mode, set the number of [Setting method] snapshot image Input 1...
- Page 29 Bi-spectrum network camera User Manual Temperature Measurement Figure 3-2 Temperature parameters Table 3-2 Temperature parameters Parameter Description Setting Enable Enable to measure the [Default value] temperature of human face. Enable When it is disable, the camera only capture the human face without temperature.
- Page 30 Bi-spectrum network camera Temperature Measurement User Manual Parameter Description Setting Correction Correction coefficient refers to [Setting method] Coefficient the deviation of measured Enter a value manually. object temperature and actual [Default value] temperature. 0.00 For example: 1. The measured object temperature is 30, and actual temperature is 37, so the correction coefficient is 7.
- Page 31 Bi-spectrum network camera User Manual Temperature Measurement Parameter Description Setting Temperature Two modes, mode 1 is suitable [Setting method] measure mode for high air temperature, if the Select a value from the forehead temperature is less drop-down list box. than 31 ℃, not to show as body [Default value] temperature.
- Page 32 Bi-spectrum network camera Temperature Measurement User Manual Figure 3-3 temperature alarm linkage Table 3-3 Temperature parameters Parameter Description Setting Area ID Choose the area ID to alarm [Setting method] Select a value from the drop-down list box. [Default value] Output channel Choose channels to output [Setting method] alarm...
- Page 33 Bi-spectrum network camera User Manual Temperature Measurement SMTP Enable, when there is an alarm, [Setting method] the camera will send mail. Disable FTP upload Enable, when there is an alarm, [Setting method] the camera will upload FTP. Disable Audio detect alarm Enable, when there is alarm, the camera will broadcast the audio.
- Page 34 Bi-spectrum network camera Temperature Measurement User Manual Figure 3-4 Sound alarm output User can upload the audio that the format is WAV, and set cycles and schedule of enabling. Step 3 Set schedule. Issue V 1.0(2020-10-19)...
-
Page 35: Ambient Temperature
Bi-spectrum network camera User Manual Temperature Measurement ⚫ Method 1: Click left mouse button to select any time point within 0:00-24:00 from Monday to Sunday as shown in Figure 3-5. ⚫ Method 2: Hold down the left mouse button, drag and release mouse to select the alarm time within 0:00-24:00 from Monday to Sunday. -
Page 36: Thermal Mapping
Bi-spectrum network camera Temperature Measurement User Manual Parameter Description Setting Adaptation environment Set the ambient temperature, and click “Apply”, click “Refresh” ,the temperature camera will obtain automatically. 3.3 Thermal Mapping NOTE ⚫ This function will be set up before leaving the factory, user don’t need to modify it. -
Page 37: Bad Point Check
Bi-spectrum network camera User Manual Temperature Measurement Step 2 Settings please refer to Table 3-5. Table 3-5 Parameter of thermal mapping Parameter Description Setting Zoom in /zoom out. [Setting method] Click the button Near focus / far focus. [Setting method] Click the button Lock focus position [Setting method]... - Page 38 Bi-spectrum network camera Temperature Measurement User Manual Operation Procedure Step 1 Choose Configuration > Temperature Measurement >bad point check, if there are some bad point as shown in Figure 3-7. Figure 3-7 Bad point check interface Bad Point 1 Bad Point 2 Step 2 Click the white point at image, click Apply to recover the bad point, as shown in Figure 3-8.
-
Page 39: Thermal Calibration
Bi-spectrum network camera User Manual Temperature Measurement Figure 3-8 Recover bad point Step 3 Click Reset to return the previous settings. Step 4 Click Apply. The message "Apply success" is displayed, the system saves the settings. ----End 3.5 Thermal Calibration Enable the thermal calibration function;... - Page 40 Bi-spectrum network camera Temperature Measurement User Manual Figure 3-9 Thermal calibration interface Step 2 Enable the button and display area info. Step 3 Input the target temperature, emission rate and distance. Step 4 Click Apply. The message "Apply success" is displayed, the system saves the settings.
-
Page 41: Measure Verify
Bi-spectrum network camera User Manual Temperature Measurement 3.6 Measure Verify NOTE ⚫ This operation does not need to be started, and only needs to be started when the measuring device is provided by a third-party measurement corporate. ⚫ If the function is enable, the temperature measurement function of the human body is paused, and only the temperature of the object (standard black body) in the ID area is working. -
Page 42: Digital Tube
Bi-spectrum network camera Temperature Measurement User Manual Figure 3-11 LED control param Table 3-7 LED control param Parameter Description Setting Display Mode There are four modes can be chosen. [Setting method] Open: the LED is always lighting. Select from drop-down list . - Page 43 Bi-spectrum network camera User Manual Temperature Measurement Figure 3-12 Digital tube Table 3-8 Digital tube Parameter Description Setting Enable Enable it, the digital tube will show [Default value] the temperature of detecting. Enable Relate Area ID It is relativity to the Area ID of [Setting method] Parameter Configure, choose one Select from drop-down...
-
Page 44: Visible Sensor Configuration
Bi-spectrum network camera Visible Sensor Configuration User Manual Visible Sensor Configuration 4.1 Accessing the Sensor Interface Procedure Step 1 On the web or NVMS interface, move the cursor to the real-time video page and right-click on the page. A shortcut menu is displayed, as shown in Figure 4-1 Figure 4-1 Sensor setting interface Step 2 Choose Sensor Configure and the Sensor Setting dialog box appears. -
Page 45: Image Adjust
Bi-spectrum network camera User Manual Visible Sensor Configuration Figure 4-2 Mode Step 2 Choose the switch mode from the drop-down list. Step 3 Time mode: Set the Start Time, set the End Time. Step 4 Click Save, the message "Save succeed" is displayed, the system saves the settings. 4.3 Image Adjust Figure 4-3 shows the Image Adjust tab page. - Page 46 Bi-spectrum network camera Visible Sensor Configuration User Manual Table 4-1 Parameters of Image Parameter Description Configuration Method Brightness It indicates the total brightness of an image. As [Setting method] the value increases, the image becomes Drag the slider. brighter. [Default value] Sharpness It indicates the border sharpness of an image.
-
Page 47: Scene
Bi-spectrum network camera User Manual Visible Sensor Configuration 4.4 Scene Figure 4-4 shows the scene tab page. Figure 4-4 Scene Table 4-2 describes the parameters on the scene tab page. Table 4-2 Parameters of scene Parameter Description Configuration Method Scene Indoor or outdoor. -
Page 48: Exposure
Bi-spectrum network camera Visible Sensor Configuration User Manual 4.5 Exposure Figure 4-5 shows the Exposure tab page. Figure 4-5 Exposure Table 4-3 describes the parameters on the Exposure setting tab page. Table 4-3 Parameters of exposure setting Parameter Description Configuration Method Exposure Mode The exposure modes include:... - Page 49 Bi-spectrum network camera User Manual Visible Sensor Configuration Max Shutter It is valid in mode. You can [Setting method] Iris Priority select a maximum shutter speed. As the Select a value from value increases, the image becomes the drop-down list. brighter.
-
Page 50: Daynight
Bi-spectrum network camera Visible Sensor Configuration User Manual Table 4-4 Parameters of WB Parameter Description Configuration Method Mode It is used to display the real color of a [Setting method] monitoring scenario when the color temperature Select a value changes. from the drop- down list. - Page 51 Bi-spectrum network camera User Manual Visible Sensor Configuration Table 4-5 Parameters of day night Parameter Description Configuration Method DayNight It can be set to Auto, Day Mode, Night Mode [Setting method] Mode and Timing. Select a value from the drop-down list. ⚫...
-
Page 52: Noise Reduction
Bi-spectrum network camera Visible Sensor Configuration User Manual 4.8 Noise Reduction Figure 4-8 shows the noise reduction tab page. Figure 4-8 Noise Reduction Table 4-6 describes the parameters on the Special Function tab page. Table 4-6 Parameters of noise reduction Parameter Description Configuration... - Page 53 Bi-spectrum network camera User Manual Visible Sensor Configuration Figure 4-9 Enhance image Table 4-7 describes the parameters on the enhance image setting tab page. Table 4-7 Parameters of enhance image Parameter Description Configuration Method It is intended to provide clear image [Setting method] performance in strong backlight areas such as Drag the slider.
- Page 54 Bi-spectrum network camera Visible Sensor Configuration User Manual Anti-shake When the camera shakes out, it is processed [Default value] by algorithm compensation Disable Defog It indicates the camera defog automatically. [Setting method] Drag the slider. [Default value] Issue V 1.0(2020-10-19)...
-
Page 55: Thermal Sensor Configuration
Bi-spectrum network camera User Manual Thermal Sensor Configuration Thermal Sensor Configuration 5.1 Accessing the Sensor Interface Operation Procedure Step 1 On the Internet Explorer interface or the client software interface, choose channel 2 select and right-click the surveillance image to the set, as shown in Figure 5-1. Figure 5-1 Sensor configuration Step 2 Choose Sensor. -
Page 56: Images
Bi-spectrum network camera Thermal Sensor Configuration User Manual Figure 5-2 Mode interface Operation Procedure Step 1 Click in the lower left corner of Sensor Setting, and choose Debug Mode. Step 2 Choose switch mode from the drop-down list Step 3 Time mode: Set the Start Time, set the End Time. -
Page 57: Scene
Bi-spectrum network camera User Manual Thermal Sensor Configuration Figure 5-3 Image setting interface Step 1 Click in the lower left corner of Sensor Setting, and choose Debug Mode. Step 2 Drag the slider to adjust parameter of image. Step 3 Click Save, the message "Save succeed"... -
Page 58: Set Pseudocolor
Bi-spectrum network camera Thermal Sensor Configuration User Manual Figure 5-4 Scene setting interface Step 1 Click in the lower left corner of Sensor Setting, and choose scene Step 2 Choose mirror mode from drop-list. Step 3 Click Save, the message "Save succeed" is displayed, the system saves the settings. NOTE ⚫... -
Page 59: Ffc Control
Bi-spectrum network camera User Manual Thermal Sensor Configuration Figure 5-5 Set pseudocolor setting interface Step 1 Click in the lower left corner of Sensor Setting, and choose set pseudo color Step 2 Choose polarity/LUT mode from drop-list. Step 3 Enable or disable the temperature strip switch Step 4 Click Save, the message "Save succeed"... - Page 60 Bi-spectrum network camera Thermal Sensor Configuration User Manual Figure 5-6 FFC control interface Table 5-1 lists the parameters on the FFC control interface. Table 5-1 Parameters on the FFC control interface Parameter Description Setting The internal of the thermal imaging camera may comprise the mechanical action correction mechanism that can periodically improve the image quality.
-
Page 61: Noise Reduction
Bi-spectrum network camera User Manual Thermal Sensor Configuration Parameter Description Setting temperatures collected by the internal temperature probe. The temperature of the camera sharply changes when the camera is powered on. The FFC is relatively frequent, which is normal. Manual: In the manual FFC mode, the camera does not automatically perform the FFC based on the temperature change or the specified period. -
Page 62: Enhance Image
Bi-spectrum network camera Thermal Sensor Configuration User Manual Figure 5-7 Noise reduction interface Table 5-2 lists the Noise reduction parameters. Table 5-2 Parameters on the Noise reduction interface Parameter Description Setting [How to set] Select from the drop-down list box. Decrease the image 2DNR noise. - Page 63 Bi-spectrum network camera User Manual Thermal Sensor Configuration Figure 5-8 Enhance image interface Step 1 Click in the lower left corner of Sensor Setting, and choose enhance image. Step 2 Tick Defog, then drag the slider to set. It ranges from 0-100, the default value is 50. Step 3 Click Save, the message "Save succeed"...
-
Page 64: Intelligent Analysis
Bi-spectrum network camera Intelligent Analysis User Manual Intelligent Analysis 6.1 Advanced Description Set the scene and the actual size of the scene, according to depth of field validate, so that it provide scene reference data for the camera. Figure 6-1 Advanced Issue V 1.0(2020-10-19)... - Page 65 Bi-spectrum network camera User Manual Intelligent Analysis Table 6-1 Parameter of advanced Parameter Description Setting The scene which camera installed. Scene [How to set] Select indoor/outdoor base on the Select from the drop-down Environment. list box. [Default value] Indoor Mark the line base on the ID of line, Automatic generated select the according line by the ID.
-
Page 66: Perimeter
Bi-spectrum network camera Intelligent Analysis User Manual ⚫ Choose the line ID, or Click the calibration line segment (the line segment turns red), and click "Delete" to delete the calibration line segment. ⚫ Click to calibrate the line segment (the line segment turns to red) to modify the length of the line segment, or select the ID through the advanced parameter interface to modify the "real size in scene"... - Page 67 Bi-spectrum network camera User Manual Intelligent Analysis Table 6-2 Perimeter Parameter Description Parameter Description Setting Channel Channel 1: visible. Choose one channel to set. Channel 2: thermal. Enable Enable the button to enable the alarm. [How to set] Click Enable to enable. [Default value] Limit Target Effective alarms are set based on target...
- Page 68 Bi-spectrum network camera Intelligent Analysis User Manual Parameter Description Setting Alarm Record If you install SD card, enable this [How to set] function, the device will record the Click to enable Alarm alarm video. Record. [Default value] SMTP Enable the button to enable SMTP [How to set] serve.
-
Page 69: Single Virtual Fence
Bi-spectrum network camera User Manual Intelligent Analysis Method 3:Click in the deployment time page to select the whole day or whole week. NOTE ⚫ When you select time by dragging the cursor, the cursor cannot be moved out of the time area. - Page 70 Bi-spectrum network camera Intelligent Analysis User Manual Figure 6-4 Single Virtual Fence Setting Interface Step 2 Set all parameters for the single virtual fence. Table 6-3 describes the specific parameters. Table 6-3 Parameters of single Virtual Fence Parameter Description Setting Channel Channel 1: visible.
- Page 71 Bi-spectrum network camera User Manual Intelligent Analysis Parameter Description Setting Limit Target Type Effective alarms are set based [How to set] on target type, with options of Click to enable Limit Person or Car, person, car. Target Type. When the device is used [Default value] indoors, because of small space and large targets, alarms are...
- Page 72 Bi-spectrum network camera Intelligent Analysis User Manual Parameter Description Setting Alarm Record If you install SD card, enable [How to set] this function, the device will Click to enable Alarm record the alarm video. Record. [Default value] SMTP Enable the button to enable [How to set] SMTP sever.
-
Page 73: Double Virtual Fences
Bi-spectrum network camera User Manual Intelligent Analysis NOTE ⚫ A single virtual fence is not within any deployment area, therefore, when an alarm is generated, the trace always exists. Only when the target object moves out of the field of view, the trace disappears. - Page 74 Bi-spectrum network camera Intelligent Analysis User Manual Figure 6-5 Double Virtual Fences Setting Interface Step 2 Set all parameters for the double virtual fences. The details please refer to Table 6-3 Step 3 Set a deployment area. Draw a line: move the cursor to the drawing interface, hold down the left mouse button, and move the cursor to draw two lines.
-
Page 75: Object Left
Bi-spectrum network camera User Manual Intelligent Analysis virtual fence and move the mouse to modify the position and length of this virtual fence. You can right-click to delete the double virtual fences. NOTE ⚫ The two virtual fences are in sequential order. An alarm is generated only when a target crosses virtual fence 1 and then virtual fence 2 within the set maximum passing time. - Page 76 Bi-spectrum network camera Intelligent Analysis User Manual Figure 6-6 Object Left Setting Interface Step 2 Set all parameters for object left, The details please refer to Table 6-3. Step 3 Set a deployment area. Move the cursor to the drawing interface and click to generate a point, move the cursor to draw a line, and then click to generate another point.
-
Page 77: Object Removed
Bi-spectrum network camera User Manual Intelligent Analysis 6.6 Object Removed Description The object removed function refers to that an alarm is generated when the removing time of an object within the deployment area meets the set shortest removing time. Procedure Step 1 Select Configuration >... - Page 78 Bi-spectrum network camera Intelligent Analysis User Manual NOTE ⚫ A drawn line cannot cross another one, or the line drawing fails. ⚫ Any shape with 32 sides at most can be drawn. ⚫ The quantity of deployment areas is not limited yet and will be described in future when a limit is applied.
-
Page 79: Alarm Setting
Bi-spectrum network camera User Manual Alarm Setting Alarm Setting 7.1 Alarm Output Procedure Step 1 Select Configuration > Alarm > Alarm Output to access the Alarm Output setting interface, as shown in Figure 7-1. Figure 7-1 Alarm output interface Step 2 Set alarm output of channel, name, enable valid signal and alarm time choose alarm output mode. -
Page 80: Disk Alarm
Bi-spectrum network camera Alarm Setting User Manual 7.2 Disk Alarm Procedure Step 1 Select Configuration > Alarm > Disk Alarm to access the disk alarm setting interface, as shown in Figure 7-2. Figure 7-2 Disk alarm interface Step 2 Enable the disk full alarm, when the disk is full it will alarm. Step 3 Set alarm interval and tick output channel. -
Page 81: I/O Alarm Linkage
Bi-spectrum network camera User Manual Alarm Setting Figure 7-3 Network alarm interface Step 2 Choose network card ID and enable exceptional alarm to set alarm interval. Tick output channel. Step 3 Click Apply to save the settings, click refresh will return last settings. 7.4 I/O Alarm Linkage Procedure Step 1... -
Page 82: Motion Alarm
Bi-spectrum network camera Alarm Setting User Manual Figure 7-4 I/O alarm linkage interface Step 2 Choose alarm input and trigger mode, set name, enable other linkages such as alarm input, PTZ linkage, Alarm Record SMTP and FTP upload. Step 3 Set alarm schedule, choose the duration of linkage. -
Page 83: Push Message
Bi-spectrum network camera User Manual Alarm Setting Figure 7-5 Motion alarm interface Step 2 Choose channel and enable the motion alarm, set alarm interval and sensitivity, enable other linkages such as SMTP, FTP upload and motion detect stream. Step 3 Set motion alarm schedule, Step 4 Click Apply to save the settings, click Refresh will return last settings. -
Page 84: Sound Alarm Output
Bi-spectrum network camera Alarm Setting User Manual Figure 7-6 Push message interface Step 2 Enable the push message, you will receive the message when the alarm happened. Step 3 Click Apply to save the settings, click Refresh will return last settings. 7.7 Sound Alarm Output Procedure Step 1... - Page 85 Bi-spectrum network camera User Manual Alarm Setting Figure 7-7 Sound alarm output interface Step 2 Click to upload the audio file, browse the file, and the formate should be wav. There are 12 default files, you can listen and test the files. Step 3 Set alarm schedule, choose the duration of linkage.
-
Page 86: Audio Abnormal Output
Bi-spectrum network camera Alarm Setting User Manual Figure 7-8 Upload audio file Step 4 Click Apply to save the settings, click Refresh will return last settings. 7.8 Audio Abnormal Output Procedure Step 1 Select Configuration > alarm >Audio Abnormal Output to access the Sound Alarm Output setting interface, as shown in Figure 7-7. - Page 87 Bi-spectrum network camera User Manual Alarm Setting Figure 7-9 Audio abnormal output interface Step 2 Enable the audio abnormal detection, enable sudden rise, sudden drop, when happen the condition of enable, it will alarm. Step 3 Tick the output channel, enable alarm record, SMTP, FTP upload. Step 4 Set alarm schedule, choose the duration of linkage.
-
Page 88: Other Web Configurations
Bi-spectrum network camera Other Web Configurations User Manual Other Web Configurations 8.1 Device Information You can view the information about device, as shown in Figure 8-1. Figure 8-1 Device information interface 8.2 Stream 8.2.1 Base Stream Step 1 Choose Configuration >Stream >Base Stream, as shown in Figure 8-2. Issue V 1.0(2020-10-19)... -
Page 89: Svc Stream
Bi-spectrum network camera User Manual Other Web Configurations Figure 8-2 Base stream interface Step 2 Choose channel, stream ID, video encode type, video encode level, audio encode type, resolution, frame rate, frame interval, bit rate type and bit rate from all drop list. Step 3 Set name of base stream, enable smart encode. -
Page 90: Roi
Bi-spectrum network camera Other Web Configurations User Manual Step 3 Click Apply. The message "Apply success" is displayed, the system saves the settings. 8.2.3 ROI Step 1 Choose Configuration > Stream >ROI, as shown in Figure 8-4. Figure 8-4 ROI interface Step 2 Click Apply. -
Page 91: Device
Bi-spectrum network camera User Manual Other Web Configurations settings. 8.3 Device You can set local network, device port, data and time, camera, OSD, microphone, CVBS, system, voice denoise and software licenses, as shown in Figure 8-6. Figure 8-6 Device interface 8.4 External Device Choose Configuration >External Device, enable PTZ, set parameters as shown in Figure 8-7. -
Page 92: Privacy Masking
Bi-spectrum network camera Other Web Configurations User Manual 8.5 Privacy Masking Choose Configuration > Privacy masking. You can set privacy masking if some area need keep secret, drag mouse to select the area to cover, double click will delete the setting, as shown in Figure 8-8. -
Page 93: Protocol
Bi-spectrum network camera User Manual Other Web Configurations Figure 8-9 Privacy manager interface 8.8 Protocol Choose Configuration > Protocol. You can set protocol information, security, CMS configuration and multicast parameter. Figure 8-10 Protocol interface 8.9 Device Log Choose configuration > device log. You can view operation log and alarm log, or collect all log information, as shown in Figure 8-11. -
Page 94: Maintenance
Bi-spectrum network camera Other Web Configurations User Manual Figure 8-11 Device log interface 8.10 Maintenance Choose configuration > maintenance. You can restart, update, reserve IP setting and restore to factory default, as shown in Figure 8-12. Figure 8-12 Maintenance interface 8.11 Local Config Choose configuration >... -
Page 95: Qos
Bi-spectrum network camera User Manual Other Web Configurations Figure 8-13 Local config interface 8.12 QOS Description If the device is connected to a router or switch with a QOS function, and the priority rule of the corresponding mark is configured on the network device, the network device will preferentially pass the data packet of the corresponding mark. - Page 96 Bi-spectrum network camera Other Web Configurations User Manual Figure 8-14 QOS page Step 2 Input the value range from 0 to 63( audio/video dscp, alarm dscp and command dscp). Step 3 Click Apply. The message "Apply success!" is displayed, and the system saves the settings. ----End Issue V 1.0(2020-10-19)...
-
Page 97: A Troubleshooting
Bi-spectrum network camera User Manual A Troubleshooting Troubleshooting Common Trouble Possible Cause Solution Unable to access Network is not Connect the network cable of the camera to the the web connected. PC to check whether the network cable is in good contact. - Page 98 Bi-spectrum network camera A Troubleshooting User Manual Common Trouble Possible Cause Solution The upgrade package Perform the correct upgrade package again. is incorrect. There is no face 1. check if the face is in the detection area. detection frame in 2.
Need help?
Do you have a question about the SN-F22-B and is the answer not in the manual?
Questions and answers