Fulgor Milano FOBQ 1000 G X Instructions For Installation And Use Manual
Built-in barbecue for home outdoor use
Hide thumbs
Also See for FOBQ 1000 G X:
- Instructions for installation and use manual (140 pages) ,
- Instructions for installation and use manual (164 pages)
Table of Contents
Advertisement
Quick Links
FOBQ 1000 G X
FOBQ 1000 G MBK
FOBQ 803 G X
FOBQ 602 G X
FOBQ 601 TY G X
BARBECUE DA INCASSO PER USO
DOMESTICO DA ESTERNO
BUILT-IN BARBECUE FOR HOME
OUTDOOR USE
EINBAU-GRILLKOFFER FÜR DEN
HAUSGEBRAUCH IM OUTDOOR-BEREICH
BARBECUE DE EMPOTRADO PARA USO
DOMÉSTICO EN EXTERIORES
IT
ISTRUZIONI PER L'INSTALLAZIONE E L'USO
EN
INSTRUCTIONS FOR INSTALLATION AND USE
DE
INSTALLATIONS- UND BEDIENUNGSANLEITUNG
ES
INSTRUCCIONES PARA LA INSTALACIÓN Y EL USO
Advertisement
Table of Contents

Related Manuals for Fulgor Milano FOBQ 1000 G X


Summary of Contents for Fulgor Milano FOBQ 1000 G X
- Page 1 FOBQ 1000 G X FOBQ 1000 G MBK FOBQ 803 G X FOBQ 602 G X FOBQ 601 TY G X BARBECUE DA INCASSO PER USO ISTRUZIONI PER L’INSTALLAZIONE E L’USO DOMESTICO DA ESTERNO BUILT-IN BARBECUE FOR HOME INSTRUCTIONS FOR INSTALLATION AND USE OUTDOOR USE EINBAU-GRILLKOFFER FÜR DEN...
-
Page 3: Table Of Contents
Suggestion for the environment Disposal information Congratulations Congratulations and thanks for choosing our integrated for users barbecue. We are confident that it will be a pleasure for you to use our new barbecue. Before using the barbecue, we recommend reading the entire user guide, which provides a description of the barbecue and its functions. -
Page 4: Product Description
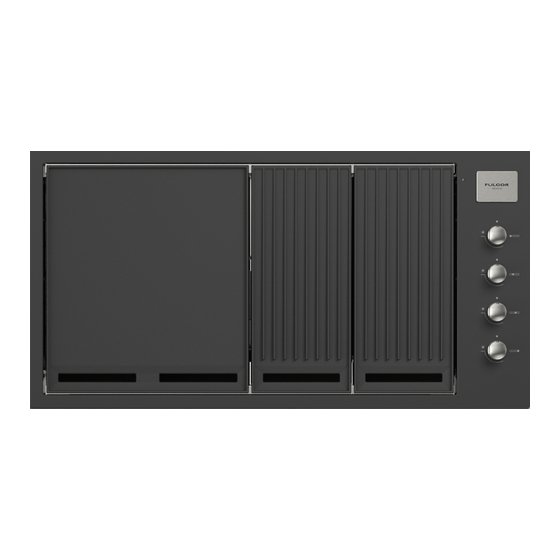
1 - Product description BARBECUE MOD. FOBQ 1000 G MBK BARBECUE MOD. FOBQ 1000 G X LOW LID MOD. FOBQ LL 1000 MBK LOW LID MOD. FOBQ LL 1000 X Integrated barbecue with thin cover Thin cover Thin cover Battery compartment cover... - Page 5 BARBECUE MOD. FOBQ 1000 G MBK BARBECUE MOD. FOBQ 1000 G X HIGH LID MOD. FOBQ LL 1000 MBK HIGH LID MOD. FOBQ HL 1000 X Integrated barbecue with high cover High cover High cover Heating racks Heating racks Battery compartment cover...
- Page 6 BARBECUE MOD. FOBQ 803 G X BARBECUE MOD. FOBQ 803 G X LOW LID MOD. FOBQ LL 800 MBK HIGH LID MOD. FOBQ HL 800 MBK Integrated barbecue with cover Low cover High cover Battery compartment cover Heating racks Gas connection point Battery compartment cover Burner controls Gas connection point...
- Page 7 BARBECUE MOD. FOBQ 601 TY G X BARBECUE MOD. FOBQ 601 TY G X LOW LID MOD. FOBQ LL 600 X HIGH LID MOD. FOBQ HL 600 X Integrated barbecue with cover Low cover High cover Battery compartment cover Heating racks Gas connection point Battery compartment cover Burner controls...
- Page 8 BARBECUE MOD. FOBQ 602 G X BARBECUE MOD. FOBQ 602 G X LOW LID MOD. FOBQ LL 600 X HIGH LID MOD. FOBQ HL 600 X Integrated barbecue with cover Low cover High cover Battery compartment cover Heating racks Gas connection point Battery compartment cover Burner controls Gas connection point...
-
Page 9: Components
2 - Components IMPORTANT The quantity of each component may vary depending on the model. QTY DESCRIPTION QTY DESCRIPTION Large cast iron Burner box and external cooking plate. profile Only for 100cm models. Burners for 60cm model Stainless steel Burners for 80cm model cooking plate. -
Page 10: Important Safety Instructions
3 - Important safety instructions For your own safety, you should read this manual before operating the barbecue. Carefully read the user manual and keep it in a handy place for future reference. Below, we explain the meaning of the symbols used in this manual: ATTENTION This symbol indicates information relating to the user’s personal safety WARNING... - Page 11 NOTE FOR THE INSTALLER: THIS MANUAL MUST BE LEFT WITH THE OWNER FOR FUTURE REFERENCE ATTENTION IF YOU SMELL GAS, do not try to light the barbecue. Perform the leak test procedure described in this manual. Locate the leak and tighten the leaking fitting; if it is the cylinder fitting, also replace the gasket seal.
-
Page 12: The Manufacturer's Liability
PROHIBITION The manufacturer’s liability: • Be careful when handling gas cylinders The manufacturer will not be liable for personal even if they appear empty, in compliance injury or property damage caused by: with current safety rules. • any use of the appliance other than anticipated;... -
Page 13: Assembling The Barbecue
4 - Assembling the barbecue Tools needed for assembly: - Phillips screwdriver 3. Apply the oil drip pans to the front of the barbecue. 1. Remove all components from the box. BACK BACK FRONT FRONT BACK 2. Place the flame diffusers in the desired positions (under the points (A) in which the grill sections will be placed) and attach the rear edge of the flame diffuser to the rear of the body of the barbecue. - Page 14 5. After installation in the counter, connect the thin cover or cooking hood area as described in the chapter STAINLESS STEEL GRILLS GROUPS “Application of the thin cover or cooking hood” in this manual. BACK FRONT...
-
Page 15: Characteristics Of Gas In Different Countries
5 - Characteristics of gas in different countries... -
Page 16: Adapting To Different Types Of Gas
Adapting to different types of gas 2 - Lower the burner and replace the injector. If the appliance is configured for a different type of gas than that available, you have to replace the injectors with ones corresponding to the type of gas to be used (see tables on the preceding pages). -
Page 17: Gas Connection
NOTES • The appliance MUST only be installed and serviced by qualified and authorized personnel. • The product is exclusively intended for outdoor use. • The product must be installed according to the instructions, which require ventilation openings to allow the grill to work properly. - Page 18 Detail of the gas connection With note: natural gas connection NG.
-
Page 19: Gas Cylinder Safety Information
6 - Gas cylinder safety information • When converted for the use of universal LPG, the appliance is designed to use different types of cylinders depending on the installation made. See the chapters on Installation Preparation and Connection of the cylinder. •... -
Page 20: Installation Instructions And Warnings
7 - Installation instructions and warnings ATTENTION ATTENTION • The appliance must only be used above ground level, • A compartment with walls on all sides, but with at least in open air and natural ventilation without stagnant one permanent opening at ground level and without areas where leaking gas and combustion products are upper cover. -
Page 21: Selection Of The Point Of Installation
Selection of the point of installation Installation in a counter in a special context • The appliance must not be installed on combustible • The context must be made of non-combustible material. materials. The minimum distance from combustible • When mounting the appliance against a wall or a materials is 600 mm. - Page 22 Wall FRONT Special opening for ventilation 25x700 mm Wall FRONT Special opening for ventilation 25x700 mm...
- Page 23 ATTENTION • The appliance requires adequate ventilation. An open area must be provided as shown below. A ventilation grate can be applied, if desired. This ventilation surface allows air to enter the compartment for the proper combustion of the gas and aspiration of the combustion products.
- Page 24 Mod. BBQ 100 cm 1 25 FRONT Mod. BBQ 80 cm FRONT Mod. BBQ 60 cm FRONT...
- Page 25 Mod. BBQ 100 cm 1 25 Mod. BBQ 80 cm...
- Page 26 Mod. BBQ 60 cm Mod. BBQ 100-80-60 cm...
- Page 27 ATTENTION • The LPG cylinder in the compartment below the barbecue unit, must be isolated from it by a non-combustible panel. The compartment must comply with the requirements of EN 498. • The ventilation requirements of EN 498 for the cylinder compartment are: •...
- Page 28 cut a hole in the non-combustible barrier non-combustible necessary under barrier only for the hose the barbecue MAX 1,5 mt front of the compartment emoved for clarity The LPG cylinder may be connected inside the object-holder compartment of barbecue only if it has the dimensions WARNING shown in the guidelines.
- Page 29 BP 5 kg BUTAGAZ 6 kg CALOR 5 kg PRIMAGAZ 5.2 kg...
-
Page 30: Connection Of The Lpg Cylinder
8 - Connection of the LPG cylinder WARNING Make sure the LPG cylinder valve or regulator is closed. Connect the LPG cylinder. Some regulators are connected by pushing ON and are disconnected by pulling OFF, while other types of regulators have a nut with left hand thread for connecting to the cylinder valve. -
Page 31: Application Of The Cover
9 - Application of the cover Application of the low cover • Remove the thin cover from the packaging. • Attach the hinges to the outer frame and secure it with the special screw provided. LEFT RIGHT... -
Page 32: Application Of The High Cover
Application of the high cover • Remove the High cover from the packaging. • Remove the hinge from the cover and apply it to the outer frame. Fix it with the special screws provided. • Insert the cover into the seats of the hinge IMPORTANT Given the dimensions of the cooking hood, we recommend that two people position it. -
Page 33: Usage Instructions
10 - Usage instructions IMPORTANT Make sure that the flame diffusers are positioned flame under the panels of the grills. Mod. BBQ 100 cm BBQ 100 Solid cooking plate on the left, double grill on the BBQ 100 Solid cooking plate on the right, double grill on the right - best orientation for grilling left - alternative best orientation for grilling... - Page 34 BBQ 100 half grill on the left, central solid cooking plate, hal BBQ 100 Two solid cooking plates side by side - optional grill on the right - best orientation for roasting arrangement...
- Page 35 Mod. BBQ 80 cm Mod. BBQ 60 cm BBQ 80 total grill BBQ 60 total grill BBQ 60 total solid cooking plate...
-
Page 36: Control Functions
Control functions Manual lighting Before lighting the barbecue: • If the automatic ignition system is not working, the • Check that all the gas hoses and fittings are tight. barbecue can be lit manually. • To turn it on manually, use a long match (28cm). Pass •... -
Page 37: To Turn Off The Burner
To turn off the burner • When done cooking, turn the knob fully clockwise so that the mark on the knob is in the closed (O) position. WARNING Remember to always close the valve of the gas cylinder after use. WARNING Remember to shut-off the gas before closing the cover. -
Page 38: Cleaning And Care
11 - Cleaning and care Care and cleaning of the appliance Cleaning the stainless steel grills To preserve its original appearance, we recommend • Remove all solid materials and excess grease from the cleaning the cooking surfaces after each use. grill and cooking plate using a scraper or wire brush. -
Page 39: Cleaning The Grease Drip Pan
Burners The burners should be checked at least once a year and cleaned if necessary. Inspect the burners to make sure that 3 mm no residue deposits and that the gas connections are free. SUGGESTIONS AND INFORMATION Special note on “tea staining” Sometimes stainless steel surfaces are affected by a colour change called “tea staining”. -
Page 40: Maintenance
12 - Maintenance Ignition system Ventilation openings To change the battery, remove the battery cover by lifting The ventilation openings of the installation compartment the battery holder flap on the left side and pull out the must be inspected before each use of the appliance to make battery. -
Page 41: Troubleshooting
13 - Troubleshooting POSSIBLE CAUSE PROBLEM SOLUTION The barbecue doesn’t light No gas Check that the shut-off valve is open (ON) Gas cylinder empty - refill or change the cylinder The ignition system is not Check the battery - you should hear a clicking working sound when you press the knob Replace the battery... - Page 42 MANUFACTURER’S DECLARATION The manufacturer declares that, depending on their type, the products in this catalogue conform to the fundamental requirements of European Directives and, for this reason, the product bears the CE mark, for which this declaration of conformity was issued and made available to market supervisory bodies. DISPOSAL OF USED APPLIANCES At the end of their useful life, these appliances may not be disposed of with normal urban waste but must be given to an electronic and electrical equipment collection and recycling point.
- Page 44 DOC COD. 1.00A.34.3 - 03/21...
Need help?
Do you have a question about the FOBQ 1000 G X and is the answer not in the manual?
Questions and answers