Table of Contents
Advertisement
Quick Links
DF-2
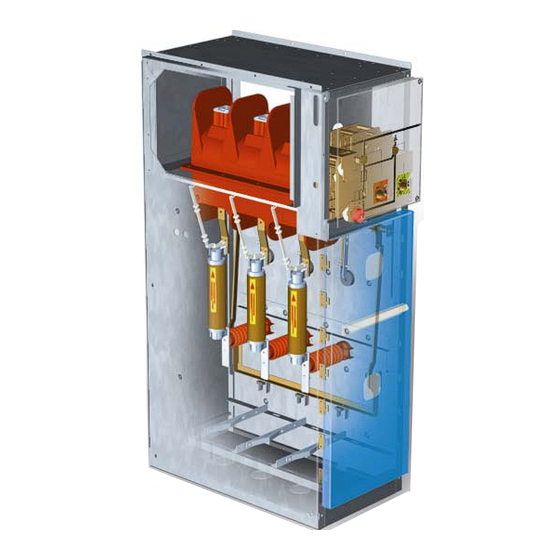
MEDIUM VOLTAGE SWITCHGEAR
THE MODULAR CONCEPT
INSTRUCTION VDS EXCHANGE HR TO LRM D/EDN
READ THIS DOCUMENT CAREFULLY BEFORE ANY OPERATION
THE SPECIALIST IN
MEDIUM VOLTAGE SWITCHGEAR
SwitchGear Company nv - Moorstraat 24 - B-9850 Nevele - Belgium
Tel: +32 (0)9/321.91.12 - e-mail: info@switchgearcompany.eu -
www.switchgearcompany.eu
Advertisement
Table of Contents

Related Manuals for SGC DF-2


Summary of Contents for SGC DF-2
- Page 1 DF-2 MEDIUM VOLTAGE SWITCHGEAR THE MODULAR CONCEPT INSTRUCTION VDS EXCHANGE HR TO LRM D/EDN READ THIS DOCUMENT CAREFULLY BEFORE ANY OPERATION THE SPECIALIST IN MEDIUM VOLTAGE SWITCHGEAR SwitchGear Company nv - Moorstraat 24 - B-9850 Nevele - Belgium Tel: +32 (0)9/321.91.12 - e-mail: info@switchgearcompany.eu -...
- Page 2 The information contained within is applicable to the standard version of the DR-6 medium-voltage switchgear. Therefore, SGC nv - SwitchGear Company cannot be held liable for any damage resulting from specifications that differ from the standard version of the DR-6 medium-voltage switchgear.
-
Page 3: Table Of Contents
TABLE OF CONTENTS TABLE OF CONTENTS PREFACE NTRODUCTION ICTOGRAMS AND SAFETY SYMBOLS IN AND ON THE MEDIUM VOLTAGE SWITCHGEAR ICTOGRAMS IN THE DOCUMENTATION ELATED DOCUMENTATION ERVICE AND TECHNICAL SUPPORT ENERAL SAFETY DIRECTIONS AND INSTRUCTIONS NTENDED USE 1 CONTENT OF LRM KIT (D/EDN CUBICLE) 2 VDS EXCHANGE ON A/D-EDN CUBICLE 2.1 D ISASSEMBLY OF THE... -
Page 4: Introduction
PREFACE Introduction This document is intended as a reference for qualified and trained operators to install the medium voltage switchgear in a safe and economical way. This document uses the term “medium voltage switchgear” to denote a random, but in actual practice, existing combination of DR6 functions that, mutually coupled and connected, constitute a client-specific transformation or distribution station. -
Page 5: Pictograms In The Documentation
Consult the indicated information sources first. Protect the medium voltage switchgear from water and damp. Related documentation The following technical documentation for medium voltage switchgear is available: • Installation manual DF-2 • User manual DF-2 DW604316 (Rev.0 dd.26/04/2016) Page 5/11... -
Page 6: Service And Technical Support
− General safety directions and instructions SGC – SwitchGear Company nv does not accept any liability for damage or injury caused by not (strictly) following the safety directions and instructions, or by negligence during the installation, use, maintenance, or the repair of the medium voltage switchgear and its accompanying options. -
Page 7: Intended Use
The medium voltage switchgear is designed exclusively for use as transformation or distribution stations, in accordance to the specifications and conditions provided by SGC – SwitchGear Company nv. Any other or further use is not in accordance with the intended use. -
Page 8: Content Of Lrm Kit (D/Edn Cubicle)
CONTENT OF LRM KIT (D/EDN CUBICLE) The delivered kit contains: • Pre-assembly frontplate DA-EDN suited for LRM • Voltage indicator of the type LRM The required type of VDS should be specified during the order VDS EXCHANGE ON A/D-EDN CUBICLE This exchange may be performed at an installation in service. -
Page 9: Disassembly Of The 2.2 Mounting Of The Lrm
Disassembly of the HR frontplate Open the LV compartment of relevant cubicle. The HR frontplate of the mechanism can be removed after disassembly of the 4 nuts (Figure 2- A). The HR frontplate (Figure 3-A) can now be removed as given in Figure 3. Figure 2: Rear view DA-98 EDND Figure 3: Remove HR frontplate mechanism... -
Page 10: Installation Of The Voltage Indicator
Mounting of the LRM frontplate Mount the pre-assembly of the LRM-frontplate on the mechanism (Figure 5-A). Fix the LRM-frontplate by means of the 3 nuts (Figure 5-B). Figure 5: Mounting of the LRM frontplate Installation of the voltage indicator 2.3.1 Verification of the C2 value The verification of the C2 value is only applicable on the voltage indicator type Capdis S1+ and Capdis S2+. -
Page 11: Connection Between Capacitive Insulators And
2.3.2 Connection between capacitive insulators and VDS The different conductors coming from the capacitive insulators are labelled in accordance with the corresponding phase. On the back side of the voltage indicator, the corresponding phase is given next to the connector. Next to the three phases, the ground terminal should be connected.
Need help?
Do you have a question about the DF-2 and is the answer not in the manual?
Questions and answers