Advertisement
Quick Links
Advertisement

Subscribe to Our Youtube Channel
Related Manuals for Little Seeds 6849196BRU


Summary of Contents for Little Seeds 6849196BRU
- Page 1 B346849196BRU01 inside for Assembly Manual Check us out! li" leseedskids.com...
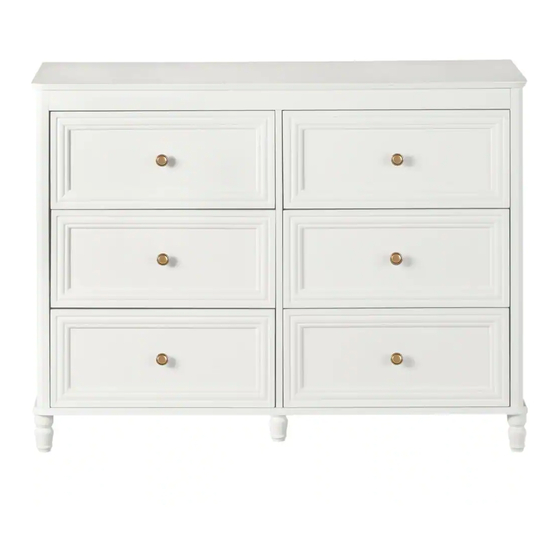
- Page 2 6849196BRU Piper 6 Drawer Dresser Keep this Assembly Manual for future reference Two Adults recommended for assembly This product is not intended for commercial use Do NOT return this product! Follow li" le seeds on For missing or broken parts - Visit li"...
-
Page 3: Helpful Hints
Do NOT return this product! Contact our friendly customer service team fi rst for help Assembly Tips Call us! 1-800-489-3351 Monday-Friday 9am - 5pm CST Visit li• leseedskids.com to view the limited warranty valid in the U.S and Canada Helpful Hints PEOPLE NEEDED FOR ASSEMBLY: 1-2 ESTIMATED ASSEMBLY TIME: 1 HOUR - Open your item in the area you plan to keep it for less heavy li"... -
Page 4: Before You Start
Before You Start Read through each step carefully and follow the proper order Separate and count all your parts and hardware Give yourself enough room for the assembly process Have the following tools: Flat Head Screwdriver, #2 Phillips Head Screwdriver and Hammer Cau•... - Page 5 Board Iden! fi ca! on Not actual size T6849196011 T6849196021 T6849196031 TOP PANEL LEFT SIDE PANEL RIGHT SIDE PANEL T6849196041 T6849196050 T6849196060 BOTTOM PANEL TOP MOLDING PARTITION T6849196070 T6849196080 T6849196090 FRONT DRAWER LEFT SIDE DRAWER RIGHT SIDE DRAWER li• leseedskids.com...
- Page 6 Board Iden! fi ca! on Not actual size T6849196100 T6849196110 T6849196120 BACK DRAWER BOTTOM DRAWER DRAWER SUPPORT T6849196130 T6849196140 T6849196151 FRONT MOLDING BACK PANEL li• leseedskids.com...
- Page 7 Part List Actual size TUD0009 TUD0001 TUD0002 TUD0004 TUD0005 CBS 4 x 38 Cam Bolt Cam Lock DOWEL 8 X 25 DOWEL 6 X 25 15-12 TUD0011 TUD0008 TUD0006 TUD0007 PH M4 X 12 CBS 3.5 x 16 NAIL CBS 3.5 X 12 li•...
- Page 8 Part List Not actual size x6 SET TUD0017 TUD0013 DRAWER SLIDE ROUND KNOB 350 MML x1 set TUD0021 ANTI TIPPING KIT li• leseedskids.com...
- Page 9 Step 1 TUD0001 TUD0021 * raw edges are shaded li• leseedskids.com...
-
Page 10: Bottom Face
Step 2 BOTTOM FACE * raw edges are shaded li• leseedskids.com... - Page 11 Step 3 TUD0001 TOP FACE * raw edges are shaded li• leseedskids.com...
- Page 12 Step 4 x3 (CL) TUD0001 TUD0008 TUD0017 TUD0002 TUD0004 Proper orienta! on of CAM LOCK Screw Posi! on * raw edges are shaded li• leseedskids.com...
- Page 13 Step 5 x3 (CR) TUD0001 TUD0008 TUD0002 TUD0004 TUD0017 Proper orienta! on of CAM LOCK Screw Posi! on * raw edges are shaded li• leseedskids.com...
- Page 14 Step 6 x3 (CR) TUD0001 TUD0008 TUD0017 LEFT FACE Screw Posi! on * raw edges are shaded li• leseedskids.com...
- Page 15 Step 7 x3 (CL) TUD0001 TUD0002 TUD0008 TUD0004 TUD0017 Proper orienta! on of CAM LOCK RIGHT FACE Screw Posi! on * raw edges are shaded li• leseedskids.com...
- Page 16 Step 8 TUD0005 TUD0002 * raw edges are shaded li• leseedskids.com...
- Page 17 Step 9 Proper orienta! on of CAM LOCK TUD0002 TUD0001 * raw edges are shaded li• leseedskids.com...
- Page 18 Step 10 * raw edges are shaded li• leseedskids.com...
- Page 19 Step 11 * raw edges are shaded li• leseedskids.com...
- Page 20 Step 12 LEFT FACE * raw edges are shaded li• leseedskids.com...
- Page 21 Step 13 RIGHT FACE * raw edges are shaded li• leseedskids.com...
- Page 22 Step 14 RIGHT FACE * raw edges are shaded li• leseedskids.com...
- Page 23 Step 15 * raw edges are shaded li• leseedskids.com...
- Page 24 Step 16 * raw edges are shaded li• leseedskids.com...
- Page 25 Step 17 TUD0006 Carefully turn the unit over onto its front as shown. Assure that the unit is square. Distance from corner to corner must be equal as shown. IMPORTANT! THE BACK PANEL IS A STRUCTURAL PART OF THIS UNIT AND MUST BE INSTALLED PROPERLY.
- Page 26 Step 18 TUD0001 * raw edges are shaded li• leseedskids.com...
- Page 27 Step 19 Proper orienta! on of CAM LOCK TUD0005 TUD0002 x6 x6 * raw edges are shaded li• leseedskids.com...
- Page 28 Step 20 x6 SET * raw edges are shaded li• leseedskids.com...
- Page 29 Step 21 x6 SET * raw edges are shaded li• leseedskids.com...
- Page 30 Step 22 x6 SET * raw edges are shaded li• leseedskids.com...
- Page 31 Step 23 TUD0009 x6 SET * raw edges are shaded li• leseedskids.com...
- Page 32 Step 24 x6 (DR & DL) TUD0007 TUD0017 x6 SET * raw edges are shaded li• leseedskids.com...
- Page 33 Step 25 TUD0013 TUD0011 x6 SET * raw edges are shaded li• leseedskids.com...
- Page 34 Step 26 For Masonry, Concrete, or other wall materials: Consult your local hardware store for appropriate anchors to securely a• ach the safety bracket. IMPORTANT: THIS UNIT MUST BE SECURE TO THE WALL TO HELP PREVENT TIPOVER. FOLLOW THESE INSTRUCTIONS TO INSTALL THE ANTI-TIPPING SAFETY BRACKET PROVIDED WITH THIS PRODUCT.
- Page 35 Step 27 * raw edges are shaded li• leseedskids.com...
-
Page 36: Maximum Loads
Maximum Loads This unit has been designed to support the maximum loads shown. Exceeding these load limits could cause sagging, instability, product collapse, and/or serious injury. 10 lbs. 4.5 kg 80 lbs. each drawer 36.3 kg Warning: Risk of serious injury to person - do not place a television on this furniture. This furniture is not approved for use with a television. - Page 37 Register your product to receive the following: * New trend details -sneak peek on what's new * Surveys -have a voice within our community * Exclusive deals and discount codes * Quick and easy replacement part service To register your product, visit Visit your local retailer's website, rate your purchased product and leave us some feedback! We would like to extend a big "Thank You"...
- Page 38 Español Cubierta Delantera Busque en el interior del manual de montaje Búsquenos! página 2 Conserve este manual de montaje para futuras consultas. Se recomienda dos adultos para el montaje. Este producto no es para uso comercial. No Regrese este producto! Para piezas perdidas o rotas. Visitar: li•...
- Page 39 Español página 25 Sujeta el panel trasero como se muestra clavando directamente en los bordes sin procesar. Asegúrese de que la unidad es cuadrada. La distancia de la esquina a la esquina debe ser igual a como se muestra. ¡IMPORTANTE! EL PANEL TRASERO ES UNA PARTE ESTRUCTURAL DE ESTA UNIDAD Y DEBE INSTALADO CORRECTAMENTE.
- Page 40 Español Máximo Cargas (página 36) CARGA MAXIMA Esta unidad ha sido disenada para soportar la carga maxima anotada. El exceder estos limites puede causar inestabilidad, colapsarse y/o causar serias resioners. Advertencia: riesgo de lesiones graves a la persona - no coloque un televisor en este mueble. Este mobiliario no está...
- Page 41 Français Capot Avant Regardez à l’intérieur du manuel d’assemblage Búsquenos! Page 2 Gardez ce manuel d’assemblage pour référence ultérieure. Deux adultes sont recommandés pour l’assemblage. Ce produit n’est pas des" né à un usage commercial. Non Retournez ce produit! Pour les pièces perdues ou cassées. Visiter: li•...
- Page 42 Français page 25 Tenez le panneau arrière comme indiqué en cliquant directement sur les bords bruts. Assurez-vous que l'unité est carrée. La distance entre le coin et le coin doit être égale à celle indiquée. IMPORTANT! LE PANNEAU ARRIÈRE EST UNE PARTIE STRUCTURELLE DE CETTE UNITÉ ET DOIT INSTALLÉMENT CORRECTEMENT.
- Page 43 Français Maximum de charges (page 36) CHARGEMENT MAXIMUM Cet appareil a été conçu pour résister à la charge nominale maximale. Dépasser ces limites peut pro- voquer une instabilité, s'eff ondrer et / ou provoquer des résonnateurs sérieux. Aver" ssement: Risque de blessures graves - ne placez pas de téléviseur sur ce• e unité. Ce mobilier n'est pas approuvé...
Need help?
Do you have a question about the 6849196BRU and is the answer not in the manual?
Questions and answers