Advertisement
Quick Links
THE ASSEMBLY INSTRUCTION
" ARNING: KEEP ALL FRAME AND HEAT SOURCES AWAY FROM THIS
W
GAZEBO FABRIC.
This Gazebo is made with fabric that meets CPAI-84 specifications for flame
r sistance. It is not fire proof. The fabric will burn if left in continuous contact
e
with any flame source. The application of any foreign substance to the Gazebo
f bric may render the flame-resistant properties ineffective. "
a
Yotrio Corporation
708 Nogales St.,
City of Industry, CA 91748
Country of Original: China
Code #: Yotrio 2012
Caution:
This Gazebo is made for the explicit purpose of providing outdoor furniture and
is not to be used as a toy. This product is no intended for inclement/severe
weather in any form including, but not limited to: rain, hail, sleet, snow and/or
wind. The manufacturer recommends that with formidable weather
approaching you remove the Canopy, Screen, Shade Walls and Lanterns. Do
not shake, lean or climb on it. A competent adult should supervise children
under the age of 10 at all times whenever near the patio set. This product is
NOT intended for commercial use and will void the warranty.
OF
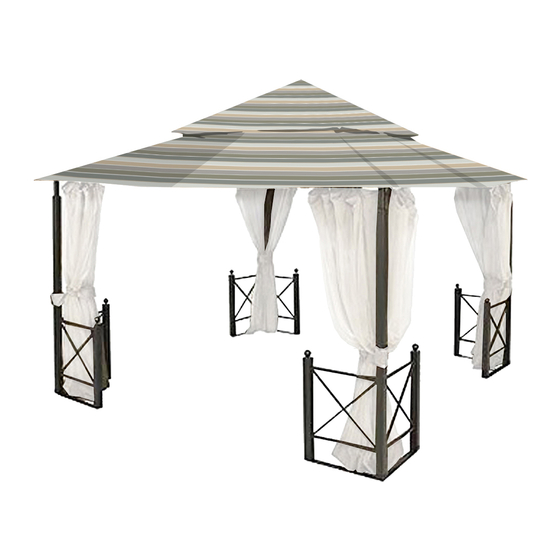
HARBOR GAZEBO
Advertisement

Subscribe to Our Youtube Channel
Related Manuals for YOTRIO HARBOR


Summary of Contents for YOTRIO HARBOR
- Page 1 708 Nogales St., City of Industry, CA 91748 Country of Original: China Code #: Yotrio 2012 Caution: This Gazebo is made for the explicit purpose of providing outdoor furniture and is not to be used as a toy. This product is no intended for inclement/severe weather in any form including, but not limited to: rain, hail, sleet, snow and/or wind.
-
Page 2: Limited Warranty
Warranty is non-transferable and void if the furniture is used in non-residential environment and/or has been abused. The warranty also becomes void in the event the Harbor Gazebo has been damaged by acts of God, calamity or misuse. This warranty does not cover in the event of inclement weather such as rain, hail, sleet, snow or wind. - Page 3 1-888-628-1888 MONDAY-FRIDAY 8:30 AM TO 5:00 PM PACIFIC STANDARD TIME / 11:30 AM TO 8:00PM EASTERN STANDARD TIME YOTRIO CUSTOMER CARE Warranty Coverage Requirements: 1. Copy of your Original Store Receipt. 2. Pictures of the damaged parts. 3. You must know the name of your product and any corresponding item numbers as well as the name of the store where you purchased the item. ...
-
Page 4: Assembly Instruction
ASSEMBLY INSTRUCTION Parts No Description Name 4pcs Pillar A 4pcs Pillar B 4pcs Pillar C 8pcs Panel 4pcs Beam E 4pcs Top Tube F 4pcs Top Tube G 4pcs Top Tube H 4pcs Top Tube I Canopy Hub J Canopy Hub K 4pcs Foot Edge... - Page 5 ASSEMBLY INSTRUCTION PARTS LIST Parts Description Name 4pcs Beam M Canopy Fabric O Canopy Fabric P 2pcs Sidewall 4pcs Netting 40pcs Plastic Ring 8pcs Decorative Ball 32pcs M6x25mm Bolt 40pcs M6x15mm Bolt M6x28mm 4pcs Bolt&Nut 4pcs Ground Spike Screwdriver Wrench Corkscrew 4pcs Ground Spike...
- Page 6 STEP #1 Tighten the Decorative Ball (S) on the top of Pillar B and Pillar C separately; line up the bolt holes on the Pillar A, B and C with corresponding bolt holes on the Panels (D). Screw the Bolts (T) on. Screw the Bolts (U) on the Foot Edge (L) together with Pillar A, B and C.
- Page 7 STEP #3 Line up the bolt holes on the ends of the connected Beams (E) with the corresponding bolt holes on the Pillars (A). Screw the Bolts (U) on. See Fig. 3 Note: Make sure that the round tube of the beams is in the inside. STEP #4 Insert the Top Tubes (F) into the Top Tubes (G).
- Page 8 STEP #5 Place the Canopy Fabric (O) on the roof. See Fig. 5 STEP #6 Insert the Top Tube (I) into the Canopy Hub (J) and insert the Top Tube (I) into the Top Tube (G). See fig. 6...
- Page 9 Place the Canopy Fabric (N) on the Top Tube (I) then tighten the Canopy Fabric (O) in place. Put up the two Side Walls (P) on the Beams (E). Note: The Harbor Gazebo package includes two privacy side walls. This is designed to be used for half of the gazebo. See Fig. 7 STEP #8 Put up the Netting (Q) on the Beams (E) by the Plastic Rings (R).
- Page 10 STEP #9 Put the Corkscrew Ground Spike (Z1) through the hole on the flat bars on the bottom of Panel (D) first and then twist the Corkscrew Ground Spike (Z1) down into the ground until Panels (D) are secure, see Fig. 9. Once the Corkscrew Ground Spikes are secured. Pound the Ground Spikes (W) through the holes on the flat bars on the bottom of Panels (D) see Fig.
-
Page 11: Instrucciones De Ensamblaje
INSTRUCCIONESDEENSAMBLAJE La Carpa Harbor... - Page 13 DE LUNES A VIERNES, DE 8:30 A.M. A 5:00 P.M. HORA ESTÁNDAR DEL PACÍFICO / DE 11:30 A.M. A 8:00 P.M. HORA ESTÁNDAR DEL ESTE SERVICIO AL CLIENTE DE YOTRIO Requisitos para la cobertura de la garantía: Copia del recibo original de compra.
- Page 14 ...
- Page 15 ...
- Page 20 ...
Need help?
Do you have a question about the HARBOR and is the answer not in the manual?
Questions and answers