Table of Contents
Advertisement
Quick Links
Advertisement
Table of Contents

Subscribe to Our Youtube Channel
Related Manuals for Cartft CTFPND-11

Summary of Contents for Cartft CTFPND-11
- Page 1 MANUAL CTFPND-11...
-
Page 2: Table Of Contents
Content 1. Safety Precautions: 1.1 Device 1.2 Environment 2. Product Overview: 2.1 Package components 2.2 Front / Left / Right / Top / Bottom / Rear 3. Getting Started: 3.1 Inserting SIM card & TF card 3.2 Mounting the RAM and cradle 3.3 Locking device and Unlocking device 3.4 Cradle cable pin assignment 3.5 Turning on the device... -
Page 3: Safety Precautions
Safety Precautions Device The tablet and the battery should not be thrown into the re and not used in areas where the temperature exceeds the speci ed values. This can lead to the outbreak of a re or cause the battery to explode. In addition, this will result in a leak occurring and the functionality will be signi cantly reduced or the tablet cannot no longer be used. -
Page 4: Product Overview
Product Overview Package components NFC card RAM mount Cable SIM Card Tape Locking Keys TF Card Tape Screws: 4 nos. 4 nos. 1 no. USB Cable... -
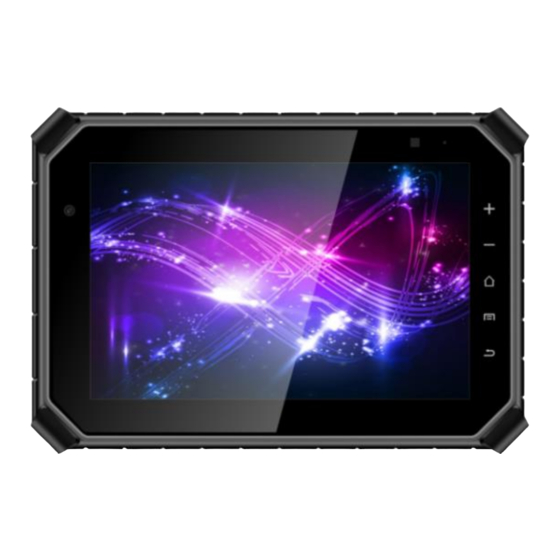
Page 5: Front / Left / Right / Top / Bottom / Rear
Product Overview Front / Left / Right / Top / Bottom / Rear Top View Left View Front View Right View Bottom View Rear View... -
Page 6: Getting Started
Getting started Inserting SIM card & TF card TF/SIM card • Insert the SIM card with the gold contacts facing up. • Insert the TF card with gold contacts facing up. • Push the card in the direction of the arrow as shown in the gure. •... -
Page 7: Mounting The Ram And Cradle
Getting started Mounting the RAM and Cradle Step 2 Main Unit Step 1 Cradle Scews X 4nos. RAM Mount... -
Page 8: Locking Device And Unlocking Device
Getting started Locking Device & Unlocking device Step 1 Insert the key Step 2... - Page 9 Remove device from cradle 1. Insert the key, rotate the key clockwisely to unlock cradle. Insert the key Rotate the key clockwisely 2. Press and hold the release button on the cradle. Press & Hold 3. Separated apart between main unit and cradle. Press &...
-
Page 10: Cradle Cable Pin Assignment
Getting started Cradle cable pin assignment Interface There are RJ45 and video input interfaces. Turning On Device Press Power button to turn on the device. Power Button... -
Page 11: Charging The Device
Getting started Charging Device Plug into vehicle power supply Notice & Warning PLEASE CHARGE AND DISCHARGE THE DEVICE AS ONE CYCLE AT ROOM TEMPERATATURE WHEN DEVICES ARE STORED FOR HALF YEAR OR ABOVE. -
Page 12: Android Turtorials
Android Tutorial Start Screen Home Screen... -
Page 13: Status Bar
Android Tutorial Status Bar The status bar shows your tablet’s status and noti cations The noti cation panel is your center for new events: like new e-mail, voicemail, updates, and more. Drag down to display noti cations. Touch a noti cation to respond. APP Screen... - Page 14 Android Tutorial Switching between home screen and app screen. Slide your ngers up from the bottom of the home screen. Split screen: 1. Press the recent key to the right of the touch screen to display the recent applications history. 2.
- Page 15 Android Tutorial 4. Select second app displayed at the same time. 5. When the second app appears, drag it to the left or right side of the screen. 6. Release the app. You can press and drag the dividing line in the center to resize the apps.
-
Page 16: Turning On The Device
Android Tutorial Close active Apps: 1. Press the recent key to the right of the touch screen 2. Slide your ngers up from the bottom of the application you want to close Turning of the device: 1. Press and hold the power button for about three seconds to choose power o . -
Page 17: Connecting To Networks
Connecting to Networks CONNECTING TO Wi-Fi NETWORK: 1. Tap Settings icon to open settings menu. 2 . In the Settings menu, tap Network & internet. 3 . Tap the Wi-Fi toggle to enable Wi-Fi connections. 4. When the list of Wi-Fi networks appears, tap an available network. 5. -
Page 18: Using The Card Slots
Using Card Slots Inserting SIM card SIM Card Puller Step 1 : Stick Stick Area Step 2 : Peer the cover Step 3 : Insert Remove : SIM Card Puller helps to insert SIM Card easily. -
Page 19: Removing Sim Card
Using Card Slots Removing SIM card Step 1 : Step 2 : Peer the cover Pull to remove Remove : SIM Card Puller helps to pull-out SIM Card easily. -
Page 20: Inserting Tf Card
Using Card Slots Inserting TF card SIM Card Puller Step 1 : Stick TF card Stick Area Step 2 : Peer the cover Step 3 : Insert Remove : TF Card Puller helps to insert TF Card easily. -
Page 21: Removing Tf Card
Using Card Slots Removing TF card Step 1 : Peer the cover Step 2 : Pull to remove TF card Remove : TF Card Puller helps to pull-out TF Card easily. -
Page 22: Speci Cation
Speci cation Model 8” CTFPND-11 Hardware MTK platform 2GHz oct core CPU high sensitivity receiver, 64 channels 2 version (EUR and NAR) with voice call: EUR - (Europe market ) • GSM : 900/1800Mhz • WCDMA – 850/900/2100Mhz 4G / 3G module / GSM module •... - Page 23 Capacity 6300mAh (default) Standby Battery Operating Time Software Operating System Android version 9.0 Android applications Navigation software Packaging Details 1pc main unit and 1pc cradle Customization Services On request...
-
Page 24: Safety & Regulatory Compliance
Safety and Regulatory Compliance FCC RF Exposure Information and Statement This device meets the government's requirements for exposure to radio waves. The guidelines are based on standards that were developed by independent scienti c organizations through periodic and thorough evaluation of scienti c studies. The standards include a substantial safety margin designed to assure the safety of all persons regardless of age or health.
Need help?
Do you have a question about the CTFPND-11 and is the answer not in the manual?
Questions and answers