Advertisement
Instructions
Please read the following instructions carefully before setting up the Aurender Music Player.
• Be careful not to drop the device to avoid internal damage.
• Do not disassemble the device.
• Keep magnetic materials away from Aurender to prevent any damage to data.
• Do not expose device to oil, dust, water, high humidity, or smoke.
• Keep ventilation openings free from obstruction.
• When cleaning, use only a soft cloth. Keep out of contact with water or other liquids.
• All servicing must be performed by a qualified representative, or the warranty will be voided.
• Unplug power cord during severe lightning storms or when unused for a long period of time.
• Unplug the device from the outlet only after completely turning off the unit.
• Always turn the power off before connecting or disconnecting any cables.
• Please note that hard drives can break down.
It is important to back up your music collection periodically to a separate memory device. In the event of
drive failure, Aurender is not responsible for any loss of data. The drive manufacturer will only replace
faulty drives under warranty and do not compensate for any loss of data.
Positioning
• Place your device on a flat, horizontal, and stable surface.
• Keep away from heat sources, such as radiators.
• Do not stack other products on top of the Aurender.
• Allow space around the device for ventilation.
• Do not place inside an enclosed cabinet.
Aurender A30 Manual
Advertisement
Table of Contents

Subscribe to Our Youtube Channel
Related Manuals for Aurender A30


Summary of Contents for Aurender A30
- Page 1 It is important to back up your music collection periodically to a separate memory device. In the event of drive failure, Aurender is not responsible for any loss of data. The drive manufacturer will only replace faulty drives under warranty and do not compensate for any loss of data.
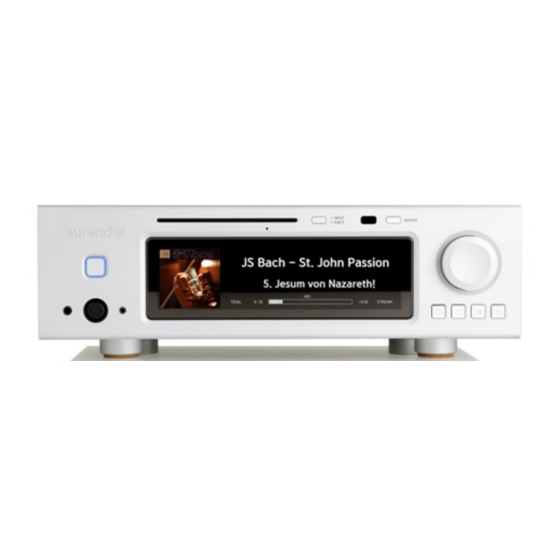
- Page 2 Flashing will stop when the unit is off. 2. CD slot for ripping 3. Input selection / CD eject button -Press the button short to toggle input A30-COAXIAL 1-COAXIAL 2-OPTICAL 1-OPTICAL 2 -Press the button long to Eject the CD in the tray 4. IR Receive window 5.
- Page 3 1. Analog Audio Output – XLR Right 2. Analog Audio Output – RCA Right 3. Digital Audio Input – Optical SPDIF 1 4. Digital Audio Input – Optical SPDIF 2 5. Digital Audio Input – Coaxial SPDIF 1 (RCA) 6. Digital Audio Input – Coaxial SPDIF 2 (BNC) 7.
- Page 4 The A30’s front panel also uses text indicators to display MQA playback and the respective sampling rate of the file or stream being played. ‘MQA’ or ‘MQA Studio’ indicates that the unit is decoding and playing an MQA stream or file, and denotes provenance to ensure that the sound is identical to that of the source material.
- Page 5 1. Mute 2. Power ON/OFF 3. Play Previous 4. Play / Pause 5. Play Next 6. Output Select 7. Input Select 8. Display Menu 9. Volume Up 10. Volume Down Connection Warning Before connecting audio cables, first check to see that all devices are grounded using grounded plugs and grounded sockets.
Need help?
Do you have a question about the A30 and is the answer not in the manual?
Questions and answers