
Related Manuals for Sonic Air Systems Sonic 150

Summary of Contents for Sonic Air Systems Sonic 150
- Page 1 L10028_RevK Operation and Maintenance Manual Sonic 150 / 150C Sonic Air Systems 1050 Beacon Street Brea, California 92821 Tel: 714-255-0124 Fax: 714-255-8366 www.sonicairsystems.com Page i...
-
Page 2: Table Of Contents
L10028_RevK Table of Contents Sonic 150 / Sonic 150C ............................1 Introduction ..............................1 Blower Performance ............................1 Product Profile ..............................2 Typical Applications ............................3 Initial Inspection..............................4 Safety Instructions ............................. 5 Electrical ................................. 5 Mechanical ..............................5 Installation and Adjustments ..........................6 Lifting and Handling ............................ - Page 3 L10028_RevK Table of Figures Figure 1 - Sonic 150 ..............................1 Figure 2 - Sonic 150C ..............................1 Figure 3 - Sonic Nameplate ............................4 Figure 4 – Blower Serial Number ..........................4 Figure 5 - Blower Lifting Point............................6 Figure 6 - Remove Belt Guard ............................
- Page 4 L10028_RevK Figure 54 – Remove Water Cooling Tubing ........................ 38 Figure 55 – Remove Filter or Inlet Screen ........................38 Figure 56 – Remove Cover ............................39 Figure 57 – Remove Impeller ............................39 Figure 58 – Remove Blower Pulley ..........................39 Figure 59 –...
-
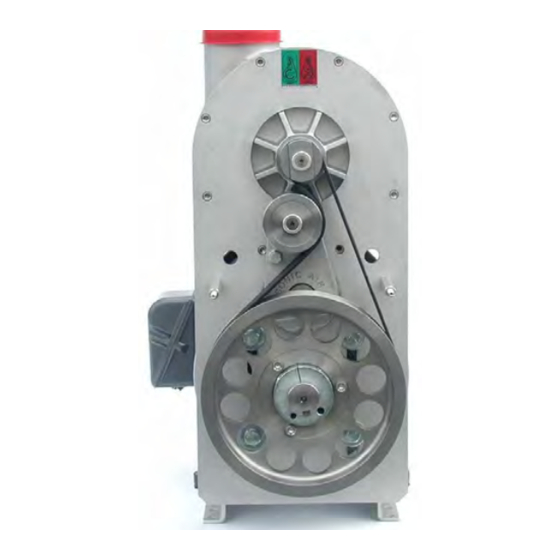
Page 5: Sonic 150 / Sonic 150C
Provide Sonics’ Performance Guarantee and Warranty information 1.2 Blower Performance The Sonic 150 series blower is a single stage centrifugal blower and has been designed in accordance with fan engineering laws. Horsepower demand increases in proportion to increased air volume (motor amperage draw increases). As the air volume decreases (valve closes or filter clogs), the amp draw decreases. -
Page 6: Product Profile
Sonic air blowers have some of the largest turndown ratios of any blower in their performance range. At 10:1, a Sonic 150’s range is from 120 cfm 57 (lps) to 1,200 cfm (566 lps) without overheating or surging. Outside of those ranges the air surging is mild and continuous operation may shorten the bearing life. -
Page 7: Typical Applications
1.4 Typical Applications The following is a list of typical applications for using a Sonic 150 centrifugal blower assembly. This is only a partial list of the possible uses for supplying low cost, clean air to a particular application. -
Page 8: Initial Inspection
The serial number of the blower identifies the blower model, pulley size, belt size, mounting position, and the motor specifications. Please use this number for any correspondence with the Sales / Customer Service Department at Sonic Air Systems. Blower Serial Number... -
Page 9: Safety Instructions
3 Safety Instructions 3.1 Electrical Always use qualified electrical and mechanical personnel for installation and maintenance of Sonic air blowers. No work should be performed on a Sonic air blower until the power has been turned off and an isolation device has been applied. Disconnect the electrical power at the motor starter, fuse box, or circuit breaker before working on the blower / motor. -
Page 10: Installation And Adjustments
4 Installation and Adjustments The following steps and procedures detail the installation and setup of a typical blower assembly. Disassembly of a blower unit is the opposite of the assembly procedure. 4.1 Lifting and Handling Due to the weight of the blower / motor assembly, it should be lifted by a hoist or forklift using the single eyebolt on the top middle of the motor (See Figure 5). - Page 11 4.2.6 Corrosive Environments The Sonic 150 blower can be protected with special coatings for protection in corrosive environments. Protection level and life of blower is dependent on the type of chemical and the concentration level.
-
Page 12: Belt Installation
4.2.9 Thermocouple Option All Sonic 150 blower heads can be ordered with a thermocouple option. The thermocouple is in direct contact with the shaft bearing and continuously monitors the temperature of the bearing. Continuous monitoring of the blower head bearing temperature can indicate an imminent bearing failure (See Section 12 for Sonics’... -
Page 13: Figure 6 - Remove Belt Guard
Figure 6 - Remove Belt Guard Figure 8 – Verify Belt Gap Figure 7 - Install Belt Figure 9 - Loosen Bracket Bolts Page 9... -
Page 14: Figure 10 - Adjust Belt Gap To ¾
Figure 10 – Adjust Belt Gap to ¾” Page 10... -
Page 15: Blower Head Mounting Adjustment
4.4 Blower Head Mounting Adjustment The blower head position was adjusted at the factory to the application specifications. Therefore, it should not be necessary to change the position of the blower head outlet unless the application specifications have changed or the unit is relocated. See Figure 11 for blower head rotation options. - Page 16 7. Using the ¼ inch allen socket, remove the eight screws from the bracket that secure the blower head. (See Figure 18) 8. Remove the water-cooling plugs from the blower head and rotate as necessary. (See Figure 19) (If Applicable) 9.
-
Page 17: Figure 12 - Remove Belt Guard
Figure 12 - Remove Belt Guard Figure 14 - Remove Motor Pulley Figure 13 - Remove Belt Figure 15 - Remove Bracket Hardware Page 13... -
Page 18: Figure 16 - Rotate Bracket
Figure 16 - Rotate Bracket Figure 20 - Reinstall Blower Head Figure 21 - Reinstall Belt Figure 17 - Install Bracket Hardware Figure 22 - Adjust Belt Gap to 3/4" Figure 18 - Remove Blower Hardware Figure 19 - Move Water-Cooling Plugs Figure 23 - Final Position Page 14... -
Page 19: Retro Kit Installation (Assemble Sonic Blower To Existing Motor)
4.5 Retro Kit Installation (Assemble Sonic blower to existing motor) 4.5.1 Tools Required Description Qty. Description Qty. 3/8 inch ratchet driver 9/16 inch box-end wrench ¾ inch deep socket 1/2 inch socket 9/16 inch open-end wrench ¼ inch flat head screwdriver 5/16 inch allen socket Rubber mallet Calipers... -
Page 20: Figure 24 - Install Uni-Mounts
Figure 27 - Install Bushing Figure 24 - Install Uni-mounts Figure 28 – Install Bushing Hardware Figure 25 - Mount Bracket to Motor Figure 29 - Bushing Installation Figure 26 - Prepare Bushing Figure 30 – Install Set Screw Page 16... -
Page 21: Figure 31 - Install Motor Pulley
Figure 31 - Install Motor Pulley Figure 33 - Set Belt Gap to ¾” Figure 32 - Install Belt Figure 34 - Check Alignment Page 17... -
Page 22: Electrical Wiring, And Start-Up
5 Electrical Wiring, and Start-Up 5.1 Motor Wiring Only qualified personnel should perform motor wiring. Review motor nameplate for wiring diagram and wiring information. Many Sonic motors are dual rated for 50 and 60 hertz operation and therefore will have two nameplates. Every motor is supplied with a sticker indicating the hertz set up of the blower unit. -
Page 23: Blower Specifications
6 Blower Specifications 6.1 Blower Specification Sheet Page 19... -
Page 24: Assembly Drawing
6.2 Assembly Drawing Page 20... -
Page 25: Parts List
6.3 Parts List 6.3.1 Sonic 150 Blower Unit Item Part No. Description Qty. 215TC & 284TSC 256TC Frame Frame (Only) Section 6.4.1 Motor, Electric 14458 Blower Head, Sonic 150 12335 12623 Bracket, Sonic 150 13455 Belt Tensioner Assembly 13450 Pulley, Blower... - Page 26 215TC & 284TSC 256TC Frame Frame (Only) Section 6.4.1 Motor, Electric 14459 Blower Head, Sonic 150C 12335 12623 Bracket, Sonic 150 13455 Belt Tensioner Assembly 13450 Pulley, Blower 13452 Pulley, Motor Section 6.4.2 Bushing Kit Section 6.5 Belt 11130 12615...
- Page 27 6.3.3 Sonic 150 Retro Kit Item Part No. Description Qty. 215TC & 284TSC 256TC Frame Frame (Only) (Not Supplied) 14458 Blower Head, Sonic 150 12335 12623 Bracket, Sonic 150 13455 Belt Tensioner Assembly 13450 Pulley, Blower 13452 Pulley, Motor Section 6.4.2 Bushing Kit Section 6.5...
- Page 28 Description Qty. 215TC & 284TSC 256TC Frame Frame (Only) (Not Supplied) 14459 Blower Head, Sonic 150C 12335 12623 Bracket, Sonic 150 13455 Belt Tensioner Assembly 13450 Pulley, Blower 13452 Pulley, Motor Section 6.4.2 Bushing Kit Section 6.5 Belt 11130 12615...
- Page 29 6.3.5 Sonic 150 IEC Retro Kit Item Part No. Description Qty. Frame Frame (Not Supplied) 14458 Blower Head, Sonic 150 13007 13028 Bracket, Sonic 150 IEC 13455 Belt Tensioner Assembly 13450 Pulley, Blower 13452 Pulley, Motor Section 6.4.3 IEC Bushing Kit Section 6.5...
- Page 30 6.3.6 Sonic 150C IEC Retro Kit Item Part No. Description Qty. Frame Frame (Not Supplied) 14459 Blower Head, Sonic 150C 13007 13028 Bracket, Sonic 150 IEC 13455 Belt Tensioner Assembly 13450 Pulley, Blower 13452 Pulley, Motor Section 6.4.3 IEC Bushing Kit Section 6.5 Belt 11130...
- Page 31 6.3.7 Sonic 150 Upgrade Kit Item Part No. Description Qty. 215TC & 284TSC 256TC Frame Frame (Only) 14458 Blower Head, Sonic 150 12335 12623 Bracket, Sonic 150 13455 Belt Tensioner Assembly 13450 Pulley, Blower 13452 Pulley, Motor Section 6.5 Belt...
-
Page 32: Motor Reference
61 / 30.5 3500 All standard Sonic supplied motors are equipped with C-face, foot mounted, and are for 3 phase power only. Special motors are available from Sonic Air Systems and are not included in the above table. 6.4.2 Nema Motor Specifications... -
Page 33: Periodic Maintenance
7 Periodic Maintenance 7.1 Maintenance Schedule Sonic 150 series blowers are designed for 24 hour / 365 day operation with periodic service and / or replacement of the belts and filters. The following inspection and service intervals are listed as hours of operation or elapsed time from blower installation, whichever comes first. -
Page 34: Figure 36 - Remove Belt Guard
4. Using the 9/16 inch box-end wrench, rotate the belt tensioner arm counter clockwise (CCW). At the same time wrap the belt around the blower pulley, then along the right side of the idler pulley, and finally around the motor pulley. (See Figure 38) 5. -
Page 35: Figure 38 - Install New Belt
Figure 40 - Loosen Bracket Hardware Figure 38 - Install New Belt Figure 39 – Verify Belt Gap Figure 41 - Adjust Belt Gap to ¾” Page 31... -
Page 36: Belt Tensioner Service
7.4 Belt Tensioner Service 7.4.1 Tools Required Description Qty. Description Qty. 3/16 inch allen wrench #3 Drive Extension (optional) 9/16 inch box end wrench ¾ inch deep socket (optional) 1/2 inch socket Rubber Mallet (optional) 3/8 inch ratchet driver 7.4.2 Belt Tensioner Service Procedure 1. -
Page 37: Figure 42 - Remove Belt Guard
Figure 42 - Remove Belt Guard Figure 44 - Remove Motor Pulley Figure 43 - Remove Belt Figure 45 - Remove Bolt Page 33... -
Page 38: Figure 46 - Remove Belt Tensioner
Figure 46 - Remove Belt Tensioner Figure 48 - Correct Position Figure 47 - Caution Loose Springs Figure 49 - Verify Belt Gap Page 34... -
Page 39: Figure 50 - Loosen Bracket Hardware
Figure 50 - Loosen Bracket Hardware Figure 51 - Adjust Belt Gap to 3/4" Page 35... -
Page 40: Bearing Cartridge Replacement Procedure
7.5 Bearing Cartridge Replacement Procedure 7.5.1 Assembly Drawing Page 36... -
Page 41: Required Tools
7.5.2 Bearing Cartridge Assembly Parts List Item Part Description Qty. Housing-Blower Head 13995 Housing-Sonic 150 BC 14451 Housing-Sonic 150C BC 14453 Spindle-Sonic 100/150 Series Bearing Cartridge 12638 Impeller-Sonic 85/150 Series 12604 Cover-Sonic 150 13450-%%% Pulley-Blower 16G 10766 Retainer-Impeller 10769 Screw-5/16-24 x 1.0 lg., SHCS SS 10454 Screw-5/16-18 x 1.0 lg., SHCS SS... -
Page 42: Figure 52 - Remove Belt Guard
Figure 52 - Remove Belt Guard Figure 54 – Remove Water Cooling Tubing Figure 53 - Remove Belt Figure 55 – Remove Filter or Inlet Screen Page 38... -
Page 43: Figure 56 - Remove Cover
Figure 56 – Remove Cover Figure 58 – Remove Blower Pulley Figure 57 – Remove Impeller Figure 59 – Remove Thermocouple Page 39... -
Page 44: Figure 60 - Remove Compression Fitting
Figure 60 – Remove Compression Fitting Figure 62 – Remove Bearing Cartridge Figure 61 – Remove Bearing Cartridge Hardware Figure 63 – Blower w/ Bearing Cartridge Removed Page 40... -
Page 45: Recommended Spares
7.8 Recommended Spares Although the Sonic 150 blowers are designed for many years of continued operation, a number of components are wear or consumable items and must be replaced periodically. The following is a list of recommended spare components that should be used to... -
Page 46: Troubleshooting
8 Troubleshooting Trouble Cause Remedy Section Low Flow / Pressure Blower rotating backwards (Incorrect wiring) Reverse motor wiring / Vacuum Dirty or contaminated filter Clean or replace filter element Collapsed flexible hose lining Use only reinforced flexible hose ... -
Page 47: Performance Guarantee
9 Performance Guarantee Sonic Air Systems, Inc. (SAS) guarantees that each SAS supplied system will meet or exceed the designed level of performance. In the event the system does not achieve the designed performance, SAS will provide additional resources and equipment at no cost or refund 100% of the original purchase price. -
Page 48: Warranty Policy
10 Warranty Policy Sonic Air Systems, Inc. (SAS) and its employees are proud of our products and are committed to providing our customers with quality, engineered products. Scope of Warranty: All SAS designed products are warranted against defects in SAS design, workmanship and materials. -
Page 49: 24/7/365 Service Program
11 24/7/365 Service Program Sonic Air Systems, Inc. (SAS) provides emergency product and shipping service, 24 hours a day, 7 days a week, 365 days a year, to all customers, worldwide. Shipments are made by Federal Express, UPS or UPS' Sonic Air Service or product may be picked up will-call at the SAS facility in Brea, CA USA. -
Page 50: Sonic Repair Policy
12 Sonic Repair Policy Sonic blower heads are high-speed close tolerance machined components. The Sonic 150 blower head is rated for a 20,000 RPM maximum impeller speed. Sonic uses only the best internal components for the blower head assembly and is confident that the head will perform exceptionally in the application it was designed to perform.
Need help?
Do you have a question about the Sonic 150 and is the answer not in the manual?
Questions and answers