
Related Manuals for Geovent ASA-2

Summary of Contents for Geovent ASA-2
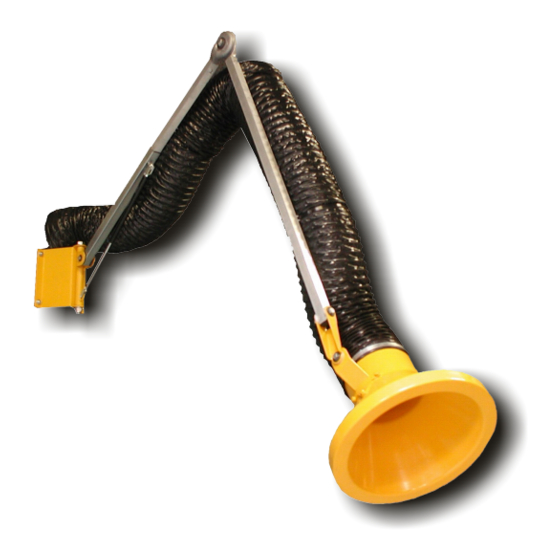
- Page 1 ASA-2 arm ø80, ø100, ø125, ø160 & ø200 Instruction manual Bedienungsanleitung Instruktionsmanual...
-
Page 2: Table Of Contents
Boring in the gas spring or other ways of puncturing it is deadly dangerous. 1.2 Field of application The GEOVENT ASA-2 Arm is the ideal Extraction Arm for the extraction of welding smoke, grinding dust, fumes, etc., where the well-being of the 1.4 Construction... -
Page 3: Installation
Ø160 Ø200 2.0 Installation Procedure: The ASA-2 Arm is supplied partly assembled. The wall bracket is firmly attached to the wall Depending on model, it may consist of 1 partly by means of 4 off 10mm bolts. (When using assembled carrying arm, 1 funnel and 1 set of the extension arm, please fix this bracket first hose with clamp. -
Page 4: Optional Equipment
2.3 Trial run – exact adjustment 2.1 Mounting of optional equipment After the final mounting, the ASA-2 Arm should be Mounting of extension arm adjusted to the typical working area, for optimum Start by fixing the extension arm to the wall, as utilisation of the Arm. -
Page 5: Maintenance
Instruction Manual ASA-2 Arm Less optimal welding situation. User liability In order for Geovent to be capable of granting the declared warranty, the user/fitter must follow this Instruction Manual in all respects. Under no circumstances may the products be changed in any way, without prior written agreement with Geovent A/S.
Need help?
Do you have a question about the ASA-2 and is the answer not in the manual?
Questions and answers