Table of Contents
Advertisement
Available languages
Available languages
Quick Links
Original Bedienungsanleitung
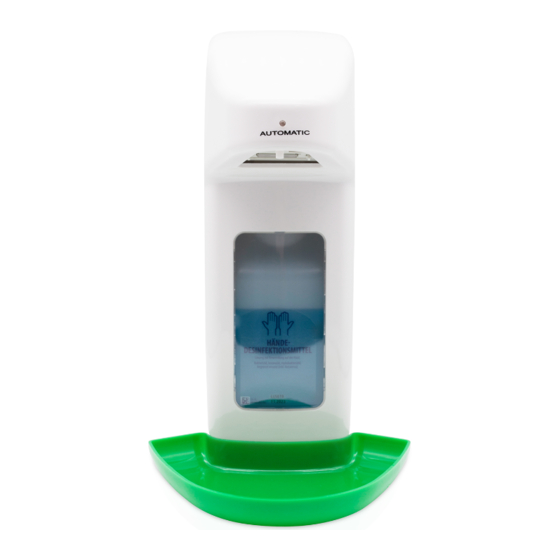
Automatische „touchless" Desinfektionsmittel- und
Seifenspender mit Einweg-Rollerpumpe
Automated „touchless" disinfectant and soap dispensers
with disposable roller pump
SD4005 für 500 ml-Flaschen
SD4005 for 500 ml bottles
|
Original instruction manual
(translation)
●
SD4010 für 1.000 ml-Flaschen
●
SD4010 for 1,000 ml bottles
Advertisement
Table of Contents

Related Manuals for EURANEG SD4010

Summary of Contents for EURANEG SD4010
- Page 1 Original instruction manual (translation) Automatische „touchless“ Desinfektionsmittel- und Seifenspender mit Einweg-Rollerpumpe Automated „touchless“ disinfectant and soap dispensers with disposable roller pump ● SD4005 für 500 ml-Flaschen SD4010 für 1.000 ml-Flaschen ● SD4005 for 500 ml bottles SD4010 for 1,000 ml bottles...
-
Page 3: Table Of Contents
Inhaltsverzeichnis │ Contents Seite 1 | Page 1 Inhaltsverzeichnis Seite 1. Allgemeine Hinweise 2. Sicherheitshinweise 3. Definition „Bestimmungsgemäßer Gebrauch“ und „Handhabung“ 4. Schematische Darstellung/Bauteile 5. Montage, Inbetriebnahme und Bedienung 6. Technische Funktionsbeschreibung 7. Pumpentausch 8. Flaschentausch 9. Batteriewechsel 10. Pflege und Wartung 11. -
Page 4: Allgemeine Hinweise
Seite 2 Allgemeine Hinweise │ Sicherheitshinweise 1. Allgemeine Hinweise Bitte lesen Sie diese Bedienungsanleitung vor Inbetriebnahme des Spenders sorgfältig durch und beachten die Hinweise zur Gerätesicherheit und zum bestimmungsgemäßen Gebrauch. Bewahren Sie diese Bedienungsanleitung auf, um im Falle von Störungen deren Ursache anhand der Hinweise in der Tabelle (Seiten 11 und 12, „11. -
Page 5: Definition „Bestimmungsgemäßer Gebrauch" Und „Handhabung
Definition „Bestimmungsgemäßer Gebrauch“ und „ Handhabung“ Seite 3 3. Definition „Bestimmungsgemäßer Gebrauch“ und „Handhabung“ 3.1 Bestimmungsgemäßer Gebrauch Die Spender sind zum berührungslosen Desinfizieren der Hände, aber auch zur Dosierung von Gels, Flüssigseifen und Lotionen geeignet (Viskosität beachten!). Die Medien werden in die Hände eingerieben. Die Spender sind ausschließlich für den Betrieb mit 4 x 1,5 V AA Mignon LR6 Batterien ausgelegt. -
Page 6: Schematische Darstellung/Bauteile
Seite 4 Schematische Darstellung / Bauteile Schematische Darstellung/Bauteile 4. Schematische Darstellung / Bauteile 1. Wandmontageplatte 3. Gehäuse, Frontdeckel mit Dübel- und Schraubenset (im Lieferumfang m. Sichtfenster enthalten), nicht notwendig, wenn am vorgese- n. Schlitze zum Aufstecken der henen Montageplatz bereits ein Armhebelspender Tropfschale mit vergleichbarer Platte installiert war o. - Page 7 Montage, Inbetriebnahme und Bedienung Seite 5 5. Montage, Inbetriebnahme und Bedienung 5.1 Vorbereitung Beim Auspacken des Spenderkartons darauf achten, dass folgende Teile enthalten sind: 1 Spender mit montierter Roller(Jet)-Pumpe und 1 Ersatzpumpe (Jet) 1 Rückwand zur Wandmontage (wird nicht benötigt, wenn bereits eine passende Rückwand eines manuellen Spenders montiert ist) 1 Tropfschale (zum Aufstecken nach der Montage) 1 Beutel mit 1 Schlüssel und je 3 Schrauben und Dübeln...
-
Page 8: Montage, Inbetriebnahme Und Bedienung
Seite 6 Montage, Inbetriebnahme und Bedienung Geschlossenen Spender von oben auf die Wandmontage- platte schieben, bis die Verriegelungszunge hörbar einrastet Tropfschale aufstecken Spender mit dem Schlüssel wieder öffnen 5.3 Inbetriebnahme Die Pumpe mit dem Installationsdatum beschriften. Dazu entweder das Etikett bei montierter Pumpe beschriften oder Pumpe demontieren und flach auflegen ... - Page 9 Montage, Inbetriebnahme und Bedienung Seite 7 5.4 Bedienung Eine Hand (oder beide Hände) in den Sensorbereich halten (sensitiver Bereich werkseitig eingestellt bis etwa Mitte des Sichtfensters), der Spender dosiert Hand wegziehen und erneut in den Sensorbereich halten, der Spender dosiert nochmals ...
-
Page 10: Technische Funktionsbeschreibung
Seite 8 Technische Funktionsbeschreibung 6. Technische Funktionsbeschreibung Die automatischen „touchless“ Spender dosieren flüssige Medien mit einer einfach zu entnehmenden und austauschbaren Einweg-Rollerpumpe. Dazu wird das (längere) Ende des Silikonschlauchs in die Gebrauchsflasche eingeführt, das vordere (kürzere) Ende des Schlauchs mit aufgesteckter Auslaufspitze an der Spitze der Sensor- Trägerplatte eingeklinkt. -
Page 11: Pumpentausch
Pumpentausch Seite 9 7. Pumpentausch Um den gestiegenen Anforderungen an die Hygiene-Sicherheit zu genügen, sind die Spenderpumpen als Einwegpumpen ausgelegt, die in regelmäßigen Abständen - je nach Häufigkeit der Benutzung alle 3 - 4 Monate - ausgetauscht werden sollen, obwohl ihre Haltbarkeit sehr viel länger ist. -
Page 12: Flaschentausch
Seite 10 Flaschentausch │ Batteriewechsel 8. Flaschentausch Vorgehen: Spender mit dem Schlüssel öffnen Flaschenfeststeller zur leichteren Entnahme der leeren Gebrauchsflasche eventuell entriegeln Flasche nach vorne ziehen und entnehmen Neue Flasche einsetzen, Flaschenfeststeller für optimalen Sitz der Flasche eventuell neu justieren ... -
Page 13: Pflege Und Wartung
Pflege und Wartung │ Beschreibung und Behebung von Störungen Seite 11 Seite 10 10. Pflege und Wartung Die Spender sind grundsätzlich wartungsfrei. Lediglich die Einweg-Rollerpumpen sollten regelmäßig (siehe Seite 9 „7. Pumpentausch“) und die Batterien nach ca. zwei Jahren getauscht werden. Ansonsten sollten die Spender für eine möglichst lange Verwendungsdauer pfleglich behandelt werden –... - Page 14 Seite 12 Beschreibung und Behebung von Störungen Angezeigte Störung Mögliche Ursache Fehlerbehebung LED blinkt rot (nach Ein- Batterien nicht korrekt Sitz der Batterien überprüfen, setzen frischer Batterien eingesetzt/verkantet vorsorglich Polarität prüfen Spender dosiert nicht 1. Gebrauchsflasche leer 1. Neue Flasche einsetzen 2.
-
Page 15: Technische Und Sicherheitsdaten
Batterien 4 x 1,5 V AA Mignon LR6 Schutzart IP 22 Gewicht SD4005: ca. 850 g (ohne Batterien und Flasche) SD4010: ca. 930 g Abmessungen: 500 ml-Spender 1.000 ml-Spender 12.2 Sicherheitsrelevante Daten Keine Störungen durch elektromagnetische Felder (EMC-zertifiziert) ... -
Page 16: Sonstiges
Wandplatte für Art. SD4010 SD4005-80 Dübel- und Schraubenset für Art. SD4005/SD4010, incl. Schlüssel SD4005-85 Batteriefachdeckel für Art. SD4005/SD4010 SD4005-90 Markenbatterien, Größe AA (Set à 4 Stück), für Art. SD4005/SD4010 SD4005-99 Leerkarton für Art. SD4005 SD4010-99 Leerkarton für Art. SD4010 SDTA100 Acrylglas-Tischaufsteller für Art. -
Page 17: General Notices
General notices │ Safety notices Page 15 1. General notices Please read through this instruction manual carefully before first use of the dispenser and observe the notes on device safety and its intended use. Keep this instruction manual for future reference and for quickly finding and eliminating any faults using the indications in the troubleshooting table (pages 24 and 25). -
Page 18: Definition Of "Intended Use" And "Handling
Page 16 Definition of „intended use“ and „handling“ 3. Definition of “intended use” and “handling” 3.1 Intended use The dispensers are suitable for touchless disinfection of hands as well as for dispensing gels, liquid soaps and lotions (pay attention to viscosity!). The intended media are for rubbing into the hands. -
Page 19: Schematic Diagram/Components
Schematic diagram / components Page 17 4. Schematic diagram / components 1. Wall-mounting plate 3. Housing, front cover with dowel and screw set included – not needed m. Inspection window if the dispenser can be mounted on an existing and n. -
Page 20: Installation, First Use And Operation
Page 18 Installation, first use and operation 5. Installation, first use and operation 5.1 Preparation When unpacking, make sure that the box contains all of the following parts: 1 dispenser with installed roller jet pump and 1 spare pump (jet) 1 wall plate for wall mounting (not needed if the dispenser can be mounted on an existing and suitable wall-mounting plate of a manual dispenser) 1 dripping tray (for fixing after installation) - Page 21 Installation, first use and operation Page 19 Push the closed dispenser onto the wall-mounting plate from above, until the locking tongue audibly clicks into place Attach the dripping tray Open the dispenser again with the key 5.3 First use ...
- Page 22 Page 20 Installation, first use and operation 5.4 Operation Hold one hand (or both hands) within the sensor’s range (sensitive area has been factory set to the middle of the inspection window), and the dispenser will deliver Take your hand away and then hold it again in the sensor’s range, and the dispenser will deliver again ...
-
Page 23: Technical Functional Description
Technical functional description Page 21 6. Technical functional description The automatic “touchless” dispensers deliver liquid media using a disposable roller pump easy to remove and change. The (longer) end of the silicone tube goes into the supply bottle while the front (shorter) end of the tube, with the dispensing tip clipped onto it, clicks onto the end of the sensor base plate. -
Page 24: Changing The Pump
Page 22 Changing the pump 7. Changing the pump In order to satisfy the increasingly stringent requirements for hygiene and safety, the pump in our dispensers is designed as a disposable pump to be changed at regular intervals – 3 to 4 months depending on usage frequency – even though the service life is much longer. -
Page 25: Changing The Bottle
Changing the bottle | Changing batteries Page 23 8. Changing the bottle Procedure: Open the dispenser with the key If necessary, unlock the bottle fastener to make removal of the empty bottle easier Carefully pull the bottle forwards and remove it ... -
Page 26: Care And Maintenance
Page 24 Care and maintenance | Description and elimination of faults Care and maintenance The dispensers are essentially maintenance-free. Only the disposable roller pumps will need regular changing (see page 22 “7. Changing the pump”) as will the batteries after approx. - Page 27 Description and elimination of faults Page 25 Fault displayed Possible cause Remedy LED blinks red (after Batteries not correctly Check batteries for proper inserting fresh inserted/skewed position, check polarity batteries) precautionarily Dispenser does not 1. Supply bottle empty 1. Insert new bottle deliver 2.
-
Page 28: Technical And Safety Data
4 x 1.5 V AA Mignon LR6 Degree of protection IP 22 Weight SD4005: approx. 850 g (without batteries and bottle) SD4010 : approx. 930 g Dimensions: 500 ml dispenser All dimensions (approx.) in mm 1,000 ml dispenser All dimensions (approx.) in mm 12.2 Safety-related data... -
Page 29: Miscellaneous
Dowel and screw set for art. SD4005/SD4010, incl. key SD4005-85 Battery compartment cover for art. SD4005/SD4010 SD4005-90 Brand batteries, size 1.5 V AA LR6 (set of 4), for art. SD4005/SD4010 SD4005-99 Empty box for art. SD4005 SD4010-99 Empty box for art. SD4010 SDTA100 Table stand (made from acrylic glass) for art. -
Page 30: Erklärung
Seite 28 | Page 28 Erklärung | Declaration Diese Bedienungsanleitung entspricht vollumfänglich der deutsch- bzw. englischsprachigen Original-Bedienungsanleitung des Herstellers/ Bevollmächtigten im Sinne der Maschinen-Richtlinie 2006/42/EG EURANEG GmbH Am Rathaus 7 D-84095 Furth Deutschland Telefon +49 (0) 8704 8681 Service Telefon +49 (0) 8704 913136 kontakt@euraneg.com...
Need help?
Do you have a question about the SD4010 and is the answer not in the manual?
Questions and answers