Table of Contents

Related Manuals for RadioLink F121


Summary of Contents for RadioLink F121
- Page 1 F121 Mini Racing Drone Altitude Hold by Inertial Navigation User Manual V 1.0 * Please be kindly noted that this manual will be updated regularly and please visit RadioLink official website to download the latest version:www.radiolink.com...
- Page 2 RadioLink Electronic Limited www.radiolink.com Thank you for purchasing RadioLink mini racing drone F121. To fully enjoy the benefits of this product and ensure safety, please read the manual carefully and set up the device as instructed steps. If any problems found during the operation process, either way listed below can be used as online technical support.
-
Page 3: Table Of Contents
4.1 Altitude Mode: Rise/Descend ......................13 4.2 Altitude Mode: Hover ........................13 4.3 Altitude Mode: Forward/Backward/Right/Left ................... 13 4.4 Altitude Mode: Clockwise/Anticlockwise Rotation ................13 4.5 Stabilize Mode ..........................13 Chapter 5 Image Transmission of F121 ....................... 11 Specification .............................. 13... -
Page 4: Chapter 1 Features Of F121
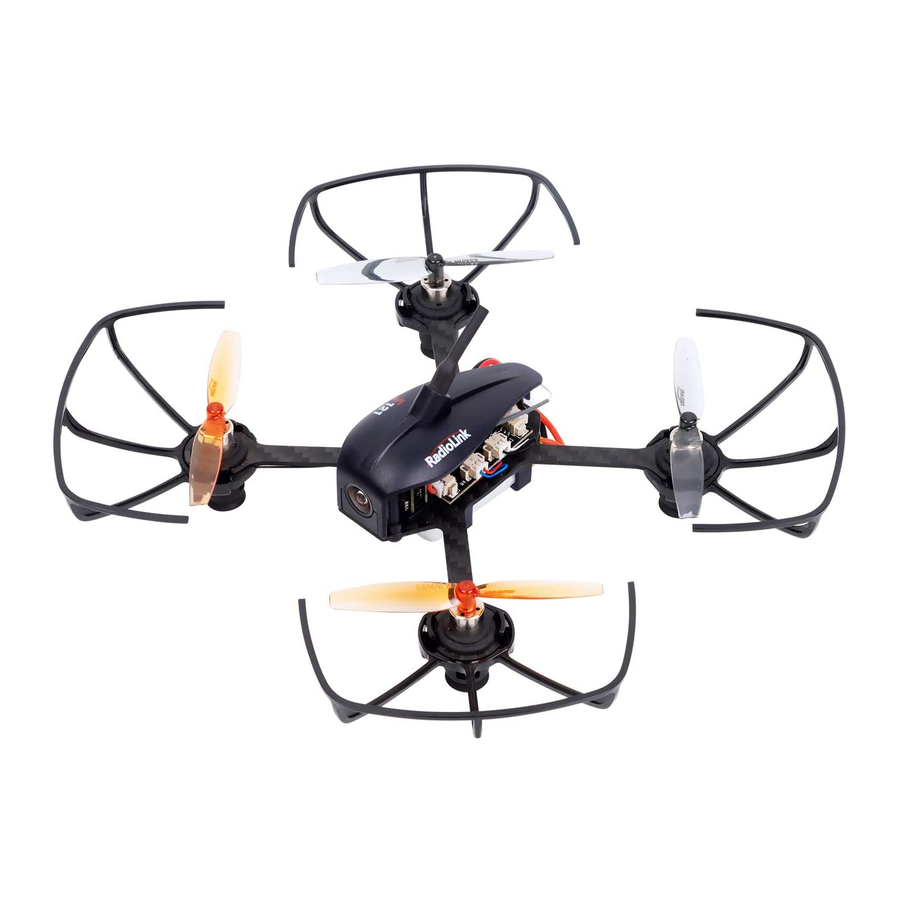
Chapter 1 Features of F121 As the mini racing drone that can fly at high speed at Altitude Hold Mode, F121 is very easy to master for drone freshman. The inertial navigation system technology blending Kalman filtering, gyro, accelerometer and barometer makes F121 possible to flight through narrow space with accuracy and hold altitude even it’s less than... -
Page 5: Chapter 2 Before Flight
Power for transmitter T8S: Make sure the transmitter is fully charged. Power for F121: The voltage of 1S LiPo battery packed with F121 by default is not fully charged so the battery needs to be charged with the charger CM120 before flight. -
Page 6: F121
Prop protector *There are screws packed with F121 to ensure the firm installation of the propellers protector to the F121 frame even with collision. Pilots can fix them on as necessary. games.Learning knowledge of science and technology when assembling, setting parameters and flight. -
Page 7: Joysticks & Flight Movements
Descend B. Yaw: Clockwise/Anticlockwise Toggle the yaw stick (on the left) to the left and F121 will turn anticlockwise and toggle the yaw stick to the right, then F121 turns clockwise. Yaw stick to the left , F121 turns anticlockwise... - Page 8 Pitch stick downward, F121 moves backward D. Roll: Right/Left Toggle the roll stick (on the right) to the left and F121 will fly to the left side and toggle the roll stick to the right, then F121 will fly to the right side.
- Page 9 RadioLink Electronic Limited www.radiolink.com Roll stick to right, F121 flies to the right side...
-
Page 10: Chapter 3 Get Ready To Flight
Screw Installation Note After the installation of the four propeller protectors, double confirm if they are leaning or slightly shake F121 to see if they drop. If they are crooked or drop, repeat the above steps to ensure the well installation. -
Page 11: Power On F121
F121 may not flight successfully. 3.3 Power On F121 Before powering on F121, fully charge the 1S LiPo battery first. Plug the PH2.0 end of the battery into the F121, then insert the battery into the battery frame under at the bottom of F121. -
Page 12: Setup Compatible Transmitters
RadioLink Electronic Limited www.radiolink.com remain at this height. It’s simpler because pilots only need to toggle the other joystick to make the F121 move forward/backward or turn left/right. If it’s the Stabilize Mode chosen, try to toggle the joysticks slightly to correct the flight and avoid the drone having sudden moves. -
Page 13: Binding
If it’s the RTF version( whole pack including T8S+F121+bag) purchased, there’s no need to bind because the binding is complete with receiver R8SM installed by factory default. However, if it’s only the aircraft F121 is purchased, binding between the transmitter and F121 with receiver installed needs to done first. -
Page 14: Arm And Disarm F121
④ The binding is complete when the LED is always on. ⑤ Make sure F121 is armed (Details in next section). Gently push the throttle of transmitter to see if motors move. If doesn’t, retry binding again. Binding button on receiver Note ⚫... - Page 15 B. How to disarm When the flight is finished, always make sure F121 is disarmed when get close and try touching it to avoid unexpected harm. Throttle on left(Mode 2): Toggle the left joystick to the lower left corner and hold this position for 3 seconds till the green LED of F121 is off.
-
Page 16: Chapter 4 Flight At Different Flight Modes
Clearly knowing the direction will quickly help master drone flight. Try imagine sitting on the drone could be a better way to practice. Toggle the rudder joystick to the left and F121 will flight anticlockwise while if to the right, then the F121 will flight clockwise. -
Page 17: Chapter 5 Image Transmission Of F121
F121 and the FPV screen has been done by factory default. Pilots only need to power both on before flight. If it’s the standalone version of F121, an FPV screen or a goggle with integrated 5.8G image transmission receiver is needed and setup by following its instructions. -
Page 18: Specification
⑤ If there’s interference during the usage, try switching the camera channel first, then search for a new channel on FPV screen or goggle. Specification Name: F121(Altitude Hold Micro Racing Drone) Weight: 47.5g(Drone only) Drone Size: 121*55mm(with antenna; 41mm without antenna)... - Page 19 RadioLink Electronic Limited www.radiolink.com Low Voltage Alarm: Green led flashes quickly when lower than 3.8V Control Distance: 2KM in the air(Maximum range is tested in an unobstructed area free of interference) Thank you again for choosing RadioLink products.
Need help?
Do you have a question about the F121 and is the answer not in the manual?
Questions and answers