Table of Contents
Advertisement
Quick Links
s p e a k e r k i t
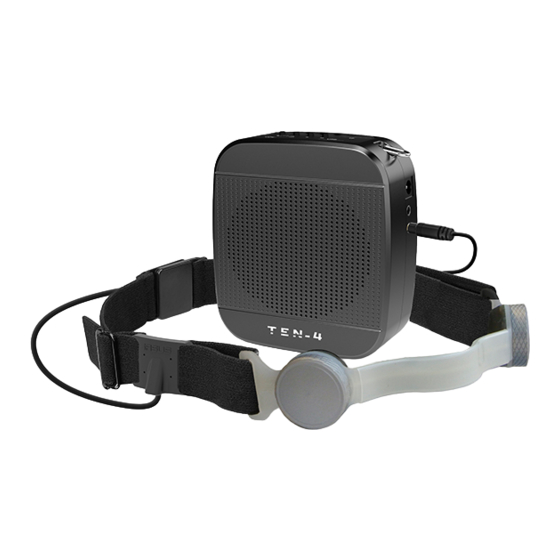
MODEL NUMBER: IA-FR-SPKR-104-BK
Congratulations
on the purchase of your IASUS Concepts
TEN-4 Speaker Kit! You have now joined an increasing group of
individuals enjoying IASUS communication solutions.
Please review this owner's manual before use and follow our
recommended installation procedures to get your TEN-4 speaker
kit performing at its absolute best. Should you have any questions
and require assistance with setup and usage, please feel free to
visit our website:
W W W. I A S U S - C O N C E P T S . C O M
info@iasus-concepts.com
Or contact us directly at:
1
I A S U S _ T E N 4 _ I N S T R U C T I O N M A N U A L _ 2 0 2 1
Advertisement
Table of Contents

Related Manuals for IASUS TEN-4


Summary of Contents for IASUS TEN-4
- Page 1 MODEL NUMBER: IA-FR-SPKR-104-BK Congratulations on the purchase of your IASUS Concepts TEN-4 Speaker Kit! You have now joined an increasing group of individuals enjoying IASUS communication solutions. Please review this owner’s manual before use and follow our recommended installation procedures to get your TEN-4 speaker kit performing at its absolute best.
- Page 2 We recommend reviewing this instruction manual in its entirety before using your TEN-4 speaker kit. It introduces and explains the TEN-4’s features, how to set it up, and correct operation for a rich user experience that you come to expect.
-
Page 3: Table Of Contents
OPERATING THE TEN-4 SPEAKER ........ -
Page 4: Pac Kag E C O Nt E N Ts
P A C K A G E C O N T E N T S GP3-R Throat Mic ....... Throat Mic Adapter ....... TEN-4 Speaker ....... Shoulder Strap ....... USB Charging Cable ....... Power Adapter ....... DIN Connector ....... 3.5mm Headphone Plug ...... -
Page 5: Pa Rt S & C O N T Ro L S R E F E R E N C E
P A R T S & C O N T R O L S R E F E R E N C E Power ON/OFF | Volume Control ....... Charging LED ....... Power ON LED ....... PA Mode LED ....... DC 5V Charging Port ....... -
Page 6: C O Nn E C Ti N G T H E Te N- 4 S P E A K E R K I T
C O N N E C T I N G T H E T E N - 4 S P E A K E R K I T GP3-R IASUS THROAT MIC EXTENSION CABLE DIN CONNECTOR TO 3.5MM HEAPDHONE PLUG... -
Page 7: U S In G T H E T E N -4 S Pe A K E R K I T
Microphone Port (6) of the speaker. Be sure to align the arrow indicators before firmly Turn on the speaker See Using the TEN-4 speaker section pressing them together to avoid bending the pins. 3. Wearing the throat mic: I. Open the magnetic breakway II. -
Page 8: Use And Care Of The Gp3-R Throat Mic
U S E A N D C A R E O F T H E G P 3 - R T H R O A T M I C WEARING THE THROAT MIC: For the best transmission quality when using the GP3-R, place the Gen 3.0 Transponder Microphon (A) about 0.5 - 1 inch on either side of your larynx / voice box. -
Page 9: Magnetic Breakaway Clasp
POWER OFF CLICK CLICK To power on the TEN-4 speaker and increase the volume, To power off the EAR3H, turn the volume control wheel turn the volume control wheel (1) clockwise until you (1) counter-clockwise until you hear and feel the click. -
Page 10: Low Battery
VOLUME UP VOLUME DOWN Power on the speaker and continue turning the volume To decrease the volume, turn the volume control wheel control wheel clockwise, toward the sign to your counter-clockwise, toward the sign to your desired desired volume level. volume level. -
Page 11: C Ha Rg I N G T H E T E N -4 S P E A K E R
C H A R G I N G T H E S P E A K E R A red light indicates that the device is low on A full charge requires approximately 3-5 hours. battery. Only use the provided power adapter (F) Once the speaker is fully charged, the charging LED and charging cable (E) to charge the speaker. -
Page 12: 1 - Y E A R L I M I T E D W A R R A N T Y
IF this is true for your area, the above limitations or exclusions may not apply to you. IASUS Concepts shall not be liable for any special or consequential damages or for loss or expense directly or indirectly arising from use of the product, inability to use the product in combination with other equipment, or from any other cause.
Need help?
Do you have a question about the TEN-4 and is the answer not in the manual?
Questions and answers