
Related Manuals for Black Stone E Series 8003


Summary of Contents for Black Stone E Series 8003
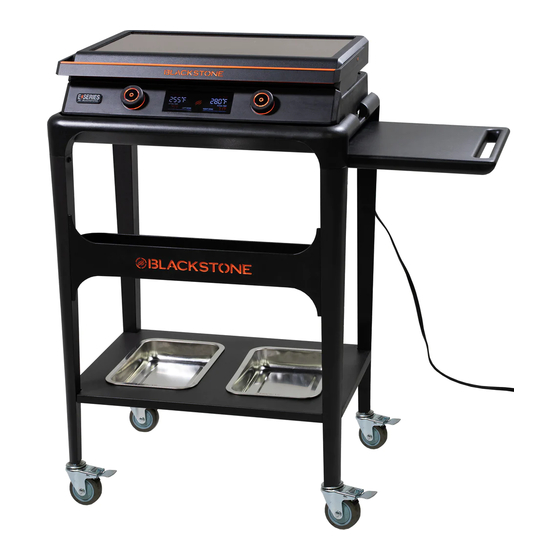
- Page 1 OWNER’S MANUAL 22” ELECTRIC TABLETOP GRIDDLE Model 8003 North Atlantic Imports LLC | 1073 West 1700 North Logan, UT 84321 | Blackstoneproducts.com...
- Page 2 Model 8003 | Owner’s Manual | D A N G E R D A N G E R D A N G E R Never operate this appli- Do not store or use gaso- • This appliance is for outdoor ance unattended.
- Page 3 | Owner’s Manual | Model 8003 I M P O R TA N T S A F E G U A R D S D A N G E R When using electrical appliances, basic safety precautions should • The power cord must be always be followed including the following: electrically grounded in 1.
- Page 4 Model 8003 | Owner’s Manual | TABLE OF CONTENTS It is the consumer’s responsibility to see that the unit is properly assem- bled, installed, and maintained. Failure to follow the instructions in this manual could result in bodily injury and/or property damage. CONTENTS 01.
- Page 5 Register Your Product | Owner’s Manual | Model 8003 REGISTER YOUR PRODUCT Registration allows our Customer Service Representatives to quickly Q. W provide assistance with your Blackstone product if needed. A. W The North Atlantic Imports LLC 1-Year Warranty covers replacement parts up vege to one year after the date of purchase.
- Page 6 Model 8003 | Owner’s Manual | For Your Safety WA R N I N G FOR YOUR SAFET Y NEVER partially cook meat or poultry to finish cooking later. Cook food completely Before proceeding, make certain that you understand the FOR YOUR to destroy harmful bacteria.
- Page 7 For Your Safety | Owner’s Manual | Model 8003 WA R N I N G Keep children and pets away Section 02 from appliance at all times. ELECTRIC GRIDDLE SAFET Y This appliance is not intended for use by children. SAFE T Y TIPS FOR DAILY CLEANING: Close supervision is neces-...
- Page 8 Model 8003 | Owner’s Manual | Assembly Guide ASSEMBLY GUIDE E XPLODED VIEW...
- Page 9 Assembly Guide | Owner’s Manual | Model 8003 ILLUSTRATED PARTS LIST Griddle body (1 piece) Griddle top & Hood assembly Side shelf (1 piece) (1 piece) Front brace (1 piece) Bottom shelf (1 piece) Table top (1 piece) Front legs Back legs Shelf bins (2 pieces) Wheels...
- Page 10 Model 8003 | Owner’s Manual | Assembly Guide WA R N I N G WA R N I N G The manufacturer has made The manufacturer has made every effort to eliminate any every effort to eliminate any sharp edges. However, you sharp edges.
- Page 11 Assembly Guide | Owner’s Manual | Model 8003 WA R N I N G This appliance will be hot during and after use. While cooking, place unit on S T E P 0 2 Use four (4) self tapping screws to attach the two (2) power cord heat-resistant and flame-re- brackets to the back right leg.
- Page 12 Model 8003 | Owner’s Manual | Assembly Guide S T E P 0 3 Use two (2) step bolts to attach the side shelf to the right legs. Use eight (8) M6x12 screws to attach the bottom shelf to the legs. S T E P 0 4 Use four (4) M6x12 screws to attach the front brace to the front legs.
- Page 13 Assembly Guide | Owner’s Manual | Model 8003 S T E P 0 5 Set the two (2) shelf bins in the bottom shelf. S T E P 0 6 Hang the grease cup on the back of the griddle body. Place the griddle top and hood assembly onto the griddle body, making sure that the griddle top feet are fully seated.
- Page 14 Model 8003 | Owner’s Manual | Assembly Guide WA R N I N G NEVER APPLY COLD WATER ACROSS THE WHOLE SURFACE OF A S T E P 0 7 With the help of another person, set the cart on its feet. Set HOT GRIDDLE AT ONCE.
- Page 15 Warranty | Owner’s Manual | Model 8003 NORTH ATLANTIC IMPORTS LLC 1-YEAR WARRANT Y North Atlantic Imports, the manufacturer, will warranty for one year from purchase all parts, workmanship, and finishes. It will be the manufacturer’s option as to whether to repair or replace any of the above items. All warran- ties are limited to the original purchaser only.
- Page 16 North Atlantic Imports LLC | 1073 West 1700 North Logan, UT 84321 | Blackstoneproducts.com...
- Page 17 MANUEL D’UTILISATION PLAQUE DE CUISSON ÉLEC- TRIQUE DE 22 PO Modèle 8003 North Atlantic Imports LLC | 1073 West 1700 North Logan, UT 84321 | Blackstoneproducts.com...
- Page 18 Modèle 8003 | Manuel d’utilisation | D A N G E R D A N G E R D A N G E R N’utilisez jamais cet appareil Ne pas stocker ni utiliser • Cet appareil est destiné à un sans surveillance.
- Page 19 | Manuel d’utilisation | Modèle 8003 G A R A N T I E S I M P O R TA N T E S D A N G E R Lors de l’utilisation d’appareils électriques, des précautions de sécurité •...
-
Page 20: Table Of Contents
Modèle 8003 | Manuel d’utilisation | TABLE DES MATIÈRES Il incombe au consommateur de s’assurer que l’unité est correctement assemblée, installée et entretenue. Si vous ne suivez pas les instruc-tions de ce manuel, vous risquez des blessures corporelles et/ou des dégâts matériels. -
Page 21: Enregistrer Votre Produit
Enregistrer votre produit | Manuel d’utilisation | Modèle 8003 ENREGISTRER VOTRE PRODUIT L’enregistrement permet à nos représentants du service client de fournir Q. Q rapidement une assistance avec votre produit Blackstone si nécessaire. de c La garantie d’un an de North Atlantic Imports LLC couvre les pièces de rechange R. -
Page 22: Pour Votre Sécurité
Modèle 8003 | Manuel d’utilisation | Pour votre sécurité AT T E N T I O N POUR VOTRE SÉCURITÉ NE JAMAIS cuire partielle- ment la viande ou la volaille pour terminer la cuisson plus Avant de poursuivre, assurez-vous de bien comprendre la tard. - Page 23 Pour votre sécurité | Manuel d’utilisation | Modèle 8003 AT T E N T I O N Gardez les enfants et les Section 02 animaux éloignés de l’appa- reil à tout moment. SÉCURITÉ DE LA PLAQUE Cet appareil n’est pas destiné CHAUFFANTE ÉLECTRIQUE à...
-
Page 24: Guide De Montage
Modèle 8003 | Manuel d’utilisation | Guide de montage GUIDE DE MONTAGE VUE ÉCL ATÉE... - Page 25 Guide de montage | Manuel d’utilisation | Modèle 8003 LISTE DES PIÈCES ILLUSTRÉES Corps de plaque chauffante Ensemble plaque chauffante et Tablette latérale (1 pièce) (1 pièce) hotte (1 pièce) Renfort avant (1 pièce) Tablette inférieure (1 pièce) Plateau de table (1 pièce) Pattes avant Pieds arrière Bacs à...
- Page 26 Modèle 8003 | Manuel d’utilisation | Guide de montage AT T E N T I O N AT T E N T I O N Le fabricant a tout mis Le fabricant a tout mis en œuvre pour éliminer en œuvre pour éliminer les bords tranchants.
- Page 27 Guide de montage | Manuel d’utilisation | Modèle 8003 AT T E N T I O N Cet appareil sera chaud pendant et après son utilisation. Pendant la ÉTAPE 02 Utilisez quatre (4) vis autotaraudeuses pour fixer les deux (2) cuisson, placez l’appareil supports du cordon d’alimentation au pied arrière droit.
- Page 28 Modèle 8003 | Manuel d’utilisation | Guide de montage ÉTAPE 03 Utilisez deux (2) boulons étagés pour fixer la tablette latérale aux pieds droits. Utilisez huit (8) vis M6x12 pour fixer la tablette inférieure aux pieds. ÉTAPE 04 Utilisez quatre (4) vis M6x12 pour fixer le renfort avant aux pieds avant.
- Page 29 Guide de montage | Manuel d’utilisation | Modèle 8003 ÉTAPE 05 Placez les deux (2) bacs à tablettes dans la tablette inférieure. ÉTAPE 06 Accrochez la tasse à graisse à l’arrière du corps de la plaque chauffante. Placez le dessus de la plaque chauffante et la hotte sur le corps de la plaque chauf- fante, en vous assurant que les pieds supérieurs de la plaque chauffante sont bien en place.
- Page 30 Modèle 8003 | Manuel d’utilisation | Guide de montage AT T E N T I O N N’APPLIQUEZ JAMAIS D’EAU FROIDE SUR UNE PLAQUE DE CUISSON ÉTAPE 07 Avec l’aide d’une autre personne, mettez le chariot sur ses pieds. CHAUDE. Cela peut provo- Placez le corps de la plaque chauffante sur le chariot.
-
Page 31: Garantie
Garantie | Manuel d’utilisation | Modèle 8003 GARANTIE D’UN AN DE NORTH ATLANTIC IMPORTS LLC North Atlantic Imports, le fabricant, garantira toutes les pièces, la fabrication et les finitions pendant un an. Le fabricant aura le choix de réparer ou de remplacer l’un des éléments ci-dessus. - Page 32 North Atlantic Imports LLC | 1073 West 1700 North Logan, UT 84321 | Blackstoneproducts.com...
- Page 33 MANUAL DEL PROPIETARIO PLANCHA ELÉCTRICA DE SOBREMESA DE 22” Modelo 8003 North Atlantic Imports LLC | 1073 West 1700 North Logan, UT 84321 | Blackstoneproducts.com...
- Page 34 Modelo 8003 | Manual del propietario | P E L I G R O P E L I G R O P E L I G R O Nunca opere este aparato No almacene ni use gaso- • Este electrodoméstico es sin supervisión.
- Page 35 | Manual del propietario | Modelo 8003 CONSIDERACIONES IMPORTANTES P E L I G R O Al usar aparatos eléctricos, siempre se deben seguir las precauciones • El cable de alimentación básicas de seguridad, incluidas las siguientes: debe estar conectado a tierra de acuerdo con 1.
- Page 36 Modelo 8003 | Manual del propietario | TABLA DE CONTENIDO Es responsabilidad del consumidor asegurarse de que la unidad esté correctamente ensamblada, instalada y mantenida. El incumplimiento de las instrucciones de este manual puede provocar lesiones corpo-rales y / o daños a la propiedad.
- Page 37 Registre su producto | Manual del propietario | Modelo 8003 REGISTRE SU PRODUCTO El registro permite a nuestros Representantes de Servicio al Cliente brindar P. ¿Q asistencia rápidamente con su producto Blackstone si es necesario. R. Re La garantía de 1 año de North Atlantic Imports LLC cubre piezas de repuesto aceit hasta un año después de la fecha de compra.
- Page 38 Modelo 8003 | Manual del propietario | Por su seguridad A D V E R T E N C I A POR SU SEGURIDAD NUNCA ase parcial- mente la carne o las aves y termine de cocinarlas Antes de continuar, asegúrese de comprender la sección más tarde.
- Page 39 Por su seguridad | Manual del propietario | Modelo 8003 A D V E R T E N C I A Mantenga a los niños y Sección 02 las mascotas alejados del aparato en todo momento. SEGURIDAD DE LA PLANCHA Este aparato no está...
- Page 40 Modelo 8003 | Manual del propietario | Guía de montaje GUÍA DE MONTAJE VISTA EN DESPIECE ORDENADO...
- Page 41 Guía de montaje | Manual del propietario | Modelo 8003 LISTA DE PIE Z AS ILUSTRADA Cuerpo de plancha (1 pieza) Conjunto de tapa de plancha y Estante lateral (1 pieza) campana (1 pieza) Tirante delantero (1 pieza) Balda inferior (1 pieza) Tablero de mesa (1 pieza) Patas delan- Patas tras-...
- Page 42 Modelo 8003 | Manual del propietario | Guía de montaje A D V E R T E N C I A A D V E R T E N C I A El fabricante ha hecho todo El fabricante ha hecho todo lo posible para eliminar lo posible para eliminar los bordes afilados.
- Page 43 Guía de montaje | Manual del propietario | Modelo 8003 A D V E R T E N C I A Este aparato estará cali- ente durante y después de su uso. Mientras cocina, PASO 02 Utilice cuatro (4) tornillos autorroscantes para sujetar los dos (2) coloque la unidad sobre soportes del cable de alimentación a la pata trasera derecha.
- Page 44 Modelo 8003 | Manual del propietario | Guía de montaje PASO 03 Use tUse dos (2) pernos de escalón para sujetar el estante lateral a las patas derechas. Utilice ocho (8) tornillos M6x12 para sujetar el estante inferior a las patas. PASO 04 Utilice cuatro (4) tornillos M6x12 para sujetar la abrazadera delan- tera a las patas delanteras.
- Page 45 Guía de montaje | Manual del propietario | Modelo 8003 PASO 05 Coloque los dos (2) compartimientos de estantes en el estante inferior. PASO 06 Cuelgue la taza de grasa en la parte posterior del cuerpo de la plancha. Coloque la parte superior de la plancha y el conjunto de la campana sobre el cuerpo de la plancha, asegurándose de que las patas superiores de la plancha estén completamente asentadas.
- Page 46 Modelo 8003 | Manual del propietario | Guía de montaje A D V E R T E N C I A NUNCA APLIQUE AGUA FRÍA EN TODA LA SUPERFICIE DE UNA PASO 07 Con la ayuda de otra persona, coloque el carro sobre sus pies. PLANCHA CALIENTE Coloque el cuerpo de la plancha en el carro.
- Page 47 Guía de montaje Garantía | Manual del propietario | Modelo 8003 NORTH ATLANTIC IMPORTS LLC GARANTÍA DE 1 AÑO North Atlantic Imports, el fabricante, garantizará por un año a partir de la compra a todas las piezas, mano de obra y acabados. Será la opción del fabricante en cuanto a si reparar o reemplazar cualquiera de los elementos anteriores.
- Page 48 North Atlantic Imports LLC | 1073 West 1700 North Logan, UT 84321 | Blackstoneproducts.com...
Need help?
Do you have a question about the E Series 8003 and is the answer not in the manual?
Questions and answers