Table of Contents
Advertisement
A
技术要求:
1.该手册印刷颜色均为黑色 : PANTONE BLACK C
2.纸张规格为A 5
3.如果供应商的排版需要加空白页,请加在封底之前
B
4. 封面页的 Serial number:后需粘贴序列号,随订单更新
(注意:红色框不用印刷)
C
处数 分区
标记
D
编
制
审 核
审 定
批 准
1
1
更改文件号 签 名
校对
性能
排版
日期
用户手册
FD10PW ( 7618J )
Statesman 英国
日 期
阶 段 标 记
REV. 00
00
数
量
重
1
共
1
张
第
2
6710025468
比 例
80G双胶
1:1
量
佛山市顺德区美的
洗涤电器制造有限公司
1
张
2
A
B
C
D
D
Advertisement
Table of Contents

Related Manuals for STATESMAN FD10PWE


Summary of Contents for STATESMAN FD10PWE
- Page 1 技术要求: 1.该手册印刷颜色均为黑色 : PANTONE BLACK C 2.纸张规格为A 5 3.如果供应商的排版需要加空白页,请加在封底之前 4. 封面页的 Serial number:后需粘贴序列号,随订单更新 (注意:红色框不用印刷) 用户手册 FD10PW ( 7618J ) 6710025468 Statesman 英国 处数 分区 日 期 比 例 标记 更改文件号 签 名 阶 段 标 记 80G双胶 REV. 00 校对...
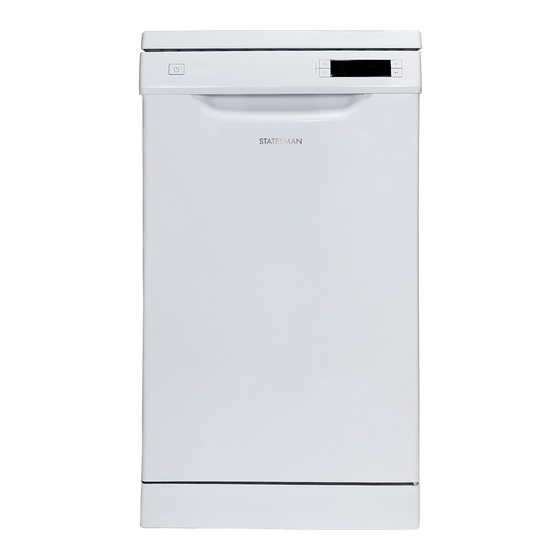
- Page 2 FD10PWE 45CM SLIMLINE 10 PLACE DISHWASHER WHITE Instruction Manual Made in China Serial number: Please read these instructions carefully before use and retain for future reference. Before switching on your appliance – Always check for any damage that may have been caused in transit.
-
Page 3: Table Of Contents
CONTENTS Important Safety Instructions ..........3-5 Technical Specification .............. 6 Appliance Overview ..............7 Control Panel ................8-9 Installation ................10-13 Prior to Using Your Dishwasher for the First Time ..... 13-18 Recommended Loading of Racks ........19-22 Wash Cycle Table ..............23 Operating Instructions ............ -
Page 4: Important Safety Instructions
IMPORTANT SAFETY INSTRUCTIONS Read and follow all of the instructions even if you feel you are familiar with the product, and find a place to keep this manual handy for future reference. If the appliance is sold, given away or moved, make sure the instruction manual is kept with the machine. - Page 5 11. When installing the appliance to the water supply ensure that the new supplied hose set is used. 12. Before using the appliance ensure that all packaging materials are removed. 13. Do not abuse, sit on, or stand on the door or dish rack of the dishwasher.
- Page 6 24. Please unplug before cleaning and performing maintenance on the appliance. 25. Do not operate your dishwasher unless all interior panels are properly in place. 26. Open the door very carefully if the dishwasher is operating, there is a risk of water squirting out. 27.
-
Page 7: Technical Specification
TECHNICAL SPECIFICATION Brand Mark Statesman Model Number FD10PWE Rated capacity in standard place settings Energy efficiency class (1) Energy consumption per year in kWh (2) 211 kWh Energy consumption of the standard cleaning cycle in kWh 0.741 kWh Power consumption of the off-mode in W 0.45... - Page 8 Product information sheet (EN60436) Supplier's name or trade mark: Supplier's address ( ): FD10PWE Model identifier: General product parameters: Parameter Value Parameter Value Height 84,5 Rated capacity ( ) (ps) Dimensions in cm Width 44,8 Depth 61,0 EEI ( )
-
Page 9: Appliance Overview
APPLIANCE OVERVIEW Inner Pipe Lower Spray Arm Filter Assembly Salt Container Dispenser Cutlery Basket Upper Basket Lower Basket Cutlery Rack Upper Spray Cup Rack TECHNICAL INFORMATION Height (H) 845 mm Width (W) 448 mm 610 mm Depth (D1) (with the door closed) 1175 mm Depth (D2) (with the door opened 90°) -
Page 10: Control Panel
CONTROL PANEL Operation (Button) Press this button to turn on your dishwasher, the screen (1) Power lights up. This option allows you to lock the buttons on the control panel - except the Power button - so that children cannot accidentally start the dishwasher. To (2) Child Lock lock or unlock the buttons on the control panel, press and hold the Half-load button + Delay button for 3... - Page 11 Display If the “ ” indicator is lit, it means the tap is closed. Rinse Aid Warning If the “ ” indicator is lit, it means the dishwasher is Indicator low on dishwasher rinse aid and requires a refill. Salt If the “...
-
Page 12: Installation
INSTALLATION The dishwasher meets the requirements set out by the regulations in force concerning safety and electrical equipment. Warning: If the appliance must be moved at any time, keep it in an upright position; if absolutely necessary, it may be tilted onto its back. Any technical checks should be conducted exclusively by a trained and authorised technician: Repairs carried out by unauthorised persons will invalidate the guarantee, as well as posing a potential hazard to the user. - Page 13 Water Supply and Drain Cold Water Connection Connect the cold water supply hose to a threaded 3/4(inch) connector and make sure that it is fastened tightly in place. If the water pipes are new or have not Ordinary Supply Hose been used for an extended period of time, let the water run to make sure that the water is clear.
- Page 14 Connection of Drain Hoses Insert the drain hose into a drain pipe with a minimum diameter of 4 cm, or let it run into the sink, making sure to avoid bending or crimping it. The height of drain pipe must be less than 1000mm. The free end of the hose must not be immersed in water to avoid back flow.
-
Page 15: Prior To Using Your Dishwasher For The First Time
WARNING: HAZARDOUS VOLTAGE! Under no circumstances should the water inlet hose be cut as it contains live electrical parts. Electrical Connection Before inserting the plug into the electrical socket, make sure that: • The socket is earthed and complies with current regulations; •... - Page 16 Adjusting Salt Usage The dishwasher is designed to allow for adjustment in the amount of salt used based on the hardness of the water. This is intended to optimise the amount of salt used. Please follow the steps below for adjustment in salt used. 1.
- Page 17 Loading the Salt Always use salt intended for dishwasher use. The salt container is located beneath the lower basket and should be filled as explained in the following: Warning: Only use salt specifically designed for dishwashers use! Every other type of salt not specifically designed for dishwasher use, especially table salt, will damage the water softener.
- Page 18 Note: The salt container must only be refilled when the salt warning light ( ) in the control panel comes on. Depending on how well the salt dissolves, the salt warning light may still be on even of the salt container has been filled. If salt has spilled, run a soak or quick program to remove it.
- Page 19 Filling the Rinse Aid Reservoir Rinse Aid Indicator To open the dispenser, turn the Carefully pour in the rinse-aid into cap to the “open” (left) arrow and its dispenser, whilst avoiding it to lift it out. overflow. Note: Clean up any spilled rinse aid with an absorbent cloth to avoid excessive foaming during the next wash.
- Page 20 Filling the Rinse Aid Reservoir Push Latch to Open Press the release catch on the Add detergent into the larger detergent dispenser to open the cavity (A) for the main wash cycle . cover. For more heavily soiled wash loads, also add some detergent into the smaller cavity (B) for the pre-wash cycle .
-
Page 21: Recommended Loading Of Racks
RECOMMENDED LOADING OF RACKS For best performance of the dishwasher, follow these loading guidelines: • Scrape off any large amounts of leftover food. Soften remnants of burnt food in pans. • It is not necessary to rinse the dishes under running water. •... - Page 22 LOADING THE BASKETS ACCORDING TO EN50242: 1.Upper basket: Item Number Cups Saucers Glasses Small serving bowl Medium serving bowl Large serving bowl Item Number Dessert dishes Dinner plates Soup plates Oval platter Cutlery basker...
- Page 23 3.Cutlery rack: NOTE: 4.Cutlery basket: Number Item Soup spoons Forks Knives 4 4 4 Tea spoons Dessert spoons Information for comparability Serving spoons tests in accordance with EN50242 Capacity: 10 place settings Serving fork Position of the upper basket: lower position Gravy ladle Program: ECO Rinse aid setting:...
- Page 24 LOADING THE BASKETS ACCORDING TO EN60436: 1.Upper basket: Item Number Cups Saucers Glasses Dessert bowls Glass bowl Item Number Dessert plates Dinner plates Soup plates Melamine dessert plates Melamine bowl Oval platter mall Cutlery basket...
- Page 25 3.Cutlery rack: NOTE: 4.Cutlery basket: Number Item Soup spoons Forks Knives 4 4 4 Tea spoons Dessert spoons Information for comparability Serving spoons tests in accordance with EN60436 Capacity: 10 place settings Serving fork Position of the upper basket: lower position Gravy ladle Program: ECO Rinse aid setting:...
- Page 26 Adjusting the Upper Rack The height of the upper rack can be Lower position Upper position adjusted in order to create more space for large utensils both for the upper/ lower rack. The height of the upper basket can be adjusted by placing the wheels on different height of the rails.
- Page 27 WASH CYCLE TABLE The table below shows which programs are best for the levels of food residue left on the dishes and how much detergent is needed. ) Means: rinse aid must be added to the Rinse Aid Dispenser. Description of Detergent Running Energy...
-
Page 28: Wash Cycle Table
Wash Cycle Table The table below shows which programs are best for the levels of food residue on them and how much detergent is needed. It also show various information about the programs. )Means: need to fill rinse into the Rinse-Aid Dispenser. Detergent Energy Water... -
Page 29: Operating Instructions
OPERATING INSTRUCTIONS Starting a Cycle Wash 1. Ensure the water supply is switched on. 2. Insert the plug into the wall socket. 3. Pull out the lower and upper basket, load the dishes and push them back into place. It is recommended to load the lower basket first, then the upper one. - Page 30 Forgot to Add a Dish? A forgotten dish can be added any time before the detergent dispenser opens. If this is the case, follow the instructions below: 1. Press the Start/Pause button to pause the washing. 2. Wait 5 seconds then open the door. 3.
-
Page 31: Cleaning And Maintenance
CLEANING AND MAINTENANCE Frost Precaution Please take frost protection measures on the dishwasher in winter. Every time after washing cycles, please operate as follows: 1. Cut off the electrical power to the dishwasher at the supply source. 2. Turn off the water supply and disconnect the water inlet pipe from the water valve. - Page 32 Filtering System The filtering system in the base of the wash cabinet retains coarse debris from the washing cycle. The collected coarse debris may cause the filters to clog. Check the condition of the filters regularly and clean them if necessary under running water.
- Page 33 Cleaning the Spray Arms It is necessary to clean the spray arms regularly for hard water chemicals as they can clog the spray arm jets and bearings. To clean the spray arms, follow the instructions below: To remove the lower spray arm, pull To remove the upper spray arm, hold the spray arm up.
-
Page 34: Mains Plug Fuse Replacement
Leaving the Machine Unused for Extended Periods It is recommend that you run a wash cycle with the dishwasher empty and then remove the plug from the wall socket, turn off the water supply and leave the door of the appliance slightly ajar. This will help the door seals to last longer and prevent odours from forming within the appliance. -
Page 35: Troubleshooting
TROUBLESHOOTING If you are having problems with your appliance, please use our troubleshooting guide below. If you are unable to resolve the issue using this guide please ring our Customer Service Department on 0844 848 5861. Please have the model code and purchase information available. - Page 36 Problem Possible Cause Possible Solution The affected items are not Avoid washing items that are not corrosion corrosion resistant. resistant in the dishwasher. A program There are was not run after Always run a wash program without any rust stains on dishwasher salt was crockery after adding salt.
-
Page 37: Error Codes
Problem Possible Cause Possible Solution White spots appear on Hard water area can cause Add more detergent. dishes and limescale deposits. glasses. Black or grey Aluminium utensils have Use a mild abrasive cleaner to eliminate marks on rubbed against dishes those marks. -
Page 38: Disposal
DISPOSAL The European Directive 2012/19/EU on Waste Electrical and Electronic Equipment (WEEE), requires that old household electrical appliances must not be disposed of in normal unsorted municipal waste. Old appliances must be collected separately in order to optimise the recovery and recycling of the materials they contain and reduce the impact on human health and the environment. - Page 41 Ipswich, IP3 9RR 0844 848 5861 Disclaimer: Statesman operate a policy of continual improvement and development. We therefore reserve the right to change/alter the specification and appearance of our appliances without prior notice. All diagrams and images shown in this manual are for illustration purposes only.
Need help?
Do you have a question about the FD10PWE and is the answer not in the manual?
Questions and answers
How to adjust to water hardness setting
To adjust the water hardness setting on the STATESMAN FD10PWE:
1. Switch on the appliance.
2. Within 60 seconds, press and hold the Start/Pause button for more than 5 seconds to enter water softener mode.
3. Press the Program button to cycle through the settings: H1 → H2 → H3 → H4 → H5 → H6. Choose the setting that matches your local water hardness.
4. Press the Power button to exit setup mode.
This answer is automatically generated